The report home page of the compliance planet presents all the transaction types and their date range and the number of transactions under each transaction type, which have been processed on the Compliance Planet. Date range on the software refers to the earliest and the latest date of the transactions processed in Compliance planet. From a glance at the home page, you will see all transactions and their respective details. This is just a click away, irrespective of wherever you are on the software.
Note: Only persons assigned right(s) to ‘view CTR reports’ and ‘process CTR reports’ will be able carry out this operation.
STEP 1: From the main dashboard click on “Reports” as in fig 2.2a below.
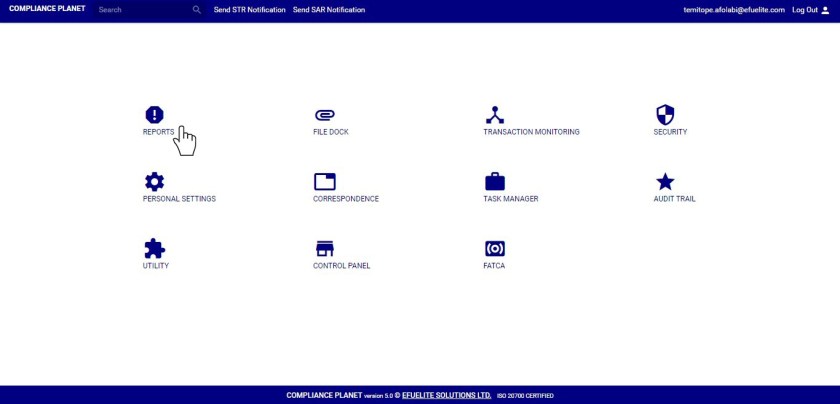
(fig. 2.2a)
- This will display a page as in fig 2.2b below
STEP 2: Click on “View All” as in fig 2.2b below to go to the CTR FTR Explorer. It is at the top-right of the list of the transaction types ranges.
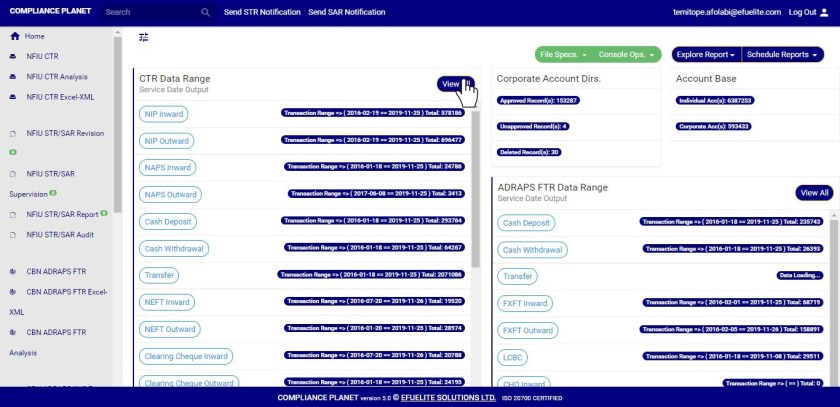
(fig. 2.2b)
- clicking any of the transaction type buttons will also display the CTR FTR Explorer.
See the explorer page in fig. 2.2c below.
(fig. 2.2c)
- On the explorer page, you can select any date range and view list of transactions for that period. Here is how to explore CTR FTR transactions.
STEP 3: Click the “Tran Type” box to select the transaction type you want to view its records. See an example in fig 2.2d below

(fig. 2.2d)
STEP 3: Click on the “filter” box to select a bank branch you want to see transactions for. (See an example in fig. 2.2e). If you want to see the transactions for all branches, select bank branches. It is the first option on the filter list.

(Fig. 2.2e)
STEP 4: Click on the “Start date” button and “End date” button to specify the transaction date range. A calendar drops below the date box when you click any of the date buttons. (See fig. 2.2f)
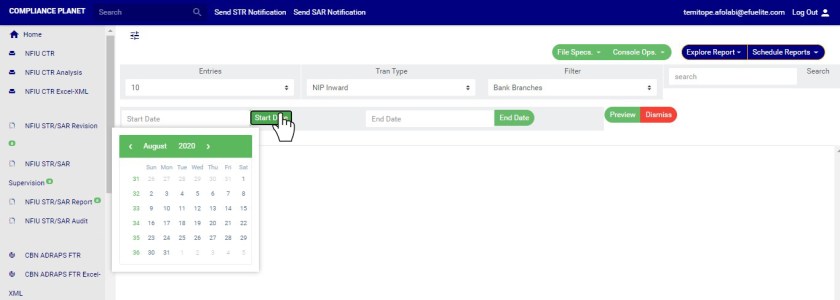
(fig. 2.2f)
- Take a look at the arrows labelled a to d in fig. 2.2g to study the calendar.
- Click on the given year to change it to your year of choice.
- Click on the given month to change it to your month of choice.
- Then, click on the date of the month.
- You can also click on the angle brackets on the calendar [ ‘<’ or ‘>’ ] to go backward or forward.
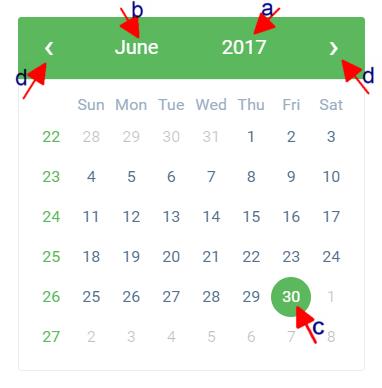
(fig. 2.2g)
STEP 5: Click on the entries box to change the number of transactions you want to see per page. (See the drop-box in fig. 2.2h. below)

(Fig. 2.2h)
STEP 6: To see the transactions, click on PREVIEW as in fig 2.2i. You can change your start date, end date, or bank branch or number of entries per page as you wish but you must click on the preview button for the changes to be effected. To close the CTR FTR Explorer page, click on the red “Dismiss” button. See fig 2.2h.
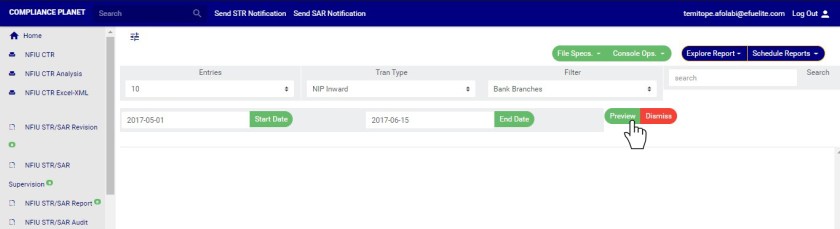
(fig. 2.2i)
- This will display CTR records row by row and three (3) action buttons; ‘Tran Details’, ‘Acc Details’ and ‘Delete’. See an example in fig 2.2j below. White arrows indicate the action buttons.

(fig 2.2j)
- clicking Tran Details button (arrow 1 in fig 2.2j) displays a page with the details of the transaction on that row you clicked on like the example in fig 2.2kj. The detail covers information about debit and credit part of the transaction according to the CTR FTR schema.

(fig 2.2k)
- Clicking Acc Details button (arrow 2 in fig 2.2j) displays a page with the details of the account involved in the transaction on that row you clicked on. See fig 2.2l to see an example of a CTR FTR Account details page.

(fig 2.2l)
- To delete the transaction, click on the Delete button (This is labelled as arrow 3 in fig 2.2j).
- This will display a confirmation console as in fig. 2.2m. Click on proceed to delete the transaction or cancel to close the console.
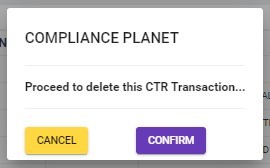
(Fig. 2.2m)
For further enquiries :
Tel +234(0) 816 555 9818
Email solutions@efuelite.com
Web http://solutions.efuelite.com
