NOTE: Only person(s) profiled as an auditor can carry out this operation
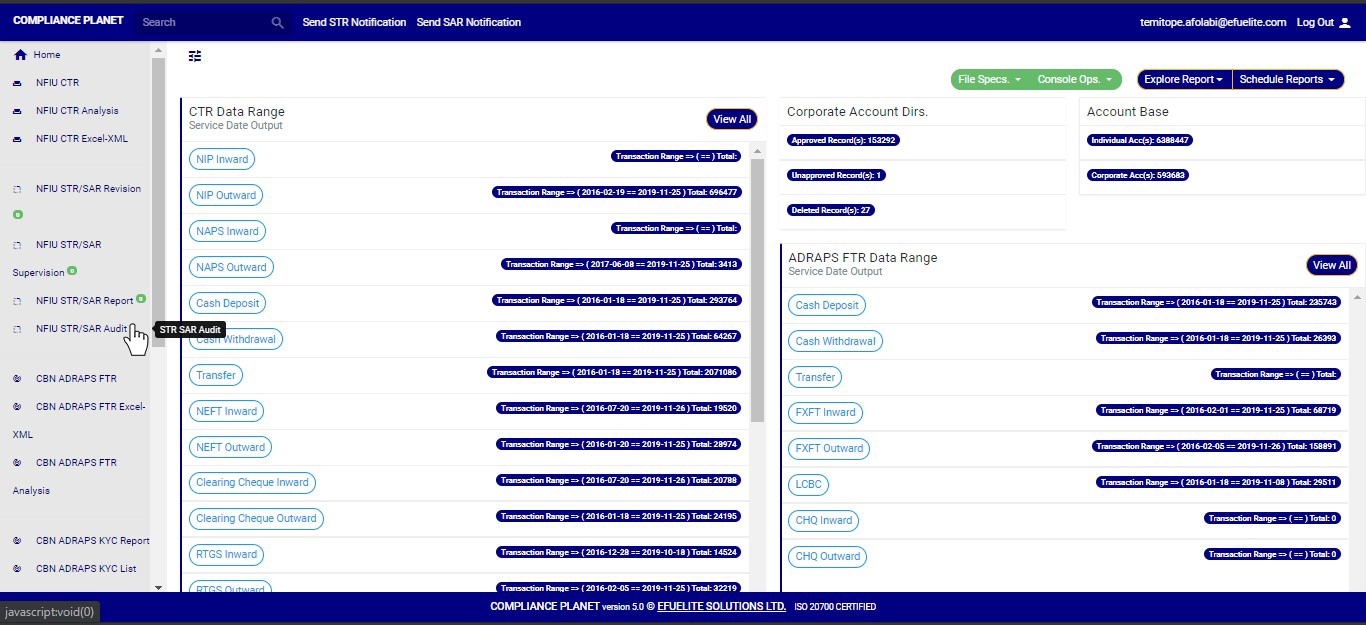
STEP 1: From the left hand side menu, click on “NFIU STR/SAR Audit”. See this feature in fig. 6.5at below.
(Fig. 6.5at)
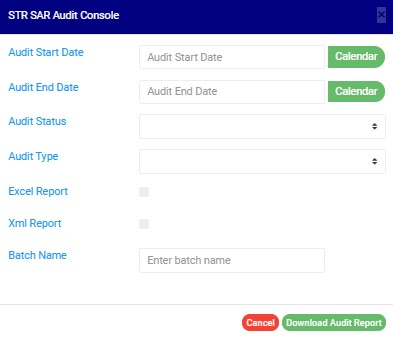
➔ Clicking on NFIU STR SAR AUDIT will display an “STR SAR AUDIT CONSOLE” as in fig. 6.5au below.
(fig. 6.5au)
STEP 2: Click on AUDIT START DATE and AUDIT END DATE to specify the beginning and the end of the period (respectively) for which you want to generate report. A calendar drops below the date box.
(Fig 6.5av)
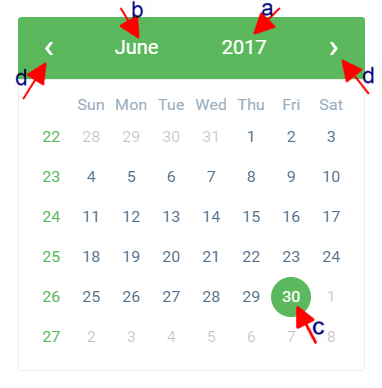
● Take a look at the arrows labelled a to d in fig.6.5av above to study the calendar.
a. Click on the given year to change it to your year of choice.
b. Click on the given month to change it to your month of choice.
c. Then, click on the date of the month.
d. You can also click on the angle brackets on the calendar ‘’ to go backward or forward.
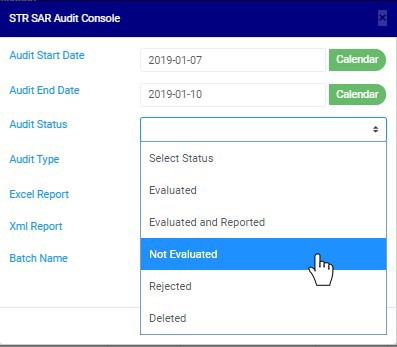
STEP 3: Click on AUDIT STATUS to select the status of the notification(s) you want to audit i.e. Evaluated notifications, Evaluated and reported notifications, Not Evaluated notifications, Rejected notifications or deleted notifications. See an example in Fig 6.5aw below.
(Fig 6.5aw)
STEP 4: Click on AUDIT TYPE to select the type of notification audit report you want to download i.e. STR Notifications or SAR notifications. See an example in Fig 6.5ax below
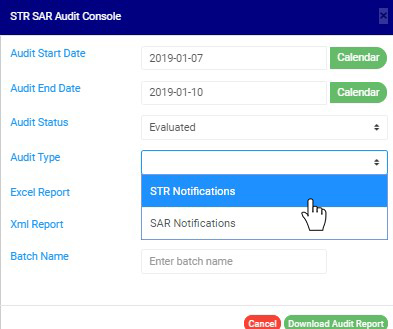
(Fig 6.5 ax)
STEP 5: Tick the Excel Report checkbox to export your report to Excel file format or XML REPORT to export reports to XML. Note, you can tick one or both of the check boxes. This is illustrated in fig 6.5 ax and 6.5 ay below.

(Fig 6.5ax)

(Fig 6.5ay)
STEP 6: Fill in the name of your report in the BATCH NAME box. The report name should be any title of your choice for easy identification later on. See Fig 6.5az for an example.

(Fig 6.5az)
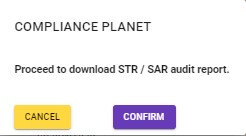
STEP 7: Click on the DOWNLOAD AUDIT REPORT button to generate report. If you want to cancel schedule, click on the CANCEL button. These buttons are at the bottom-right corner of the console. (See Fig 6.5az above). A console will be displayed like in fig. 6.5ba below if you choose to process report.
➔ Click on Confirm to continue.
➔ If you want to make changes to the settings of your report, like changing the date or selecting/deselecting an Audit type, etc., click on Cancel. The software takes you back.
➔ The signal console shows on going processes. An example of a signal console is fig 6.5bb
➔ You can terminate unfinished processes by clicking CANCEL OPS.
➔ To minimize signal console, click on DISMISS CONSOLE.

(fig 6.5bb)
How to View Audit Trail for a single STR/SAR Notification
- You can view the audit trail for a particular transaction on either the revision, supervision or reporting desk by double clicking the reported Account name or Account number as in fig 6.5bc below.
 (Fig 6.5bc)
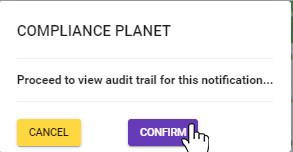
- This will display a confirmation console as in Fig 6.5bd below. Click ‘confirm’ to proceed or ‘cancel’ to close the console.
(fig 6.5bd)
- Clicking ‘confirm’ will display a ‘STR/SAR Audit Trail’ console as in fig 6.5be below. The console shows detail of every action taken on the notification from the time it was sent to the current state of the notification.

(fig 6.5be)
- Click on ‘Dismiss Console’ to close the console or click ‘Export to PDF’ to download the data as a PDF file.
- Clicking on ‘export to pdf’ will display a notification at the top of the page as in fig 6.5bf below and a file will be downloaded to your computer.

(fig 6.5bf)
