The compliance planet allows you to manually schedule your ADRAPS KYC report ahead of time and download them when they are completely processed. Here is how to do this.
NOTE; Only person(s) assigned right to ‘Process KYC report’ can carry out this operation
STEP 1: From the left hand side menu, click on CBN ADRAPS KYC Report. As in fig. 5.3a below.
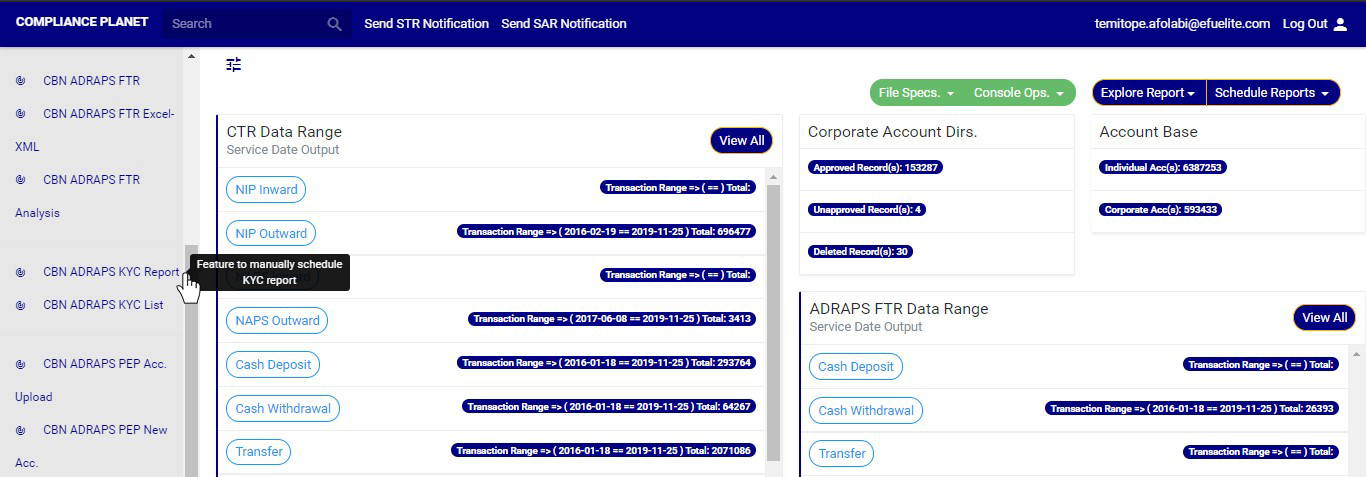
(fig. 5.3a)
➔ By clicking on ‘CBN ADRAPS KYC REPORT’, a Manual KYC Scheduler console as in fig. 5.3b below will be displayed.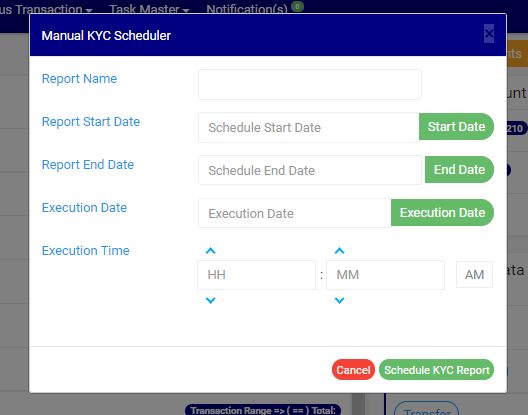
(fig. 5.3b)
STEP 2: Fill in the name of your report in the REPORT NAME box. The report name should be any title of your choice for easy identification. See fig. 5.3c for an example.
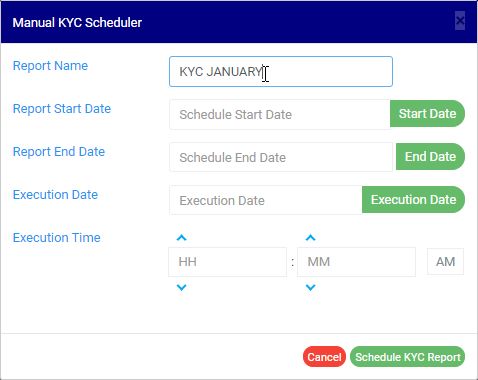
(fig. 5.3c)
STEP 3: Click on the REPORT START DATE button to select the date that begins the period for which you want to generate an ADRAPS KYC report from a calendar as shown in fig. 5.3d.
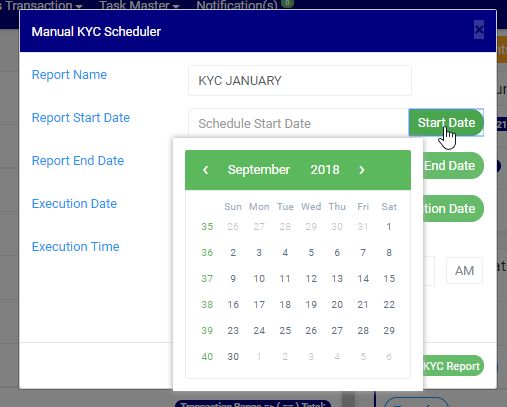
(fig. 5.3d)
➔ Take a look at the arrows labelled a to d in fig. 5.3e to study the calendar.
a. Click on the given year to change it to your year of choice.
b. Click on the given month to change it to your month of choice.
c. Then, click on the date of the month.
d. You can also click on the angle brackets on the calendar [ ‘’ ] to go backward or forward.
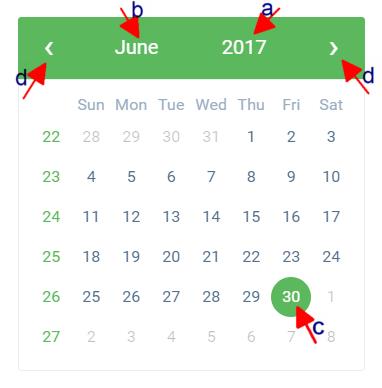
(fig. 5.3e)
STEP 4: Click on the REPORT END DATE button to select the date ending the period for which you want to generate an ADRAPS KYC report from a calendar as shown in fig. 5.3f. The calendar works like the one in fig. 5.3e above.
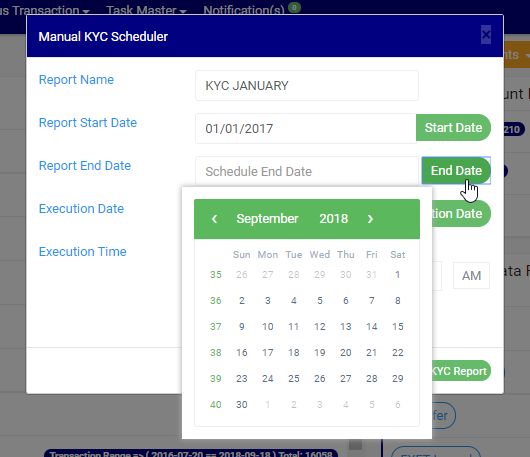
(fig. 5.3f)
STEP 5: Click on the EXECUTION DATE button to select the date you want your ADRAPS KYC report to be processed, from a calendar as shown in fig. 5.3g. The calendar also works like the one in fig. 5.3e above.
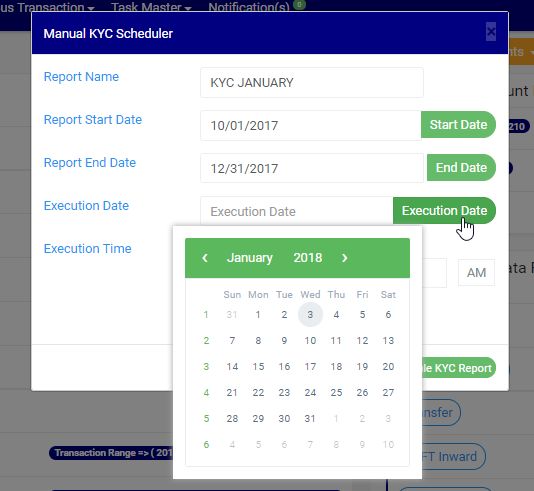
(fig. 5.3g)
STEP 5: Set your report’s EXECUTION TIME by filling in the ‘hour’ and the ‘minute’ you want the report to be processed. There’s a button next to the hour and minute boxes used for switching between AM and PM. See an example in fig. 5.3h.
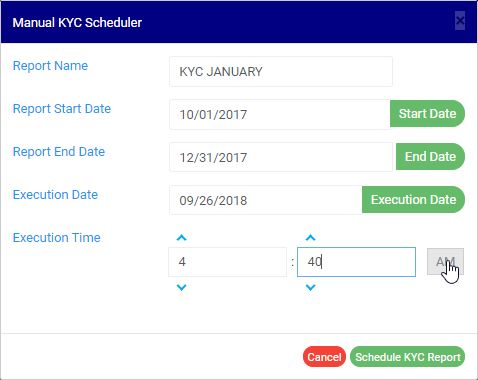
(fig. 5.3h)
STEP 6: Click on ‘SCHEDULE KYC REPORT’ to create your report or CANCEL to close the console. These buttons are at the bottom-right corner of the console. See them in fig. 5.3h above.
- Clicking the ‘SCHEDULE KYC REPORT’ displays a confirmation console as in fig 5.3i below click on ‘CONFIRM’ to proceed with your operation to schedule the report or ‘CANCEL’ to go back to the scheduler.
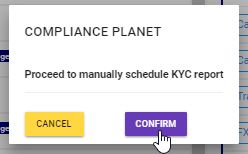
(fig. 5.3i)

One thought on “How To Generate KYC Report In Compliance Planet Anti Money Laundering/Core Banking Finance Software”