The compliance planet software keeps a record list of all KYC reports that have been manually scheduled. In this section, you will learn how to find your scheduled KYC report and some other features to give you the best experience.
NOTE; Only person(s) assigned right to ‘View KYC report’ can carry out this operation
STEP 1: From the left hand side menu, click on ‘CBN ADRAPS KYC LIST’ Check out fig. 5.4a below.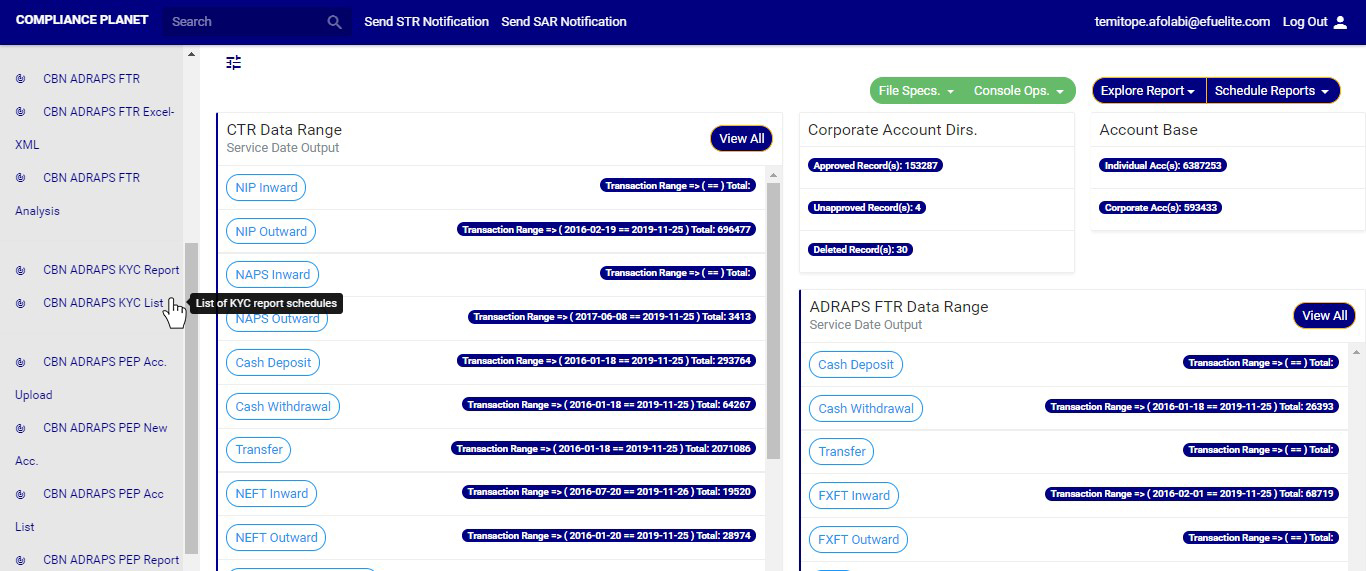
(fig. 5.4a)
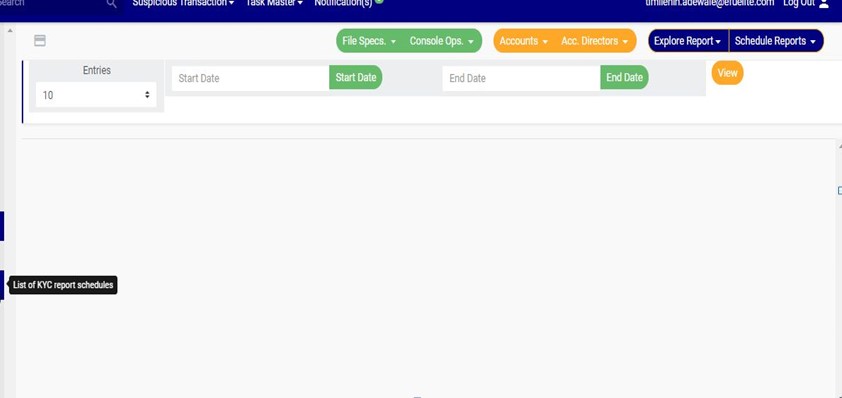
➔ Clicking on ‘KYC Repository LIST’ will display a page as in fig. 5.4b below. On this page, you can search out KYC reports by specifying periods in which they were scheduled for.
(fig. 5.4b)
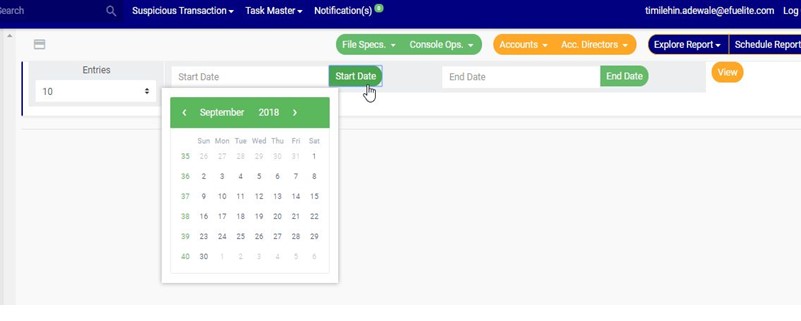
STEP 2: Click on the START DATE button/box and the END DATE button/box to set the beginning and the end of the period in which the reports you want to see have been scheduled for. See fig. 5.4c below for an example and check out fig. 5.3e to study the use of the calendar.
(fig. 5.4c)
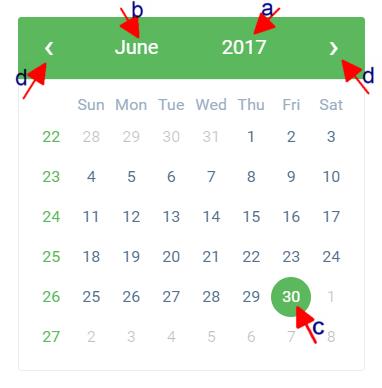
➔ Take a look at the arrow labelled a to d in fig. 5.4d to study the calendar.
a) Click on the given year to change it to your year of choice.
b) Click on the given month to change it to your month of choice.
c) Then, click on the date of the month.
d) You can also click on the angle brackets on the calendar [ ‘’ ] to go backward or forward.
(fig. 5.4d)
➔ You can increase the number of reports you want to see per page by clicking on the ENTRIES box. Pick any number of entries per page of your choice. See fig. 5.4e below for an example.
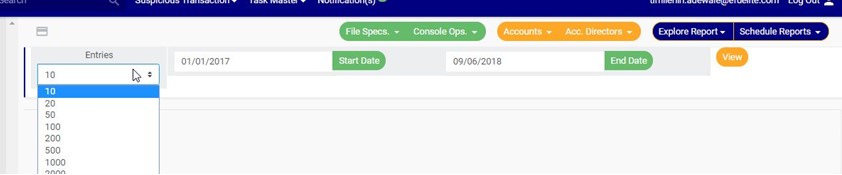
(fig. 5.4e)
STEP 3: Click on the VIEW button to see the reports. It is an orange colour button at the upper area of the page, next to the END DATE box. By doing this, the software will search out reports that were scheduled for that period you have entered in the date boxes. See fig. 5.4f below to see the pointer clicking on the view button and see the results of the example in fig. 5.3g.
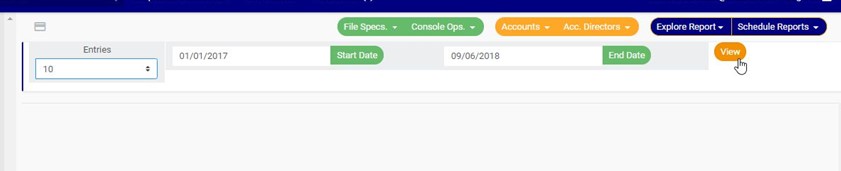
(fig. 5.4f)

(fig. 5.4g)
➔ The software will search out the requested reports and give information about the start and end date, the number of branches the account information relates to (Kiosk Rpt), the number of excel files and the XML files the report has been written into, the start date and end date for the processing of the report, the report type and whether the report has been completed or not. See fig. 5.4g above.
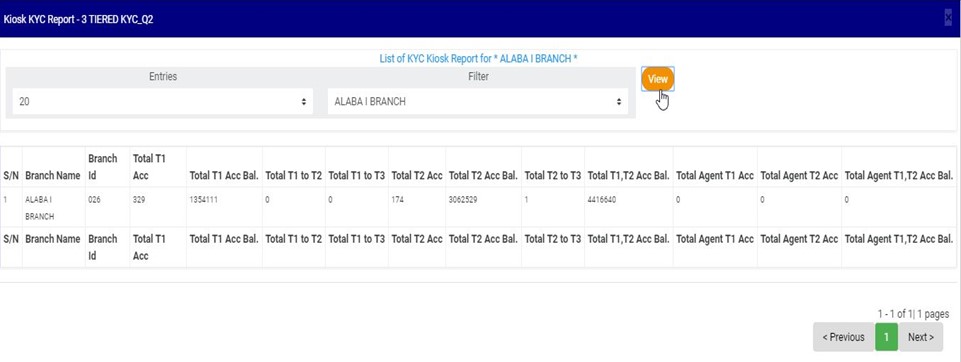
➔ The numbers under the Kiosk Rpt column represent the number of branches reported in the KYC report. By clicking on Kiosk Rpt., a page titled, Kiosk KYC Report, will come up. Another name for branch on the compliance planet is kiosk. This page gives information about the branch’s ID, number of tier one accounts and tier two accounts, their total account balances and number of accounts that moved from one tier to another, for each branch reported in the ADRAPS KYC. See fig. 5.4h below.
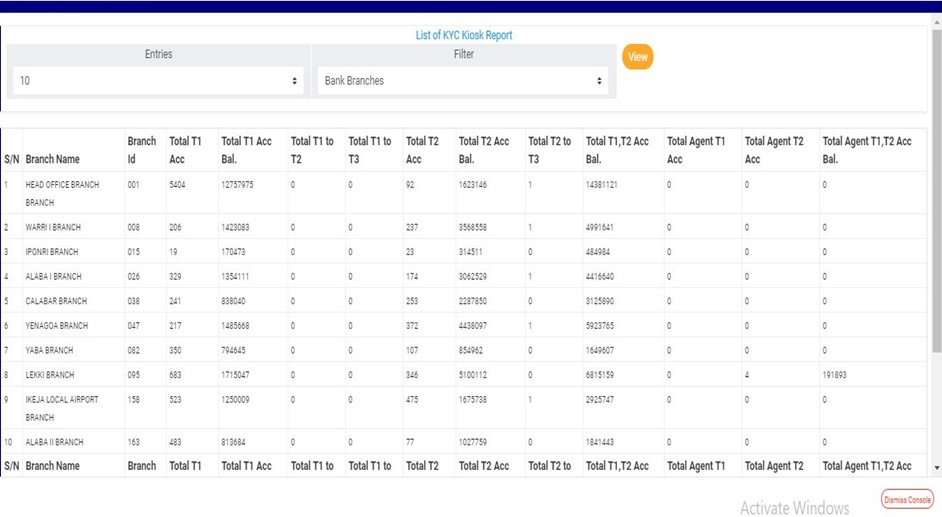
(fig. 5.4h)
➔ See the following steps on how to make use of the features on the Kiosk KYC Report page.
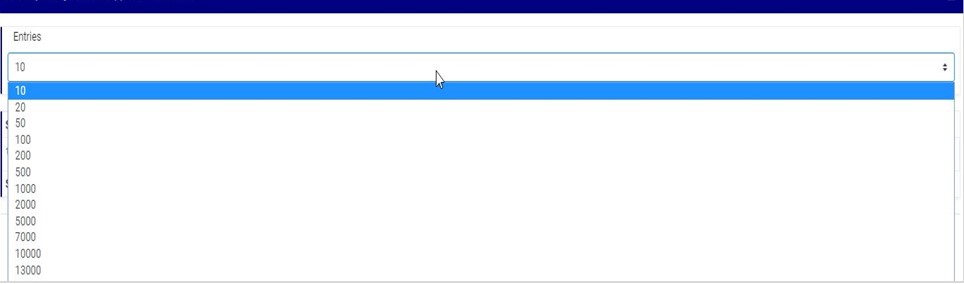
a) Click on the entries box to adjust the number of transactions you want to see per page. See fig. 5.4i below for an example on how to do this. The software will automatically effect your changes.
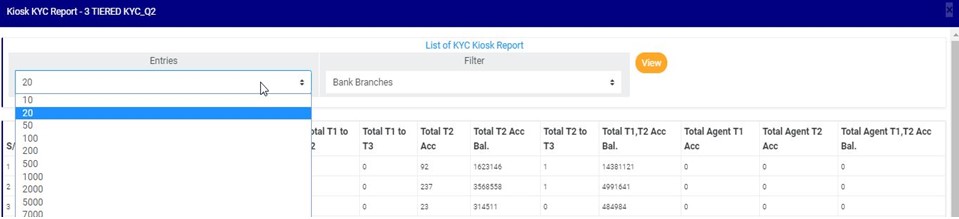
(fig. 5.4i)
b) Click on the filter box to select a bank branch for which you want to see KYC information. See fig. 5.4j below for an example on how to do this.
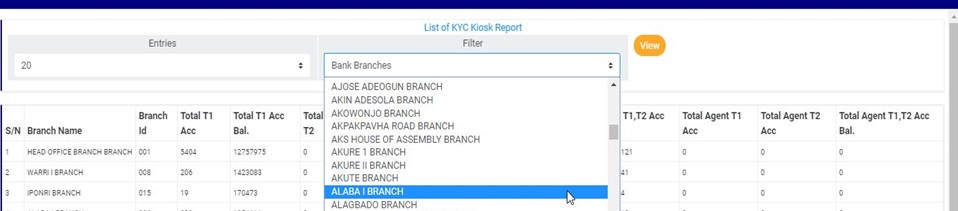
(fig. 5.4j)
c) After selecting the bank branch of your choice as in fig. 5.4j above, click on VIEW to see the result of your selection. See fig. 5.4k for an example on how to do this.
(fig. 5.4k)
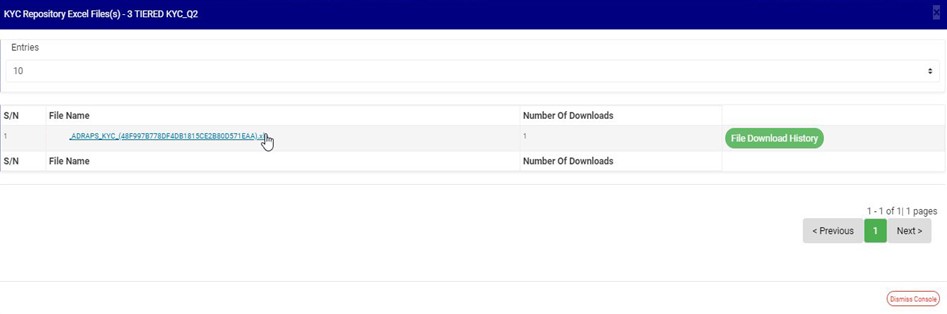
➔ The numbers under the ‘Excel’ column (in fig. 5.4g) also represent the number of Excel files that the software has written the report into. By clicking on the number of Excel files, the KYC Repository Excel file(s) console will be displayed on screen. See fig. 5.4l below for an example of the console.

(fig. 5.4l)
➔ The KYC Repository Excel file(s) page gives information about the Excel file name(s), the number of times users have downloaded the file and the download history. See the following steps on how to make use of its features.
a) Click on the entries box to adjust the number of Excel files you want to see per page. See fig. 5.4m below for an example on how to do this. The software will automatically effect your changes whenever you do this.
(fig. 5.4m)
b) Click on the file name to download the Excel file to your computer. The number of download will change as soon as you click on the file name. See fig. 5.4n below for an example on how to download KYC excel file.
NOTE; Only person(s) assigned right to ‘Process KYC report’ and ‘Download KYC Report’ can carry out this operation
(fig. 5.4n)
c) To see who downloaded the file and the time of download, click on the ‘File Download History’ button. A console will be displayed on screen as in fig. 5.4o below for an example. Close the console using the DISMISS button at the bottom-right corner of the console.
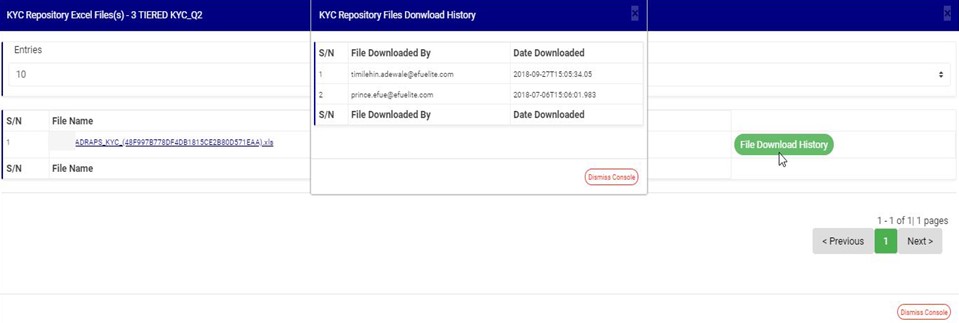
(fig. 5.4o)
d) Also, at the bottom-right corner of the KYC Repository Excel file(s) page, the software gives information about the number of pages of the KYC Repository Excel file(s) list,, with the page numbers written out. All the page numbers represent buttons for each page. By clicking on any page number, the software takes you to that particular page. The NEXT button will take you to the page after the one you are viewing at the moment, while the PREVIOUS button will take you to the page before the one you are viewing at that moment. To close this page, click on the DISMISS button. It is also at the bottom-right corner of the page.
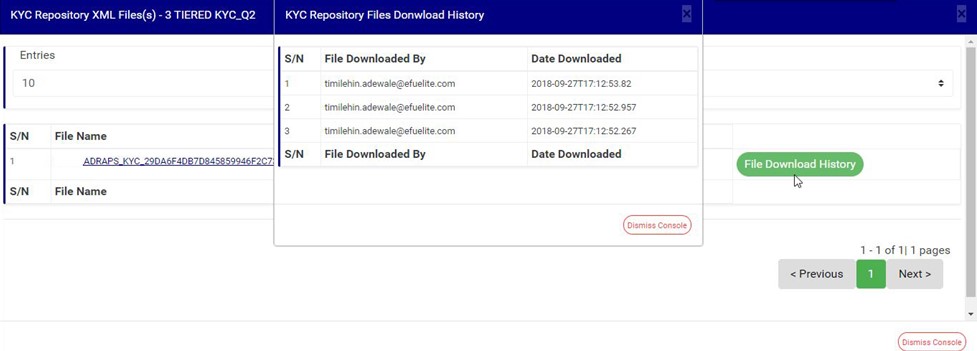
➔ The numbers under the ‘XML’ column (in fig. 5.4g) also represent the number of XML files that the software has written the respective report into. By clicking on the number of XML files, a page will be displayed as in fig. 5.4p
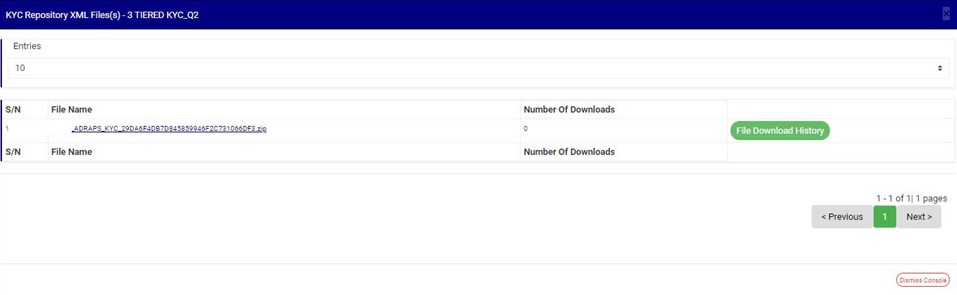
(fig.5. 4p)
➔ The KYC Repository XML file(s) page also gives information about the XML file name(s), the number of times users have downloaded the file(s) and the download history. See the following steps on how to make use of its features. The features on the KYC Repository XML file(s) page work like those of the KYC Repository Excel file(s) page.
a) Click on the entries box to adjust the number of XML files you want to see per page. See fig. 5.4q below for an example on how to do this. The software will automatically effect your changes whenever you do this.
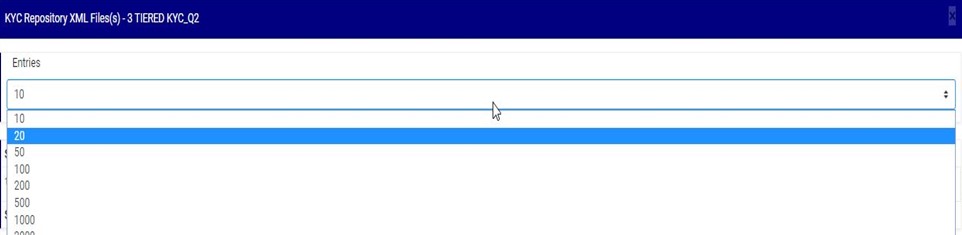
(fig. 5.4q)
b) Click on the file name to download the XML file to your computer. The number of download will change as soon as you click on the file name. The file name is underlined and the download is immediately also! See fig. 5.4r below for an example on how to download KYC XML file.
NOTE; Only person(s) assigned right to ‘Process KYC report’ and ‘Download KYC Report’ can carry out this operation.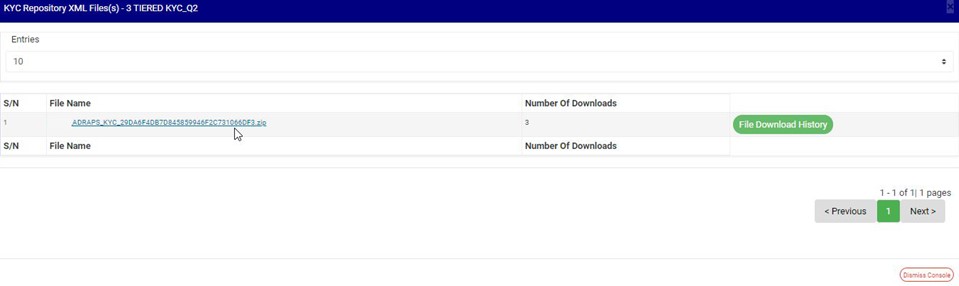
(fig. 5.4r)
c) To see who downloaded the file and the time of download, click on the ‘File Download History’ button. A console will be displayed as in fig. 5.4s below for an example. Close the console using the DISMISS button at the bottom-right corner of the console.
(fig. 5.4s)
d) At the the bottom-right corner of the KYC Repository XML file(s) page, the software also gives information about the number of pages of the KYC Repository XML file(s) list, with the page numbers written out. All the page numbers represent buttons for each page. By clicking on any page number, the software takes you to that particular page. The NEXT button will take you to the page after the one you are viewing at the moment, while the PREVIOUS button will take you to the page before the one you are viewing at that moment. To close this page, click on the DISMISS button at the bottom-right corner of the page. See these features in fig. 5.4s above.
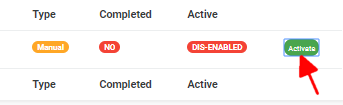
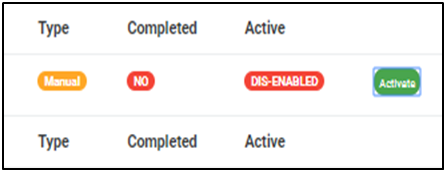
➔ Back to fig. 5.4g – KYC Repository list page, at the end of each report row, the software shows if the processing of the report is enabled or dis-enabled under the ‘ACTIVE’ column.
➔ For reports that have been completed, their status will read, ENABLED. See fig. 5.4g for an instance.
➔ For reports that have not been completed, there will be an extra button next to their ACTIVE status. This button is used to ACTIVATE or DEACTIVATE the processing of the report. See fig. 5.4g also for an example. The button turns red when the report is enabled and it can be used to DEACTIVATE the report. It is green when the report is dis-enabled and it can be used to ACTIVATE the report for processing.
STEP 4: Click on Activate to enable processing of report or Deactivate to disable the processing of the report.
NOTE; Only person(s) assigned right to ‘Process KYC report’ and ‘Edit KYC Report’ can carry out this operation
➔ Clicking on ACTIVATE turns the status bar of the report to green with an ‘ENABLED’ inscription, while clicking on DEACTIVATE will turn the status bar back to red with an ‘DIS-ENABLED’ inscription. See fig. 5.4t and fig. 5.4u to see the result of activating the report for an example and see fig. 5.4v and fig. 5.4w to see the result of deactivating the report for another example.
● Activating a report
 (fig. 4.7t)
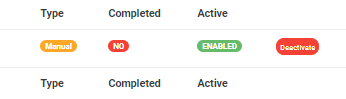
(fig. 4.7u)
● Deactivating a report
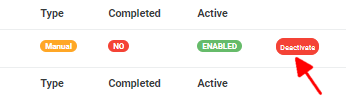
(fig. 4.7v)
(fig. 4.7w)
➔ At the bottom-right corner of the page, the software gives information about the number of pages of your result, with the page numbers written out. All the page numbers represent buttons for each page. By clicking on any page number, the software takes you to that particular page. There is the NEXT button to take you to the next page when you click on it and there is a PREVIOUS button to take you to the page before the one you are viewing at that moment. See these features in fig. 5.4x below.

(fig. 5.4x)

One thought on “KYC Repository Listing In Compliance Planet Anti Money Laundering/Core Banking Finance Software”