This section provides a guide on how to modify “REASON” options available when sending an STR notification on the Compliance Planet, with step-by-step instructions and pictures.
STR NOTIFICATION REASON OPERATIONS
Here, the operations are;
1. Editing notification reason,
2. Deleting reason
3. Adding a new reason
NOTE: Only person(s) profiled as deputy supreme admin can carry out these operations
To perform any of the operations;
STEP 1: From the main dashboard, click ‘CONTROL PANEL’ as in fig 21.1a below
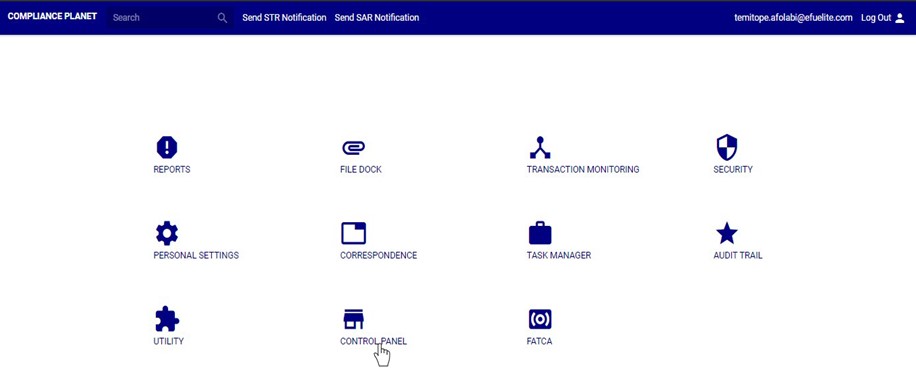
(fig. 21.1a)
STEP 2: Click on ‘STR N. REASON’ on the left hand side menu as in fig 21.1b below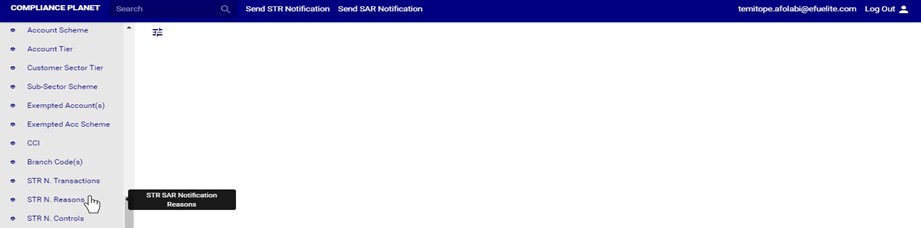
(fig. 21.1b)
➔ This displays a page showing a list of all ‘STR Notification reason’ options that have been created and available on the software. See fig. 21.1c for an example.
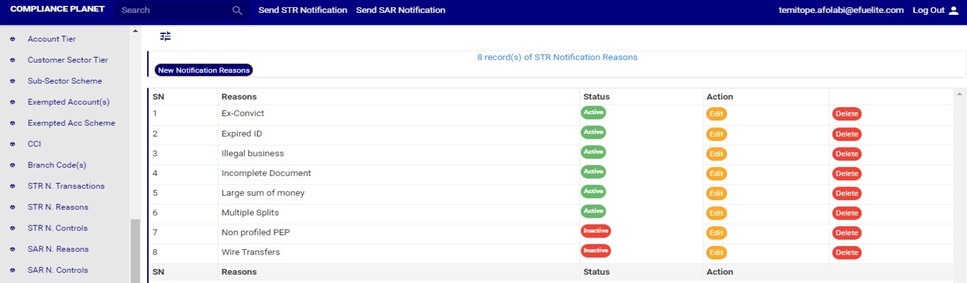
(fig. 21.1c)
How to edit an STR notification reason
This refers to changing the description or status of the STR notification reason. Here is how to do this.
STEP 1: Click on the ‘EDIT’ button on the action column. See fig. 21.3a for an example.

(Fig 21.2a)
➔ Clicking the EDIT button will display a console titled, ‘Notifications Reasons as shown in fig 21.2b below.
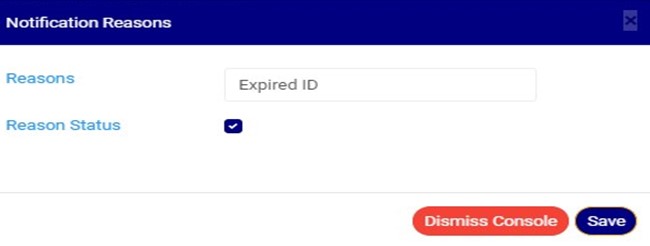
(Fig 21.2b)
STEP 2: Click on the reasons textbox to change the Notification reason description. See an example in Fig 21.2c below.
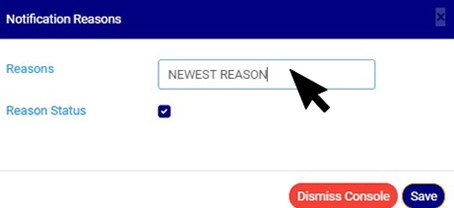
(Fig 21.2c)
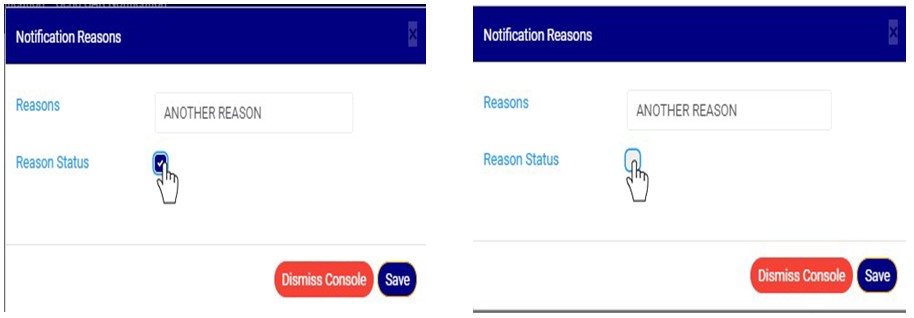
STEP 3: Click on the reason status checkbox to make that notification reason active or inactive. This is illustrated in Fig 21.2d and Fig 21.2e below
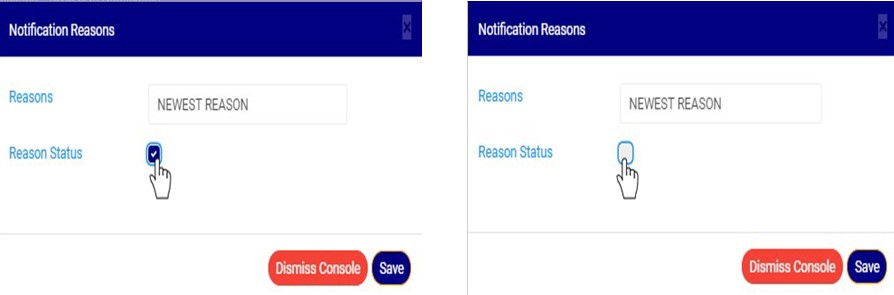
➔ Fig 21.2 d shows that the notification reason is set ACTIVE while Fig 21.2e shows that the notification reason is set INACTIVE.
➔ An active notification reason will form part of the available options when sending a new STR notification (See section 6.2.1 for sending an STR notification) while an inactive notification reason will no longer be part of the available options when sending a new STR notification.
STEP 4: Click on ‘SAVE’ button to save the edit or click ‘DISMISS CONSOLE’ to cancel the operation. See Fig 21.2f for an example
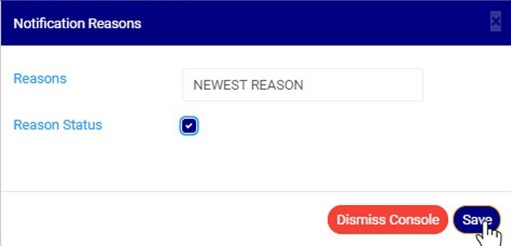
Fig 21.2f
➔ This displays a confirmation console as in fig 21.2g below
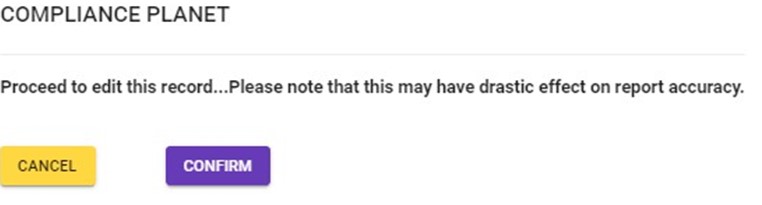
Fig 21.2g
➔ A notification as in fig. 21.2h (A) will be displayed at the top of the page. Also, See fig. 21.2h for an example of the updated description and status
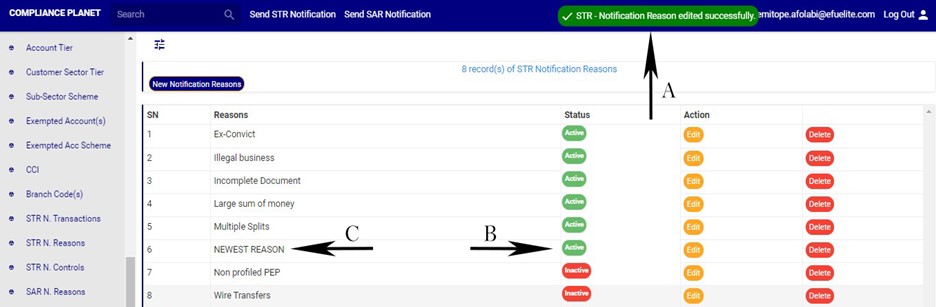
Fig 21.2h
How to Delete an STR notification reason
This operation removes the STR notification reason from the list of available reasons. A deleted STR notification reason will no longer be part of the available options when sending a new STR notification on the compliance planet (See section 6.2.1 for sending an STR notification).
STEP 1: Click on the ‘DELETE’ button of the STR notification reason as in fig 21.3a.

(fig21.3a)
➔ This displays a confirmation console to confirm your request to delete the STR reason.
STEP 2: Click on ‘CONFIRM’ as in fig21.3b to proceed or ‘CANCEL’ to discontinue.

(fig21.3b)
➔ A notification will be displayed at the top of the page as in Fig21.3c.
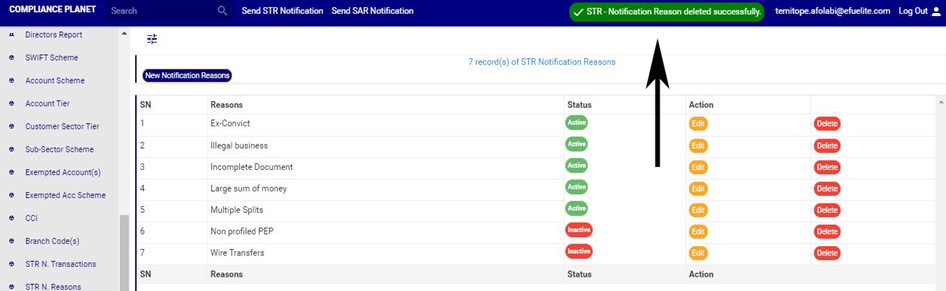
(fig21.3c)
How to add new STR notification reason
This refers to creating a new STR notification reason. This notification reason will be added to the list of available ‘reason’ option when sending a new STR notification on the compliance planet software (See section 6.2.1 for sending an STR notification).
STEP 1: Click on ‘NEW NOTIFICATION REASON’ as shown in fig. 21.4a below
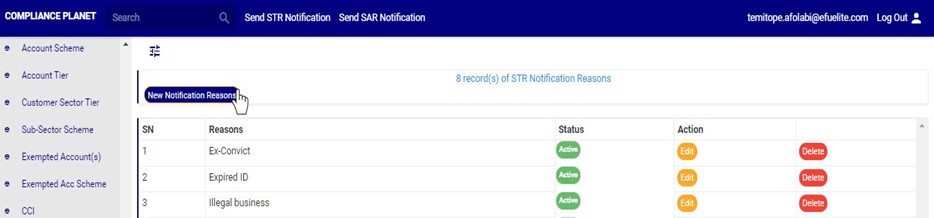
(fig. 21.4a)
➔ A console as in fig. 21.4b will be displayed.
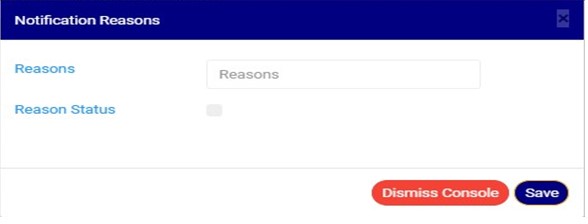
(fig. 21.4b)
STEP 2: Fill the ‘reasons’ text box as in fig. 21.4c below

(fig. 21.4c)
STEP 3: Click on the ‘reason status’ checkbox to make that notification reason active or inactive. This is illustrated in Fig 21.4d and Fig 21.4e below
➔ Fig 21.4d shows that the notification reason is set ACTIVE while Fig 22.4e shows that the notification reason is set INACTIVE.
➔ An active notification reason will form part of the available options when sending a new STR notification on the compliance planet software(See section 6.2.1 for sending an STR notification) while an inactive notification reason will no longer be available when sending a STR notification on the compliance planet software.
STEP 3: Click on ‘SAVE’ to save the edit or click ‘DISMISS CONSOLE’ to cancel the operation. See Fig 21.4f for an example
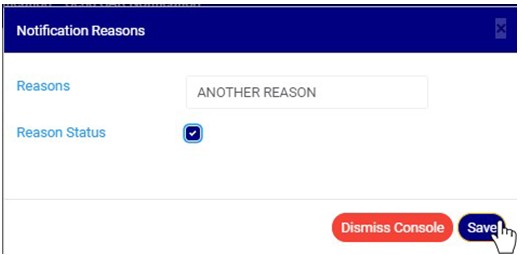
Fig 21.4f
➔ This displays a confirmation console as in fig 21.4g below
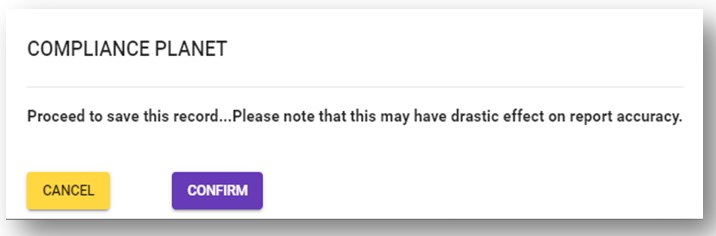
Fig 21.4g
➔ A notification as in fig. 21.4h (A) will be displayed at the top of the page when the operation is successful. Also, See fig. 21.4h for an example of the updated description and status
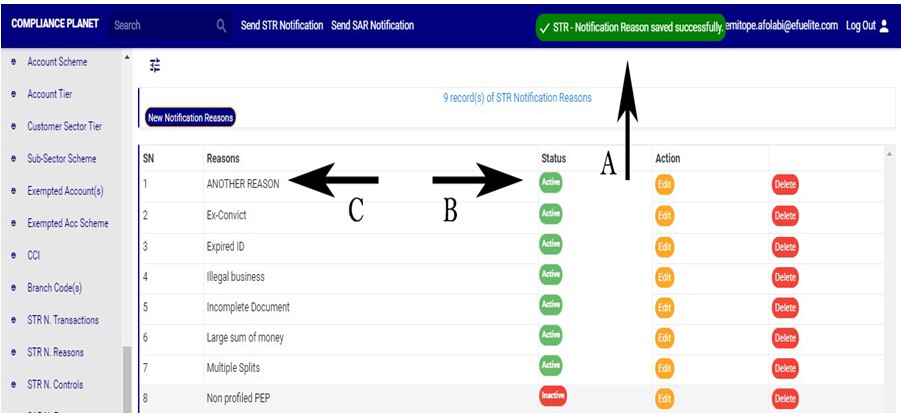
Fig 21.4h
