This section provides a guide on how to perform operations pertaining to swift, with step-by-step instructions and pictures.
- From the main dashboard, click ‘UTILITY’ as in fig 31.0a below

- This displays a page as in fig. 31.0b.
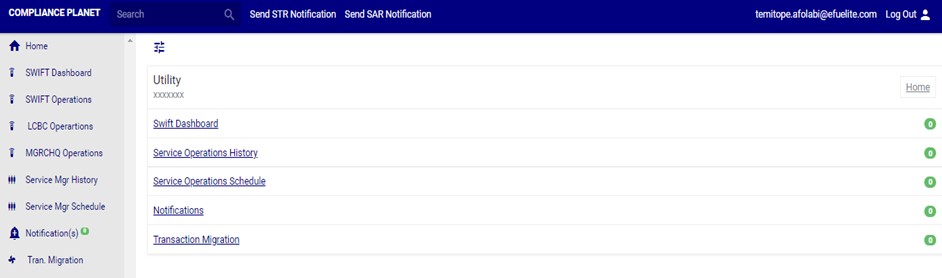
(fig. 31.0b)
- Click on ‘Swift Operations’ on the left hand side menu as in fig. 31.0c.
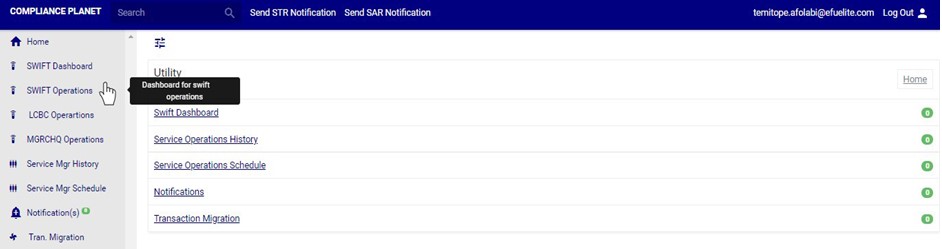
(fig. 31.0c)
- This will display a swift operations page as in fig. 31.0d below
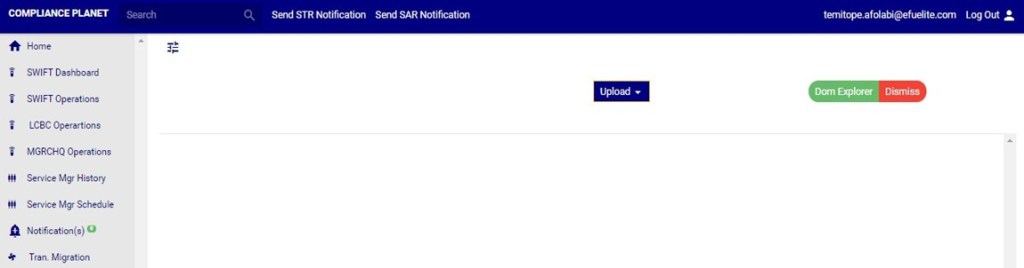
(fig. 31.0d)
How to View SWIFT FXFTI Transaction
Note: Only person(s) assigned right to ‘view SWIFT DOM transactions’ will be able to carry out this operation(s)
STEP1: From the left hand side menu, Click on ‘Swift Operations’ as in fig. 31.2a.

(fig. 31.2a)
- This displays a page as in Fig 31.2b below
STEP 2: Click on ‘Doc Explorer’ button on the Swift Operation page. See Fig 31.2b for an example

(Fig. 31.2b)
- Clicking on the ‘Doc Explorer’ button will display a ’SWIFT DOC FXFTI Explorer’ console as in Fig 31.2c below
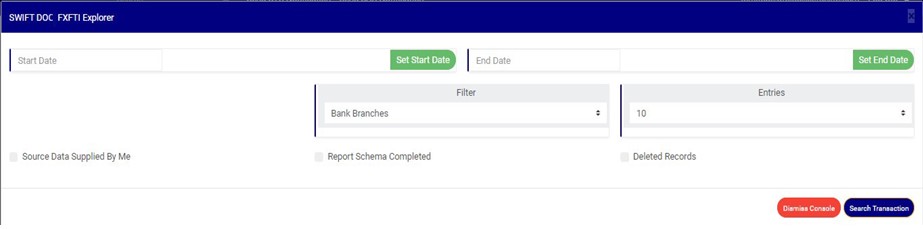
(Fig. 31.2c)
STEP 3: Click on SET START DATE and SET END DATE to specify the period to be covered. See an example in Fig 31.2d below
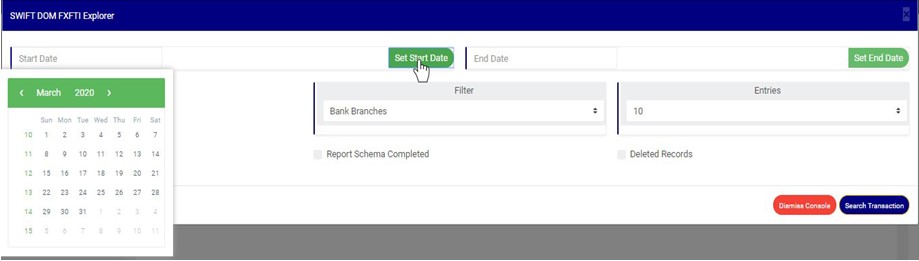
(fig. 31.2d)
- Take a look at the arrows labelled a to d in fig. 31.2e to study the calendar.
- Click on the given year to change it to your year of choice.
- Click on the given month to change it to your month of choice.
- Then, click on the date of the month.
- You can also click on the angle brackets on the calendar [ ‘<’ or ‘>’ ] to go backward or forward.
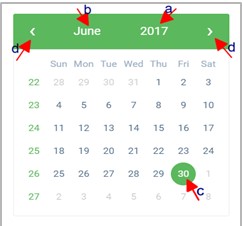
(fig. 31.2e)
STEP 4: Click on the filter box to select a particular bank branch. (See the example in fig. 31.2f). If you want to see the transactions for all branches, select bank branches. It is the first option on the filter list.
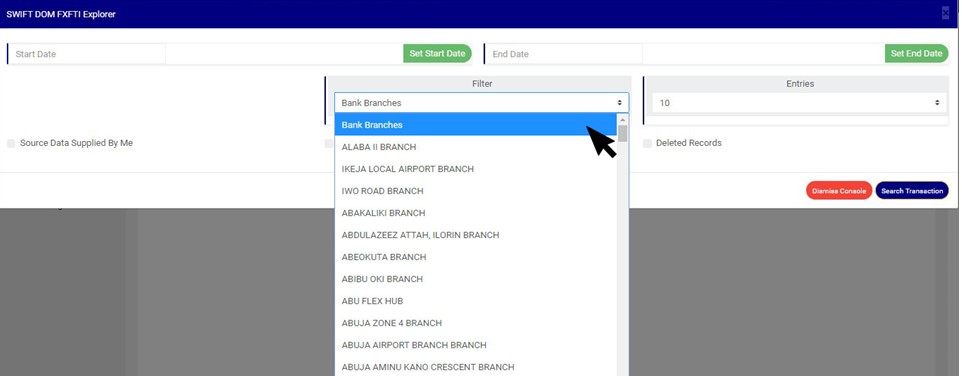
(Fig. 31.2f)
STEP 5: Click the ‘entries’ box to change the number of transactions you want to see per page. (See the drop-box in fig. 31.2g. below)
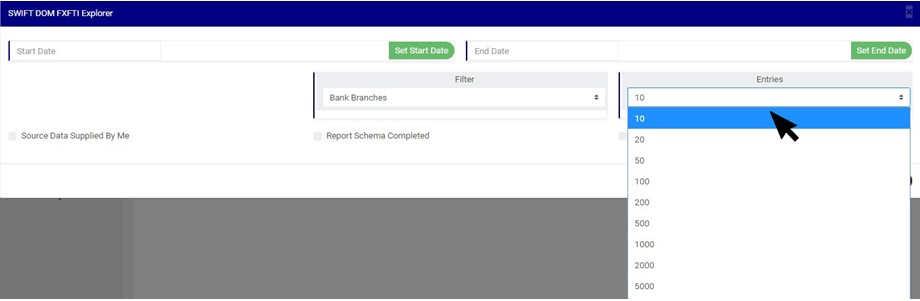
(Fig. 31.2g)
STEP 6: Tick any of the checkbox as shown in fig 31.2h to specify the transactions you want to view
- Select ‘Source Data Supplied by Me’ to see list of SWIFT FXFT transactions whose source data was supplied by you
- Select ‘Report Schema Completed’ to see list of SWIFT FXFT transactions with a complete schema
- Select ‘Deleted Records’ to see list of SWIFT FXFT transactions that have been deleted.
NOTE: Leave all checkboxes unchecked to see list of all SWIFT FXFT transactions

(Fig. 31.2h)
STEP 7: Click ‘Search Transaction’ as shown in fig 31.2i
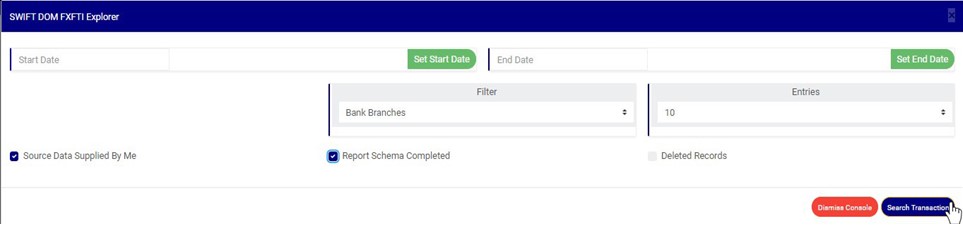
(Fig. 31.2i)
- Clicking on the search transaction button will display a page as in Fig 31.2j below
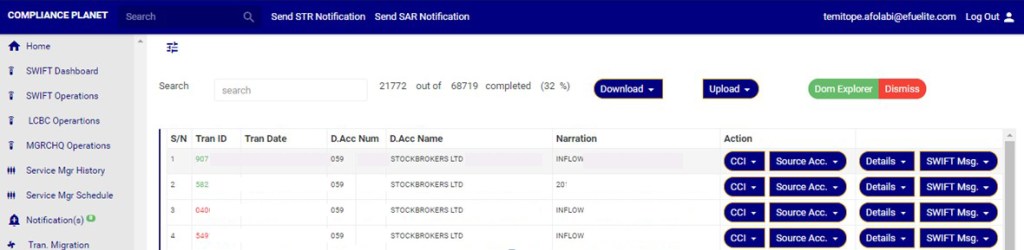
(Fig. 31.2j)
- Transactions with transaction ID coloured green signify that the schema for the transaction is complete.
- Transactions with transaction ID coloured red signify that the schema for the transaction is incomplete.
How to carry out CCI Operations on SWIFT FXFTI transaction
Note: Only person(s) assigned right to ‘view SWIFT DOM transactions’ will be able to carry out this operation(s)
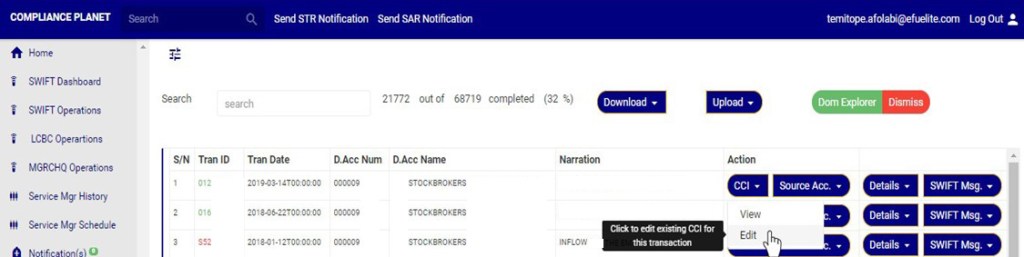
- On the Doc explorer page Click on ‘CCI’ button on the Action column, this will display a drop down with option to ‘view’ and ‘Edit’ cci if the schema for the transaction is complete. However, if the schema is incomplete, the dropdown will have an option to ‘ADD’ new CCI. See examples in fig 31.2k and 31.2l below.
- See section 18.1 for notes on certificate of capital importation (CCI)

(Fig. 31.2k)
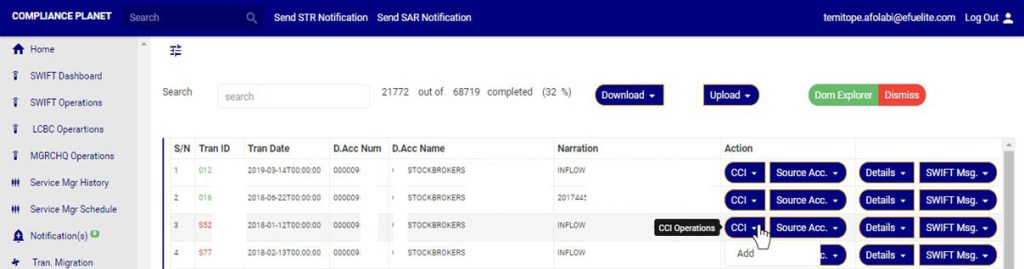
(Fig. 31.2l)
A. How to View and Delete CCI Attached to a SWIFT FXFTI Transaction
Note: Only person(s) assigned right to ‘view SWIFT DOM transactions’ and ‘Screen Edit SWIFT DOM transactions’ will be able to delete attached CCI data
This option will be available if a Certificate of Capital Importation (CCI) has been added to the schema.
- Click on ‘VIEW’ as in fig 31.2m to see the CCI attached to this transaction.
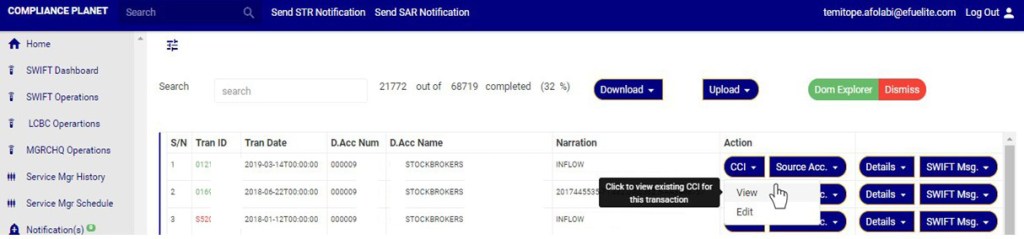
(Fig 31.2m)
- Clicking on ’View’ will display a console as in in fig 31.2n below.
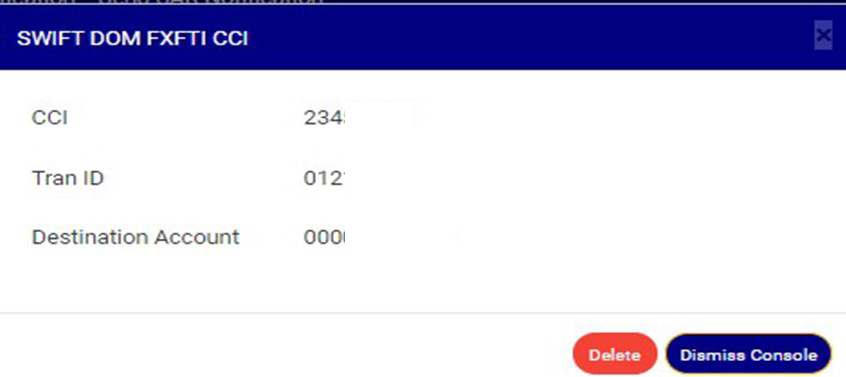
(Fig. 31.2n)
- Click on ‘Dismiss console’ to close the console or click ‘Delete’ to delete the data. See fig 31.2o for an example

(Fig. 31.2o)
- Clicking on delete will display a confirmation console as in Fig 31.2p below. Click ‘confirm’ to continue or ‘cancel’ to dismiss the operation.

(Fig. 31.2p)
- A notification will be displayed at the top when delete is successful as in Fig 31.2q below

(Fig. 31.2q)
B. How to Edit CCI Attached to a SWIFT FXFTI Transaction
This option is will be available if a cci has been added to the Swift FXFTI transaction.
Note: Only person(s) assigned right to ‘view SWIFT DOM transactions’ and ‘Screen Edit SWIFT DOM transactions’ will be able to Edit attached CCI data
- Click on ‘Edit’ to modify CCI for this transaction as in fig 31.2r below
(Fig 31.2r)
- Clicking on ’Edit’ will display a console as in in fig 31.2s below.
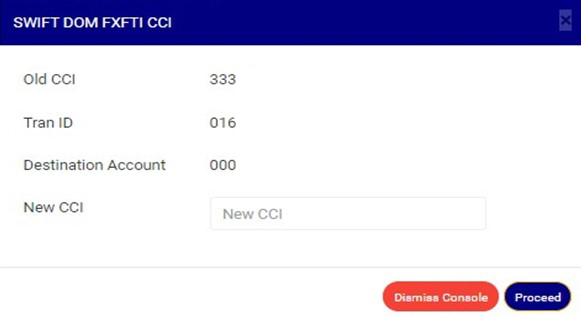
(Fig. 31.2s)
- Click the NEW CCI textbox to input the new CCI as in fig 31.2t below
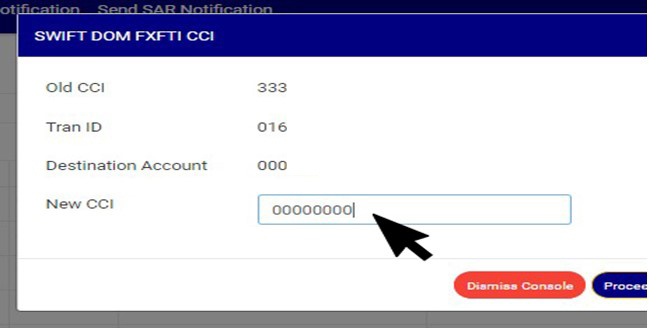
(Fig 31.2t)
- Click on ‘Dismiss console’ to close the console or click ‘proceed’ to save the new cci. See fig 31.2u
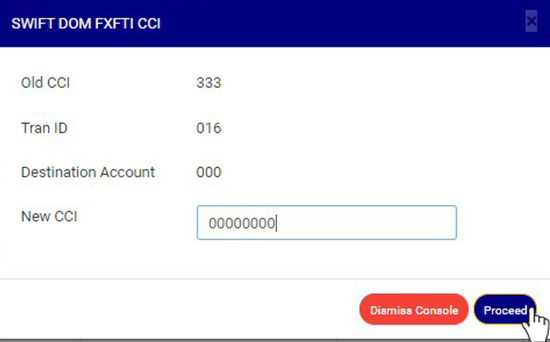
(Fig. 31.2u)
- Clicking on proceed will display an inquiry console as in Fig 30.5v below. Click on confirm to continue or cancel to dismiss the operation.
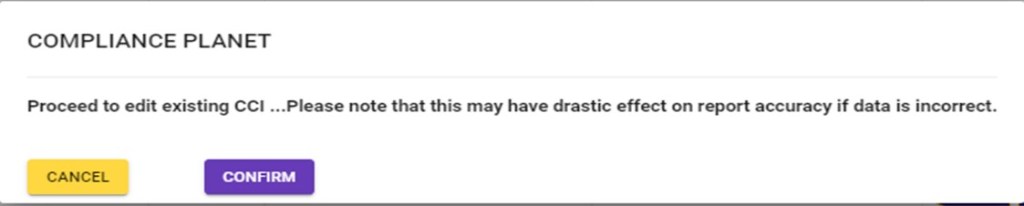
(Fig. 31.2v)
- A notification will be displayed at the top of the page when new CCI is saved successfully. See Fig 31.2w below

(Fig. 31.2w)
C. How to Add CCI to a SWIFT FXFTI Transaction
Note: Only person(s) assigned right to ‘view SWIFT DOM transactions’ and ‘Screen Edit SWIFT DOM transactions’ will be able to add CCI to a SWIFT FXFTI transaction
- Click the CCI button on the action column his display a drop down as in fig 31.2x.
- Click ‘Add’ on the dropdown, this is shown in Fig 31.2x below
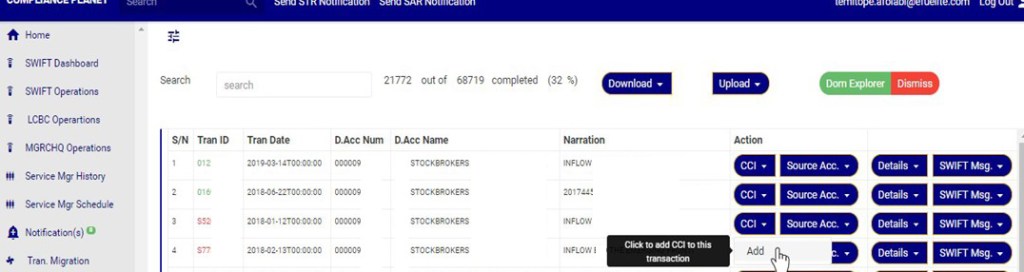
(Fig 31.2x)
- Clicking on ’add’ will display a console as in in fig 31.2ybelow.
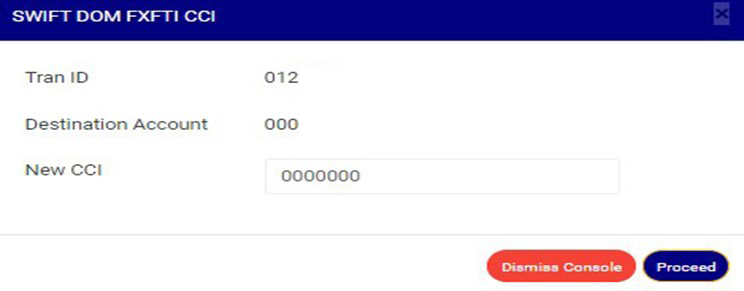
(Fig. 31.2y)
- Click on New CCI textbox to input new CCI as in in fig 31.2z below.
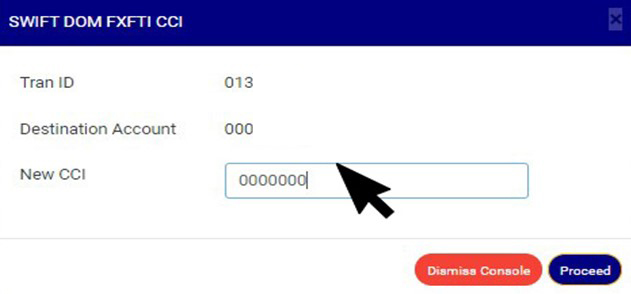
(Fig. 31.2z)
- Click on Proceed to add the new cci or ‘dismiss console’ to dismiss the operation. See an example in Fig 31.2aa below

(Fig. 31.2aa)
- Clicking on Proceed will display a confirmation console as in Fig 31.2ab below. Click on confirm to continue or cancel to dismiss the operation.
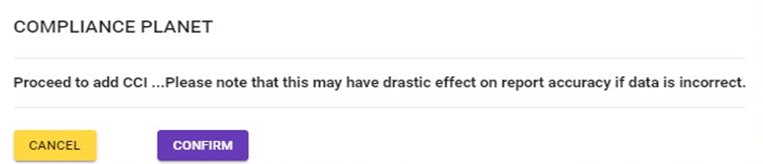
(Fig. 31.2ab)
- A notification will be displayed at the Top when cci is successfully added. See Fig.31.2ac below.

(Fig. 31.2ac)
How To Carry Out Source Account Operations on Swift FXFTI Transaction
- Click on ‘Source Acc.’ button on the action column, this will display a drop down with option to ‘view’ and ‘Edit’ Source account if the data has been added. However, if the source account data has not been added, the dropdown will have an option to ‘ADD’ source account. See an example in fig 31.2ad and 31.2ae below.
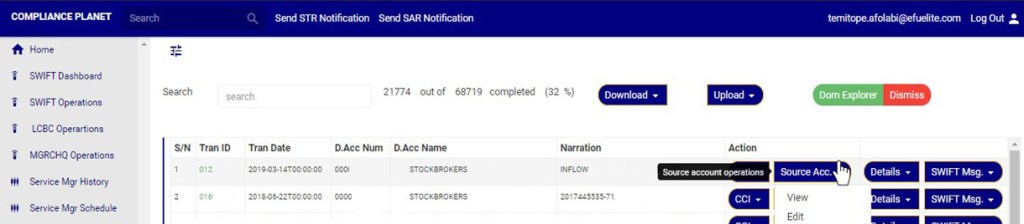
(Fig. 31.2ad)

(Fig. 31.2ae)
A. How to view and delete Source Account data attached to a Swift FXFTI Transaction
Note: Only person(s) assigned right to ‘view SWIFT DOM transactions’ and ‘Screen Edit SWIFT DOM transactions’ will be able to delete Source Account data
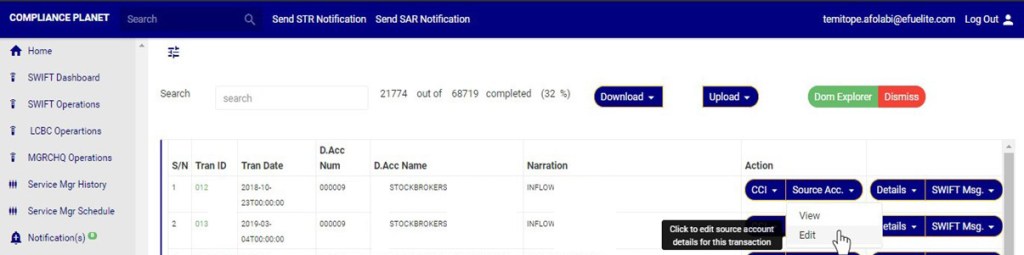
- Click on ‘Source Acc’ button on the Action column, this will display a drop down with option to ‘VIEW’ source account details and ’Edit’ source account details. See an example in fig 31.2af below.
(Fig. 31.2af)
- Click on ‘VIEW’ to see source account details as in fig 31.2ag below
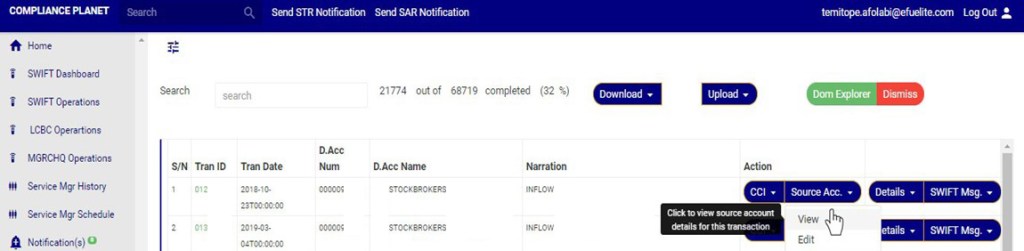
(Fig 31.2ag)
- Clicking on ’View’ will display a console as in in fig 31.2a hbelow.
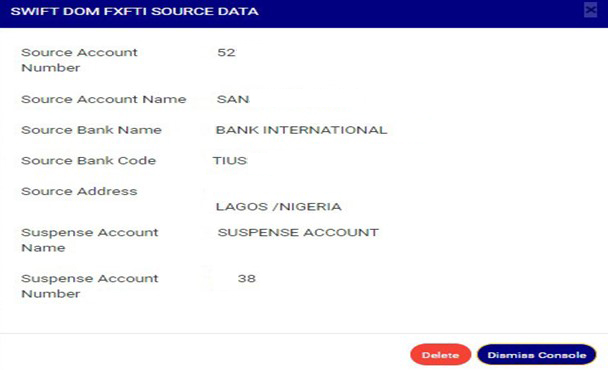
(Fig. 31.2ah)
- Click on ‘Dismiss’ to close the console or click ‘Delete’ to delete the source data. See fig 31.2ai
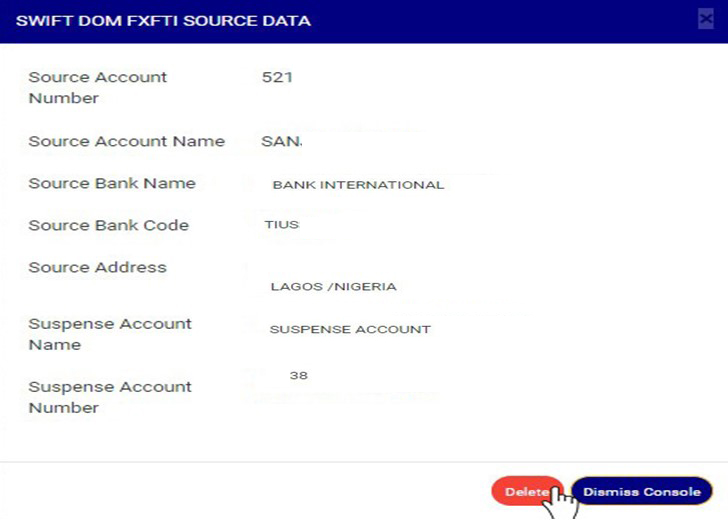
(Fig. 31.2ai)
- Clicking on delete will display a confirmation console as in Fig 31.2aj below. Click on confirm to continue or cancel to dismiss the operation.
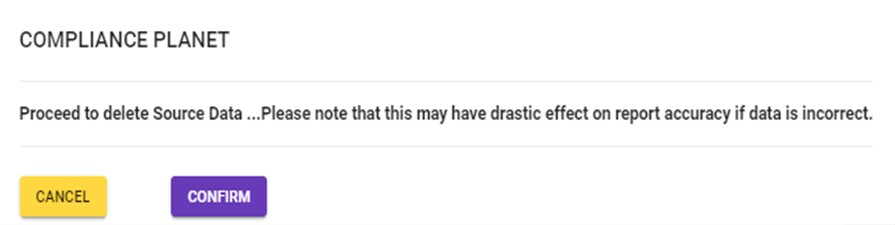
(Fig. 31.2aj)
- A notification will be displayed at the top of the page when delete is successful. See Fig 31.2ak below

(Fig. 31.2ak)
B. How to edit Account Source data attached to a Swift FXFTI Transaction
Note: Only person(s) assigned right to ‘view SWIFT DOM transactions’ and ‘Screen Edit SWIFT DOM transactions’ will be able to Edit Source Account data
- Click ‘Source account’, this will display a dropdown as in fig 31.2al
- On the Source account dropdown, click on ‘EDIT’ to modify source account details. See this in Fig 31.2al below
(Fig 31.2al)
- Clicking on ’Edit’ will display a console as in in fig 31.2am below.
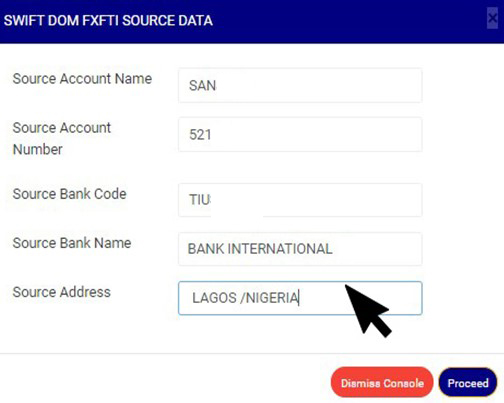
(Fig. 31.2am)
- Click on ‘Dismiss console’ to close the console or click ‘proceed’ to save the source data. See fig 31.2an
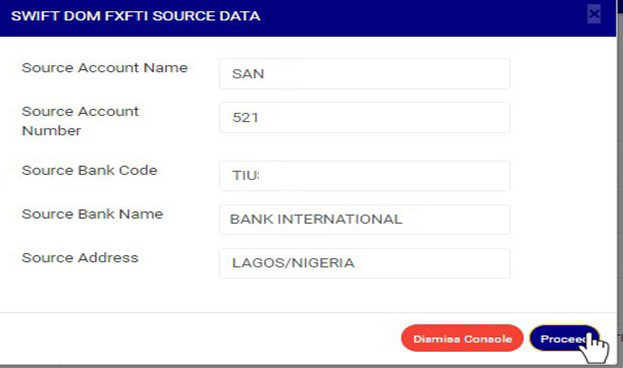
(Fig. 31.2an)
- Clicking on proceed will display a confirmation console as in Fig 31.2ao below. Click on confirm to continue or cancel to dismiss the operation.
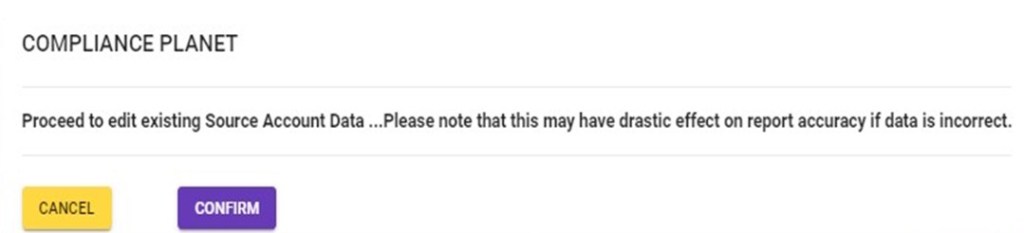
(Fig. 31.2ao)
- A notification will be displayed at the top of the page when edit is saved successfully. See Fig 31.2ap below

(Fig. 31.2ap)
C. How to add ‘Source account’ data to a SWIFT FXFTI Transaction
This Option is available for SWIFT FXFTI transactions with no source account data.
Note: Only person(s) assigned right to ‘view SWIFT DOM transactions’ and ‘Screen Edit SWIFT DOM transactions’ will be able to add Source Account data
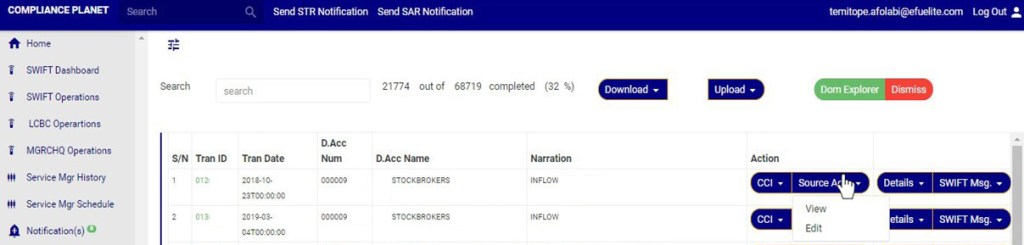
- Click ‘Source account’ on the ‘Action’ column, this will display a dropdown as in fig 31.2aq
- Click on ‘add’ on the source account dropdownto add source account data to this transaction. This is shown in Fig 31.2aq below
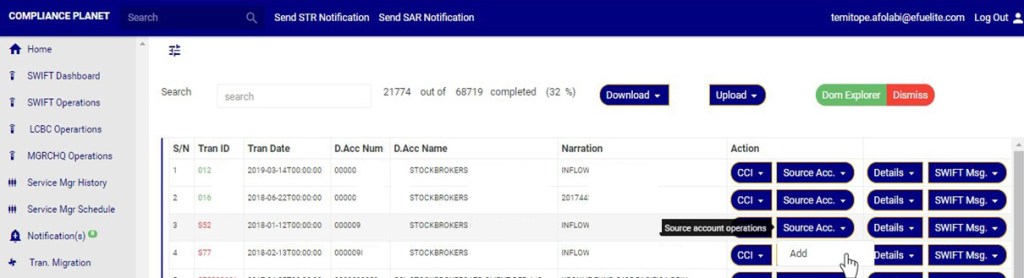
(Fig 31.2aq)
- Clicking on ’add’ will display a console as in in fig 31.2ar below.
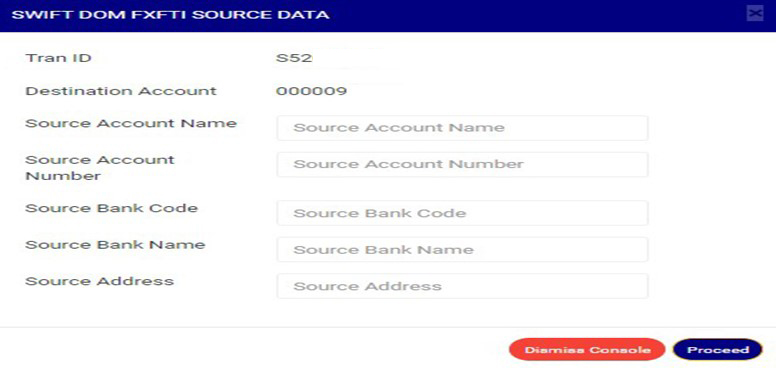
(Fig. 31.2ar)
- Click on any of the source account data textbox to fill the field as in in fig 31.2as below.
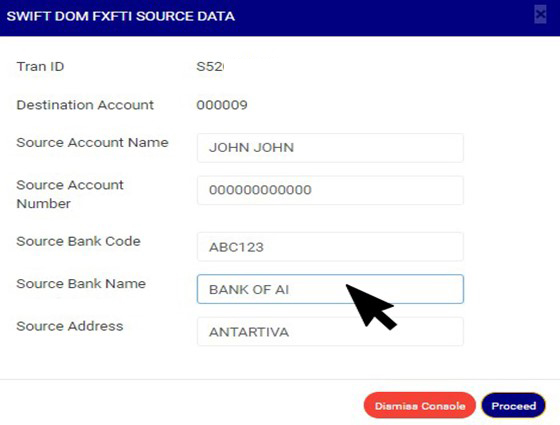
(Fig. 31.2as)
- Click on Proceed to add the source account data or ‘dismiss console’ to dismiss the operation. See an example in Fig 31.2at below
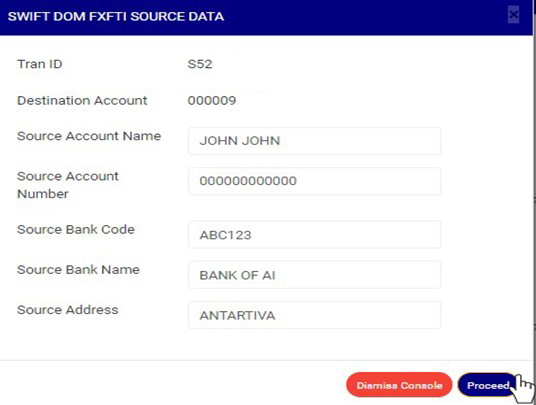
(Fig. 31.2at)
- Clicking on Proceed will display a confirmation console as in Fig 31.2au below. Click on confirm to continue or cancel to dismiss the operation.
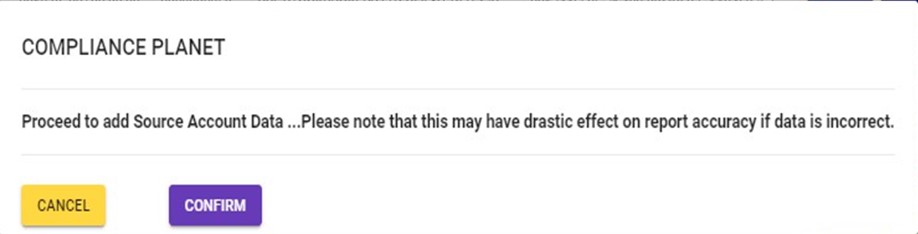
(Fig. 31.2au)
- A notification will be displayed at the Top when Source account data is successfully added. See Fig. 31.2av below.

(Fig. 31.2av)
Viewing Swift FXFTI Transaction ‘Account details’ and ‘Transaction details’
Note: You need to be assigned right to ‘view SWIFT DOM transactions’ to carry out this operations
- Click on ‘Details’ button on the Action column, this will display a drop down with option to ‘VIEW Transaction’ and ’View Account’. See an example in fig 31.2aw
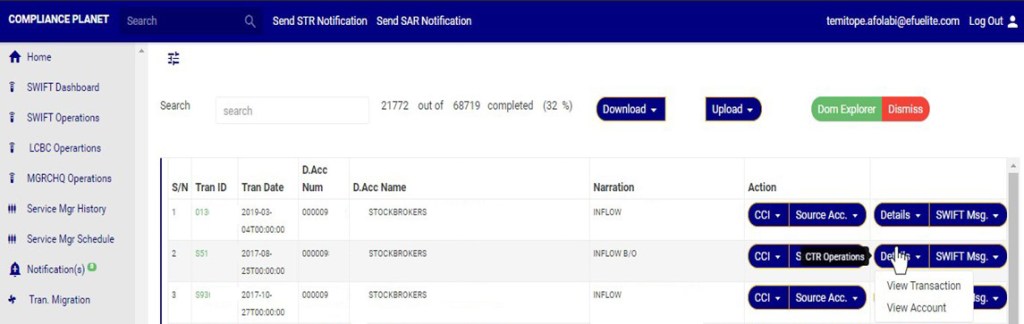
(Fig 31.2aw)
A. How to View Swift FXFTI ‘Transaction details’
Note: Only person(s) assigned right to ‘view SWIFT DOM transactions’ will be able to carry out this operation(s)
- Click ‘details’, this will display a dropdown with options to ‘view transaction’ and ‘view account’
- Click on view transaction as in fig 31.2ax below to see the details of the transaction
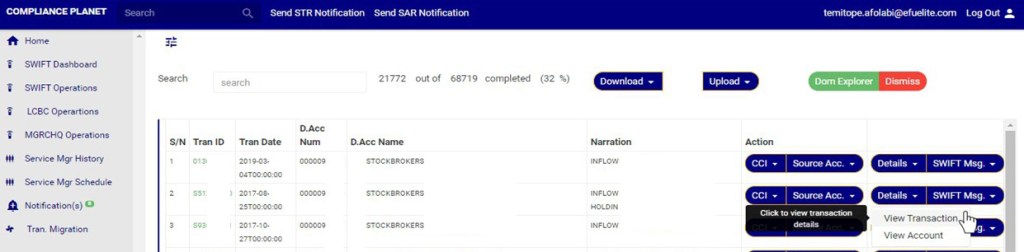
(Fig 31.2ax)
- Clicking ‘View Transaction will display a console as in fig 31.2ay below

(Fig 31.2ay)
- Click dismiss console to close the console
B. How to View Swift FXFTI Transaction ‘Account details’
Note: Only person(s) assigned right to ‘view SWIFT DOM transactions’ will be able to carry out this operation(s)
- Click ‘details’, this will display a dropdown with options to ‘view transaction’ and ‘view account’.
- Click on view Account as in fig 31.2az below to see the details of the transaction

(Fig 31.2az)
- Clicking ‘View Account will display a console as in fig 31.2ba below
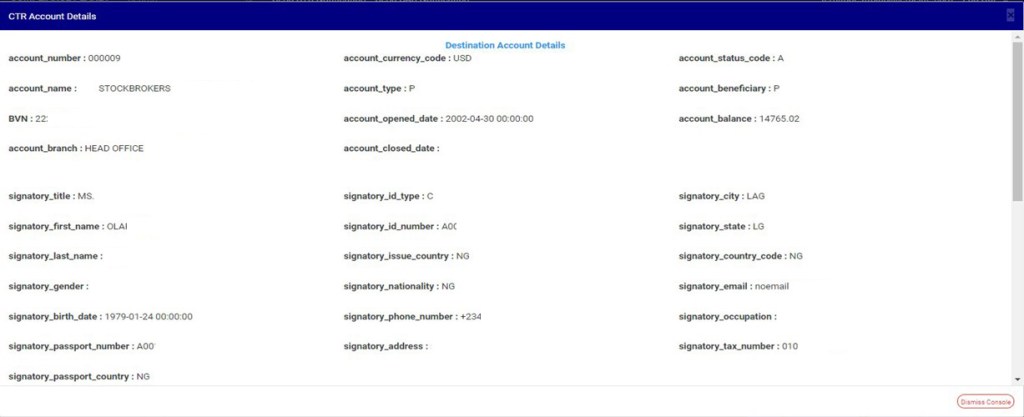
(Fig 31.2ba)
- Click dismiss console to close the console
How to View Swift FXFTI Transaction ‘Swift message’
Note: You need to be assigned right to ‘view SWIFT DOM transactions’ to carry out this operations
- Click on ‘Swift Msg.’ button on the Action column, this will display a drop down with option to ‘VIEW’ Swift message for the transaction. See an example in fig 31.2bb below.

(Fig. 31.2bb)
- Click on ‘VIEW’ to see the swift message for the transaction.as in 31.2bc below
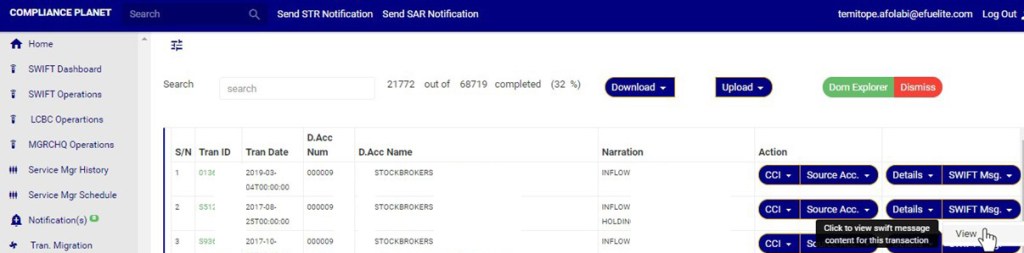
(Fig. 31.2bc)
- Clicking on ’View’ will display a console as in in fig 31.2bd below.
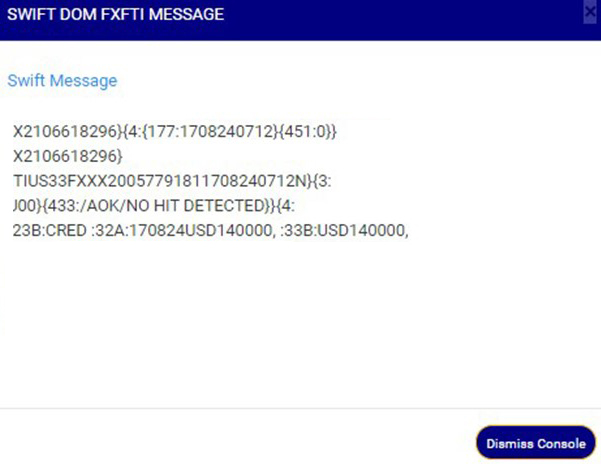
(Fig. 31.2bd)
- Click on ‘Dismiss’ to close the console
How to Carry Out bulk Swift FXFTI transaction Operations
On the SWIFT FXFTI transaction list page you can make a bulk download of Foreign Exchange Foreign Transactions (FXFT) files either for viewing or editing purpose. The process is explained below
A. How to carry out bulk view of Swift FXFTI transactions
Note: You need to be assigned right to’view SWIFT DOM transactions’ and ‘Download SWIFT DOM transactions’ to carry out this operations
STEP 1: Click on the download button on the SWIFT FXFTI transaction list page. See Fig 31.3a for an example

(fig. 31.3a)
- Clicking the download button will display a dropdown as in fig. 31.3b below

(fig. 31.3b)
STEP 2: Click on the bulk view as shown in fig 31.3c below

(fig. 31.3c)
- The signal console shows on going processes. An example of a signal console is fig 31.3d. You can terminate unfinished processes by clicking ‘CANCEL OPS’.
- To minimize signal console, click on DISMISS CONSOLE.
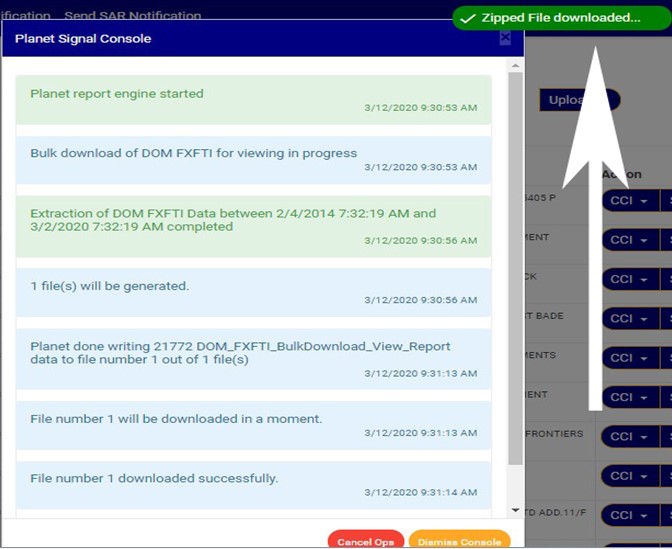
(fig 31.3d)
➔ An excel file with details of the SWIFT FXFT transaction will be downloaded when the process is complete.
B. How to carry out bulk edit of Swift FXFTI transactions
Note: You need to be assigned right to ‘view SWIFT DOM transactions’ and ‘Download SWIFT DOM transactions’ to carry out this operations
STEP 1: Click on the download button on the SWIFT FXFTI transaction page. See Fig 31.3e for an example

(fig. 31.3e)
- Clicking the download button will display a dropdown as in fig. 31.3f below

(fig. 31.3f)
STEP 2: Click on the bulk Edit as shown in fig 31.3g below

(fig. 31.3g)
- The signal console shows on going processes. An example of a signal console is fig 31.3h. You can terminate unfinished processes by clicking ‘CANCEL OPS’.
- To minimize signal console, click on DISMISS CONSOLE.
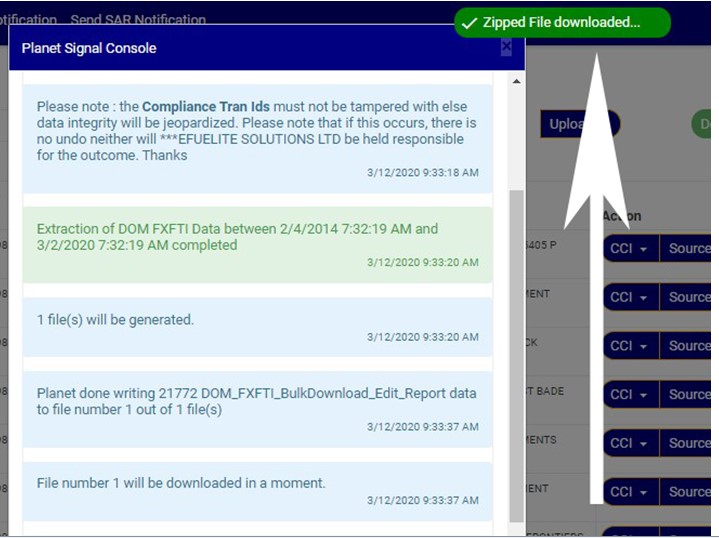
(fig 31.3h)
➔ An excel file with details of the SWIFT FXFT transaction will be downloaded when the process is complete. The data on the file when edited can be uploaded to update that record on the software using the bulk upload feature.
Note that the headings in the excel file must not be tampered with.
How to Carry out Bulk Upload of Edited Swift Documents
On the Swift Operations page you can make a bulk upload of Edited Swift Foreign Exchange Foreign Transactions (FXFT) files. The process is described below
Note: You need to be assigned right to ‘view SWIFT DOM transactions’ and ‘Bulk Edit SWIFT DOM transactions’ to carry out this operations
STEP 1: Click on the Upload button on the Swift Operation page. See Fig 31.3i for an example
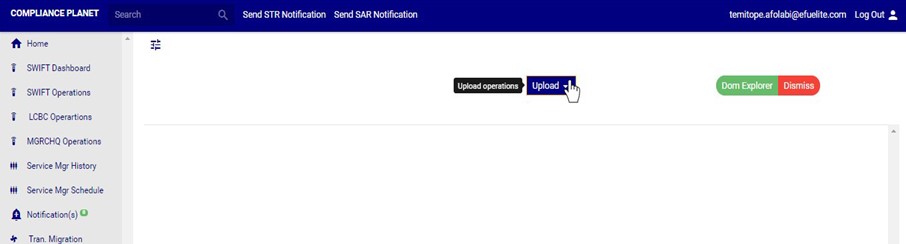
(fig. 31.3i)
- Clicking the Upload button will display a dropdown as in fig. 31.3j below
STEP 2: Click the bulk edited data as shown in fig 31.3j below
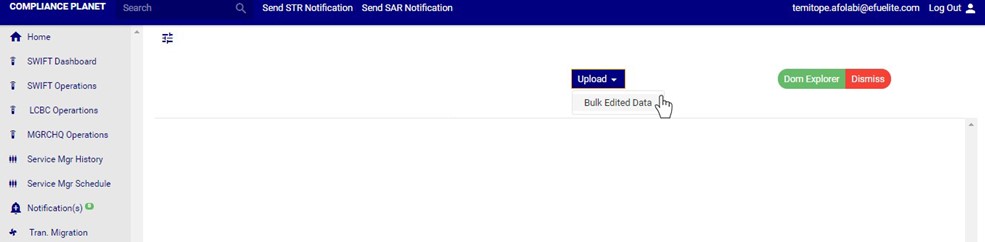
(fig. 31.3j)
- This displays a ‘Planet FXFTI Bulk Edited Upload Console’ as in Fig31.3k below.
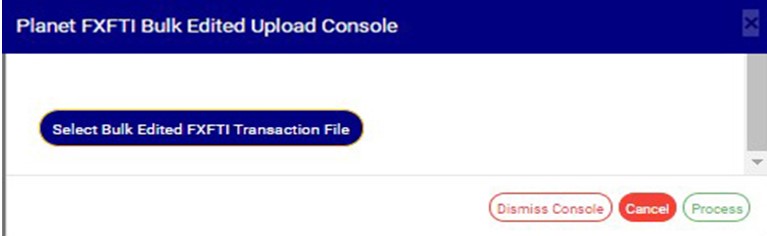
(fig. 31.3k)
STEP 3: Click on ‘Select Bulk Edited FXFTI Transaction file’ to choose the edited transaction file you want to upload from your computer. See this in Fig 31.3l below

(fig. 31.3l)
- After successful upload of file, the console will display the title of the file, that is, the file name. See fig. 31.1e to see an example of how the console looks like when you successfully upload a file from your computer.
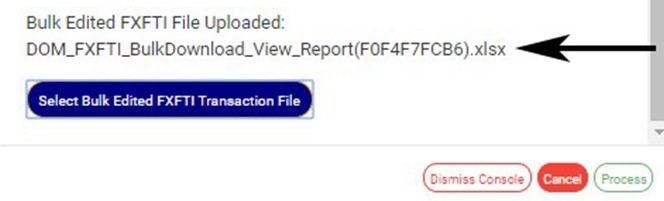
(Fig. 31.3m)
STEP 4: Click on ‘process’ button to proceed with the upload. See fig31.1fbelow to see the green button at the bottom-right corner of the console.
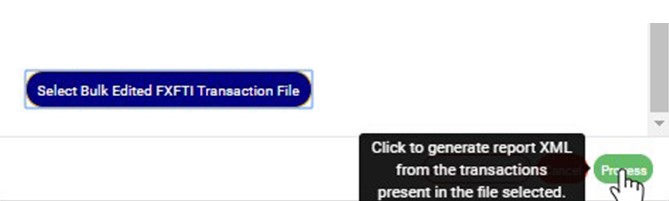
(Fig. 31.3m)
- This displays a confirmation console as in fig. 31.1g below. Click ‘Confirm’ to continue or ‘Cancel’ to close the console.
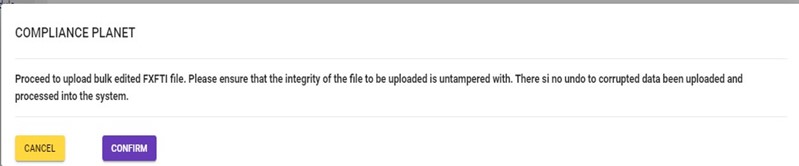
(Fig. 31.3n)
For further enquiries :
Tel +234(0) 816 555 9818
Email solutions@efuelite.com
Web http://solutions.efuelite.com
