The Compliance Planet security menu deals with the management of the various users on the Compliance Planet software in a financial institution. This section provides a guide to performing Security operations in the Compliance Planet software, with step-by-step instructions and pictures.
Security Operations
Operations here include creating a user, activating a user, deactivating a user and viewing the details of a user’s profile on the software. To perform any of these operations,
NOTE: Only person(s) profiled as deputy supreme Admin can carry out these operations.
- Click ‘Security’ on the main dashboard.
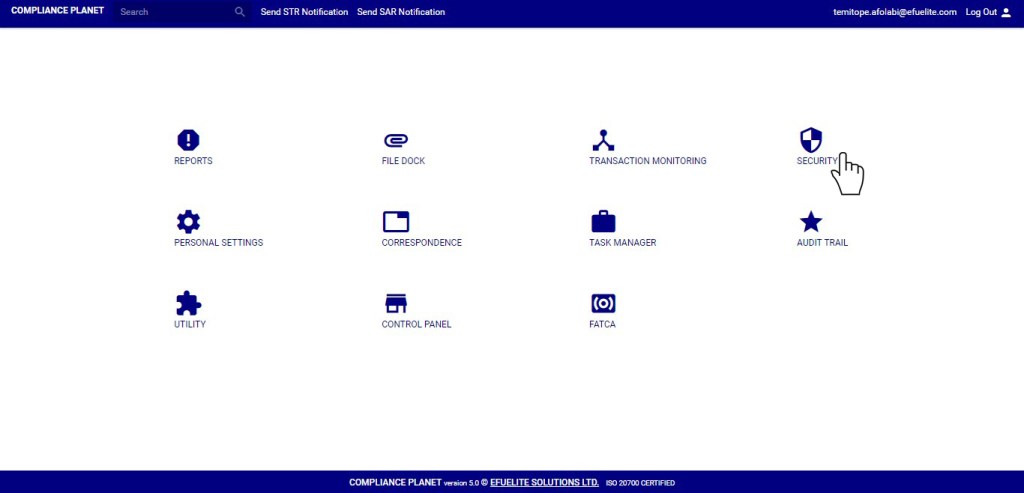
- This displays a page as in fig. 38.1b below.

(Fig 38.1b)
- As seen in fig. 38.1a, there are two categories of users. They are; ‘Active’ users and ‘Inactive’ users.
How to Create A User
This involves creating a new user account and assigning roles to the user on the compliance planet software.Here is how to do this.
STEP 1: Click on ‘New Profile’ as in fig. 38.2a below.

(Fig 38.2a)
- This displays a console as in fig. 38.2b.
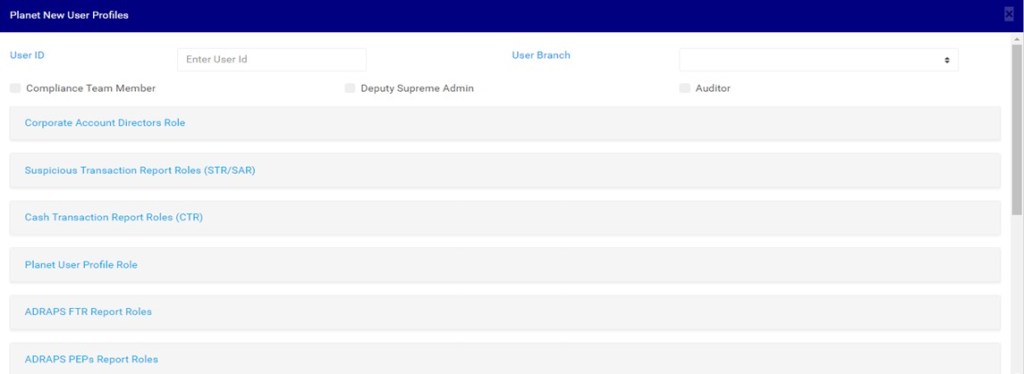
(Fig 38.2b)
STEP 2: Enter ‘User Id’ as in fig. 38.2c.

(Fig 38.2c)
STEP 3: Select ‘User Branch’ of the user as in fig. 38.2d.
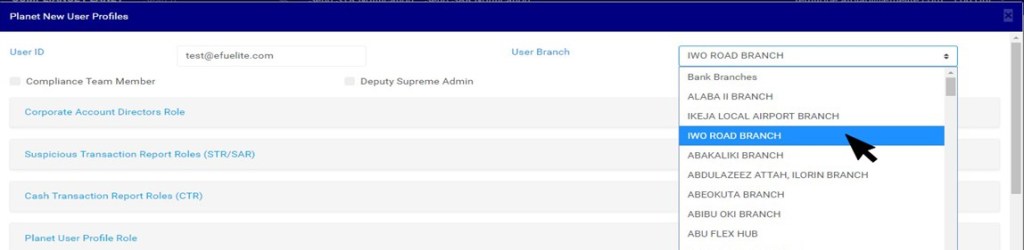
(Fig 38.2d)
STEP 4: Select the user’s designation i.e. Compliance team member and/or deputy supreme admin and/or Auditor checkbox. See fig. 38.2e for an example.

(Fig 38.2e)
STEP 5: Assign roles by clicking on role(s) segment as in fig. 38.2f to select roles or operations the user is authorized to carry under that segment.
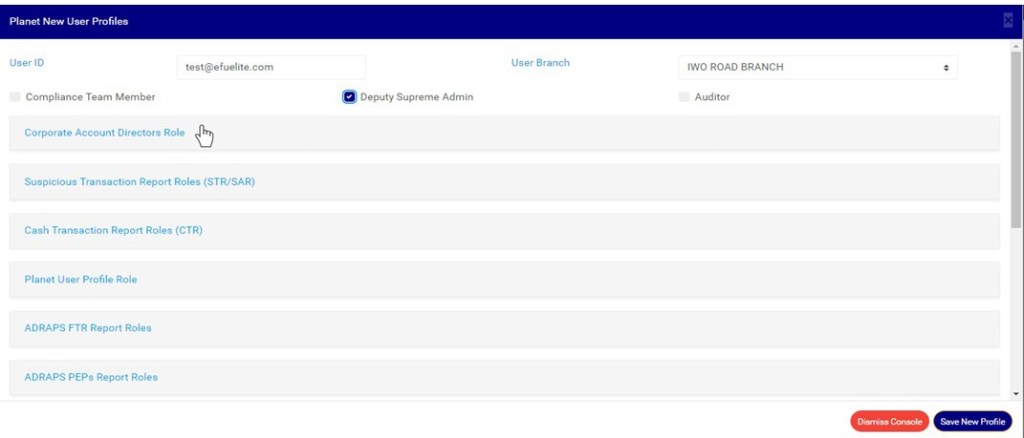
(Fig 38.2f)
- Roles relating to the operations/features under the selected segment will be displayed,select a role by clicking on its checkbox as seen in fig. 38.2g below.
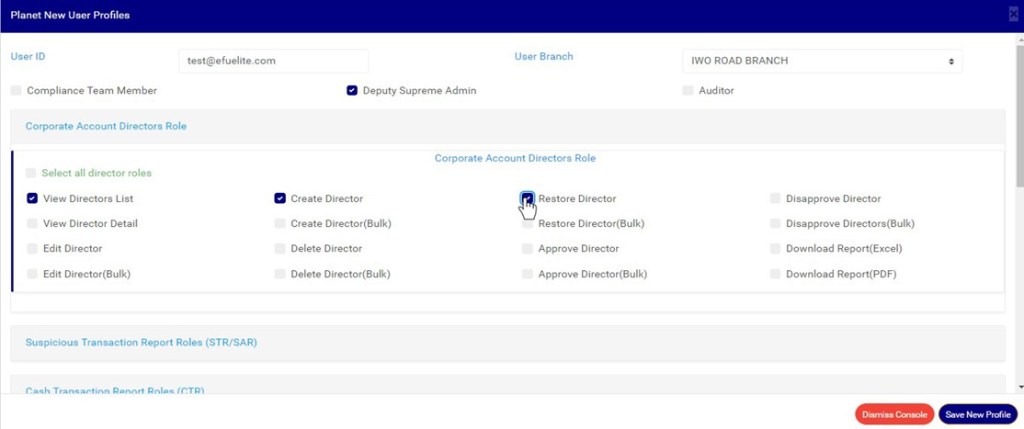
(Fig 38.2g)
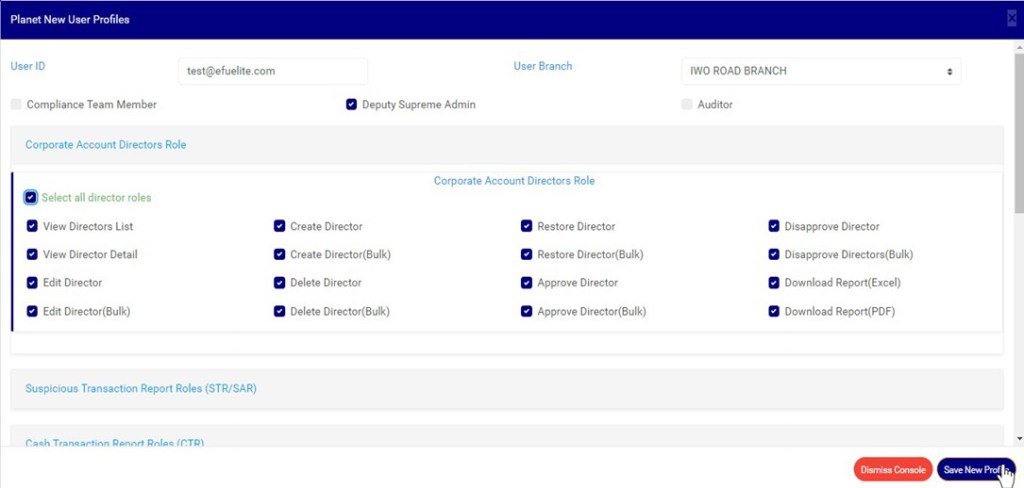
- To select all the operations under a segment, click on ‘Select all … roles’ as shown in fig. 38.2h below.
(Fig 38.2h)
- The user will be granted access to the sections and operations on the software which he/she is authorized. Roles can also be assigned after creating the user account.
STEP 6: Click on ‘Save New Profile’ as in fig. 38.2i to create new user account.
(Fig 38.2i)
- This displays a confirmation console as fig. 38.2j.

(Fig 38.2j)
- Click on ‘Confirm’ to proceed or ‘Cancel’ to discontinue.
- A notification as in fig. 38.2k will be displayed at the top of the page when the operation is complete.
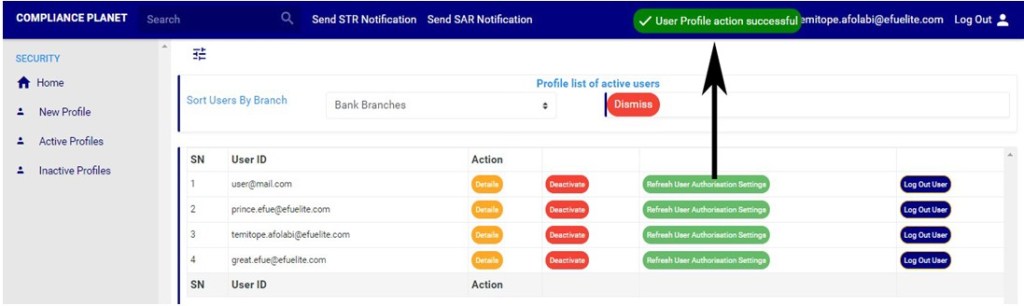
(Fig 38.2k)
How to Carry Out Active Users Operations
- Click on either ‘Active Profiles’ on the left hand side menu as in fig. 38.3a or ‘Active Users’ on the home page as in fig. 38.3b to perform any operation pertaining to active users.

(Fig 38.3a) (Fig 38.3b)
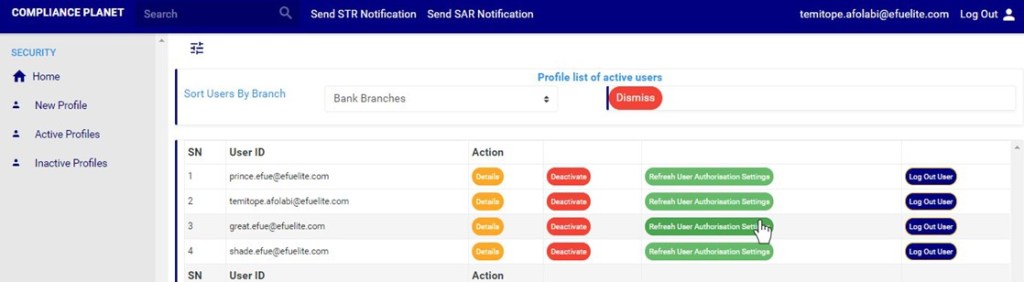
- This displays an ‘active users’page as in fig38.3c. As seen below, each active user has four buttons; ‘Details’ button, ‘Deactivate’ button, ‘refresh User Authorization’ button and ‘Log Out User’ button. To close the page Click on the ‘DISMISS’ button.
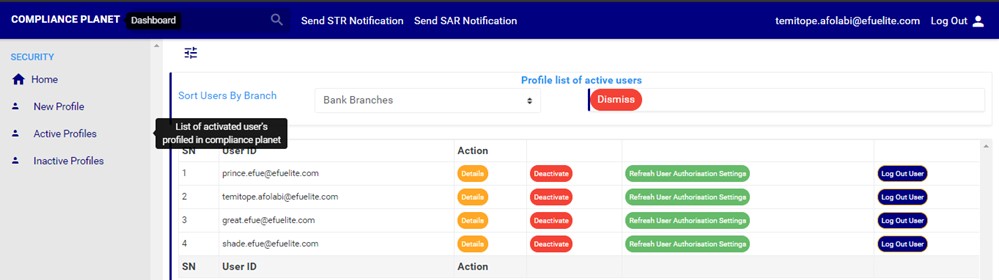
(Fig 38.3c)
- User accounts attached to a branch can be seen by selecting a branch of the institution as shown in fig. 38.3d below.

(Fig 38.3d)
How to set User’s Authorization
This refers to permitting a user to carry out operations on the software by assigning roles to the user. Here is how to set authorization for a user.
- Click on the ‘Details’ button of the user as in fig. 38.3e to see user’s profile. Details of a user’s profile can be viewed, irrespective of their status i.e. active or inactive

(Fig 38.3e)
- By clicking on a user’s details button, a console as in fig. 38.3f will be displayed.
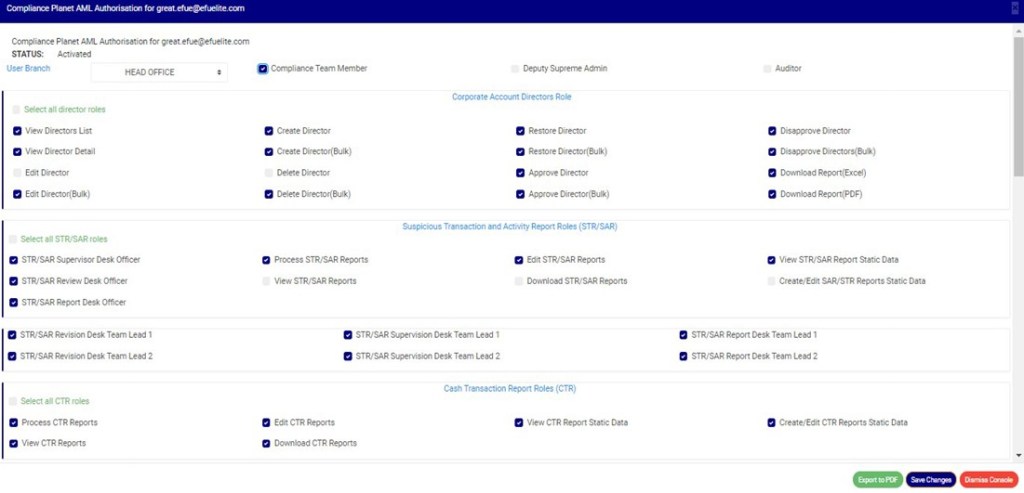
(Fig 38.3f)
- Here, on this console, a user’s branch can be set; see an example in fig 38.3g below
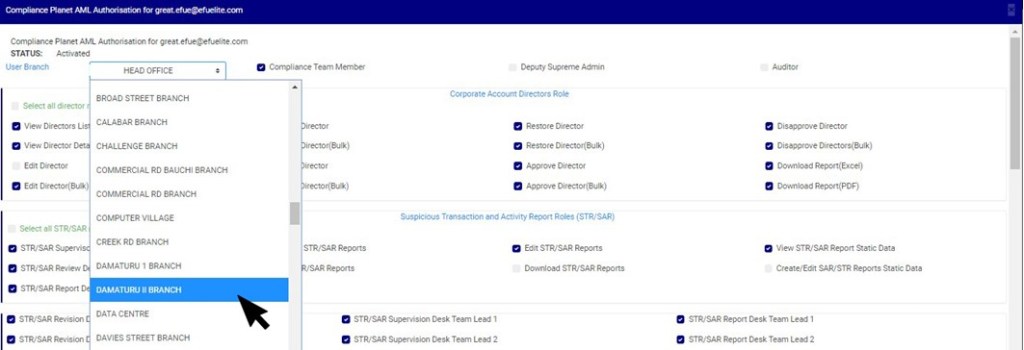
(fig 38.3g)
- Assign the user to a designation by ticking the designation checkbox. See an example in fig 38.3h below
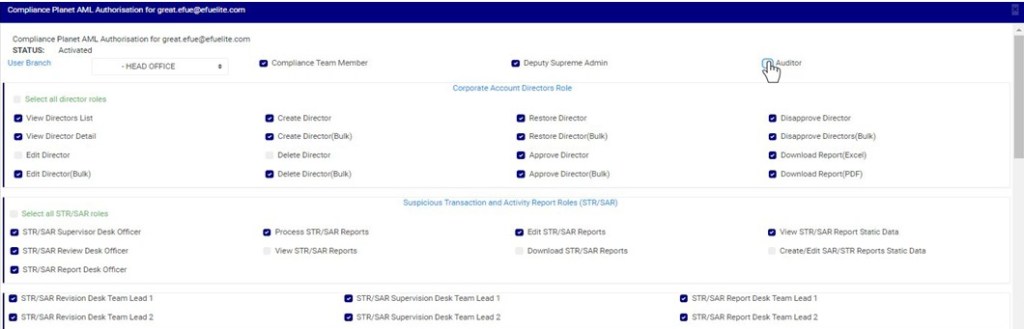
(fig 38.3h)
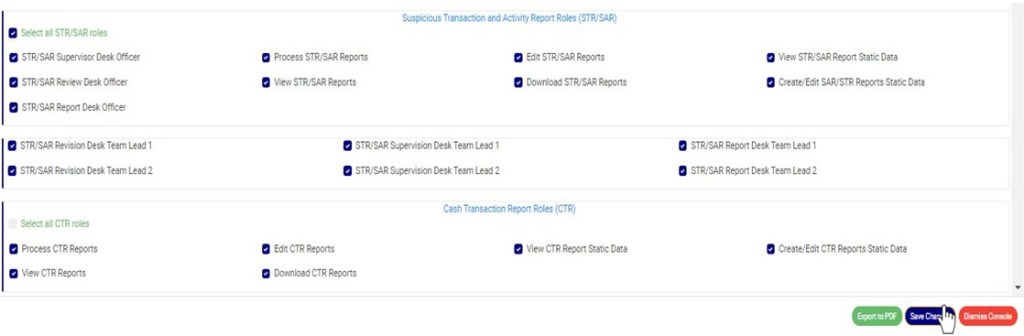
- The User can be assigned right to carry out an operation. The console provides various roles with check boxes to permit or restrict the user. When the checkbox of a role is ticked, it means the user is permitted to carry out that role and when the checkbox is unticked, the user is restricted from that operation on the Compliance planet software. To select or deselect any role, click on the checkbox. Note that you can select all roles in a particular segment by clicking on the ‘Select all…. Roles’ as in fig. 38.3i below or select a particular role by clicking on that role.

(Fig 38.3i)
- After making changes to the profile, you can export the information on the console as Pdf by clicking the ‘Export to PDF’ button see this button in Fig 38.3j below

(Fig 38.3j)
- When you click a the export to PDF button a notification will be displayed at the top of the page as in Fig 38.3k below

(Fig 38.3k)
- Click on ‘Save Changes’ as in fig. 38.3l to save the changes.
(Fig 38.3l)
- This will display a confirmation console as in fig. 38.3m.

(Fig 38.3m)
- Click on ‘Confirm’ to proceed or ‘Cancel’ to discontinue.
- A notification as in fig. 38.3n will be displayed at the top of the page when the operation is complete.
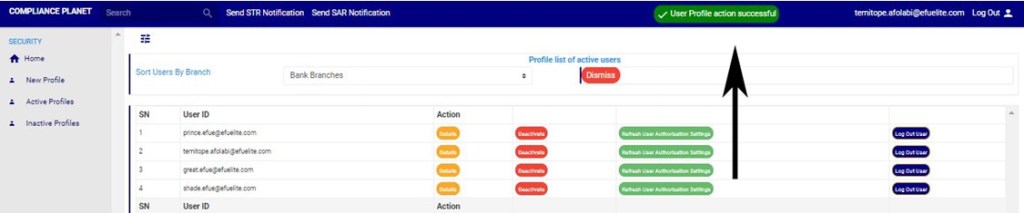
(Fig 38.3n)
- After saving changes, ‘click on Refresh User Authorization settings’ as shown below for the changes to take effect in real time on the user’s account. See an example in fig 38.3o
(fig 38.3o)
How to Deactivate A User
This refers to disabling an active account on the compliance planet. Here is how to deactivate an account.
- Click on ‘Active Profiles’ on the left hand side menu as in fig. 38.3p or ‘Active Users’ on the home page as in fig. 38.3q.

(Fig 38.3p) (Fig 38.3q)
- This displays a list of active users as in fig 38.3r below.
- Click ‘Deactivate’ on the action column as in fig. 38.3r to disable a user account. Note that the user profile will be removed from the list of active profiles.
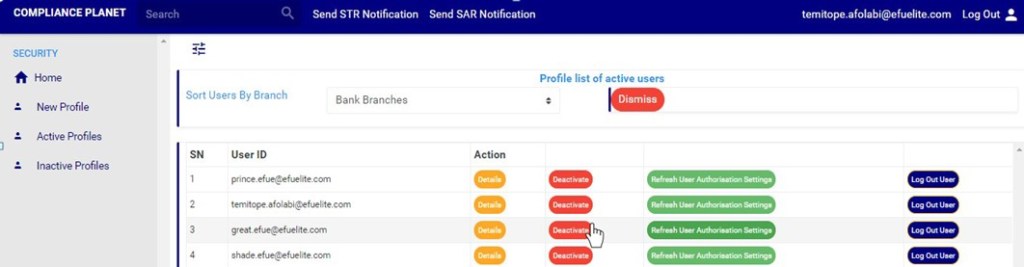
(Fig 38.3r)
- This displays a confirmation console as fig. 38.3s.
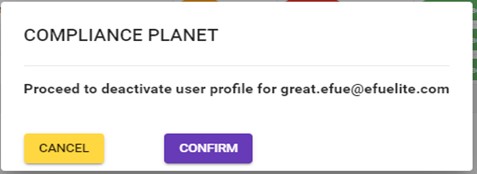
(Fig 38.3s)
- Click on ‘Confirm’ to proceed or ‘Cancel’ to discontinue.
- A notification as in fig. 38.3t will be displayed at the top of the page when the operation is complete and the user’s profile will be moved to inactive profiles.
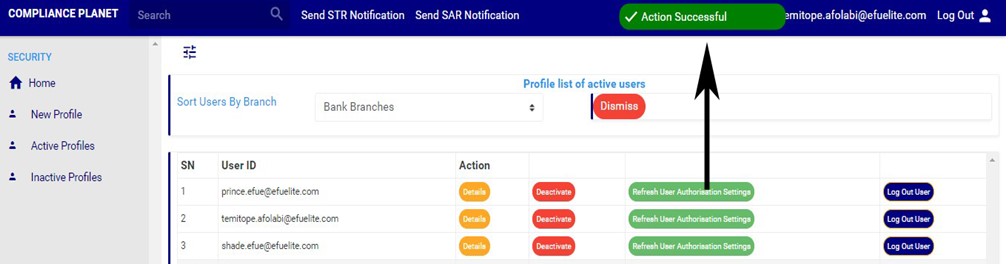
(Fig 38.3t)
How to Log a user Out
- click ‘Log Out User’ as in fig. 38.3u to log out a user account on the compliance planet software.
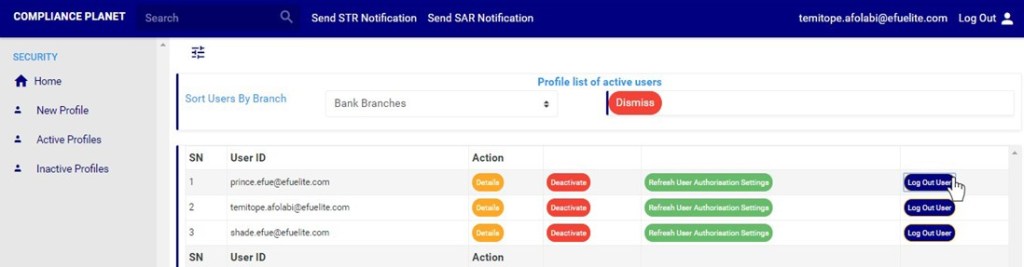
(Fig 38.3u)
- A notification as in fig. 38.3v will be displayed at the top of the page when the operation is complete.
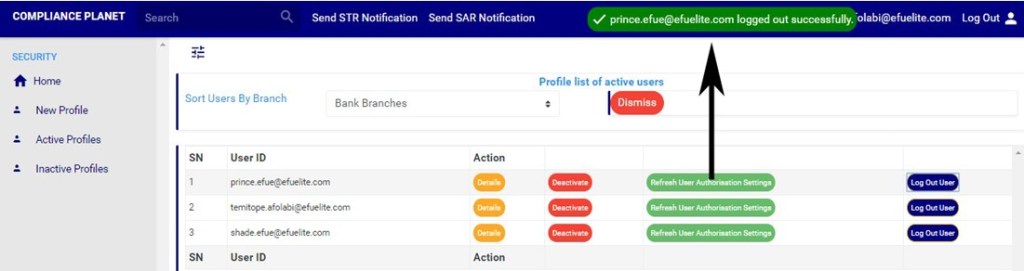
(Fig 38.3v)
Inactive Users Operations
- Click ‘Inactive Profiles’ on the left hand side menu as in fig. 38.4a or ‘Inactive Users’ on the home page as in fig. 38.4b to perform operations pertaining to inactive users.

(Fig 38.4a) (Fig 38.4b)
- This displays a page as in fig. 38.4c. Each inactive user profile has two buttons; ‘Details’ button and ‘Activate’ button. To close the page and return to the home page click the ‘DISMISS’ button at the top of the page.
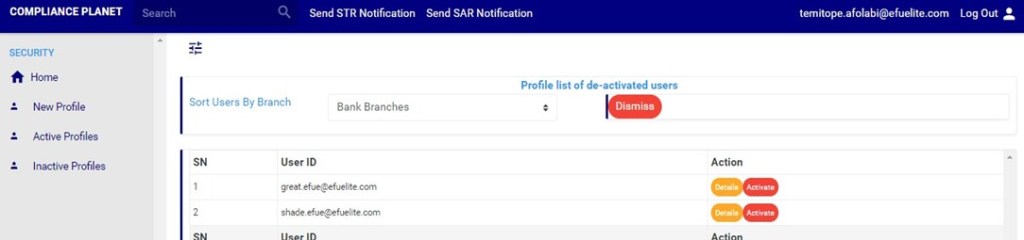
(Fig 38.4c)
How to Activate A User
- Click on the ‘Activate’ as in fig. 38.4d to activate a user account on the software.

(Fig 38.4d)
- This displays a confirmation console as in fig. 38.4e.
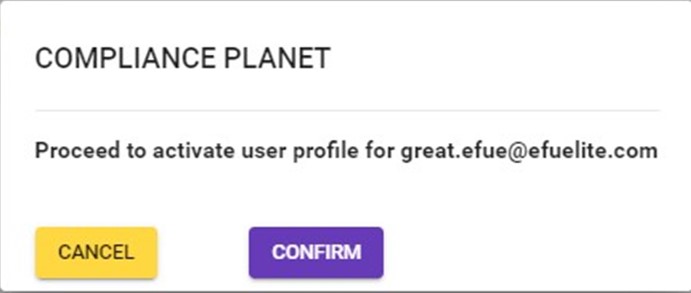
(Fig 38.4e)
- Click on ‘Confirm’ to proceed or ‘Cancel’ to discontinue.
- When the operation is complete, a notification as in fig. 38.4f will be displayed at the top of the page and the user profile will be moved to active profile list.

(Fig 38.4f)
For further enquiries :
Tel +234(0) 816 555 9818
Email solutions@efuelite.com
Web http://solutions.efuelite.com
