What is XML?
XML stands for Extensible Markup Language. It is a markup language that defines a set of rules for encoding documents in a format that is both human-readable and machine-readable. It is a metalanguage that allows users to define their own customized markup language, particularly for displaying documents on the internet. It was designed to store, transport, and describe data. It is a flexible way to create information formats and electronically share structured data via both public and corporate networks.
NOTE: Only person(s) Assigned right(s) to ‘Process FTR’ reports will be able to carry out this Operation.
The software can help you generate XML files from Excel. Here’s how to proceed.
Step 1: From the app dashboard, click on “REGULATORY REPORTS” as in Fig. 3.5a below.
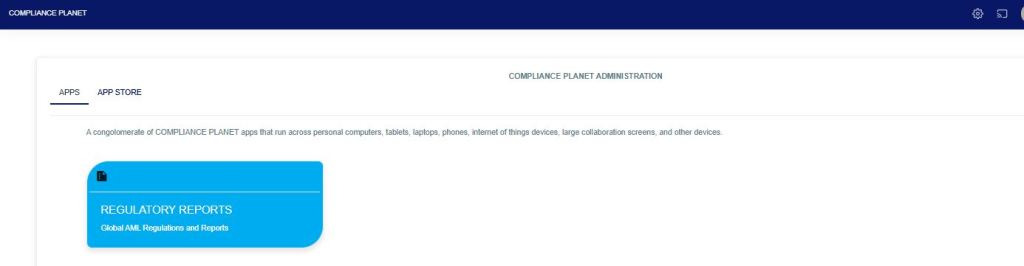
Fig 3.5a
Step 2: Click on “CBN ADRAPS FTR” in the drop-down list, and this displays the ADRAPS FTR page, as shown in Fig. 3.5b below.
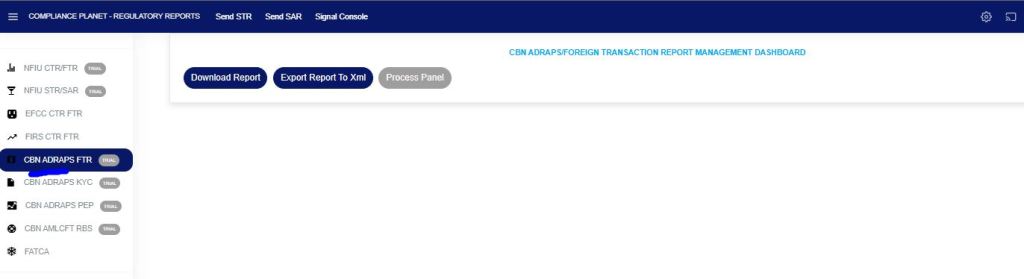
Fig 3.5b
Step 3: From the menu, click “Export Report to XML” as in Fig. 3.5c below.
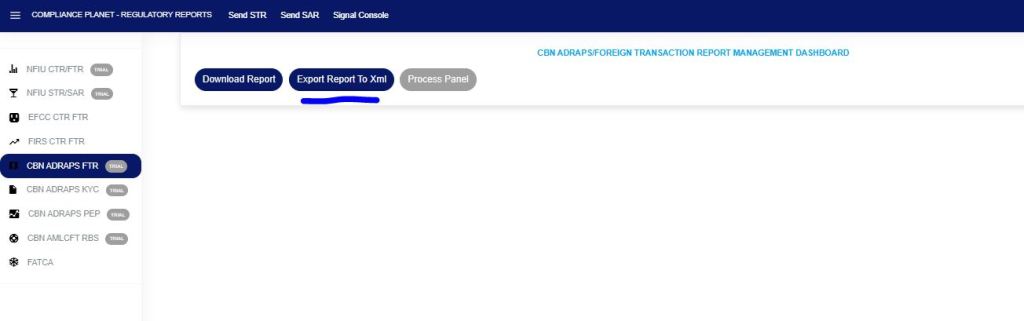
Fig 3.5c
A ‘Planet ADRAPS FTR XML Console’ as in Fig. 3.5d below will be displayed.
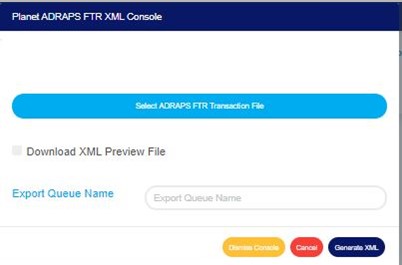
Fig 3.5d
Step 4: Click on ‘Select ADRAPS FTR Transaction File’ to upload an ADRAPS FTR file from your computer, as in Fig. 3.5e. The information in the uploaded file is what Compliance Planet will convert into an XML file. See how to upload a file from your computer.
- Note: if you are uploading a transaction file downloaded from the Compliance Planet, you must
- Unlock the Excel file; to do this, open the Excel file and click “enable editing” in the Excel editor.
- Delete the S/N column in the Excel file to be uploaded.
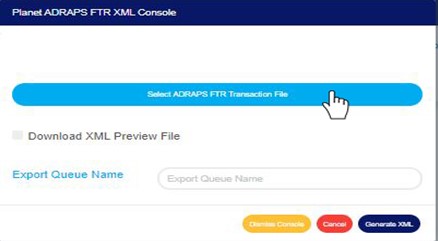
Fig 3.5e
- If you do not have the file specification for uploading the ADRAPS FTR transaction, you can download it from the “SYSTEM DATA SPEC FILES” on the software.
- Go to the Regulatory Report page and click “SYSTEM DATA SPEC FILES” as shown below.

- Click the download button associated with the report type, as shown below.
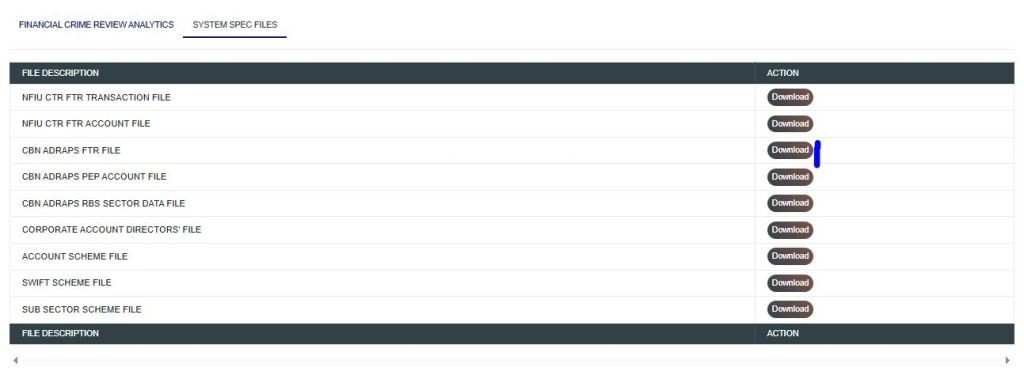
- An Excel file will be downloaded to your computer with pre-filled titled columns under which the details will be entered. Open the file, fill in the required details of the ADRAPS FTR account data, and save the changes. Renaming the file on your computer is optional. Go back to the software and click on ‘Select ADRAPS FTR Transaction File’ to select the file.
- The file must be unlocked in the Excel editor by clicking enable editing, and data must be filled in, as the software will not process an empty file.
Step 5: Tick ‘Download XML Preview File’ to download the XML preview file. This preview file provides a numerical download report on the XML file generated, including the total number of transactions XML generated, the total number of transactions not generated, and the number of transactions extracted from the ADRAPS file uploaded. It also gives details of transactions with missing information. It is in Excel format. See Fig. 3.5f to see the checkbox.
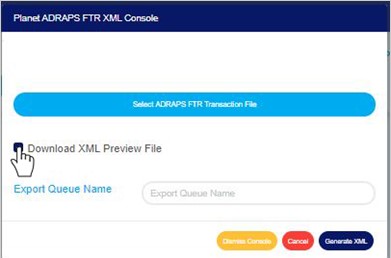
Fig 3.5f
Step 6: Click on the ‘Export Queue Name’ textbox to set the file name. See an example in Fig. 3.5g below.
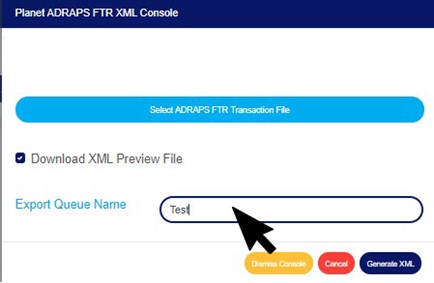
Fig 3.5g
Step 7: Click on “GENERATE XML“. Refer to Fig. 3.5h below to locate the blue button at the bottom-right corner of the console.
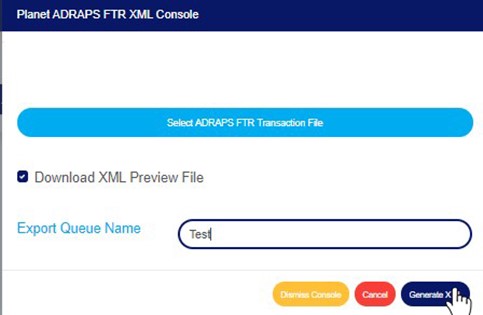
Fig 3.5h
- This displays a confirmation console as in Fig. 3.5i below.
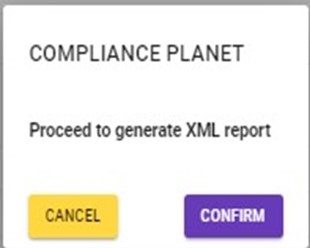
Fig 3.5i
- To make changes to your report settings on the ADRAPS FTR Console, click on Cancel. This will take you back to the ADRAPS FTR XML Console.
- Click on “CONFIRM “to continue or “CANCEL” to return to the FTR console.
- The Signal console shows ongoing processes as in Fig. 3.5j below

Fig 3.5j
- Click on the “DISMISS CONSOLE“ to close the console.
- Click on “CANCEL” to stop the operation if you do not want to continue with generating the XML file. A confirmation console as in Fig. 3.5k will be displayed. Click on CONFIRM to confirm that you wish to cancel the operation, or CANCEL to return to the XML Console.
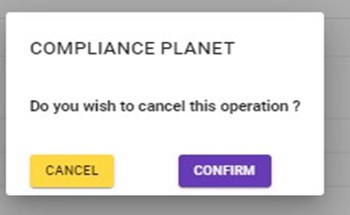
Fig. 3.5k
For further enquiries:
Tel: +234(0) 816 555 9818
Email: solutions@efuelite.com
Web: http://solutions.efuelite.com
