The Compliance Planet enables you to manually schedule your ADRAPS KYC report in advance and download it once it has been fully processed. Here is how to do this.
NOTE: Only the person(s) assigned the right to ‘Process KYC Report’ can carry out these operations.
Step 1: From the app dashboard, click on “REGULATORY REPORTS” as in Fig. 5.3a below.
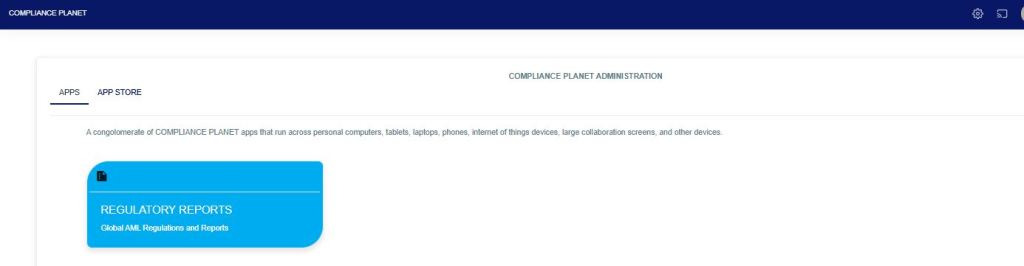
Fig 5.3a
STEP 2: Click ‘CBN ADRAPS KYC’ on the drop-down list and display the KYC page as in Fig. 5.3b below.
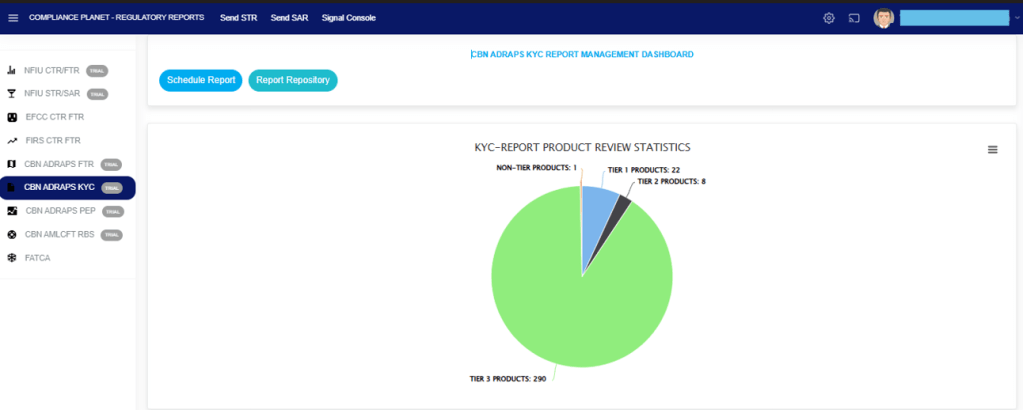
Fig 5.3b
STEP 3: From the menu, click “Schedule Report” as in Fig. 5.3c below.
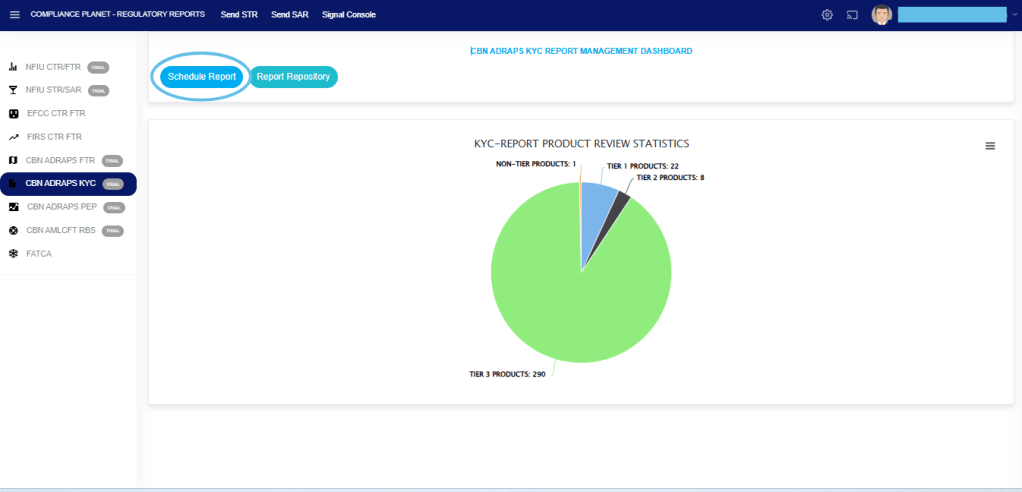
Fig 5.3c
- This displays a MANUAL KYC Scheduler console, as in Fig. 5.3d below.
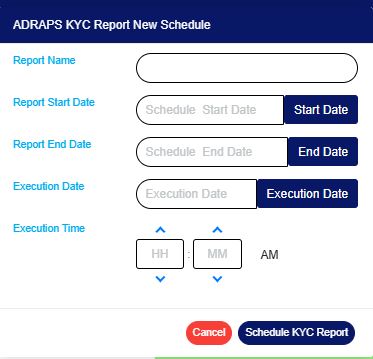
Fig 5.3d
STEP 4: Fill in the name of your report in the “REPORT NAME” box. The report name should be any title of your choice for easy identification. See Fig. 5.3e for an example.
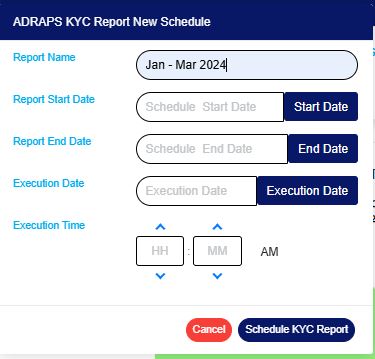
Fig 5.3e
STEP 5: Click on the “REPORT START DATE” button to select the date that begins the period you want to generate an ADRAPS KYC report from the calendar, as shown in Fig. 5.3f.
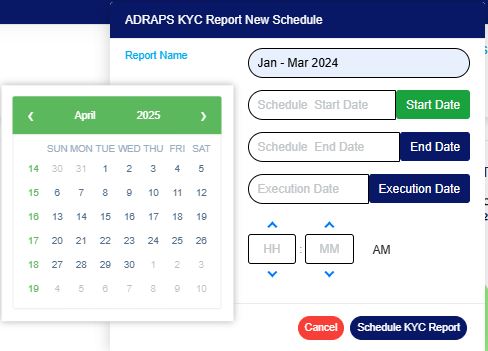
Fig 5.3f
- Look at the arrows labelled a-d in Fig. 5.3g below to study the calendar.
- Click on the given year to change it to your year of choice.
- Click on the given month to change it to your month of choice.
- Then, click on the date of the month.
- You can also click on the angle brackets on the calendar [ ‘<’ or ‘>’ ] to go backward or forward.
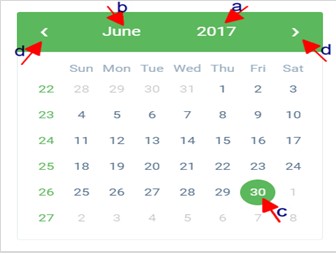
Fig 5.3g
STEP 6: Click the “REPORT END DATE” button to select the date ending the period you want to generate an ADRAPS KYC report from a calendar, as shown in Fig. 5.3h. The calendar operates similarly to the one shown in Fig. 5.3g above.
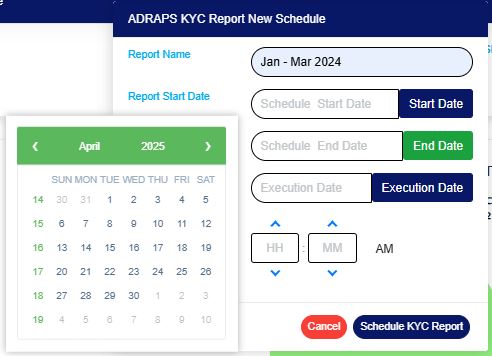
Fig 5.3h
STEP 7: Click the “EXECUTION DATE” button to select the date you want your ADRAPS KYC report processed from a calendar, as shown in Fig. 5.3i. The calendar also functions similarly to the one shown in Fig. 5.3g above.
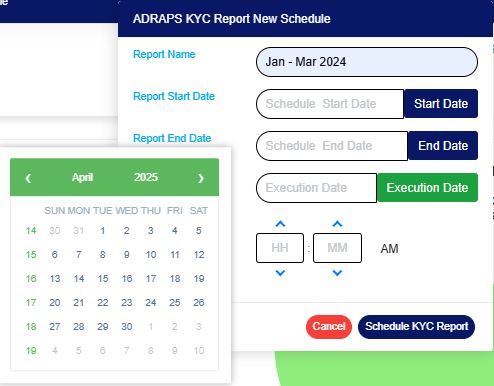
Fig 5.3i
STEP 8: Set your report’s EXECUTION TIME by filling in the ‘hour’ and the ‘minute’ you want the report to be processed. There’s a button next to the hour and minute boxes used for switching between AM and PM. See an example in Fig. 5.3j.
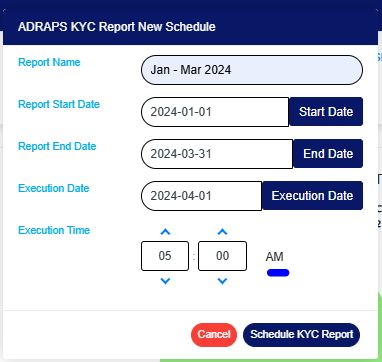
Fig 5.3j
STEP 9: Click ‘SCHEDULE KYC REPORT’ to create your report or ‘CANCEL‘ to close the console. These buttons are at the bottom-right corner of the console. See them in fig. 5.3j above.
- Click on the ‘SCHEDULE KYC REPORT’; a confirmation console will display, as shown in Fig. 5 .3k below. Click on ‘CONFIRM’ to proceed with your operation to schedule the report or ‘CANCEL’ to go back to the scheduler.
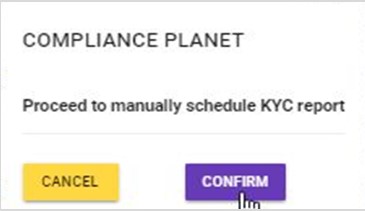
Fig 5.3k
For further inquiries:
Tel: +234(0) 816 555 9818
Email: solutions@efuelite.com
Web: http://solutions.efuelite.com
