This operation involves uploading multiple New PEP accounts. There is another feature that handles the creation of a new PEP account. For instance, to upload fifty (50) new PEP accounts on the planet, the Bulk Upload is the feature you should use instead of entering them one by one.
Compliance Planet also automatically scans the institution’s system for registered PEPs and notifies the Compliance Team.
Here is how to upload bulk PEP information:
NOTE: Only person(s) assigned the right to ‘process PEP Report’ can carry out these operations.
STEP 1: From the app dashboard, click on “REGULATORY REPORTS” as in Fig. 4.7a below.
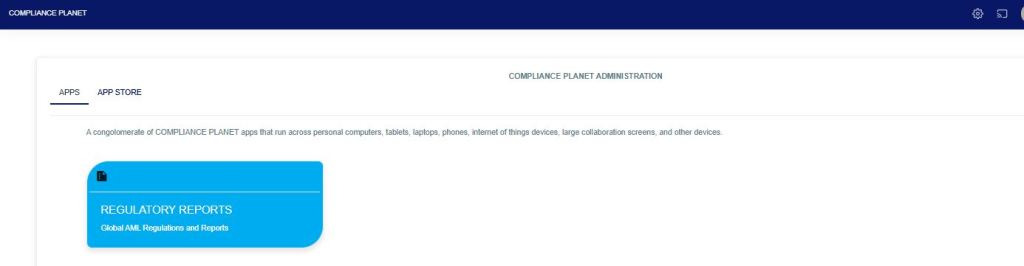
Fig 4.7a
STEP 2: Click ‘CBN ADRAPS PEP’ on the drop-down list and display the PEP page as in Fig. 4.7b below.
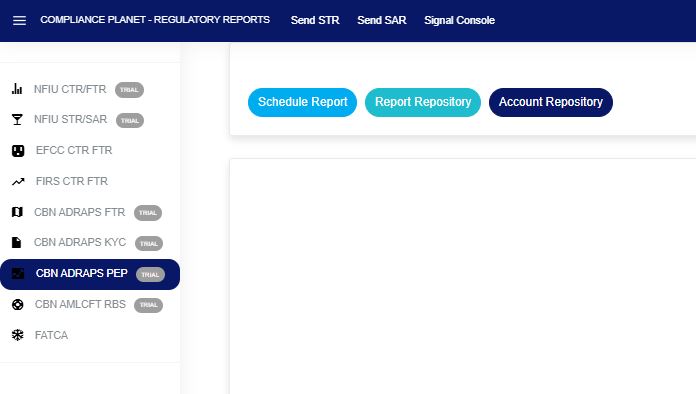
Fig 4.7b
STEP 3: From the menu, click “Account Repository” as in Fig. 4.7c below.
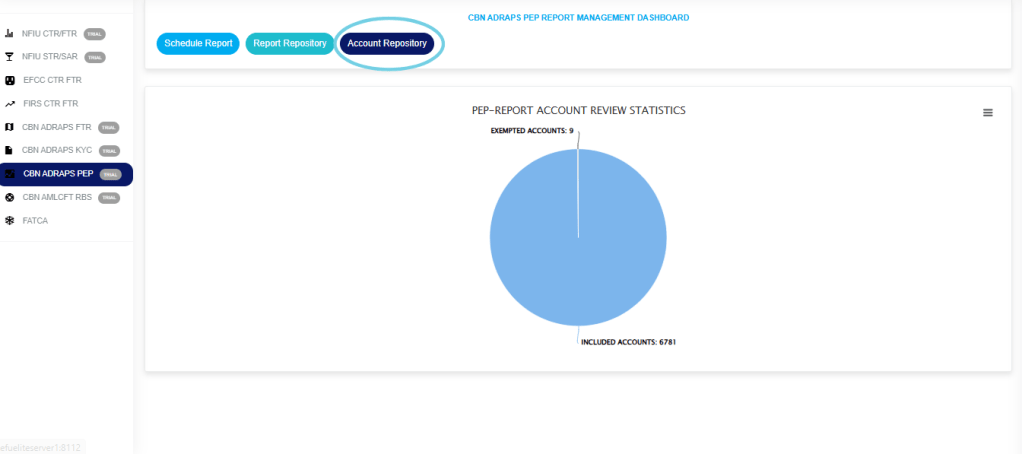
Fig 4.7c
- This displays a page showing a list of all the PEP accounts, as in Fig. 4.7d below.
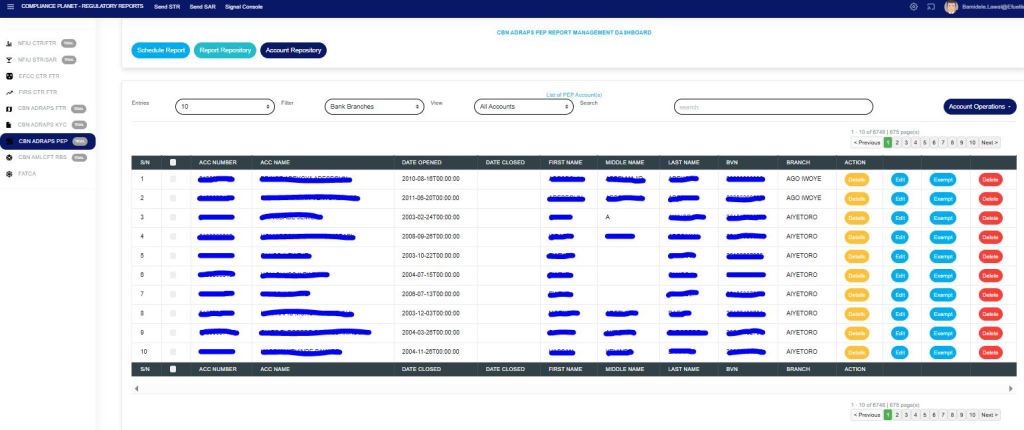
Fig 4.7d
STEP 5: Click on “Account Operations” as shown in Fig. 4.7e below.
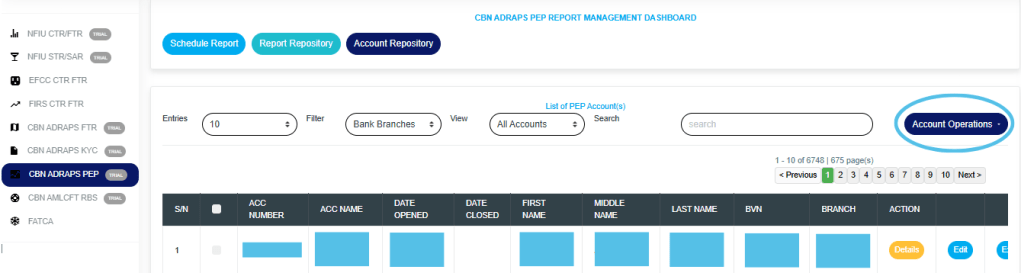
Fig 4.7e
- This will display a drop-down as in Fig. 4.7f below.
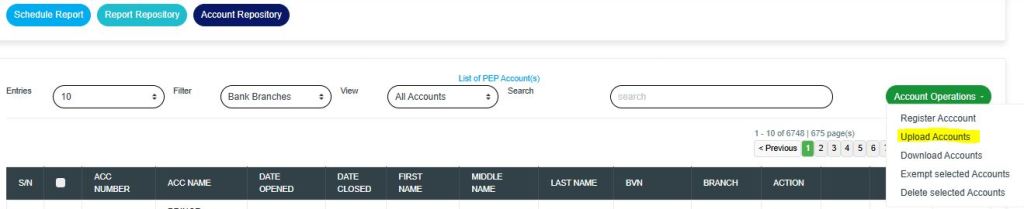
Fig 4.7f
STEP 6: Click “Upload Account” as in Fig. 4.7f highlighted above.
- This displays a ‘PEP Account Upload’ console as in Fig. 4.7g below.
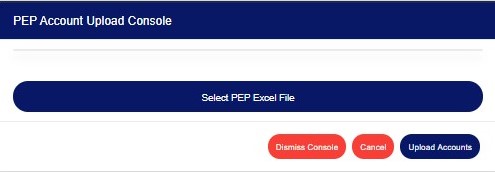
Fig 4.7g
STEP 7: Click on “Select PEP Excel File” to upload the Excel file containing the details of the PEP Accounts you want to save on the software.
Refer to Fig. 4.7h below to learn how to upload a file from your computer.
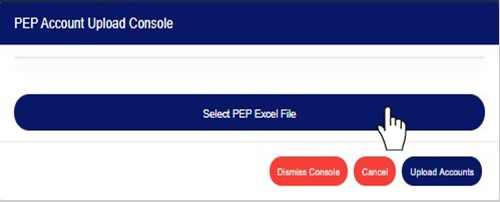
Fig 4.7h
- If you do not have the file specification for uploading new PEP Accounts, you can download it from the “SYSTEM SPEC FILES” on the software, as shown in the figure. 4.7i below to download an Excel file with the required specification.
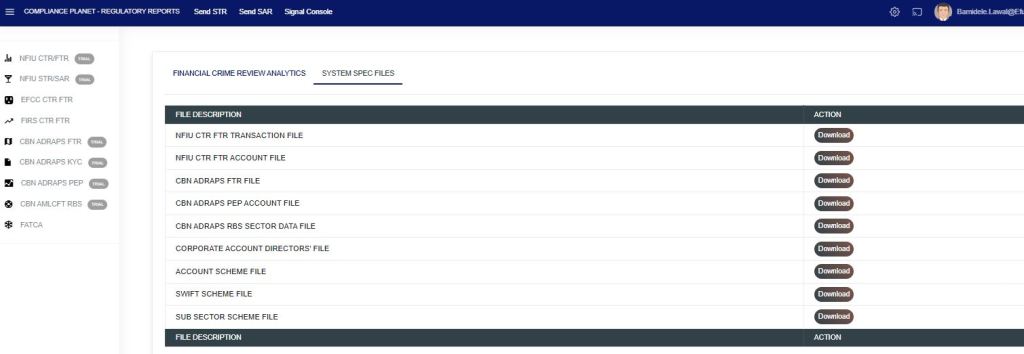
Fig 4.7i
- An Excel file will be downloaded to your computer with pre-filled titled columns under which the details will be entered. Open the file, fill in the required details of the new sub-sector schemes, and save the changes to the file. Renaming the file on your computer is optional.
Go back to the software and click on ‘Select PEP Excel File’ to select the file. - After selecting a file from your computer, the name of the selected file will be added to the upload console.
See Fig. 4.7j for an example of what the PEP Account Upload Console looks like after selecting a file for upload.
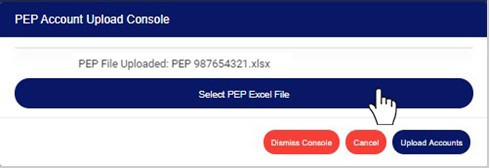
Fig 4.7j
STEP 8: Click on “UPLOAD ACCOUNTS” to upload details from the selected file on the Compliance Planet software. This button is at the bottom-right corner of the console. See fig. 4.7k below for an example.
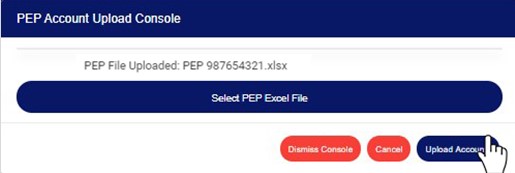
Fig 4.7k
- This displays a confirmation console as in Fig. 4.7l below.
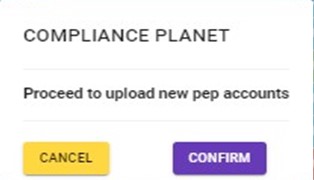
Fig 4.7l
- Click on “CANCEL” to go back to the console.
- Click on “CONFIRM” to confirm that you want to upload the PEP Accounts. By clicking on CONFIRM, a notification will be displayed at the top of the console. See the notification in Fig. 4.7m below.

Fig 4.7m
- Click on the “DISMISS CONSOLE” button to close the console. By clicking this button, the page will close, but you can return to it by clicking on Bulk Upload. See the button in Fig. 4.7j above.
- Click on “CANCEL” to cancel the operation. See the button in Fig. 4.7j above.
For further enquiries:
Tel: +234(0) 816 555 9818
Email: solutions@efuelite.com
Web: http://solutions.efuelite.com
