This refers to the upload of more than one new corporate account director. Here is how to do this.
Note : Only person(s) profiled as Deputy Supreme Admin with right(s) to create new account director (bulk) will be able to carry out this operation.
From the left hand side menu, Click ‘Control panel’ as in fig. 10.1a.

Fig 10.1a
- This will display a drop down as in Fig 10.1b below.

Fig 10.1b
Click ‘DIRECTOR’ on the drop down list. See an example in Fig 10.1c below.
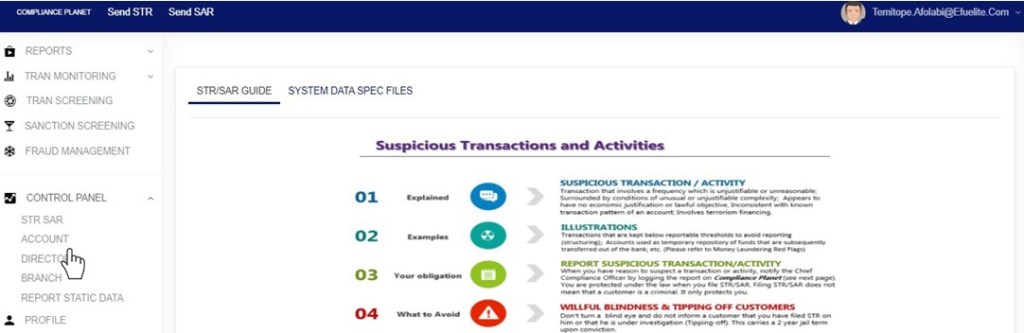
Fig 10.1c
- This will display the ACCOUNT DIRECTORS OPERATIONS dashboard as in Fig 10.1d below
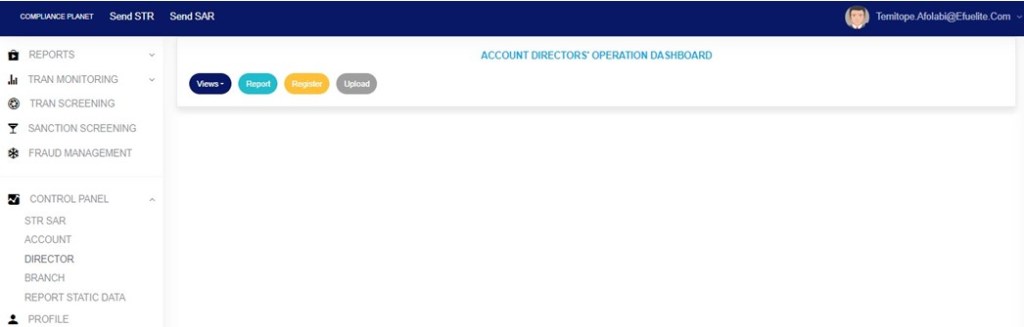
Fig 10.1d
STEP 1: From the top menu, click ‘Upload’. Check out fig. 10.2a below to see an example.

(fig. 10.2a)
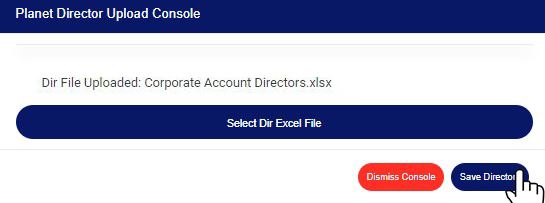
➔ This displays a ‘Planet Director Upload’ console where you are to select, from your computer, an excel file filled with the director details to be added on the compliance planet. See fig. 10.2b for an example of the console.
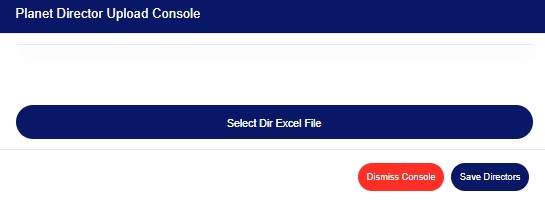
(fig. 10.2b)
➔ To close this console, click on ‘DISMISS CONSOLE’.
STEP 2: Click on ‘Select Dir Excel File’ to choose the excel file on your computer. This file must contain information entered according to the compliance planet’s specified requirements for corporate account director. Click on this button if you have the file and it is filled with the required information as shown in fig. 10.2c.

(fig. 10.2c)
- If you do not have the file specification for uploading new Account Directors schemes, You can download it from the “SYSTEM DATA SPEC FILES” on the software home page as shown in fig. 10.2 below to download an excel file with the required specification.

I
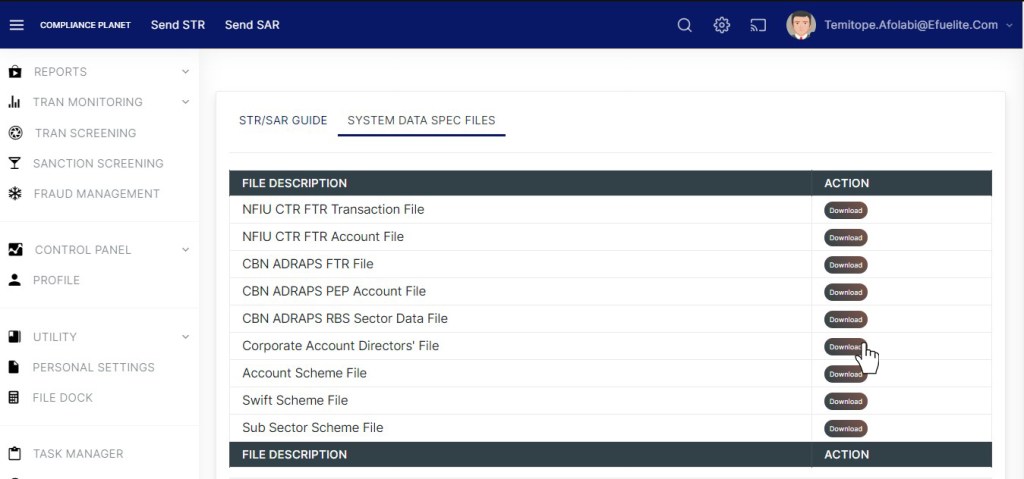
(fig. 10.2)
- An excel file will be downloaded to your computer with pre-filled titled columns under which the details will be entered. Open the file, fill in the required details of the new Account directors and save the changes to the file. Renaming the file on your computer is optional. Go back to the software and click on ‘Select Dir Excel File’ to select the file.
➔After selecting the excel file, the name of the file will be added on the console as in fig. 10.2d.
STEP 3: Click on ‘Save Directors’ to upload the new director information on the software as in fig. 10.2d.
(fig. 10.2d)
- A notification will be displayed at the top of the page as in Fig 10.2e below.
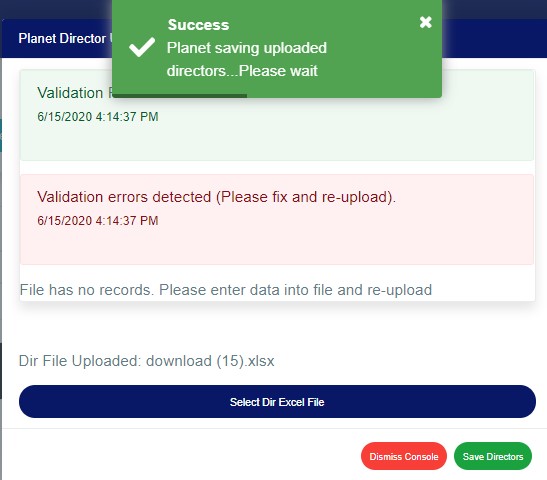
(fig. 10.2e)
- To stop the ongoing operation, click on ‘Dismiss Console’.
For further enquiries :
Tel +234(0) 816 555 9818
Email solutions@efuelite.com
Web http://solutions.efuelite.com
