The ‘JUNK LIST’ page provides a list of all corporate account directors’ information, approved or unapproved, that was deleted from the general, approved, or unapproved list.
NOTE: Only person(s) profiled as deputy supreme Admin and assigned right(s) to “view directors list” will be able to carry out this operation.
From the left hand side menu, Click ‘Control panel’ as in fig. 10.1a.

Fig 10.1a
- This will display a drop down as in Fig 10.1b below.

Fig 10.1b
Click ‘DIRECTOR’ on the drop down list. See an example in Fig 10.1c below.
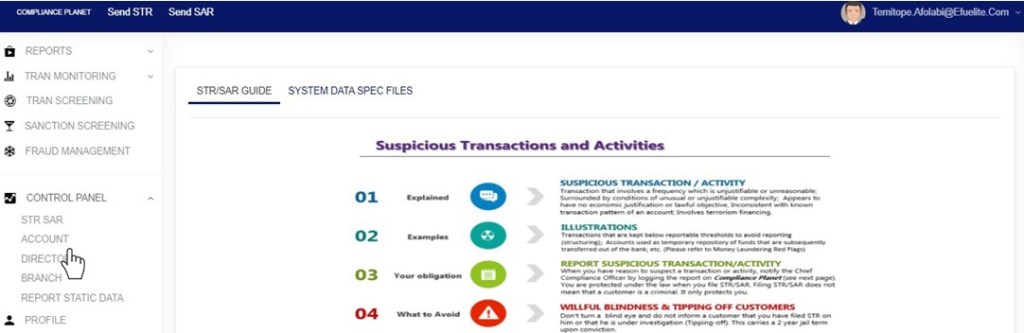
Fig 10.1c
- This will display the ACCOUNT DIRECTORS OPERATIONS dashboard as in Fig 10.1d below
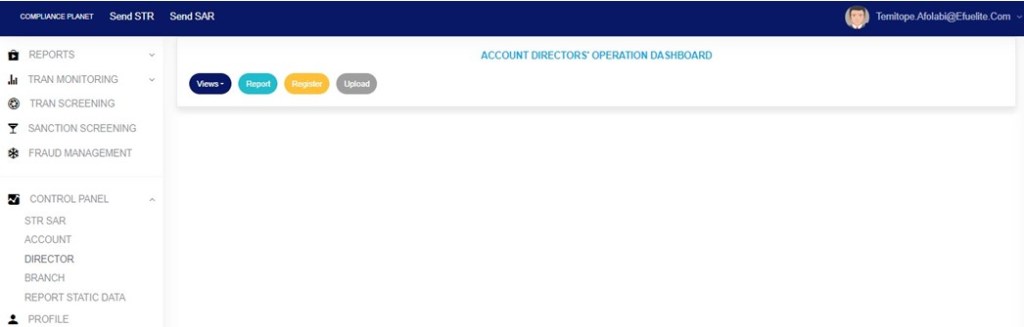
Fig 10.1d
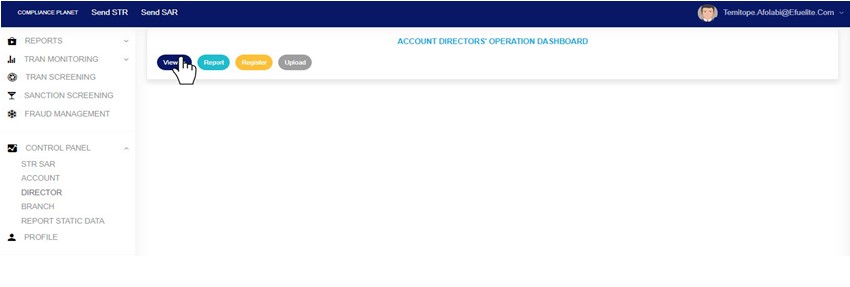
- From the top menu, Click ‘View’ as shown in fig. 10.7a below
(fig. 10.7a)
- This will display a dropdown as in fig 10.7b below
- Click “Junked” from the drop-down list as in fig 10.7b below
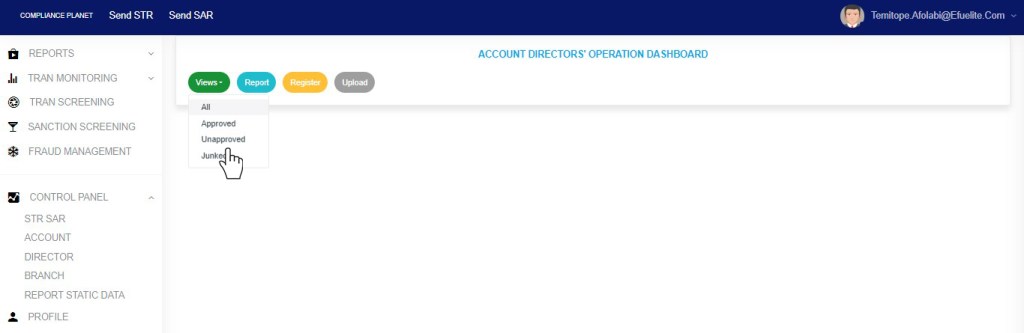
Fig 10.7b
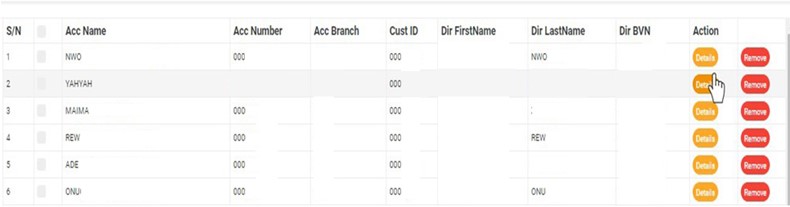
- This displays a page listing out the director information that were deleted from the general list, approved list and unapproved list. See fig. 10.7c below for an example.
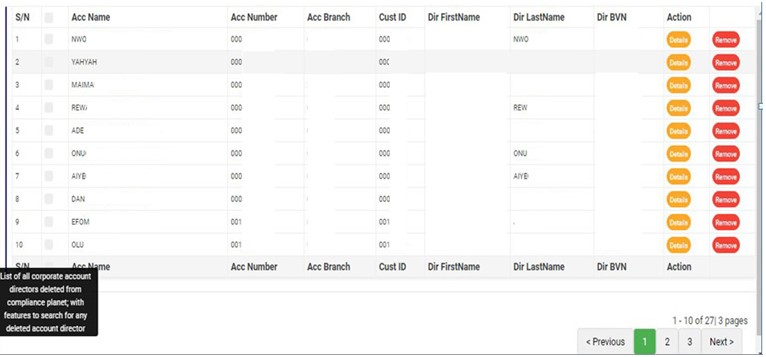
(fig. 10.7c)
- At the bottom-right corner of the page, the software provides information about the number of pages of the junk list, with the page numbers written out. The page numbers are buttons to go to each page. By clicking on any page number, the software takes you to that particular page. Click on ‘NEXT’ to go to the next page or click on ‘PREVIOUS’ to go to the page before the one you are viewing at that moment.
- Adjust the number of the account director information you want to see per page by clicking on the ENTRIES box as in fig. 10.7d below.
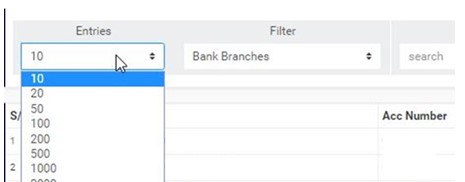
(fig. 10.7d)
- To see deleted director information of corporate accounts for any of the branches, select the branch name from the filter box as shown in fig. 10.7e below. The default list is always for all branches of the institution.
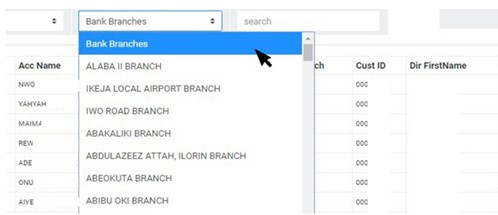
(fig. 10.7e)
- Search for a corporate account director information by the account name, account number, director’s first name, last name or director’s BVN in the search box. See an example of a search in fig. 10.7f below. Search results will appear as you input a character in the search box.
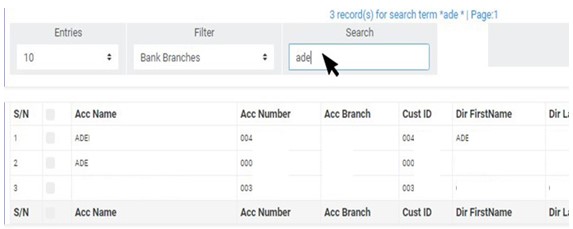
(fig. 10.7f)
- Each corporate account director information on the junk list has two (2) action buttons; the ‘DETAILS’ button and the ‘REMOVE’ button. These buttons are used for the treatment of the respective director information on the list. Here is how to make use of the action buttons.
- Click on ‘DETAILS’ as in fig. 10.7g below to view the details of the deleted corporate account director.
(fig. 10.7g)
- This displays a ‘Corporate Account Director Details’ console as in fig. 10.7h below.

(Fig. 10.7h)
- After viewing, click on ‘DISMISS CONSOLE’ (as shown below) to close the console.
- To restore director information back to the general list, click on ‘REMOVE’ as shown in fig. 10.7i below. This is the reversal of the ‘delete’ action that was previously carried out on that particular director information.
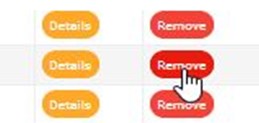
(fig. 10.7i)
- This displays a confirmation console as in fig. 10.7j to confirm your request to REMOVE that director information from the junk list (trash). Click on ‘CONFIRM’ to proceed or ‘CANCEL’ to stop action.
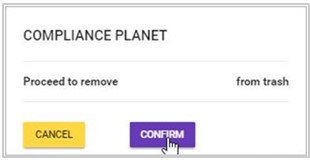
(fig. 10.7j)
- When the removal is done, a notification will be displayed at the top of the page as in fig. 10.7k below. The director information will be removed from the ‘Junk list’ and added back to the ‘General list’ and ‘Approved list’ or ‘Unapproved list’ of corporate director information.

(fig. 10.7k)
Bulk Removal
- To carry out bulk removal, select the corporate account director information to be treated. Select the account director information by clicking on their checkboxes. See fig. 10.7l below for an example.

(fig. 10.7l)
- To select/deselect all the accounts, click on the checkbox on the table title bar, that is, the checkbox between ‘S/N’ and ‘ACC NAME’. See fig. 10.7m for an example.

(fig. 10.7m)
- After making your selection,Click “Operations” button as in fig 10.7n below.

(fig. 10.7n)
This will display a drop-down as in Fig 10.7o below
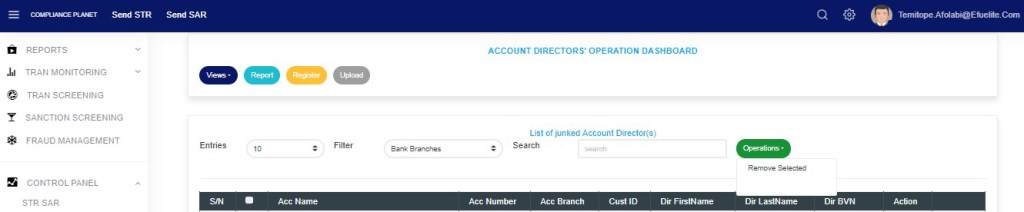
(fig. 10.7o)
- Click on the ‘REMOVE SELECTED’ button as seen in fig. 10.7p below.
- By clicking on ‘Remove Selected’, all the selected director information will be removed from the junk list, and added back to the account directors’ general list. Director information that has been approved previously will also be added back to the approved list, while unapproved information will be added to the unapproved list. Here is how to make a bulk removal.

(fig. 10.7p)
- This displays a confirmation console as in fig. 10.7q to confirm your request to REMOVE the selected director information. Click on ‘CONFIRM’ to proceed or ‘CANCEL’ to stop the action.
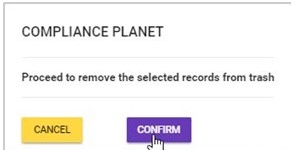
(fig. 10.7q)
- When the removal is done, a notification will be displayed at the top of the page as in fig. 10.7r below. Then, the director information will be removed from the ‘Junk list’.

(fig. 10.7r)
For further enquiries :
Tel +234(0) 816 555 9818
Email solutions@efuelite.com
Web http://solutions.efuelite.com
