The next stage of processing after revising an STR/SAR notification is the SUPERVISION STAGE. Only Notifications that have been approved by the revision desk team lead(s) will be pushed to the supervision desk. Here are the steps to supervising a suspicious transaction Notification.
NOTE: Only person(s) profiled as ‘supervision desk officer’ with the right to edit can carry out these operations.
How to supervise a fresh notification
From the app dashboard, click on ‘REGULATORY REPORTS’ as in the image below.
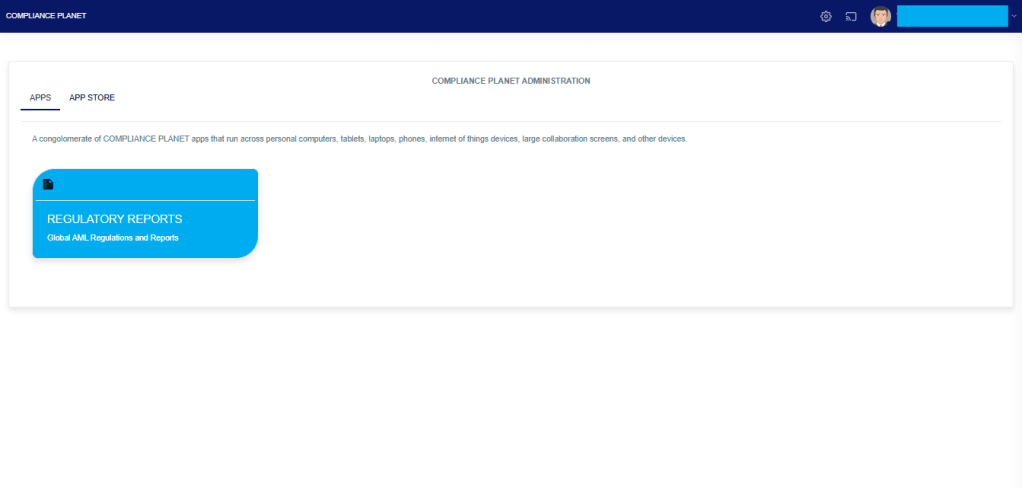
This will display a drop-down as in the image below. The dropdown lists the report types available on the Compliance Planet software.
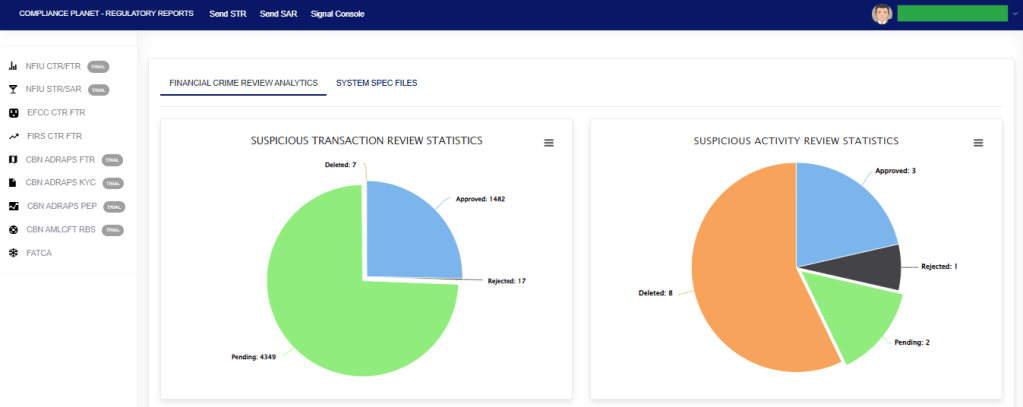
Click “NFIU STR/SAR” from the drop-down menu to open the NFIU STR/SAR page. See the image below.

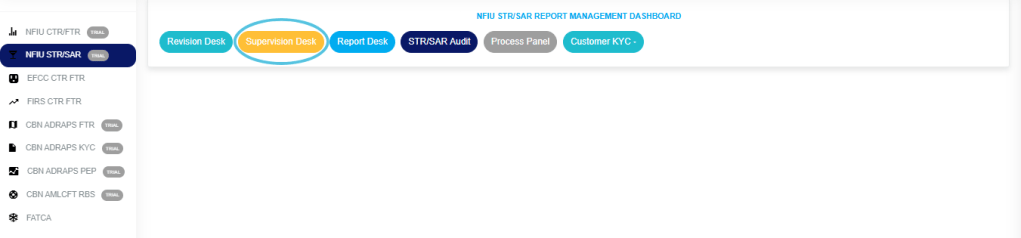
STEP 1: From the top menu, click on “SUPERVISION DESK” as in the image below.
The above action will display the Supervision Desk Page as seen in the image below. Then select the “DATA VIEW FILTERS”.
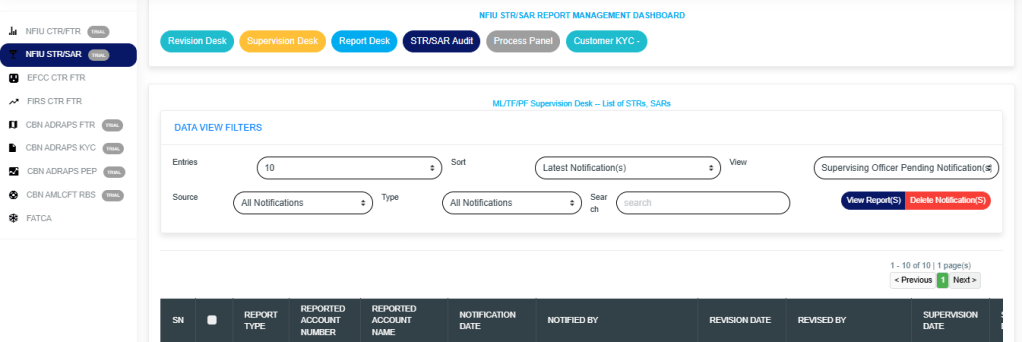
- Click on the “ENTRIES” box to increase the number of Notifications you want to see per page.
- Click on the “SORT” box to sort the notifications by alphabetical order, from the latest to the earliest, or vice versa, as shown.
- Click on the “VIEW” box to see notifications classified according to the stage of processing they have reached.
- Click on the “SOURCE” box to select either All Notifications, Digital Surveillance Notification, or Manually Filled Notifications.
- Click on the “TYPE” box to select either All Notification, Suspicious Transaction Notification, or Suspicious Activity Notification.
- Click on the “SEARCH” box to search for a particular notification by typing in the customer’s name or account number. More details below.
- Click on the “VIEW REPORTS” button after selecting the class of Notification(s) from the VIEW box. This is to view the notifications from any of the selected classes. This button is at the top-right corner of the page.
- Click on the “DELETE NOTIFICATIONS” to delete notifications.
Based on the “VIEW” box details, the notifications are categorized according to their current stage of processing, as shown in the image below.
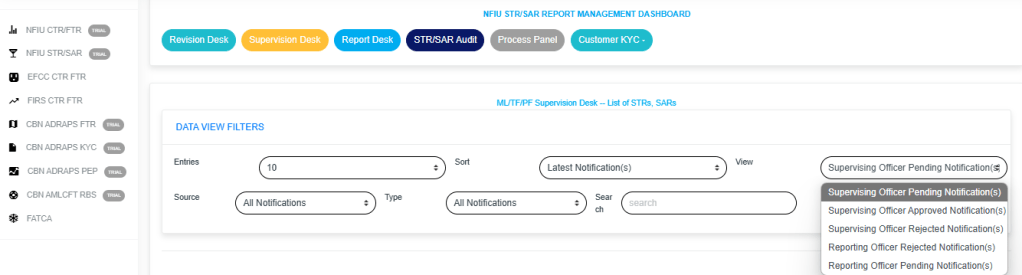
The classes are:
- Supervision Officer Pending Notification(s); these are STR/SAR notifications that have been reviewed and approved by a revision officer, but they have not been treated by the supervision officer.
- Supervision Officer Approved Notification(s); these are STR/SAR notifications that have been treated, approved, and forwarded to the reporting officer for further processing. Once a Notification is approved by a supervision officer, it joins the reporting officer pending Notification(s) list for further approval.
- Supervision Officer Rejected Notification(s); these are STR/SAR notifications that are not satisfactory to the supervision officer. When a Notification is rejected by the supervision officer, the revision officer will get a mail notification to revisit the Notification and send it again if needed. The Notification this time around will include reason(s) for rejection.
- Reporting Officer Rejected Notification(s); these are STR/SAR Notifications that have been treated and approved by the revision officer and/or the supervision officer, but they are unsatisfactory for further approval by the reporting officer.
- Reporting Officer Pending Notification(s); these are STR/SAR Notifications that have been approved by revision and/or supervision officer and await the reporting officer’s treatment.
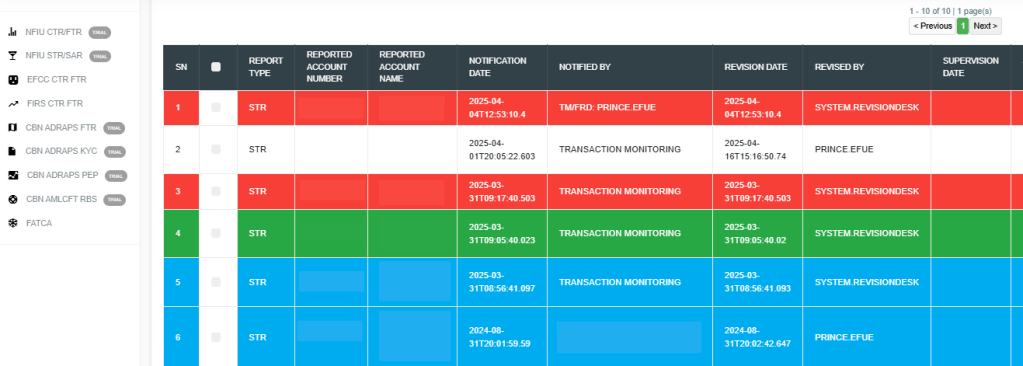
- The Notification(s) highlighted “RED” indicate that it has not been viewed by anyone on the Supervising desk.
- The Notification(s) highlighted “GREEN” indicate that it has been viewed by you alone.
- The Notification(s) highlighted “WHITE” indicates that it has been viewed by you and at least one other Supervising officer.
- The Notification(s) highlighted “BLUE” indicates that it has been viewed by other Supervising officer(s), excluding you
At the top-right and bottom-right corners of the page, the software gives information about the number of pages, with the page numbers written out. All the page numbers represent buttons to go to each page.
By clicking on any page number, the software takes you to that particular page. Click on the “NEXT “button to take you to the next page.
Click the “PREVIOUS” button to return to the page you were viewing earlier.
STEP 2: Select the notification to be treated from the ‘SUPERVISION OFFICER PENDING NOTIFICATION(S) by clicking on the “Details” button at the end of the notification row, as in the image below.

STEP 3: By clicking on ‘DETAILS’, the STR SUPERVISION DESK NOTIFICATIONS Page will display as in the image below, then click on “HISTORICAL INVESTIGATION ANALYSIS“.

The “STR OPERATION” shows if there are Deleted STR Notifications, Approved STR Notifications, Rejected STR Notifications, and Pending STR Notifications associated with that specific account.
The “SAR OPERATION” shows if there are Deleted SAR Notifications, Approved SAR Notifications, Rejected SAR Notifications, and Pending SAR Notifications associated with that specific account.
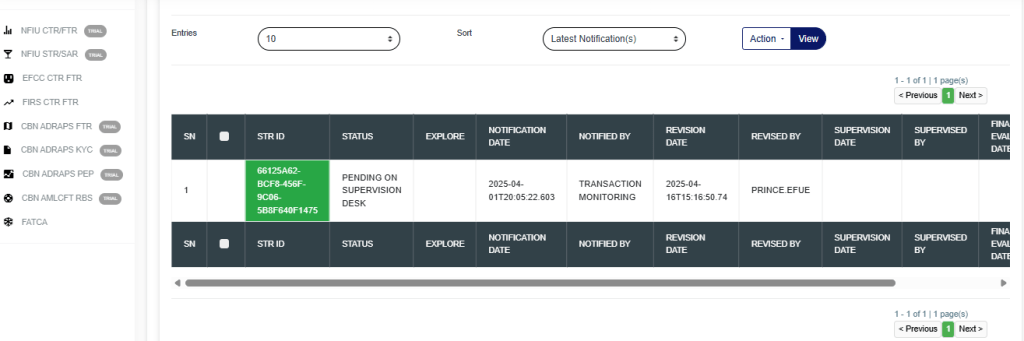
- Click on the “ENTRIES” box to increase the number of Notifications you want to see per page.
- Click on the “SORT” box to sort the notifications either by alphabetical order or from the latest to the earliest notifications, or vice-versa, as shown.
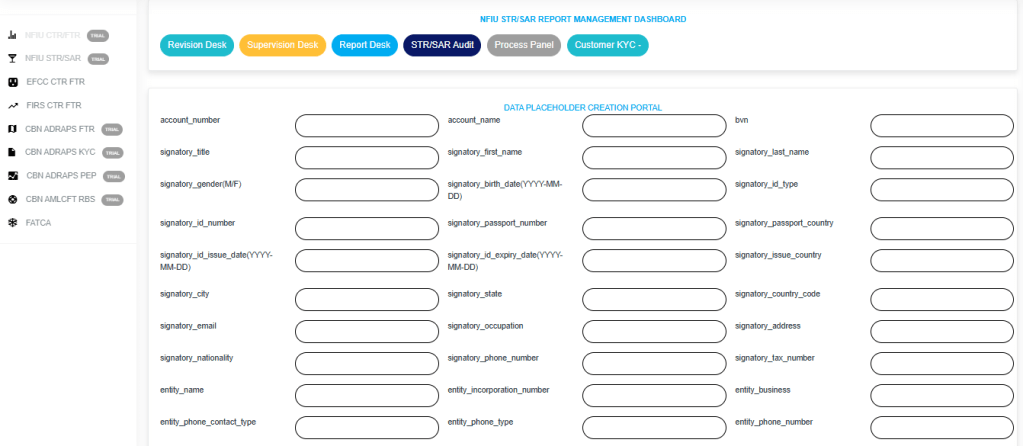
STEP 4: Click on “CUSTOMER KYC COMPLIANCE” to view the missing data for the specific account, as shown in the image below.
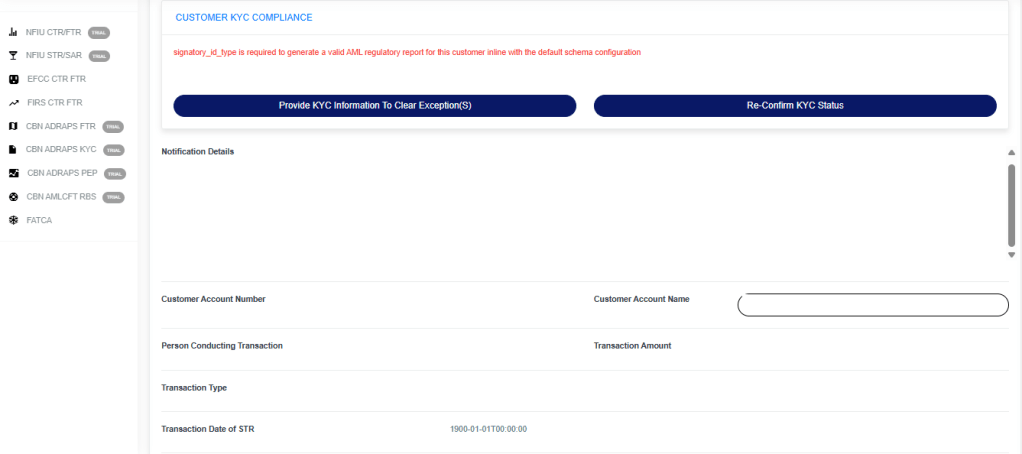
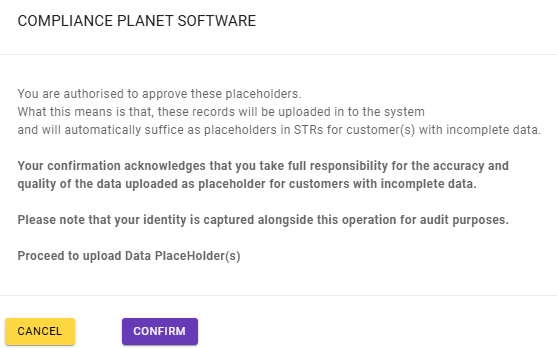
Click on “Provide KYC Information to Clear Exception(s)” to navigate to the page shown below, where you can enter the missing details. Then, click on “Submit Data Procedure” to proceed to the confirmation page.

Click “CONFIRM” to upload the data or click “CANCEL” to exit the confirmation process.
If the account has no exceptions, it will appear as shown in the image below.

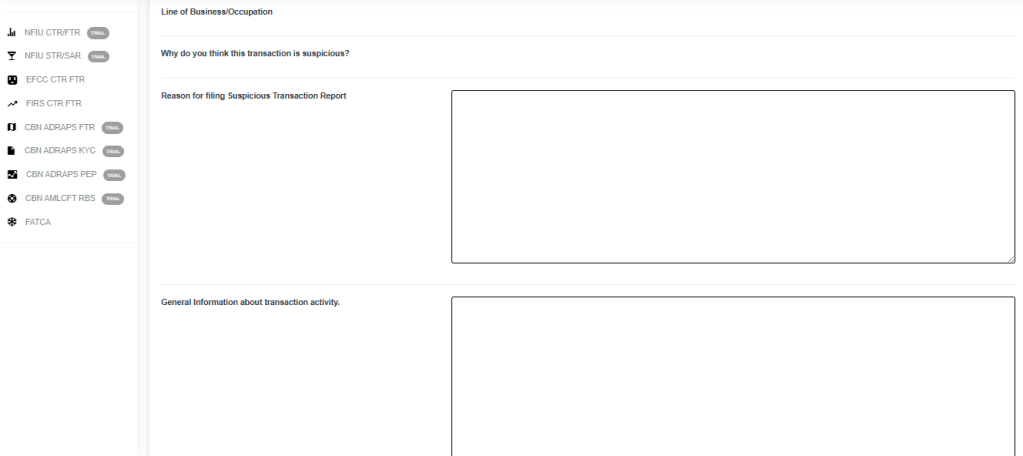
STEP 5: Click on the ‘Reason for Filing Suspicious Transaction Report’ box to edit the revision officer’s reason(s) for approving the Notification. This step is optional. See an example in the image below.
STEP 6: Click on “Extra Details” box to edit the revision officer’s comment and click on the “Action Taken” box to edit action(s) taken concerning the suspicion filed. See an example in the image below.
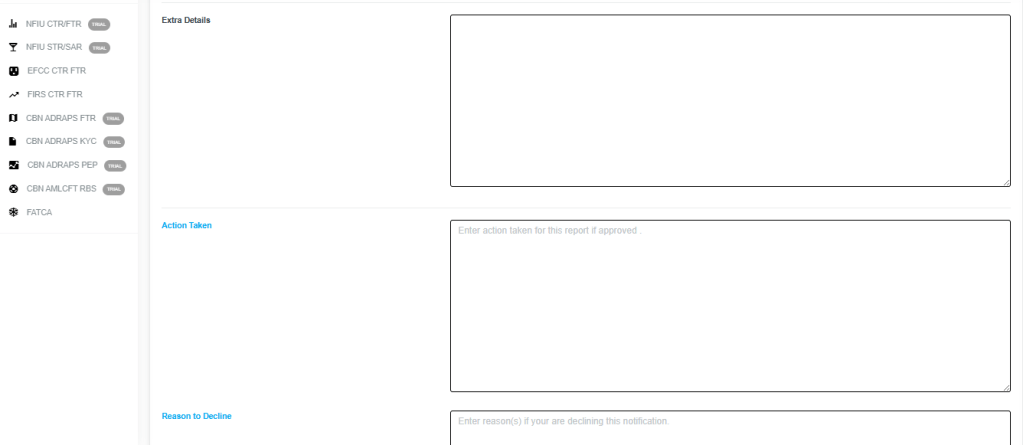
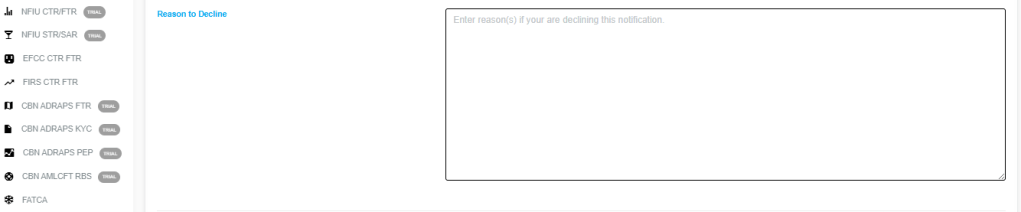
STEP 7: Click on ‘Reason to Decline’ box (if you want to reject the notification) to input your comments. This step is mandatory if you want to reject the notification. See the image below for an example.
STEP 8: Click on “SURVEILLANCE CASES” to view the account’s cases, as illustrated in the image below.

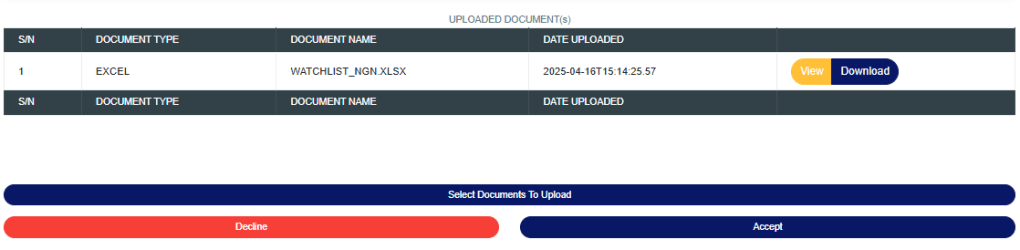
STEP 9: Click on “SELECT DOCUMENTS TO UPLOAD” to add additional documents that support the STR.
Next, click on “REJECT” or “ACCEPT”—this will open a confirmation console to verify your selected action.
Ensure you are certain of your choice before proceeding, as this action is irreversible once confirmed.
Refer to the images below to see how the confirmation console appears when selecting “Reject” and “Accept” respectively.
To continue, click CONFIRM; to exit the console without taking action, click CANCEL.

For further enquiries:
Tel: +234(0) 816 555 9818
Email: solutions@efuelite.com
Web: http://solutions.efuelite.com
