The operations pertaining to SUB-SECTOR SCHEME on the Compliance Planet are:
- Editing a sub-sector scheme
- Deleting a sub-sector scheme
- Creating a new sub-sector scheme
- Downloading all sub-sector schemes
- Bulk delete of sub-sector schemes
- Bulk upload of new sub-sector schemes
NOTE: Only person(s) profiled as Deputy Supreme Admin can carry out these operations.
The last three (3) operations are for bulk operations. To perform any of the sub-sector scheme operations;
STEP 1: From the left hand side menu, Click ‘Control panel’ as in fig. 15.2a.

Fig 15.2a
- This will display a drop down as in Fig 15.2b below.
STEP 2: Click ‘ACCOUNT’ on the drop down list. See an example in Fig 15.2b below.
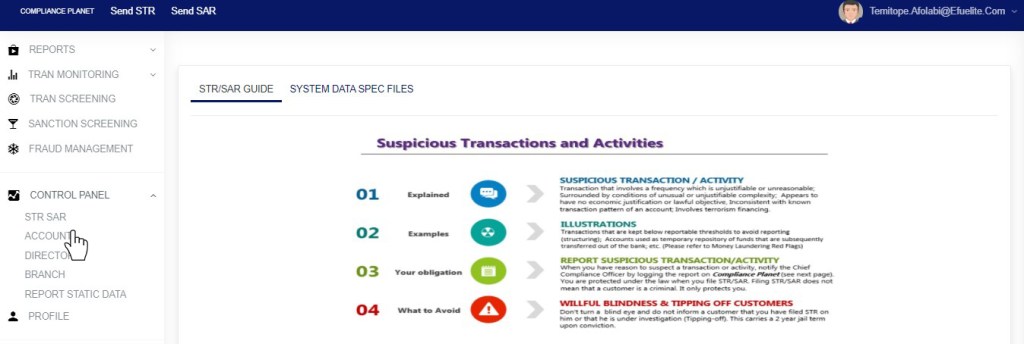
Fig 15.2b
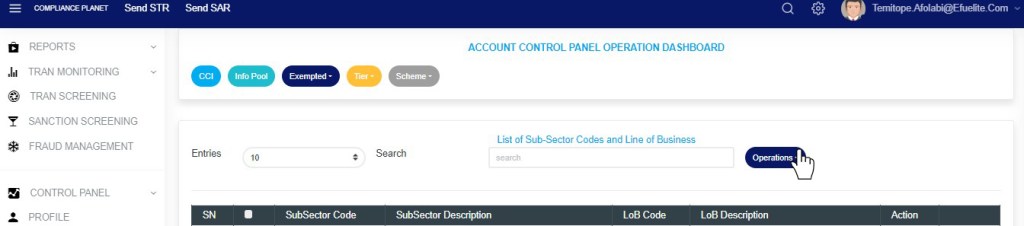
- This will display the ACCOUNT CONTROL PANEL OPERATIONS dashboard as in Fig 15.2c below

Fig 15.2c
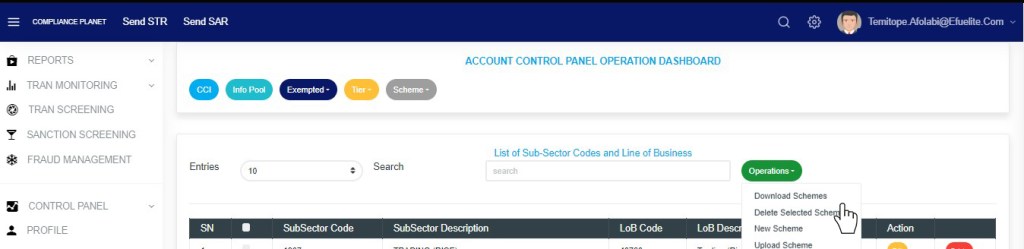
STEP 3: Click “SCHEME” from the top menu, on the account page. See an example in fig15.2d below

Fig 15.2d
- This displays a dropdown as in fig 15.2e below
STEP 4: Click “Sub Sector” on the drop down list as in fig 15.2e below
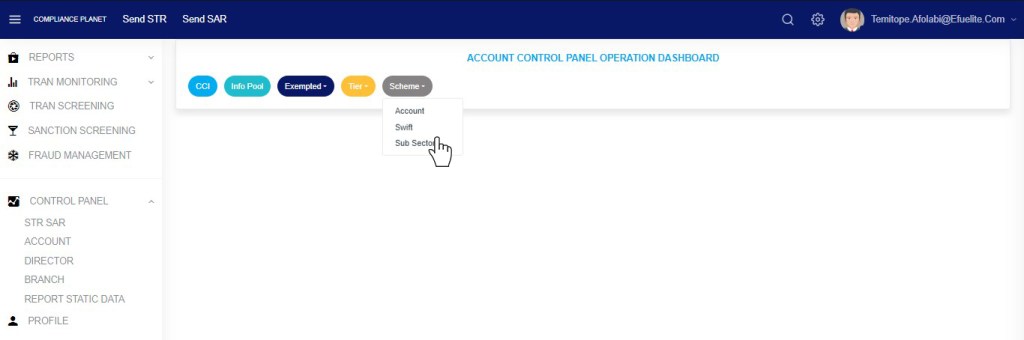
Fig 15.2e
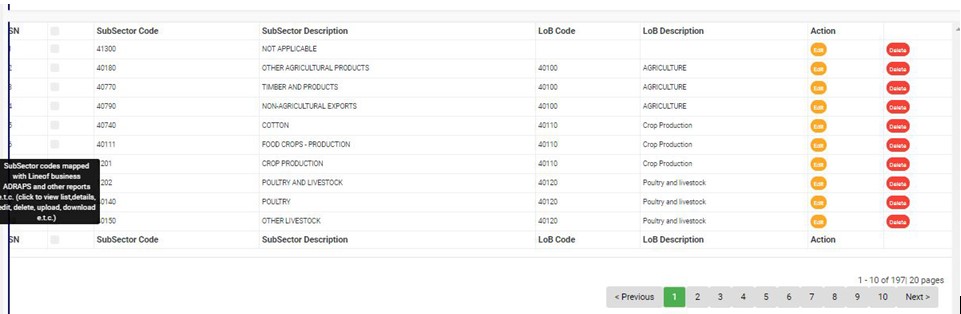
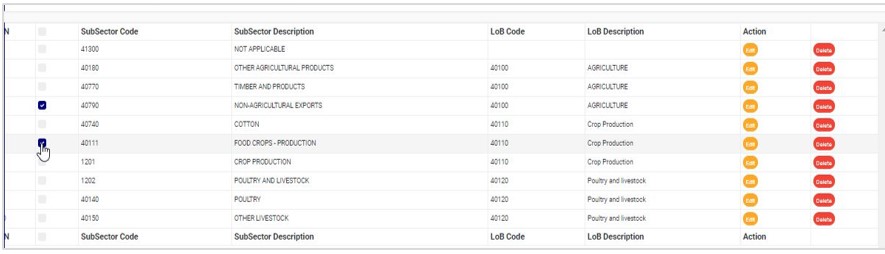
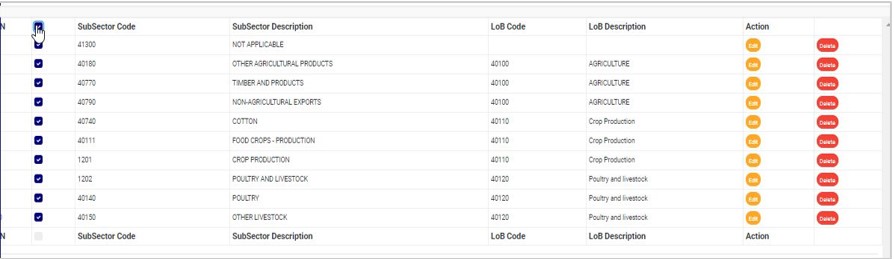
- This displays a page showing a list of all sub-sectors and their respective lines of business. See fig. 15.2f below for an example.
(fig. 15.2f)
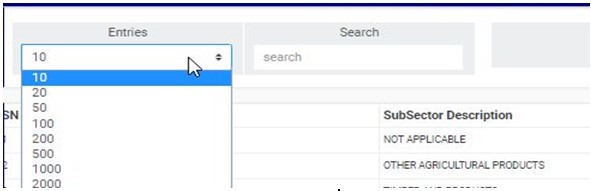
- Click on the ‘ENTRIES’ box to adjust the number of sub-sector schemes you see per page. See fig. 15.2g.
(fig. 15.2g)
- Search for Sub-sector Schemes by inputting the sub-sector code, sub-sector description, line of business code or line of business description in the search box. Search results will appear immediately a character is typed in the search box.. See an example of a search in fig. 15.2h.
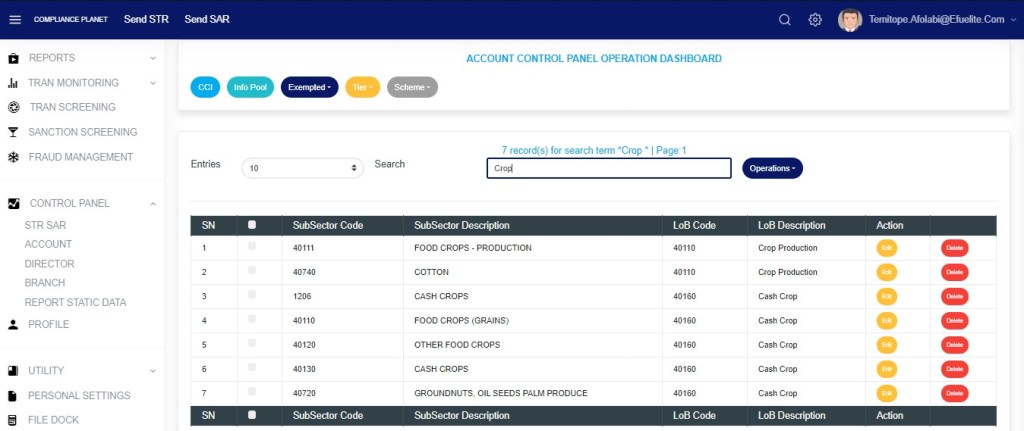
(fig. 15.2h)
- At the bottom-right corner of the page, the software supplies information about the number of pages of the list, with the page numbers written out. The page numbers represent buttons to go to each page. By clicking on any page number, the planet takes you to that particular page. Click on the ‘NEXT’ button to go to the next page or the ‘PREVIOUS’ button to go to the page before the current page. See fig. 15.2i for an example.

(fig. 15.2i)
- Each sub-sector scheme entry has two (2) action buttons; ‘Edit’ button and ‘Delete’ button. These buttons are placed at the end of each row. Also, at the top of the page are other buttons to carry out bulk operations. These operations are explained below.
How To Edit Sub-Sector Scheme
This refers to changing the details of a sub-sector scheme which includes; the sub-sector code, sub-sector description and the line of business. Here is how to edit a sub-sector scheme.
STEP 1: Click on its ‘Edit’ button as shown in fig. 15.3a below.

(fig. 15.3a)
- This displays an ‘Edit Sub sector Scheme’ console as in fig. 15.3b below.
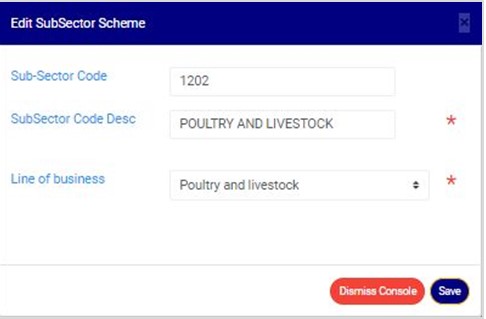
(fig. 15.3b)
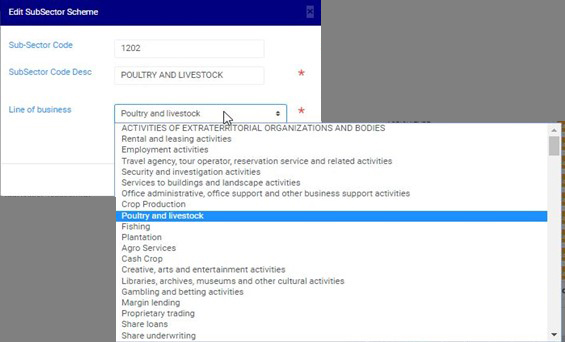
STEP 2: Fill in the new sub-sector code or new sub-sector description or select the new line of business. See fig. 15.3c for an example.
(fig. 15.3c)
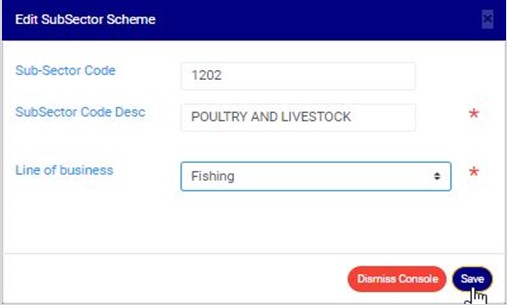
STEP 3: Click on ‘SAVE’ as in fig. 15.3d to update and save the sub-sector scheme details. To close the console, click on ‘Dismiss Console’.
(fig. 15.3d)
- This displays a confirmation console to confirm you want to save the changes. Fig. 15.3e is an example of the planet inquiry console.
STEP 4: Click on ‘CONFIRM’ to proceed or ‘CANCEL’ to discontinue.
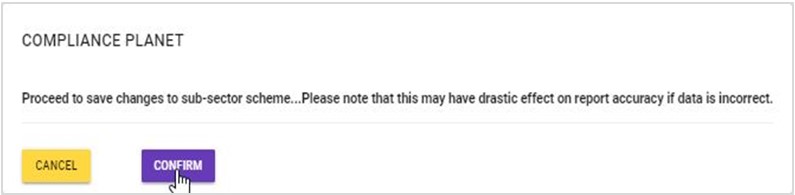
(fig. 15.3e)
- By clicking on CONFIRM, a notification as in fig. 15.3f will be displayed at the top of the page when the operation is complete.

(fig. 15.3f)
How To Delete Sub-Sector Scheme
This refers to the delete of one sub-sector scheme. Here is how to delete a sub-sector scheme.
STEP 1: Click on the sub-sector’s ‘DELETE’ button as shown in fig. 15.4a below.

(fig. 15.4a)
- A confirmation console will be displayed to confirm your request to delete the sub-sector scheme.
STEP 2: Click on ‘CONFIRM’ to proceed.as in fig. 15.4b or ‘CANCEL’ to discontinue.
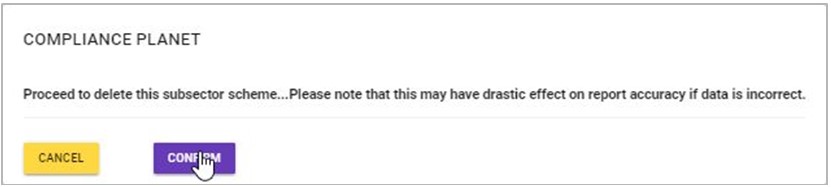
(fig. 15.4b)
- If you proceed to delete the sub-sector, a notification as in fig. 15.4c will be displayed at the top of the page when the delete operation is done.

(fig. 15.4c)
How to Create New Sub-Sector Scheme
This refers to the adding of a new sub-sector scheme on the compliance planet. Here is how to create a new sub-sector scheme.
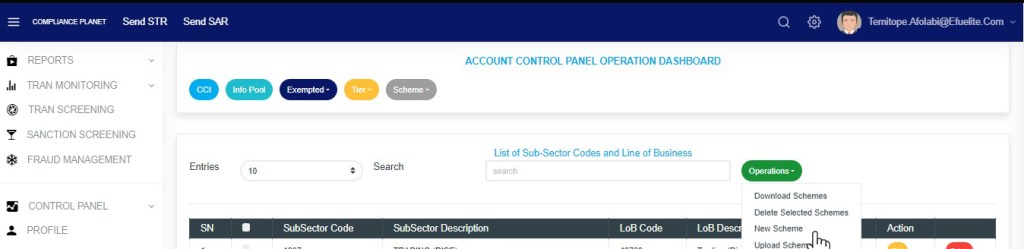
STEP 1: Click on the “OPERATIONS” button on the top-left side of the page as in fig. 15.5a below.
(fig. 15.5a)
- This displays a dropdown as in fig 15.5b below
- Click “New Scheme” on the dropdown list as in fig 15.5b below.

Fig 15.5b
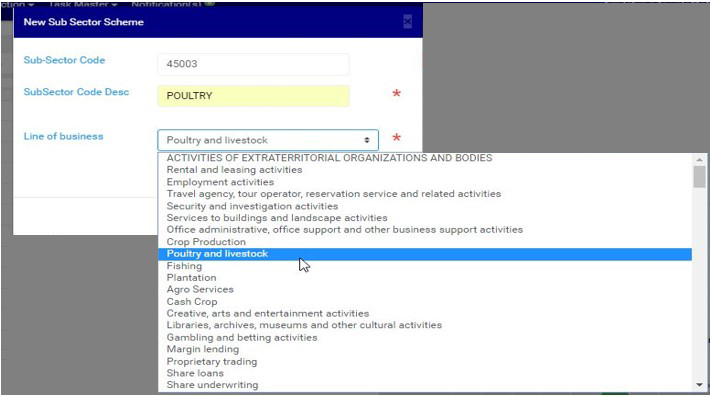
- This displays a ‘NEW SUB SECTOR SCHEME’ console. Here on this console, you are to input the details of the new sub-sector scheme which includes the sub-sector code and description and the line of business. See fig. 15.5c for an example.
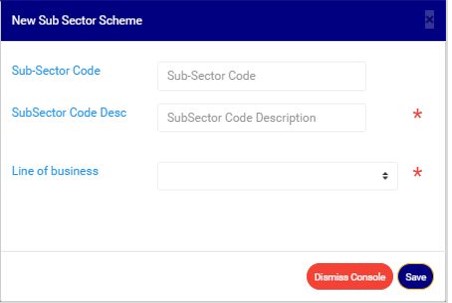
(fig. 15.5c)
STEP 2: Fill in the details of the new sub-sector scheme. See fig. 15.5d for an example.
(fig. 15.5d)
STEP 3: Click on ‘SAVE’ as shown in fig. 15.5e below.

(fig. 15.5e)
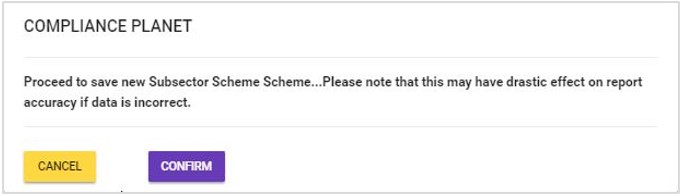
- This displays a confirmation console to confirm you want to add a new sub-sector scheme. See fig. 15.5f.
(fig. 15.5f)
STEP 4: Click ‘CONFIRM’ to proceed with the creation of the new sub-sector scheme or ‘CANCEL’ to discontinue. If you proceed, a notification as in fig. 15.5g will be displayed at the top of the page when the new sub-sector scheme has been successfully created.

(fig. 15.5g)
How to Download All Sub-Sector Schemes
This refers to the download of an excel file filled with all the sub-sector schemes saved on the compliance planet. Here is how to do this.
STEP 1: Click on ‘DOWNLOAD SUB-SECTOR SCHEMES’ on the drop down list as shown in fig. 15.6a below.

(fig. 15.6a)
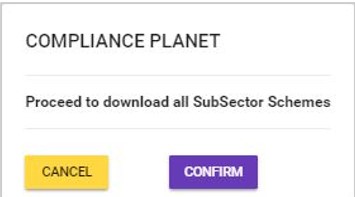
- This displays a confirmation console to confirm the download of all the sub-sector schemes.
(fig. 15.6b)
STEP 2: Click on ‘CONFIRM’ to proceed with the download or ‘CANCEL’ to discontinue with the operation.
- The signal console shows on going processes. An example of a signal console is fig 15.6b. When download is complete, a notification will be displayed at the top of the page that an excel file has been downloaded.

(fig. 15.6c)
How To Make Bulk Delete of Sub-Sector Schemes
This refers to deleting more than one sub-sector schemes at once. Here is how to carry out a bulk delete of sub-sector schemes.
STEP 1: Select sub-sector schemes to be deleted by clicking on their checkboxes as shown in fig. 15.7a below.
(fig. 15.7a)
- To select/deselect all the schemes on a page, click on the checkbox on the table’s title bar. This checkbox is between ‘SN’ and ‘Sub Sector Code’. See fig. 15.7b below.
(fig. 15.7b)
STEP 2: Click on ‘DELETE SELECTED SCHEME’ from the operations drop down as shown in fig. 15.7c below.
(fig. 15.7c)
- Clicking on ‘Delete Selected Schemes displays a confirmation console as seen in fig. 15.7d below.
STEP 3: Click on ‘CONFIRM’ to proceed or ‘CANCEL’ to discontinue delete operation. See fig. 15.7d.

(fig. 15.7d)
- If you proceed, a notification as in fig. 15.7e below will be displayed at the top of the page when delete operation is complete.

(fig. 15.7e)
How To Make Bulk Upload of New Sub-Sector Schemes
- To add more than one new account scheme on the software; you need to upload an excel file filled with the details of the new sub-sector schemes according to the software’s specification for uploading new sub-sector schemes. This process is described below.
STEP 1: Click on ‘UPLOAD SCHEME’ as in fig. 15.8a below.
(fig. 15.8a)
- This displays a ‘Planet Sub-Sector Scheme Upload’ console as in fig. 15.8b
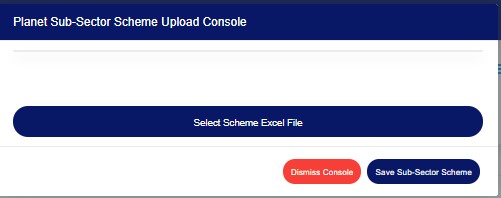
(fig. 15.8b)
STEP 2: Click ‘SELECT SCHEME EXCEL FILE’ as in fig. 15.8c to choose the excel file filled with the details of the new sub-sector schemes to be uploaded on the planet.
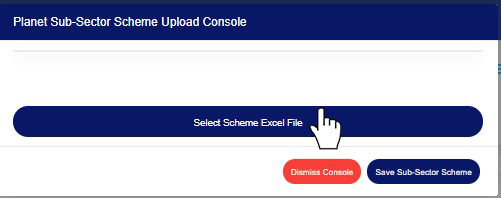
(fig. 15.8c)
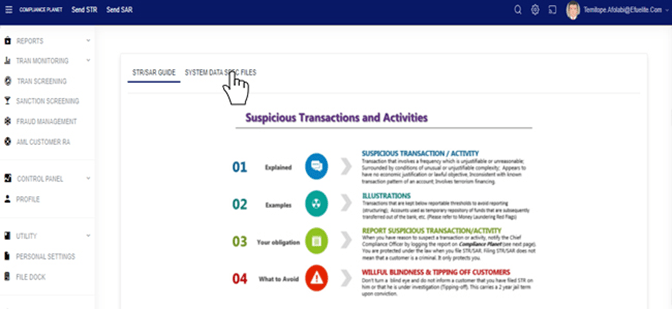
- If you do not have the file specification for uploading new sub-sector schemes, You can download it from the “SYSTEM DATA SPEC FILES” on the software home page as shown in fig. 15.8d below to download an excel file with the required specification.
I

(fig. 15.8d)
- An excel file will be downloaded to your computer with pre-filled titled columns under which the details will be entered. Open the file, fill in the required details of the new sub-sector schemes and save the changes to the file. Renaming the file on your computer is optional. Go back to the software and click on ‘Select Scheme Excel File’ to select the file.
- After selecting a file from your computer, the name of the selected file will be added to the upload console. See fig. 15.8e below for an example.
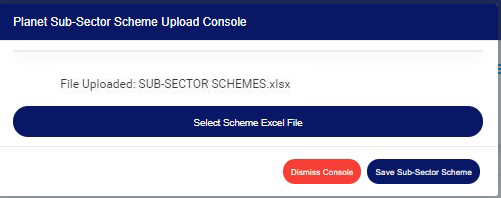
(fig. 15.8e)
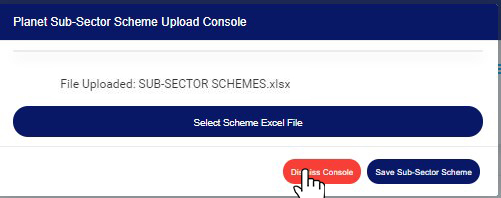
- To close the upload console, click on ‘DISMISS CONSOLE’ as in fig. 15.8f.
(fig. 15.8f)
STEP 3: Click on ‘SAVE SUB-SECTOR SCHEME’ as in fig. 15.8g below to save the new sub-sector schemes on the planet.

(fig. 15.8g)
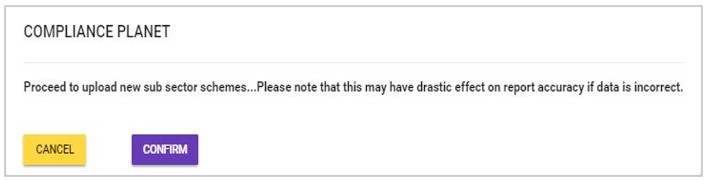
- This displays a confirmation console, Click on ‘CONFIRM’ to proceed or ‘CANCEL’ to return to the upload console. See fig. 15.8h for an example of a confirmation console.
(fig. 15.8h)
- A notification as in fig. 15.8i below will be displayed at the top of the page as the planet is saving the new sub-sector schemes.

(fig. 15.8i)
- The signal console shows on going processes. An example of a signal console is fig 6.5bb. When the upload is complete, an excel file titled, ‘Sub-sector Code Upload Report’ will be downloaded. You will be notified as shown in fig. 15.8j.
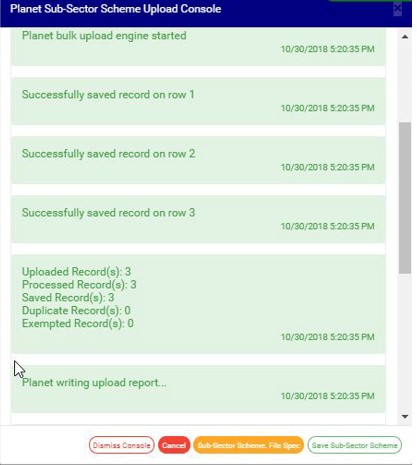
(fig. 15.8j)
For further enquiries :
Tel +234(0) 816 555 9818
Email solutions@efuelite.com
Web https://solutions.efuelite.com
