This feature allows service operations for various transaction types to be scheduled for any hour of the day.
NOTE: Only the person(s) profiled as administrator can carry out these operations
How to access the service operation schedule manager.
STEP 1: From the app dashboard, click on “CONTROL PANEL” as shown in the image below in Fig.2.1a
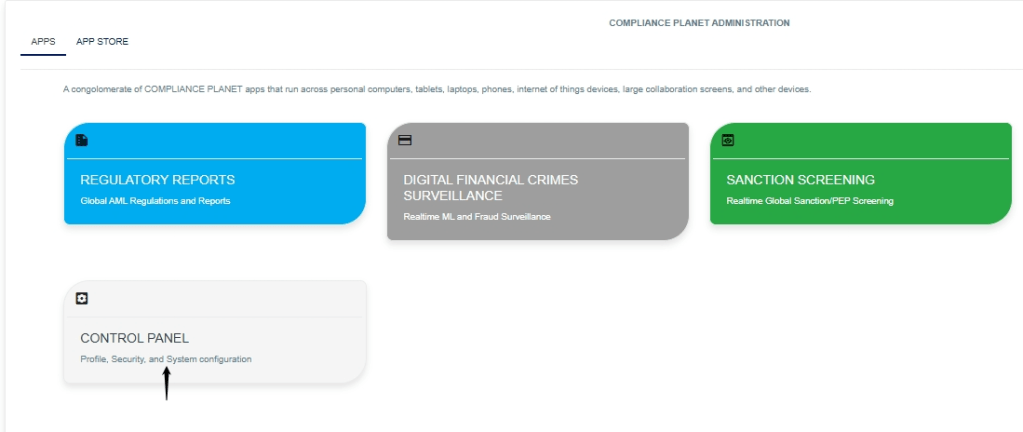
Fig.2.1a
- Click on “CONTROL PANEL” and this displays a page shown below in Fig.2.1b
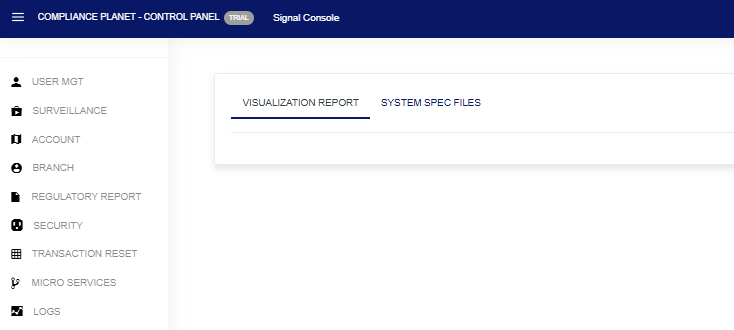
Fig.2.1b
- Click on “Micro Services”. This will display a page shown below in Fig.2.1c
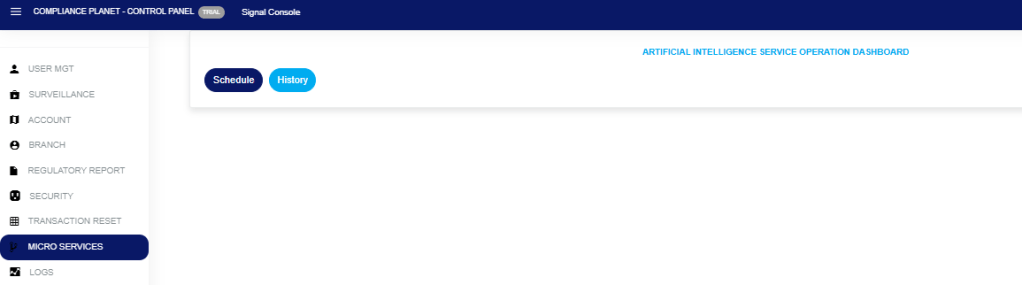
Fig.2.1c
Click on “Schedule”, which will display a page shown below as seen in Fig.2.1d
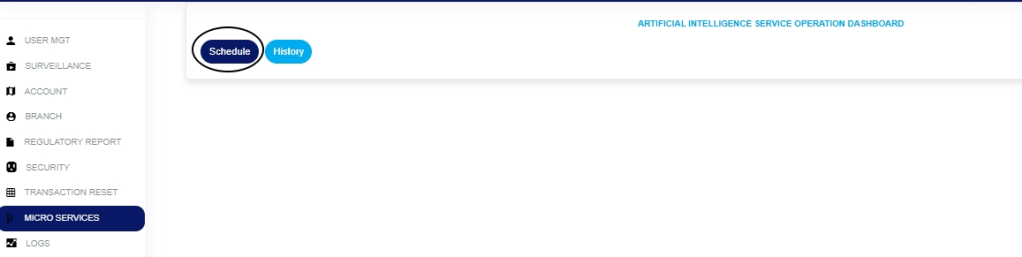

Fig.2.1d
STEP 2: Click the ‘Service’ box to select the transaction type you want to view its schedule of service operations, as shown in Fig.2.1e below.
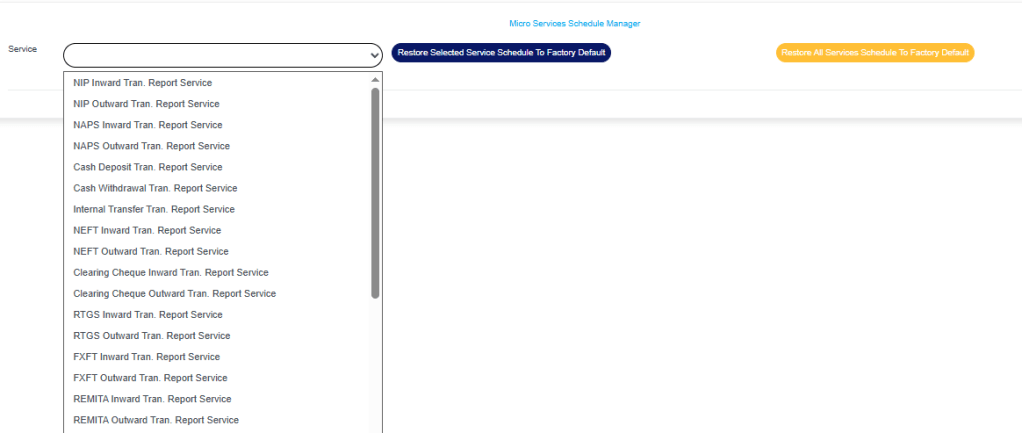
Fig.2.1e
- The selected ‘service time schedule’ will be displayed immediately, as shown in Fig.2.1f
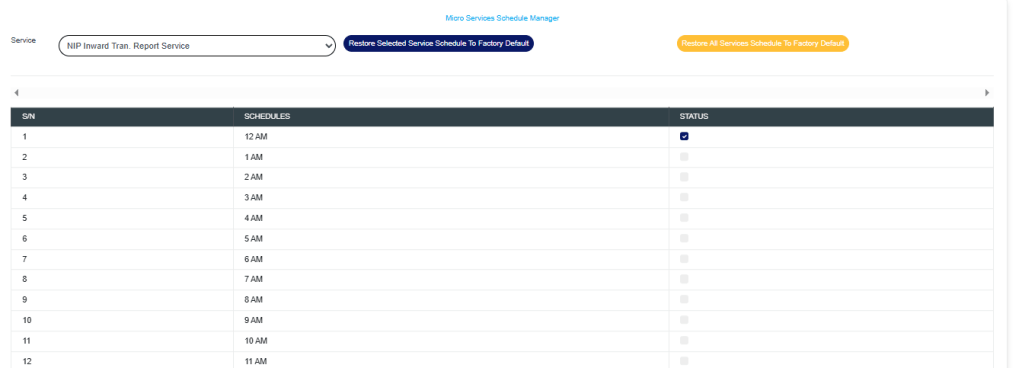
Fig.2.1f
- You can schedule a service operation at any time by marking the time checkbox. Click on the checkbox to select or deselect a time of the day as shown in Fig.2.1g

- Fig.2.1g
- By selecting or deselecting any time schedule, this will display a notification at the top of the page, as shown in Fig.2.1h.
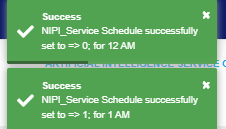
Fig.2.1h.
- You can also restore the selected service operation schedule to factory default settings by clicking on ‘Restore Selected Service Schedule To Factory Default’ as shown in Fig 2.1i

Fig 2.1i
- This will display a confirmation console. Click on ‘Confirm’ to proceed or ‘Cancel’ to dismiss the console, as shown in Fig.2.1j

Fig.2.1j
- A notification will be displayed at the top of the page showing that the schedule has been restored to default successfully, as shown in Fig.2.1k
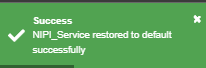
Fig.2.1k
- To restore all services operation schedule to factory default settings, click on ‘Restore All Services Schedule To Factory Default’ as shown in Fig.2.1l

Fig.2.1l
- This will display a confirmation console. Click on ‘Confirm’ to proceed or ‘Cancel’ to dismiss the console, as shown in Fig.2.1m

Fig.2.1m
- A notification will be displayed at the top of the page showing that all services have been restored to default settings successfully, as shown in Fig.2.1n
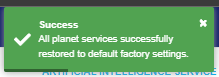
Fig.2.1n
How to view the History of the selected service operation schedule.
- STEP 1: Click on ‘History’ in the Artificial Intelligence operation dashboard page, as shown in Fig.2.2a

Fig.2.2a
- This will display a page as shown below in Fig.2.2b

Fig.2.2b
- STEP 2: Click on the ‘Entries’ box to choose the number of entries you want to view per page, as shown in Fig.2.2c
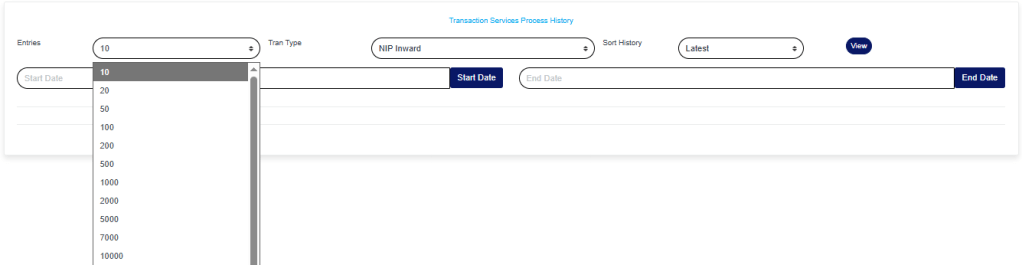
Fig.2.2c
- STEP 3: Click on the ‘Transaction type’ box and select the type of transaction you want to view its history, as shown in Fig.2.2d
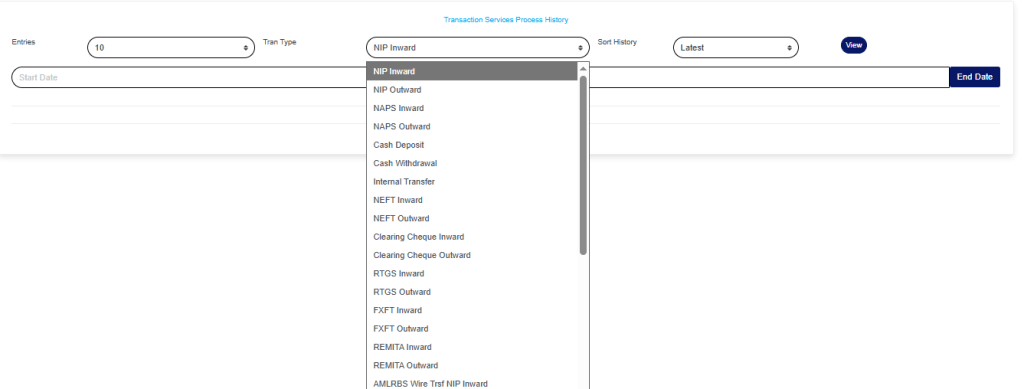
Fig.2.2d
- STEP 4: Click on the ‘Sort History’box and select the latest or earliest form of transaction you want to view its history, as shown in Fig.2.2e

Fig.2.2e
- STEP 5: Click on the “Start” and “End” dates to specify the dates. This will display a calendar as shown in Fig.2.2f and Fig.2.2g

Fig.2.2f
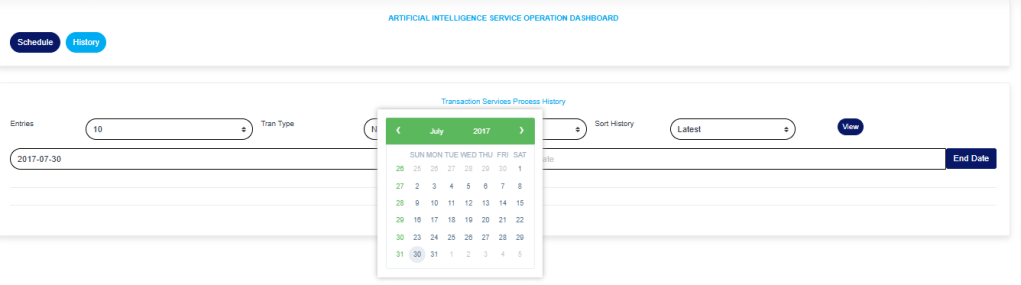
Fig.2.2g
- Take a look at the arrows labelled a to d in Fig.2.2h to study the calendar.
- a. Click on the given year to change it to your year of choice
- b. Click on the given month to change it to your month of choice
- c. Then click on the date of the month
- d. You can also click on the angle brackets on the calendar [ ‘<’ or ‘>’ ] to go backward or forward.

Fig.2.2h
Note that all boxes must be filled appropriately in the Artificial Intelligence Service Operation Dashboard page.
- STEP 6: Click on “View” as shown in the page below in Fig.2.2i

Fig.2.2i
- This will display a page below showing the history of transaction spool according to the dates filled in the start and end boxes, as seen in Fig.2.2j
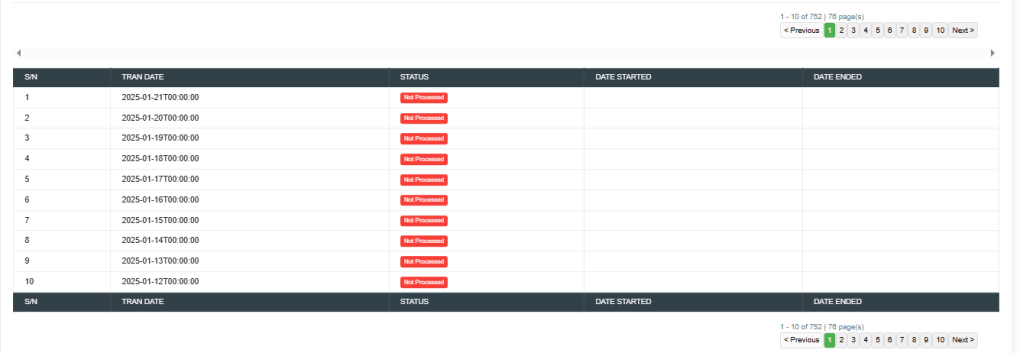
Fig.2.2j
For further enquiries :
Tel +234(0) 816 555 9818
Email solutions@efuelite.com
Web https://solutions.efuelite.com
