This section provides a guide to performing whitelisting operations on the control panel in the Compliance Planet Anti-Money Laundering/Core Banking Finance Software, complete with step-by-step instructions and illustrations.
STEP 1: From the app dashboard, click ‘Control panel’ as in Fig. 21.2a.
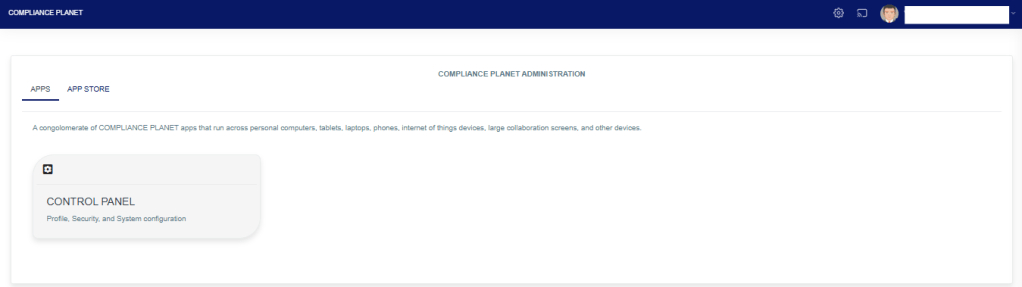
Fig 21.2a
- This will display a drop-down as shown below.
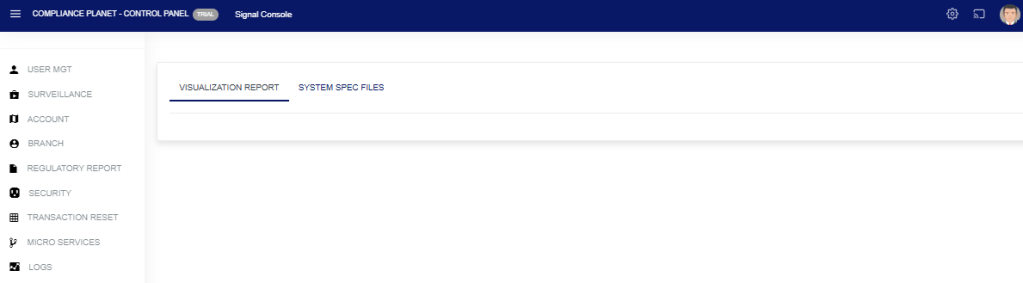
STEP 2: Select ‘SURVEILLANCE’ on the drop-down list and click on ‘Whitelist’. See an example in Fig. 21.2b below.
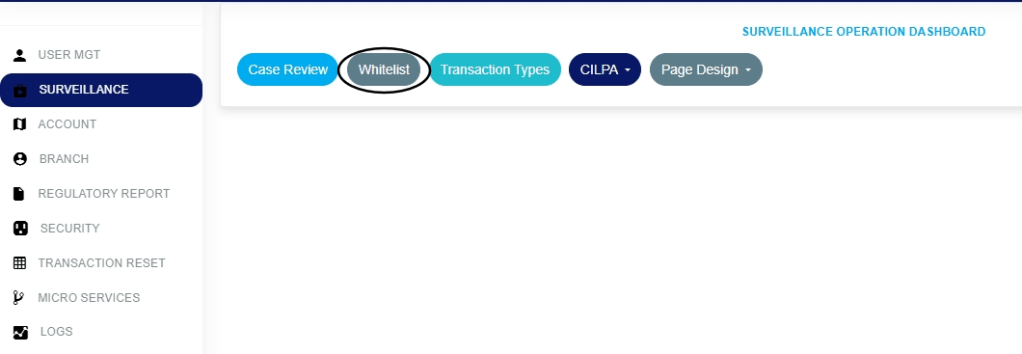
Fig 21.2b
The action above will display the drop-down shown in Fig. 21.2c.
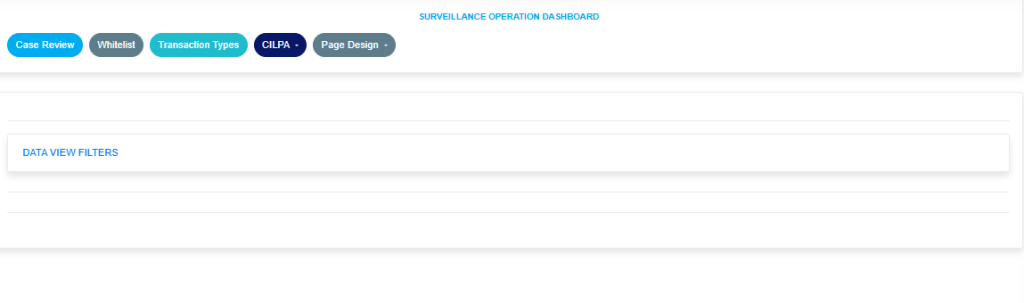
Fig. 21.2c
Click on the ‘Data View Filters’ to open the parameters as shown in the Fig. 21.2d image below.
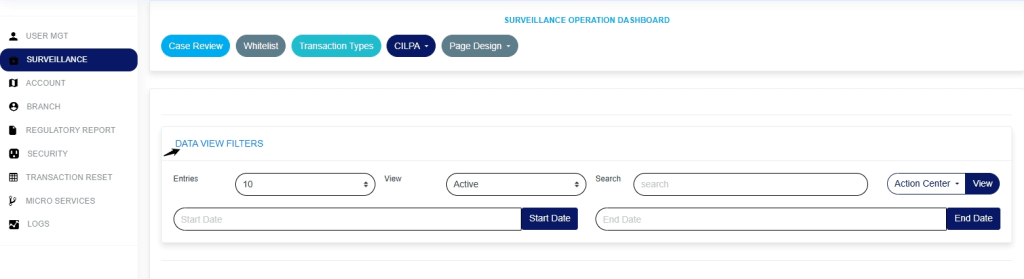
Fig. 21.2d
Entries: click on the ‘Entries’ drop-down to choose how many case entries you want displayed per page, as shown in Fig. 21.2e

Fig. 21.2e
View: Click on the ‘view’ drop-down to filter and select either active or inactive, as shown in Fig. 21.2f below.
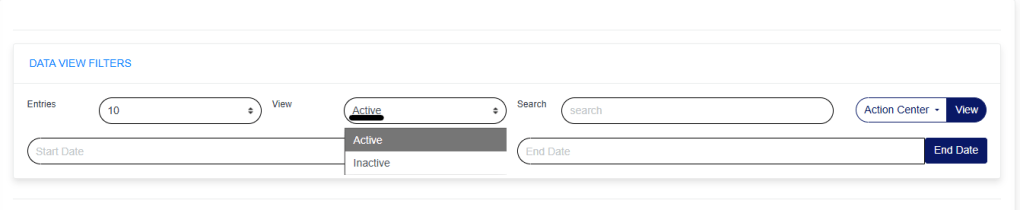
Fig. 21.2f
Search: click on the ‘search’ box and enter the account number to quickly find specific accounts, as shown in Fig. 21.2g below.

Fig. 21.2g
Action Center: click on the ‘Action Center’ drop-down to perform quick actions to Export to Excel, whitelist accounts, and deactivate whitelist as shown in Fig.21.2h below.
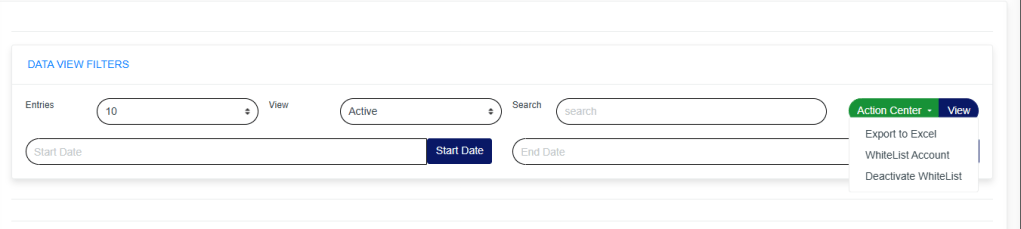
Fig.21.2h
View: click on ‘View’ to view cases. This is after all necessary parameters have been filled in, as shown in Fig. 21.3a.

Fig.21.3a
Start Date & End Date: Use the ‘Start Date’ and ‘End Date’ fields to filter cases based on a selected time range, as shown in Fig.21.3b and Fig.21.3c below
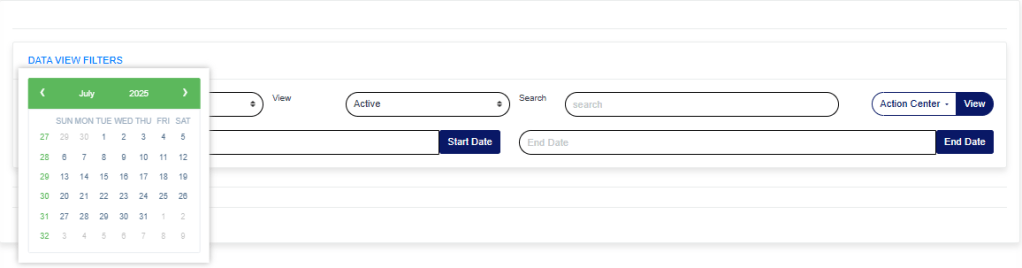
Fig.21.3b

Fig.21.3c
How to Whitelist an account on the Control Panel.
STEP 1: Click on ‘Action Center’ and select ‘Whitelist Account’ as shown in Fig.21.3d image below.

Fig.21.3d
The above action will show the ‘Whitelist Portal’ page as shown in Fig.21.3e below.
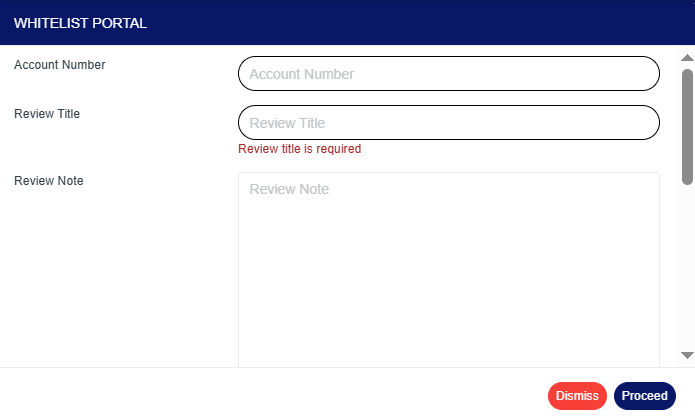
Fig.21.3e
Account Number: Click on the ‘Account Number box’ and enter the account number you want to whitelist.
Review Title: Click on the ‘Review Title box’ and enter the review title. Also, note that a review title box must be filled in to whitelist an account.
Review Note: Click on the ‘Review Note box’ to enter why you are whitelisting the account.
STEP 2: Click on ‘proceed’ to continue with the whitelisting process or ‘dismiss’ to cancel the process, as shown in Fig.21.3f image below.
Fig.21.3f
Whitelist for a specific period: Turn on the ‘Whitelist for specific period’ button to whitelist the account for a certain period of time.
Start Date & End Date: Enter the ‘Start Date’ and ‘End Date’ fields to select the time range. This is required if the Whitelist for a specific period button is turned on.
Whitelist Category: Click on the ‘Whitelist Category drop-down’ to select either TM/FRAUD Global Surveillance, TM/FRAUD Policy Surveillance, or TM/FRAUD Rule Surveillance.
Bulk Upload: Upload the bulk Excel file and click ‘proceed’ to complete the process.
For further inquiries:
Tel: +234(0) 816 555 9818
Email: solutions@efuelite.com
Web: https://solutions.efuelite.com
