The User Session Log page shows a record of active and inactive users’ sessions. A new session starts when a user logs into the software on a new browser or device and ends when the user logs out.
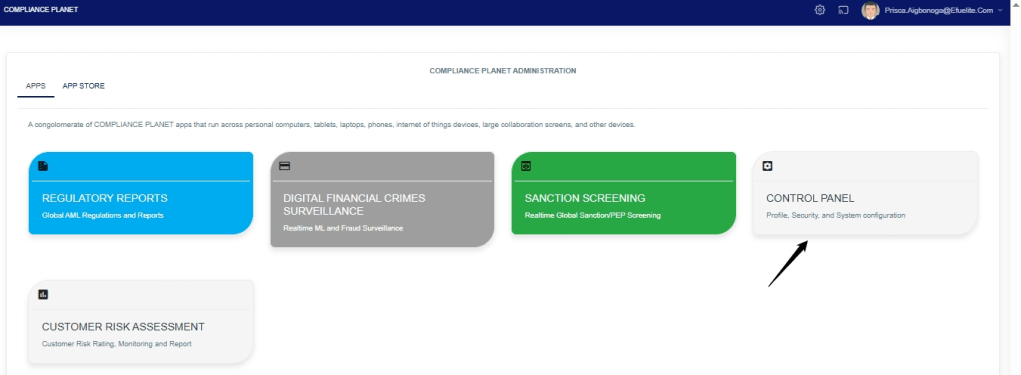
STEP 1: From the dashboard, click “Control Panel” as in Fig. 28 .5a below.
Fig. 28.5a
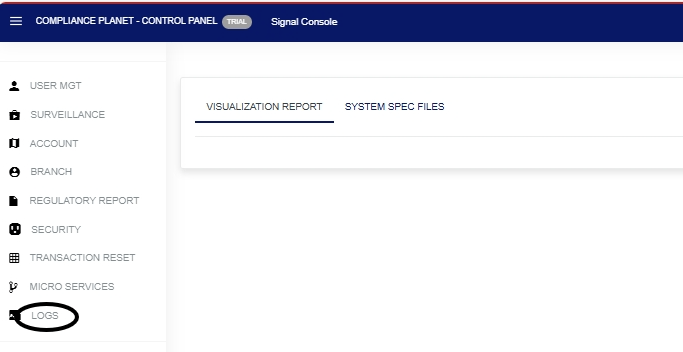
- This will display a page, then click “Logs” as in Fig. 28 .5b below
STEP 2: From the top menu, click “User Session” as in Fig. 28.5c below.
Fig.28.5c
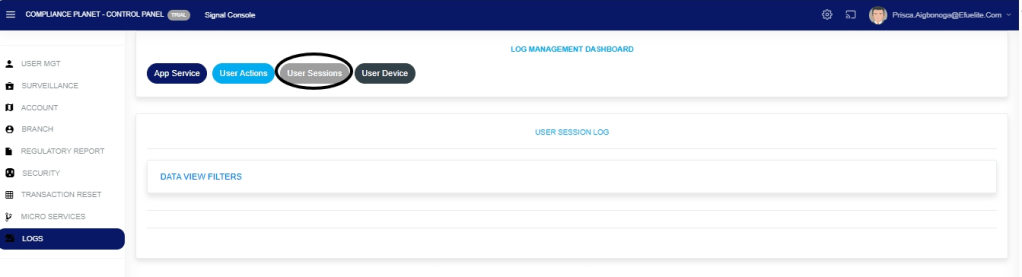
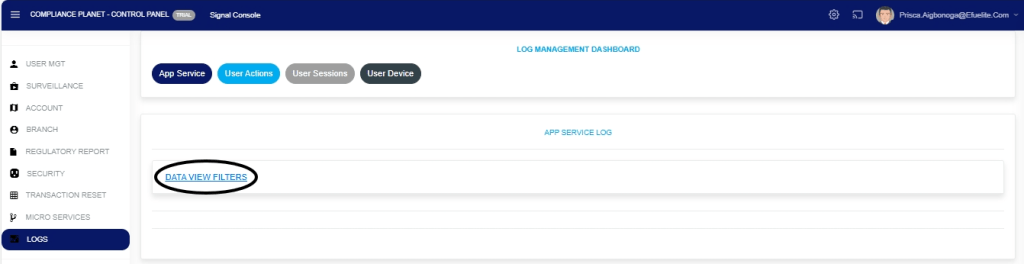
STEP 3: This displays the Service User Session log page. Click “Dataview filter” as shown in the Fig.28.5d below.
Fig.28.5d
STEP 4: Fill in all the parameters as circled and explained in Fig.28.5e below:
Click on the ‘Start Date’ button to specify the start date; this also displays a calendar below the date box.
Click the ‘End Date’ button to specify the end date; this will also display a calendar below the date box.
Click on the ‘Entries’ in the entries box to change the number of entries you want to see per page.
Click on the ‘Search’. You can search for a service by typing the search term in the Search box. The software displays the results in real time.
Click the “Session Type” box to change the view to either active or inactive sessions
Note that the software displays active user sessions by default when you navigate to the user session log.
Fig.28.5e
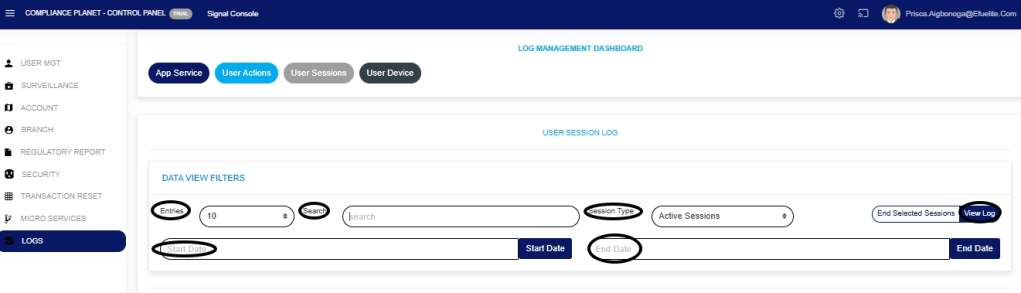
Click on ‘View Log’ as in Fig.28.5e above to view the services.
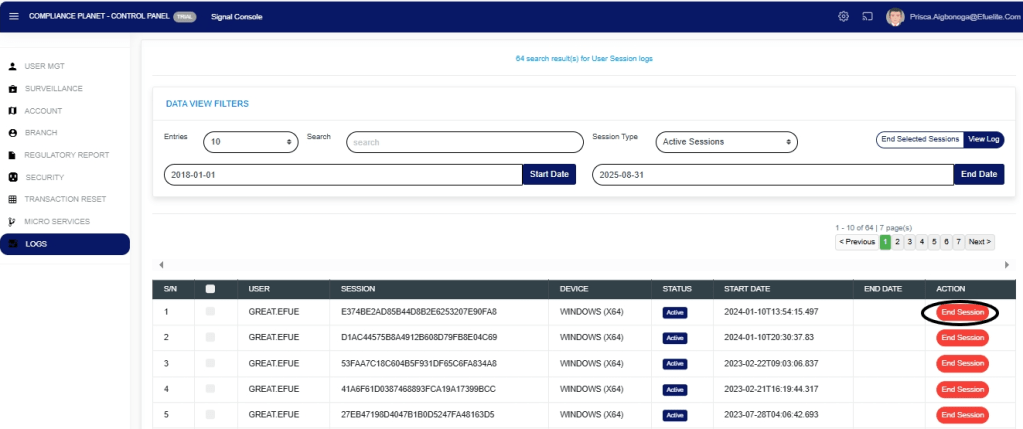
This will display a page, as shown in Fig. 28.5f below, which lists user sessions that are currently Active within the specified date range. The page also provides additional information, such as the user’s device, session status, session start date, and end date.
Fig.28.5f

STEP 5: Click the “End Session” button attached to a user’s record, as in Fig.28.5g below, to end that session.
Fig.28.5g
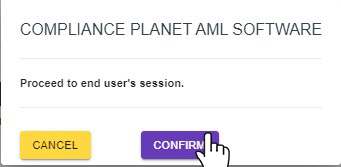
This displays a confirmation console, as shown in Fig.28.5h below.
STEP 6: Click the “Confirm” to proceed or “Cancel” to close the console.
Fig.28.5h
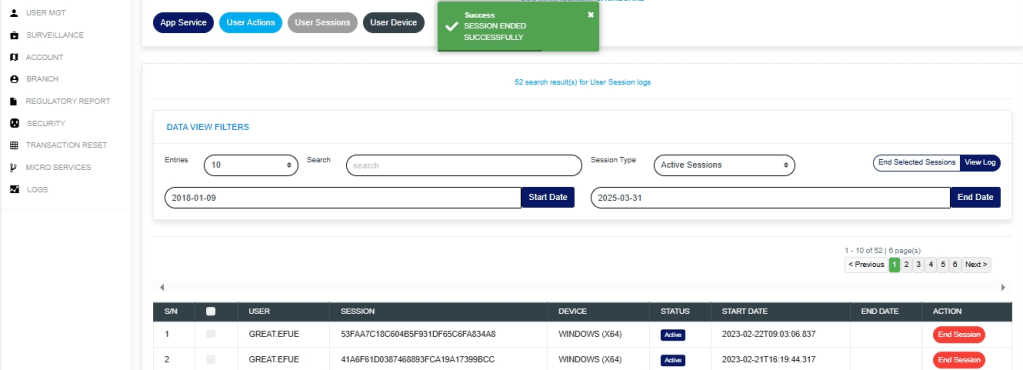
- A notification will be displayed at the top of the page in green colour as in Fig.28.5i below, showing that the session has been successfully ended and the user is successfully logged out.
- Fig.28.5i
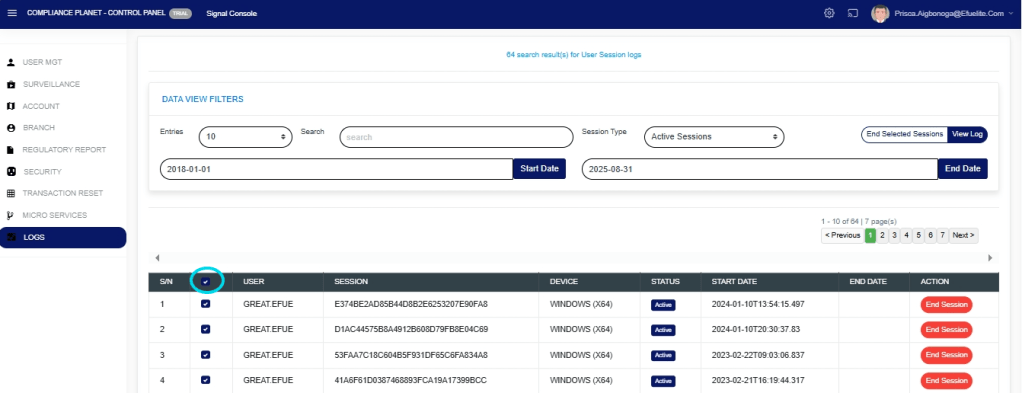
STEP 7: Click the checkbox at the top or bottom of the table, as in Fig.28.5j below, to select all the records displayed in the table.
Fig.28.5j
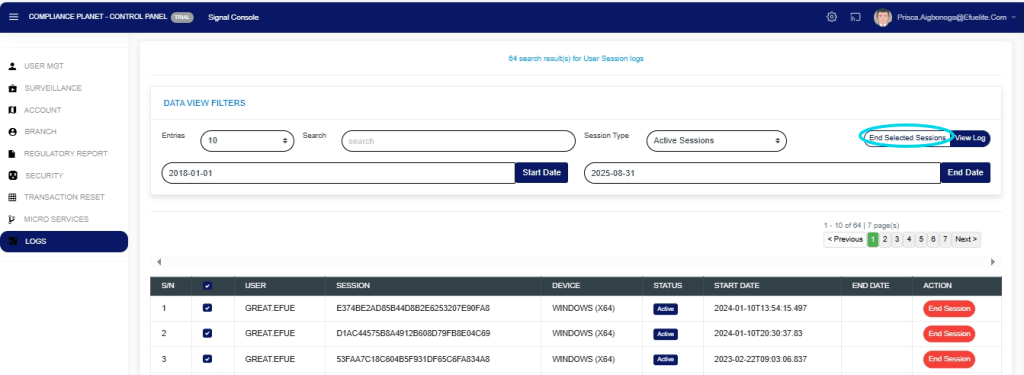
STEP 8: Click the “End Selected Sessions” as in Fig.28.5k below to end the session.
Fig.28.5k
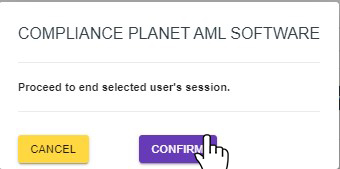
- This will display a confirmation console as in Fig.28.5l below
STEP 9: Click “Confirm” to proceed or “Cancel” to close the console.
Fig.28.5l
- A notification will be displayed at the top of the page to indicate that the sessions have been successfully ended and the users are logged out.

For further enquiries :
Tel +234(0) 816 555 9818
Email solutions@efuelite.com
Web https://solutions.efuelite.com
