Author: complianceaml
How to Search for Customer’s Account Details in The Institution’s Account base In Compliance Planet Anti Money Laundering/Core Banking Finance Software
➔ From the left hand side menu, click on ‘Account base’ Check out fig.9.2a below for an example
➔ Clicking on ‘Account Base’ will display a page as in fig. 9.3b below .
(fig. 9.2b)
STEP 2: Enter ‘Search term’ in the search box to start a search. The search box is at the top-right area of the page. The search term could be either a name or part of the name, scheme code or account number. See an example of a search ongoing in fig. 9.2c below.
(fig. 9.2c)
➔ The software will start a search in real-time as you type a character in the search box. See the result of the search term in fig. 9.2c in fig. 9.2d below.
(Fig. 9.2d)
➔ Every information seen on this page is for view only. You can adjust the number of accounts you want to see per page by clicking on the ‘ENTRIES’ box next to the search box as shown in fig. 9.3e below.
(fig. 9.2e)
➔ At the bottom-right corner of the page also, the software will provide information about the number of pages of the search result, with the page numbers written out. All the page numbers represent buttons to go to each page. By clicking on any page number, the software takes you to that particular page. Click on the ‘NEXT’ button to go to the next page when you and click on the ‘PREVIOUS’ button to take you to the page before the one you are viewing at that moment. See these features in fig. 9.3g below.
Miscellaneous Accounts Listing In Compliance Planet Anti Money Laundering/Core Banking Finance SoftwareMiscellaneous
This operation involves searching out miscellaneous accounts that exist on the Compliance planet. Here, the software can give you miscellaneous accounts from each branch of the institution or all the branches together.
NOTE: Only person(s) profiled as ‘Deputy Supreme Admin’ can carry out these operations
Here are steps on how to generate a list of miscellaneous accounts.
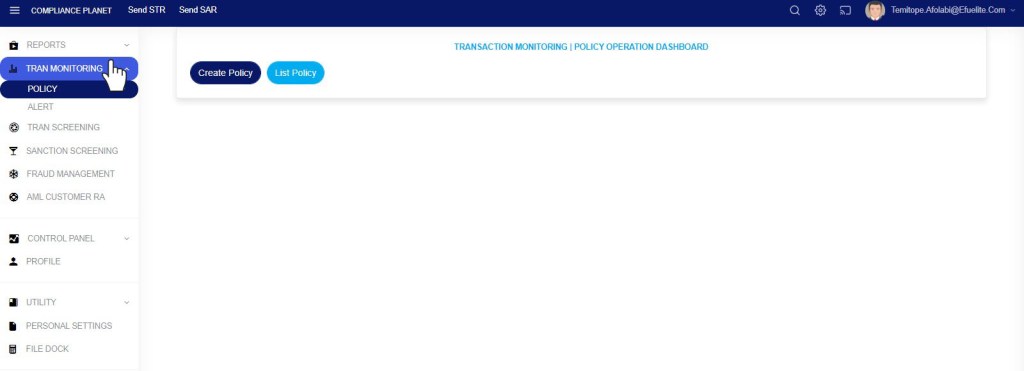
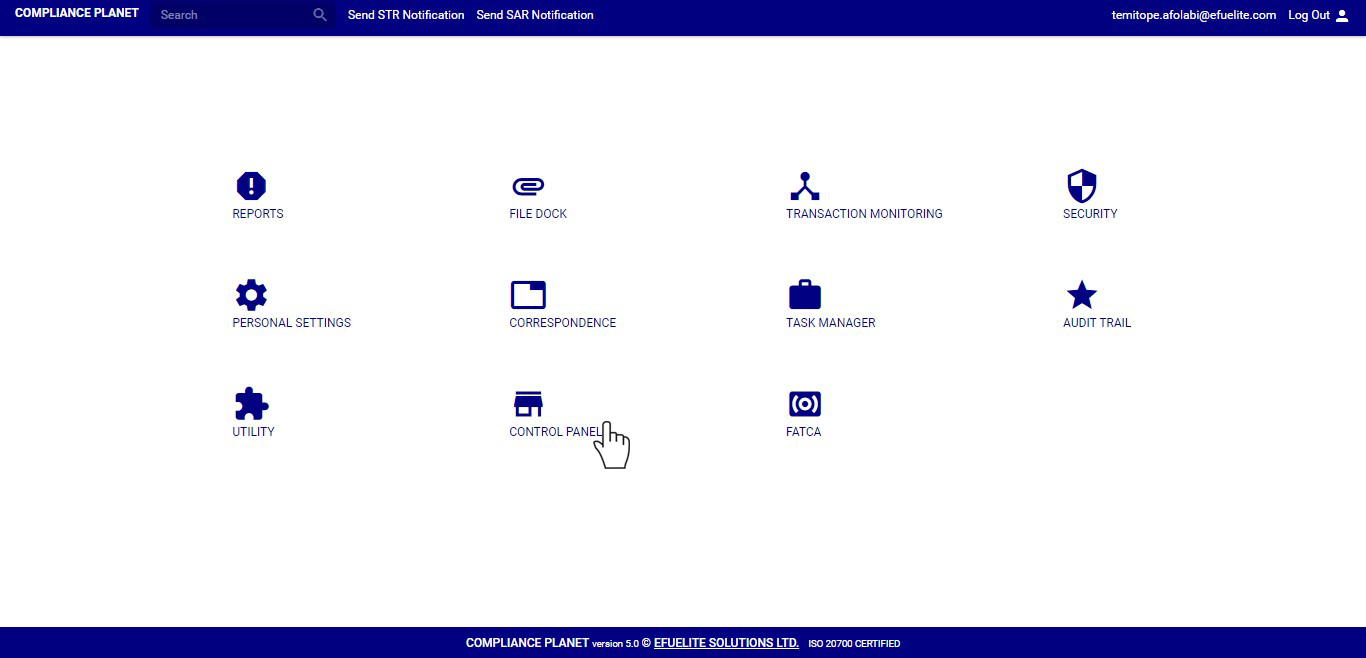
STEP 1: From the main dashboard, click on ‘CONTROL PANEL’. See an example below
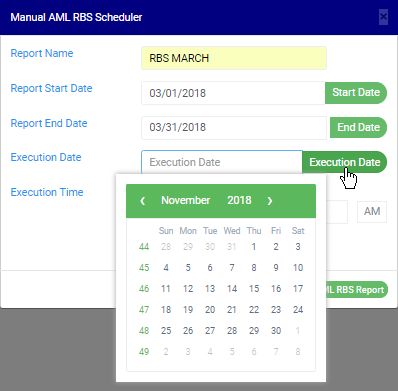
➔ From the left hand side menu, click on ‘Misc. Acc. List’ Check out fig. 8.6a below
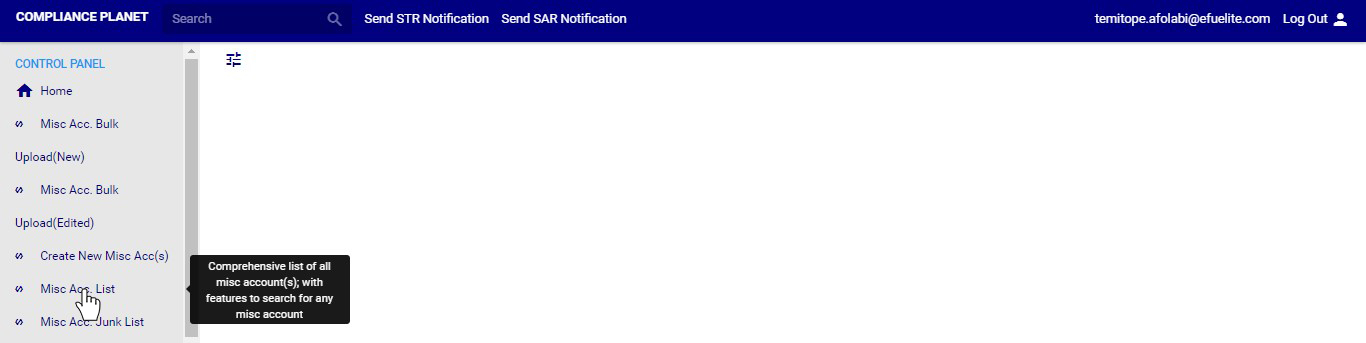
(fig. 8.6a)
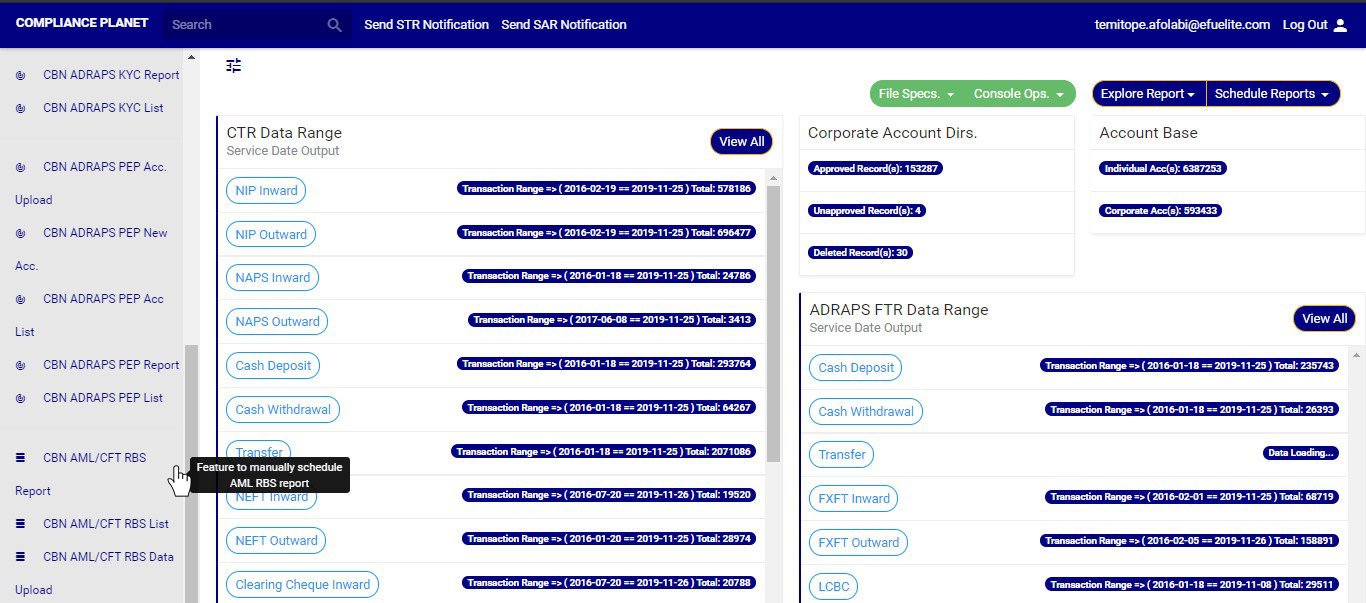
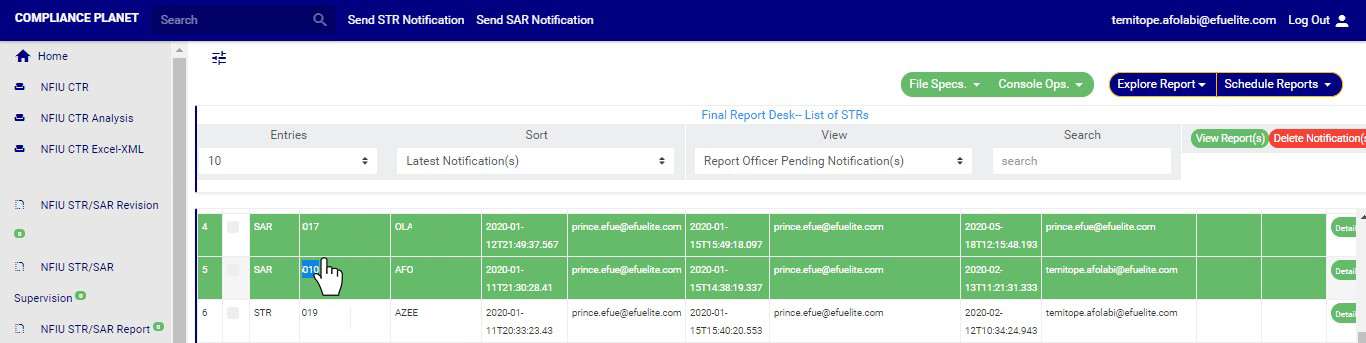
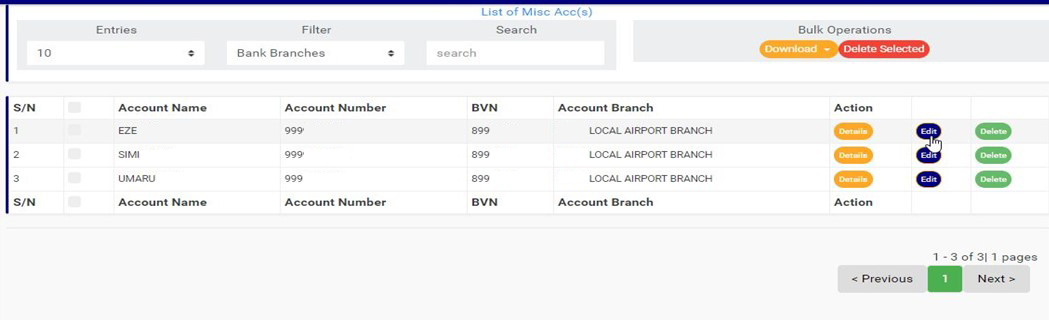
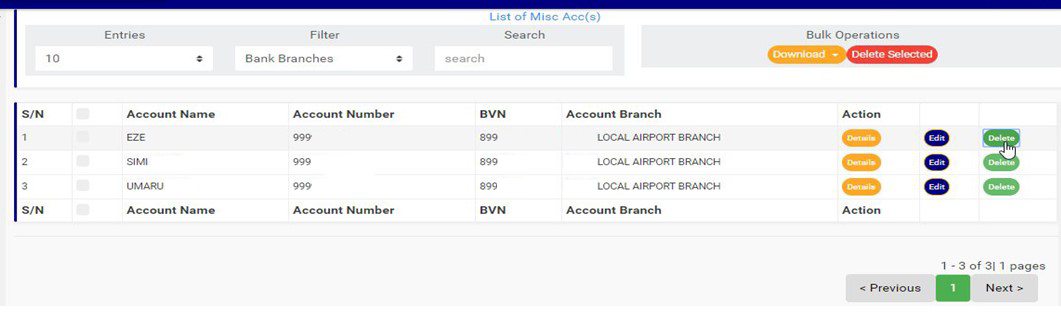
➔ Clicking on ‘Misc. Acc. List’ displays a page listing out all the miscellaneous accounts on the software. See fig. 8.6b below for an example.
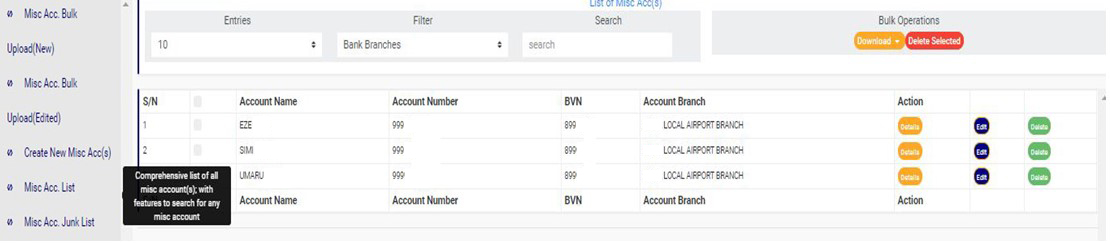
(fig. 8.6b)
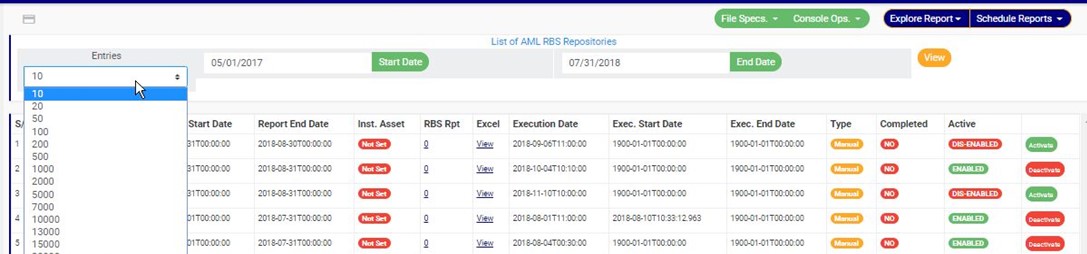
➔ You can increase the number of accounts you want to see per page by clicking on the ENTRIES box and then select the number of entries you want to see. See fig. 8.6c below for an example.
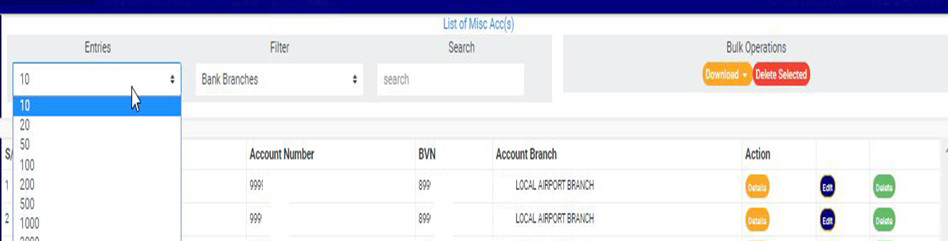
(fig. 8.6c)
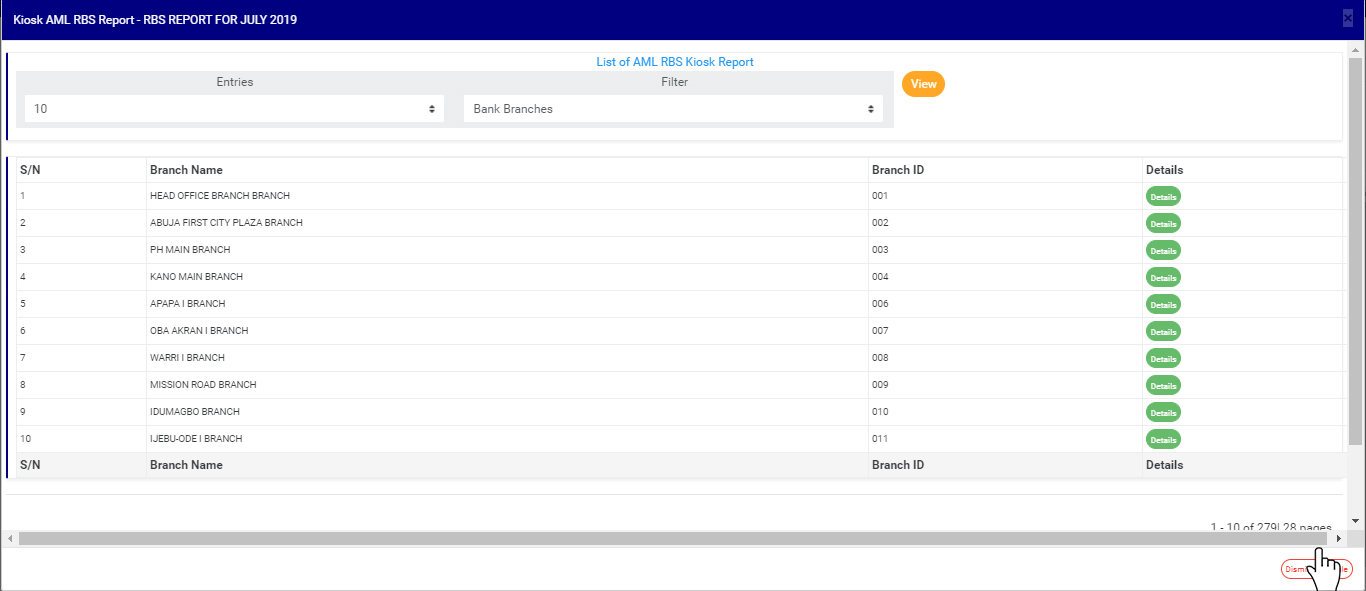
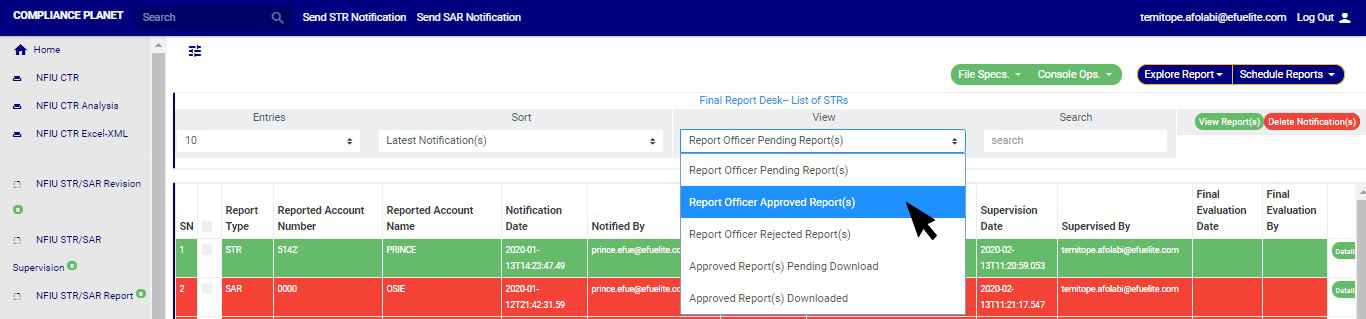
➔ To see accounts pertaining to one of the branches, select branch name from the filter box as in fig. 8.6d below. The default account list is always for all branches of the institution.
➔ You can search out miscellaneous accounts by typing the account name or account number in the search box. See an example in fig. 8.6e below.
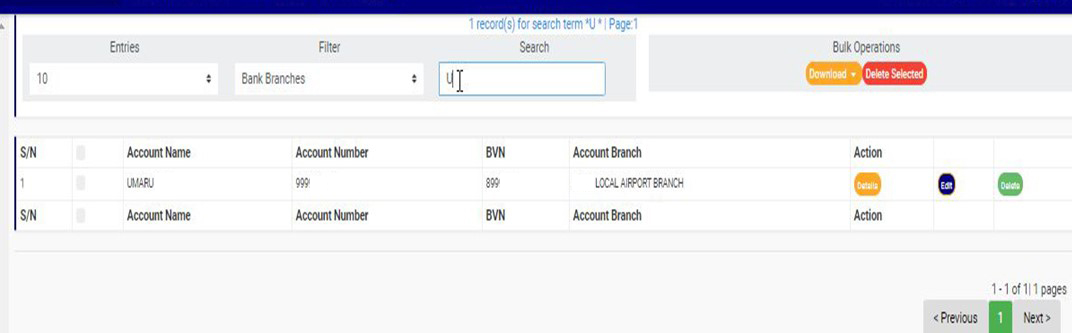
(fig. 8.6e)
➔ At the bottom-right corner of the page, the software gives information about the number of pages, with the page numbers written out. All the page numbers represent buttons to go to each page. By clicking on any page number, the software takes you to that particular page. There is the NEXT button to take you to the next page when you click on it and there is a PREVIOUS button to take you to the page before the one you are viewing at that moment. See these features in fig. 8.6e above.
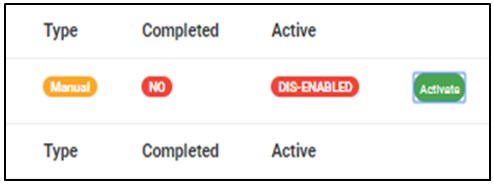
➔ Each account in the Misc. Acc. list has three buttons for individual operations and they are;
● ‘DETAILS’ button
● ‘EDIT’ button and
● ‘DELETE’ button
➔ To see details of an account, click on ‘DETAILS’ as in fig. 8.6f below.
(fig. 8.6f)
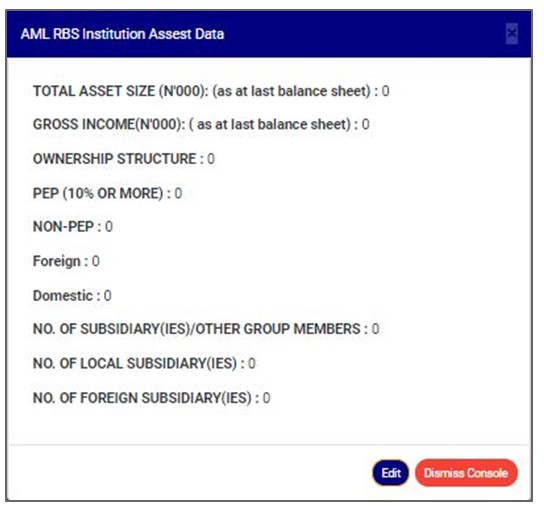
● This will display a ‘Misc. Account Details’ console. Note, you can only view the details of the miscellaneous account. See an example in fig. 8.6g below. Click on ‘CANCEL’ to close the console.
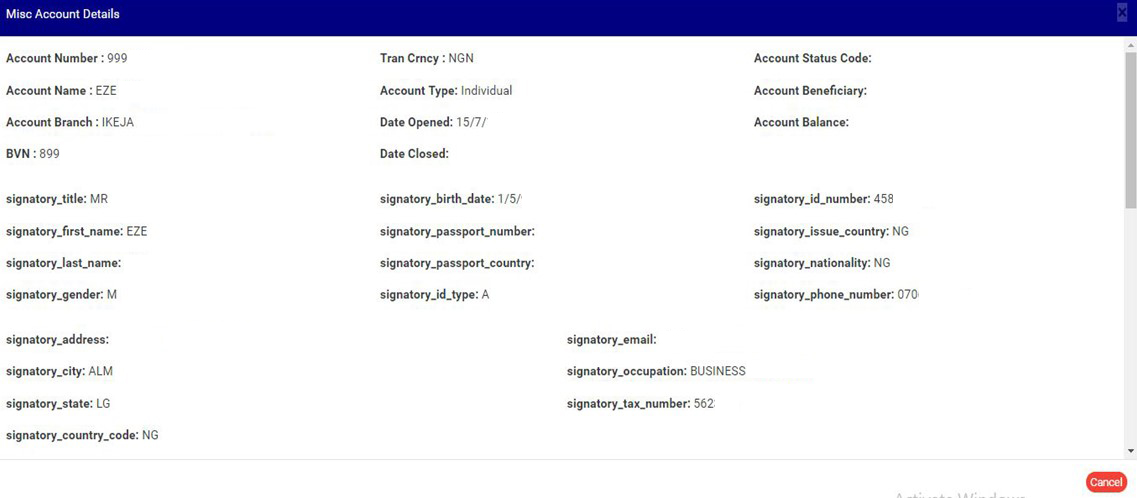
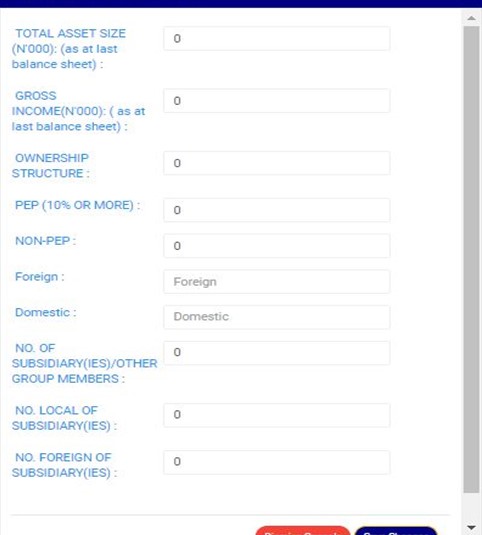
➔ To modify the details of a miscellaneous account, click on ‘EDIT’ as in fig. 8.6h below. This displays a ‘Edit Misc. Account’ console where you can edit the details and/or input details in the fields that are yet to be filled.
● See fig. 8.6i for an example of ‘EDIT MISC ACCOUNTS’ console.
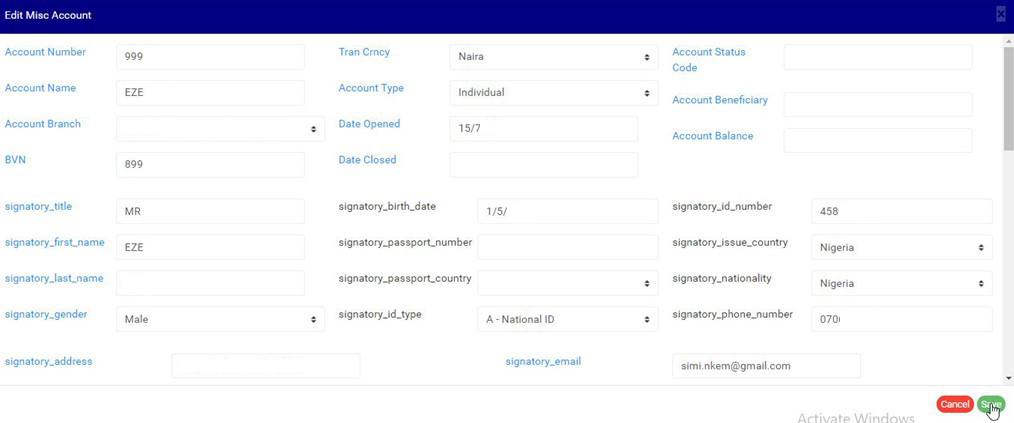
(fig. 8.6i)
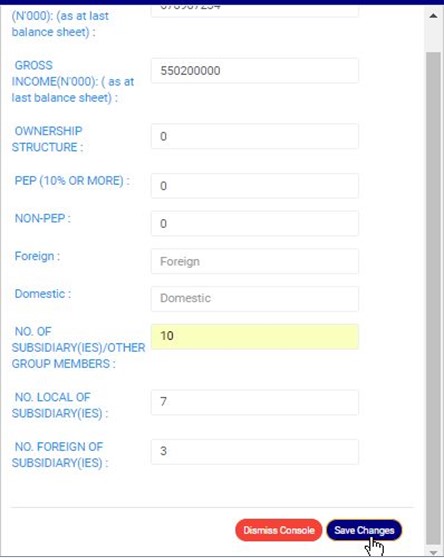
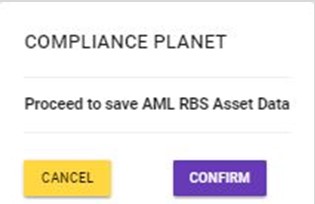
● Click on ‘SAVE’ as in fig 8.6i above to update the miscellaneous account detail.

● A temporary notification will be displayed at the top of the page as in fig. 8.6k below.
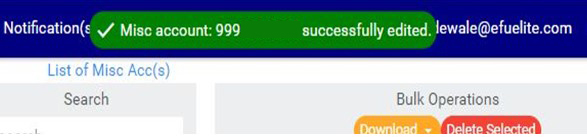
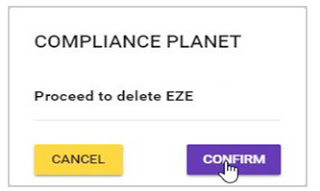
➔ To delete a miscellaneous account from the general list of miscellaneous account, click on ‘DELETE’. See an example in fig. 8.6l below.
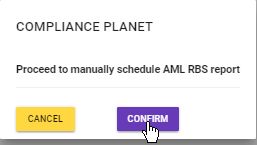
● A confirmation console as in fig. 8.6m will be displayed. To proceed, click on ‘CONFIRM’ to delete the account.

● On confirming your approval, the account will be removed from the general list immediately and added to the junk list of miscellaneous accounts. A notification will be displayed at the top of the page.
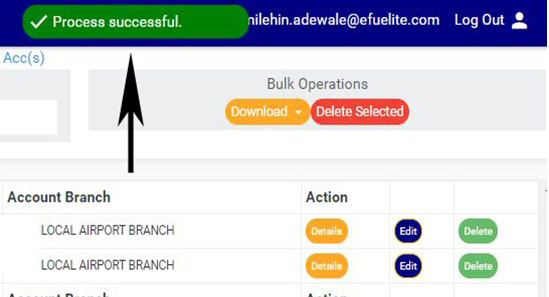
● This does not mean the miscellaneous account is permanently deleted from the software (To delete the account permanently, go to the junk list under the Misc. Account menu and delete it from the list. This process is explained under the ‘MISCELLANEOUS JUNK LIST’ section.)
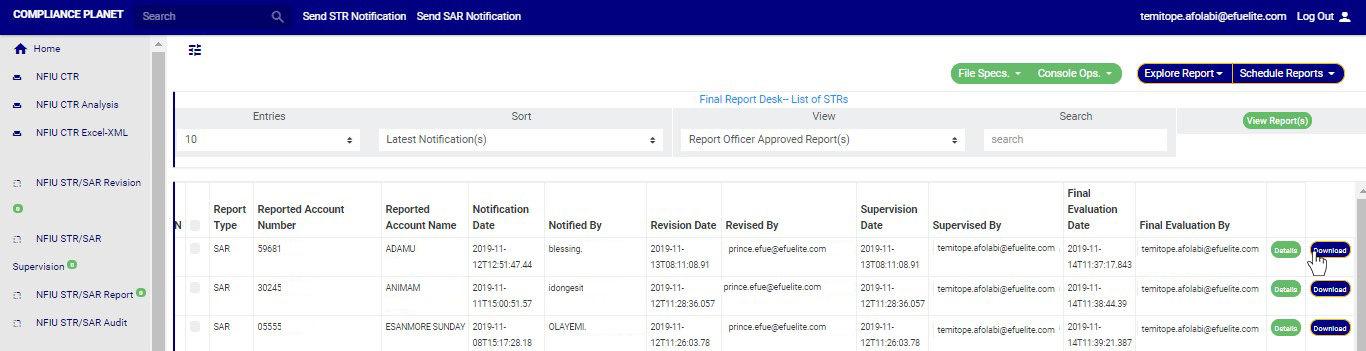
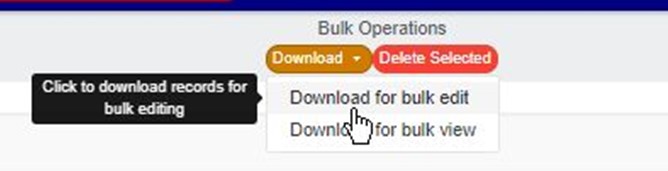
➔ Also on this page, there are features to carry out bulk operations. Bulk operation refers to operations on more than one account at the same time. I.e. you can view details, delete and edit multiple accounts at the same time. The buttons for carrying out bulk operations are at the top-right area of the page as shown in fig. 8.6n above. These features are; ‘Download’ and ‘Delete Selected’.
➔ To carry out any bulk operation, first, select checkboxes of the the accounts to be treated. See fig. 8.6f below for an example.
(fig. 8.6o)
➔ To select all the accounts on the page, click on the checkbox on the title bar, that is, the checkbox between ‘S/N’ and ‘ACCOUNT NAME’.
➔ After making your selection, proceed to carry out the bulk operations. The bulk operations are explained below.
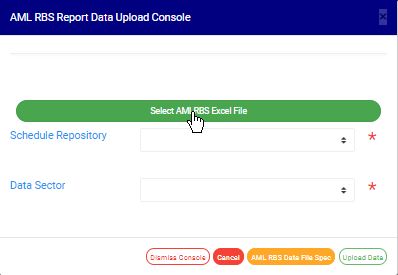
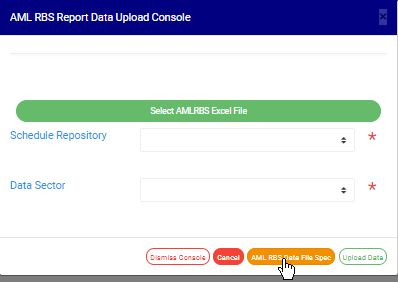
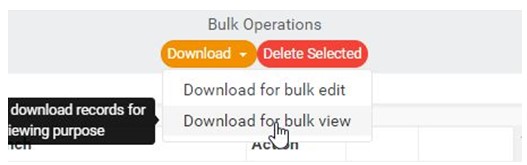
1. Download for bulk edit
This Operation downloads an excel file filled with the details of the selected miscellaneous accounts you want to edit. (See the post on “How to Edit Miscellaneous Accounts” for guide on how to edit the downloaded file.)
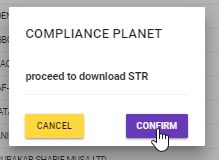
STEP 2: This will display a confirmation console as in 8.6r below. Click on ‘CONFIRM’ to proceed with the download or ‘CANCEL’ to close the console.
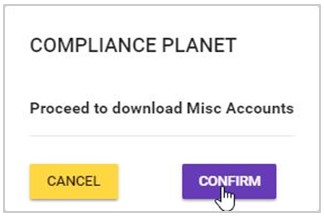
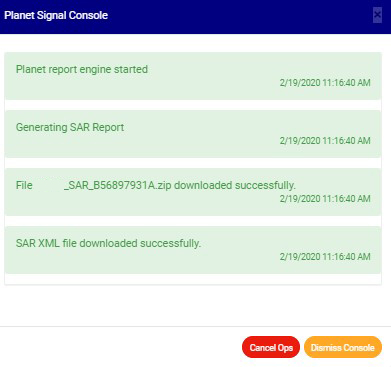
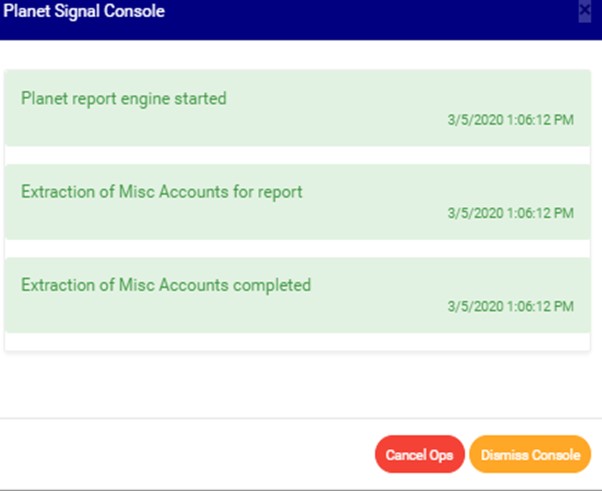
➔ The signal console shows ongoing processes as shown in fig. 8.6s below. Once download is complete, a notification will be displayed at the top of the page as seen in fig. 8.6s.
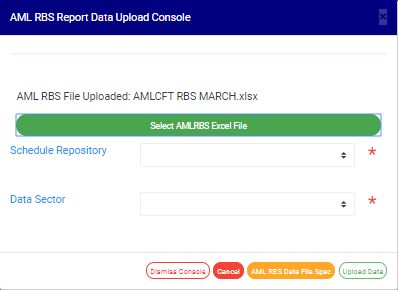
STEP 3: Open the excel file on your computer and edit the details you want to change. You can also add details that are yet to be added concerning the accounts. Ensure you save the changes you made.
➔ Read ‘How to Edit Miscellaneous Accounts’ for guide on how to edit the downloaded miscellaneous account file
2. Download for bulk view
STEP 1: Click on ‘DOWNLOAD FOR BULK VIEW’ as in fig. 8.6v below
➔ A confirmation console in fig. 8.6w will be displayed. Click on ‘CONFIRM’ to proceed with the download or ‘CANCEL’ to close the console,
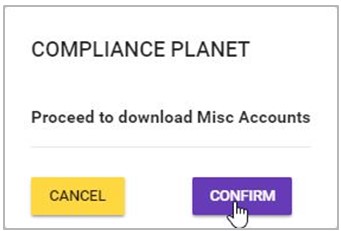
➔ The signal console shows on going processes. An example of a signal console is shown in fig. 8.6x below.
➔ The software will write the selected accounts into an excel file. Once download is complete, a notification will also be displayed at the top of the page as seen in fig. 8.6x above. Open the file to view the details of the selected accounts.
Bulk Operations – Bulk Delete.
This operation will delete the selected miscellaneous account list from the general list.
STEP 1: Click on ‘DELETE SELECTED’ as in fig. 8.6y below.
(fig. 8.6y)
➔ A confirmation console will be displayed as in fig. 8.6z below.
STEP 2: Click on ‘CONFIRM’ to proceed or click on cancel to close the console.
➔ The selected accounts will be removed immediately from the general list and added to the junk list. However, this operation does not permanently delete the miscellaneous accounts from the Compliance Planet rather it moves them to the junk list. Deleting of accounts permanently is carried out in the junk list page.
Overview Of Miscellaneous Accounts In Compliance Planet Anti Money Laundering/Core Banking Finance Software
This section provides a guide on how to perform operations pertaining to MISCELLANEOUS ACCOUNTS on the Compliance Planet, with step-by-step instructions and pictures.
These are suspense accounts used in transmitting funds between parties. Since they do not possess all the report schema details like the customer’s account by default, Compliance Planet offers these features for the compliance team to structure these accounts as the report schema demands and when they are involved in transactions, the software adds them to the report
The operations pertaining to miscellaneous accounts on the Compliance Planet are;
1. Bulk upload of new miscellaneous accounts
2. Bulk edit of miscellaneous accounts
3. Creation of miscellaneous accounts
4. List of miscellaneous accounts
5. List of deleted or junk miscellaneous accounts
➔ To perform any of the operations, go to the Control panel section of the planet. Check out fig. 8.2a below to see where it is located.
For further enquiries :
Tel +234(0) 816 555 9818
Email solutions@efuelite.com
Web http://solutions.efuelite.com
Overview of Transaction Monitoring / Activity Monitoring In Compliance Planet Anti Money Laundering/Core Banking Finance Software
In mitigating the dangers aligned with financial institutions solely relying on manual notification of suspicious transactions and activities, Compliance Planet includes an Artificial Intelligence Service that serves as a real time monitor for the institution. This CP-AIS works with well crafted policies that are deployed into the system (Compliance planet). On breaches to these policies, CP-AIS provides real time alert, signals and reports to appropriate channels as configured on Compliance planet. This module includes features to;
➔ Creating new policies.
➔ Revamping existing policies.
➔ Activating / Deactivating policies

For further enquiries :
Tel +234(0) 816 555 9818
Email solutions@efuelite.com
Web http://solutions.efuelite.com
AML / CFT Risk Based Supervision Repository Listing In Compliance Planet Anti Money Laundering/Core Banking Finance Software
The Compliance planet software keeps a record of all AML RBS reports that have been manually scheduled. The process to find scheduled AML RBS reports and carry out other associated operations are described below.
NOTE: Only persons profiled and assigned right to view and process RBS reports can carry out this operation
STEP 1: From the left hand side menu, click on CBN AML/CFT RBS list as in fig.7.4a below.
(fig. 7.4a)
➔ This will display a page as in fig. 7.4b.
(fig. 7.4b)
STEP 2: Click on the START DATE and END DATE buttons to choose the date range of the report you want to schedule. The software will display a calendar console as in fig 7.3d and Fig 7.3e below for you to set the report start date and end date respectively.
(fig. 7.4c)
(fig. 7.4d)
➔ Take a look at the arrows labelled a to d in fig. 7.4e for a description of how the calendar works.
a. Click on the given year to change it to your year of choice.
b. Click on the given month to change it to your month of choice.
c. Then, click on the day of the month.
d. You can also click on the angle brackets on the calendar [ ‘’ ] to go backward or forward.
(fig.7.4e)
➔ For instance to see AML RBS reports scheduled for dates between MAY 2017 and JULY 2018,, the start date and end date would be 05/01/2017 and 07/31/2018 respectively. See an example in fig. 7.4f below.
(fig. 7.4f)
STEP 3: Click on ‘VIEW’ as in fig. 7.4g to see the reports. This is an orange colour button at the top-right area of the page.
(fig. 7.4g)
➔ The software will display the reports that were scheduled for the date range selected. See an example in fig. 7.4h.
➔ You can make changes to previously specified date range. Whenever the date range is changed, you will have to click the ‘view’ button for the software to display the scheduled reports that fall within that date range.
➔ At the bottom-right end of the page, the software gives information about the number of pages of your result, with the page numbers written out. Click on any page number, to go to that particular page. Click on NEXT to go to the next page or click on PREVIOUS to go to the previous page.
➔ For each report on the AML RBS list, the Compliance planet will provide information on the report name, report start date and end date, whether institution asset data has been set or not, the number of the institution’s branches involved, the report execution date and time, the report execution start date and end date, the type of report, a comment on whether the processing of the report has been completed or not and the processing status (for reports that have not been processed). Each report has a button to view the download history of Excel files the software has exported report information into.
➔ Adjust the number of reports you want to see per page by clicking on the ENTRIES box as in fig. 7.4i.
(fig.7.4i)
➔ Click on a report’s ‘Inst. Asset’ as in fig. 7.4j to view and/or edit the institution asset data. The institution asset data includes the name, code, address and number of assets of an institution.
(fig. 7.4j)
● An ‘AML RBS Institution Asset Data’ console will be displayed as in fig. 7.4k below.
● Click on ‘EDIT’ to modify any of the information displayed. See fig. 7.4l.
NOTE: Only Persons assigned right(s) to ‘Edit RBS reports’ can EDIT Institution asset data
(fig. 7.4l)
● Fill the details and click on ‘Save changes’ to update the information as shown in fig. 7.4m below..
(fig. 7.4m)
● A confirmation console as in fig. 7.4n will be displayed. Click on ‘CONFIRM’ to proceed or ‘CANCEL’ to discontinue.
(fig. 7.4n)
➔ Click on a report’s ‘RBS Rpt’ to see the details of the branches included in the report.

(fig. 7.4o)
● This will display a ‘Kiosk AML RBS Report’ console as in fig. 7.4p below.

(fig. 7.4p)
● Steps (a – c) describes the features on this page.
a) Click on the ‘ENTRIES’ box as in fig.. 7.4q below to adjust the number of branches you want to see per page.
(fig. 7.4q)
b) Click on the ‘FILTER’ box to select a bank branch as in fig. 7.4r below.
(fig. 7.4r)
c) After selecting the bank branch of your choice, click on VIEW as in fig. 7.4s.
(fig. 7.4s)
d) Click details to view details of a particular branch.

e) Click dismiss console to close the console.

➔ Click on ‘VIEW’ under the ‘Excel’ column of a report as shown in fig. 7.4t to see its excel file download history.
(fig. 7.4t)
● An AML RBS excel file repository console as in fig. 7.4u will be displayed. This page gives information about the users that have downloaded the excel file
(fig. 7.4u)
➔ Click on the file name to download the file.
NOTE: Only Persons assigned right(s) to ‘Download RBS reports’ can carry out this operation.
● Click on the ‘ENTRIES’ box as in fig. 7.4v to adjust the number of Excel files you want to see per page.
(fig. 7.4v)
- Click on ‘file download history’ as shown in fig 7.5u above to see the record of those that downloaded the file. See an example of the download history console below

➔ Back on the AML RBS Repository list page, at the end of each report row, the software shows if the processing of the report is enabled or dis-enabled under the ‘ACTIVE’ column.
➔ For reports that have been completed, their status will read, ENABLED. See fig. 7.4w for an instance.
(fig. 7.4w)
➔ For reports that have not been completed, there will be an extra button next to their ACTIVE status. This button is used to ACTIVATE or DEACTIVATE the processing of the report. Also see fig. 7.4w above. The button turns red when the report is enabled and it can be used to DEACTIVATE the report. It is green when the report is dis-enabled and it can be used to ACTIVATE the report for processing.
Activating a report;
● Click on Activate to enable the processing of report. This turns the status bar of the report to green with an ‘ENABLED’ inscription. See fig. 7.4x and fig. 7.4y for an example.
(fig. 7.4x)
(fig. 7.4y)
● A notification will be displayed at the top of the page when activation is successful. See fig. 7.4z for an example.
(fig. 7.4z)
Deactivating a report;
● Click on Deactivate to disable the processing of the report. This turns the status bar to red with a ‘DIS-ENABLED’ inscription. See fig.7.4z and fig. 7.4aa to see the result of deactivating a report also.
(fig. 7.4aa)
(fig. 7.4ab)
● A notification will be displayed at the top of the page when deactivation is successful. See fig. 7.4ac for an example.
(fig. 7.4ac)
NOTE: Only person(s) profiled and assigned right(s) to ‘Edit RBS Report’ will be able to activate or de-activate a report
How to Upload AML/CFT Risk Based Supervision Report In Compliance Planet Anti Money Laundering/Core Banking Finance Software
This menu was created because the AML CFT RBS report schema covers lot of data from various sectors of the institution. In case some of these sectors do not have their monthly report data automated; this menu is used to upload such data once it is made available. This involves selecting a file filled with manually prepared sector data, and uploading it to include it’s data in a particular AML RBS report.
NB: Whenever there is a manual data to be uploaded for a particular scheduled report, all manual data upload for all sectors must be completed before the report schedule is activated to be processed.
The process to upload an AML RBS report data is described below.
NOTE: Only person(s) with right(s) to process RBS Reports will be able to carry out this operation
STEP 1: From the left hand side menu, click on CBN AML/CFT RBS Data Upload as in fig.7.5a below.
(fig. 7.5a)
➔ A console as in fig. 7.5b will be displayed.
(fig. 7.5b)
STEP 2: Click on ‘SELECT AML RBS EXCEL FILE’ as in fig. 7.5c to choose a file from your computer. This file should contain the details to be uploaded and it should be according to the compliance planet’s file specification for uploading AML RBS report data.
➔ If you are unsure of the file file specification. Click on the ‘AML RBS Data File Spec.’ to download an excel file (with pre-filled header columns according to the specification for files to be uploaded) where you can input the required data. in fig. 7.5d.
(fig. 7.5d)
➔ Open the download file and fill it with the required details. Ensure you save the changes to the file. Renaming the file is optional but this will aid the identification of the file on your computer.
➔Back on the console, click on ‘Select AML RBS Excel File’ to choose the file from your computer.
➔ When the file is successfully added, the file name is displayed on the console. See this in fig. 7.5e below
(fig. 7.5e)
STEP 3: Select the AML RBS report which the uploaded data is to be attached to from the ‘SCHEDULE REPOSITORY’ box. See fig. 7.5f for an example.
(fig. 7.5f)
STEP 4: Select the Data Sector from the ‘DATA SECTOR’ box. Data sector refers to the different sections from where data is needed as represented in the AML/CFT RBS report schema. See fig. 7.5g for an example.
(fig. 7.5g)
STEP 5: Click on the green ‘UPLOAD DATA’ button at the bottom right corner of the console to upload details in the selected excel file to the compliance planet software. See fig. 7.5h below.
(fig. 7.5h)
STEP 3: Click on ‘CONFIRM’ as in fig. 7.5i to proceed with the upload or ‘CANCEL’ to discontinue and return to the upload console.
(fig. 7.5i)
➔ This will display a notification showing ongoing process at the top of the page. See an example in fig. 7.5j
(fig. 7.5j)
➔ You can terminate unfinished processes by clicking CANCEL or close the upload console by clicking on ‘DISMISS CONSOLE’.
➔ You can view ongoing processes by opening signal console (this is described below).
● Click on the ‘CONSOLE OPS’ button at the top of the page. See fig. 7.5k.
(fig. 7.5k)
● Click on ‘DISPLAY CONSOLE’ from the drop-down list displayed. See fig. 7.5l.
(fig. 7.5l)
● The signal console shows on going processes . See an example in fig. 7.5m below.
(fig. 7.5m)
➔ You can terminate unfinished processes by clicking CANCEL OPS.. Click on ‘Dismiss Console’ to close the signal console.
➔ When upload is complete, an ‘AML RBS Report Data Upload’ report will be downloaded on your computer. It provides information on the number of uploaded records, processed records, saved records, duplicate records and exempted records. It will also give information on unsuccessful data upload, and reason(s) the upload was not successful (this will give you hints on correction(s) to be made in the file before uploading the data again).
AML / CFT Risk Based Supervision Report In Compliance Planet Anti Money Laundering/Core Banking Finance Software
The AML/CFT RBS report is required by the CBN so as to determine the high risk sector of the financial institutions. It is a monthly report.
The operations pertaining to AML/CFT Risk Based Supervision Report on the Compliance Planet are;
● Generating AML/CFT RBS report
● AML/CFT RBS Repository listing
● AML/CFT RBS Report Data Upload
● AML/CFT RBS Process Panel
➔ To carry out any of the operations listed above, click on reports on the compliance planet dashboard as shown in fig. 7.2b.
NOTE: Only Persons Profiled and assigned right(s) pertaining to AML/CFT risk based supervision report will be able to carry this operations.
AML/CFT RBS Process Panel In Compliance Planet Anti Money Laundering/Core Banking Finance Software
The AML/CFT RBS Artificial Intelligence Service does a pre-processing of the data needed for the AML/CFT RBS report. The AML/CFT RBS process panel shows the latest date for which the AML/CFT RBS Artificial Intelligence Service has processed the data that is needed for the instant preparation of the RBS report as at when needed.
NOTE: Only person(s) assigned right(s) to process RBS Reports can carry out this operation
To view the process panel;
➔ From the left hand side menu, click on CBN AML/CFT RBS PROCESS PANEL as in fig. 7.6a below.
➔ This will display a page as in fig. 7.6b.
(fig. 7.6b)
➔ All data must be up to date with all status indicators showing green before any scheduled RBS report will be processed for the current time frame reading on the dashboard. If a Risk Based Supervision report is scheduled and ALL data pools are not up to date, then the schedule will wait for all data to be processed before being executed.
➔ The last processed date for each data pool, at most, should be two days behind the current day and time. If the last processed date is earlier than this, that is, more than two days behind the current day and time, there is a red flag indication that the attention of the company’s support team is needed.
How to generate an AML / CFT Risk Based Supervision Report In Compliance Planet Anti Money Laundering/Core Banking Finance Software
The compliance planet software allows you to schedule AML/CFT RBS report ahead of time. You can manually schedule and download AML RBS reports. Here is how to do this.
NOTE: Only persons profiled and assigned right(s) to process and view AML/CFT Risk Based Supervision report, will be ale to carry out this operation.
STEP 1: From the hand side menu click on ‘CBN AML/CFT RBS report’ as in fig. 7.3a below.
(fig. 7.3a)
➔ This will display an “AML RBS scheduler” as in fig. 7.3b below .
STEP 2: Fill in your desired title in the REPORT NAME text-box. See fig. 7.3c for an example.
STEP 3: Click on the REPORT START DATE and END DATE buttons to choose the date range of the report you want to generate. The software will display a calendar console as in fig 7.3d and Fig 7.3e below for you to set the report start date and end date respectively.
➔ Take a look at the arrows labelled a to d in fig. 7.3f for a description of how the calendar works.
a. Click on the given year to change it to your year of choice.
b. Click on the given month to change it to your month of choice.
c. Then, click on the day of the month.
d. You can also click on the angle brackets on the calendar [ ‘’ ] to go backward or forward.
STEP 4: Click on the EXECUTION DATE button to specify the date you want the report to be processed as shown in fig. 7.3g below.
STEP 5: Set the report EXECUTION TIME by filling in the ‘hour’ and the ‘minute’ you want the report to be processed. Click on the arrows to select a number or input the number in the box as in fig. 7.3h
➔ There’s a button next to the hour and minute boxes used for switching between AM and PM. Click on it to specify PM or AM. See an example in fig. 7.3i below.
STEP 6: Click on ‘SCHEDULE AML RBS REPORT’ as in fig. 7.3j below to create your report or ‘CANCEL’ to close the console. These buttons are at the bottom-right corner of the console.
➔ By clicking on ‘CANCEL’, you can continue from where you stopped on the AML RBS scheduler when you click on ‘GENERATE REPORT’ as in step 1.
➔ By clicking on ‘SCHEDULE AML RBS REPORT’, a confirmation console will be displayed as in fig. 7.3k. Click on ‘CONFIRM’ to schedule the report or ‘CANCEL’ to go back to the scheduler.
➔ When report has been successfully scheduled for processing, a temporary notification will be displayed at the top of the page. See fig. 7.3l for an example.


