This section provides a brief visualization of the PEP report account in the Compliance Planet Anti-Money Laundering/Core Banking Finance Software, along with step-by-step instructions and pictures.
From the app dashboard, click on “REGULATORY REPORTS” as shown in the figure below.
Fig
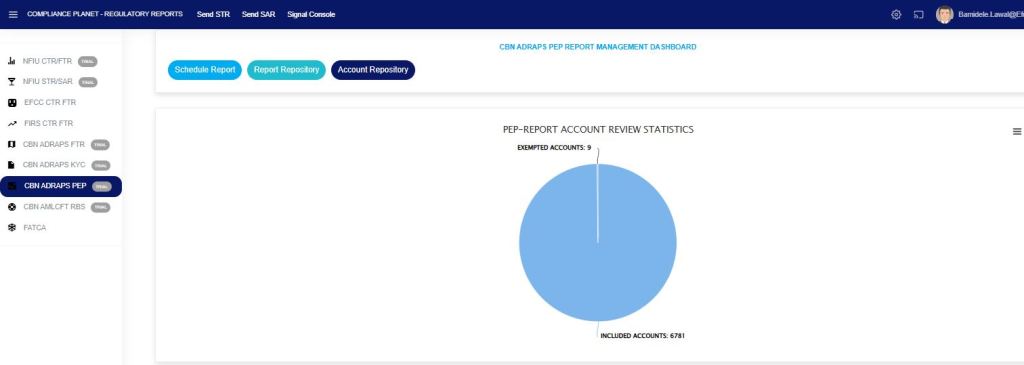
Click on “CBN ADRAPS PEP” on the drop-down list, and this displays the ADRAPS PEP page as shown in the Fig. below.
Fig
This displays the number of PEP account(s) that have been exempted from the report and those that have been included in the report.
This section provides a guide on how to use the Transaction Monitoring Case Explorer feature in the Compliance Planet Anti-Money Laundering/Core Banking Finance Software, complete with step-by-step instructions and illustrations.
STEP 1: From the app dashboard, click “DIGITAL FINANCIAL CRIMES SURVEILLANCE” as in Fig. a below.
Fig a
STEP 2: From the left-hand side menu, click “TM Case Explorer” as in Fig. b below.
FIG b
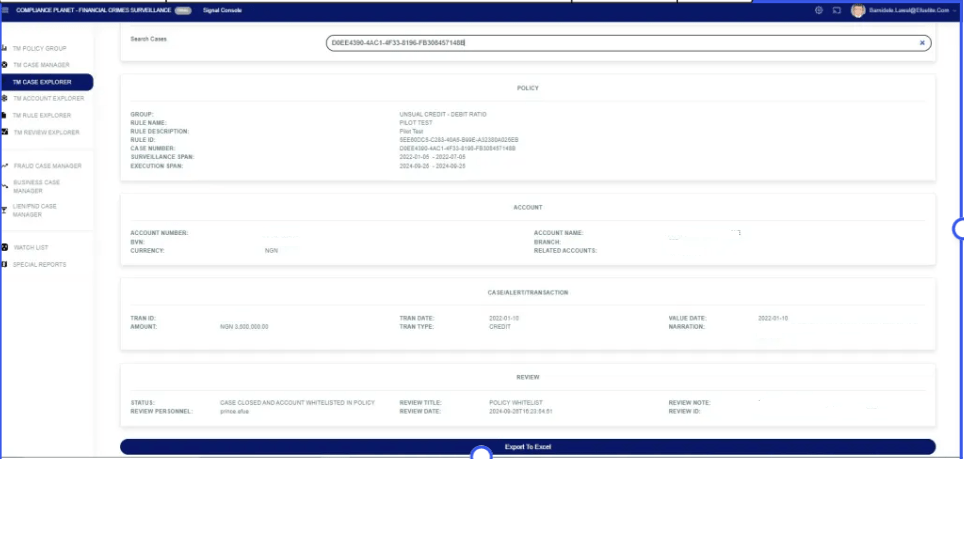
STEP 3: Input the case number to see the details of the account that has bridged the rule, as in Fig. C below. This can be exported to Excel for further review by clicking the “Export to Excel” button.
FIG c
This image displays all the data for the case under review, including Policy Group, Rule Name, Rule Description, Rule ID, Case Number, Surveillance Span (the period of monitoring), and Execution Span (the last time monitoring was executed). Also, it displays the customer’s data and the review action.
This section provides a guide on how to use TM Account Explorer on the Compliance Planet Anti-Money Laundering/Core Banking Finance Software, including step-by-step instructions and illustrations.
STEP 1: From the app dashboard, click “DIGITAL FINANCIAL CRIMES SURVEILLANCE” as in Fig. a below.
Fig a
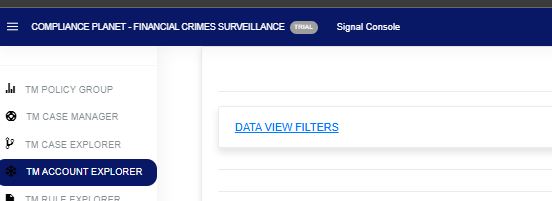
STEP 2: From the left-hand side menu, click “TM Account Explorer” as in Fig. b below.
FIG b
STEP 3: Click on the “Data View Filter” as in Fig. C below to open the sub-menu: Entries, Search, View (Export to Excel), Start Date, and End Date.
FIG c
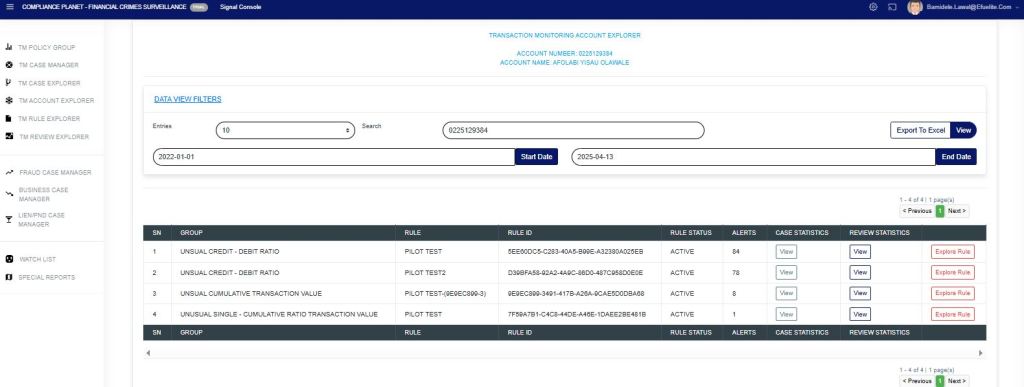
STEP 4: In the search bar, input the account number, Start Date, and End Date, then click View as in Fig. D below. This will display in detail every policy group and policy rule that the account has bridged.
FIG d
The “Alert” column displays the number of alerts captured within the specified date range for that account. This also displays other rule(s) the account has bridged within that same date range.
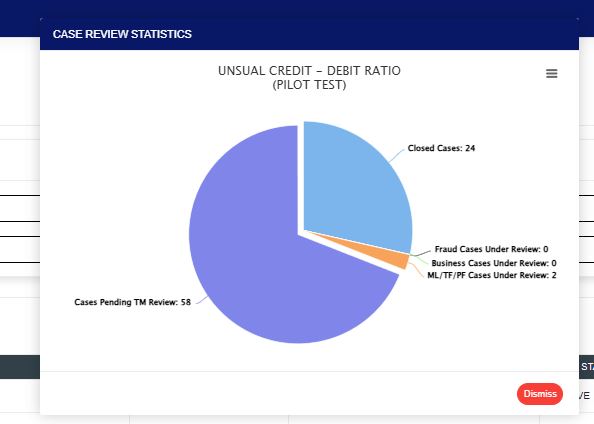
Click the View option under the case statistics column to show a visualization of the “case statistics“. All the cases pending TM review (shows the number of cases that are pending), closed cases (shows the number of cases that have been closed), fraud cases under review (shows the number of cases for fraud review), business cases under review (shows the number of cases for business review), and ML/TF/PF cases under review (shows the number of cases for STR review) within the date range specified as in Fig e below.
Fig e
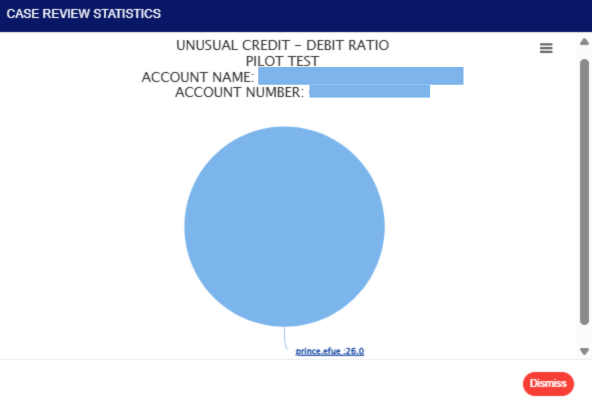
Click the view option under the review statistics column to show a visualization of the “review statistics“. This will display the policy name, the customer account name selected by the rule, and the account number. This also indicates the reviewer(s) and the number of times the rule has been reviewed out of the total number of alerts generated by the rule. Either the name of the reviewer (s) or the name of the policy with the number of reviewed actions, as in Fig. f below.
Fig f
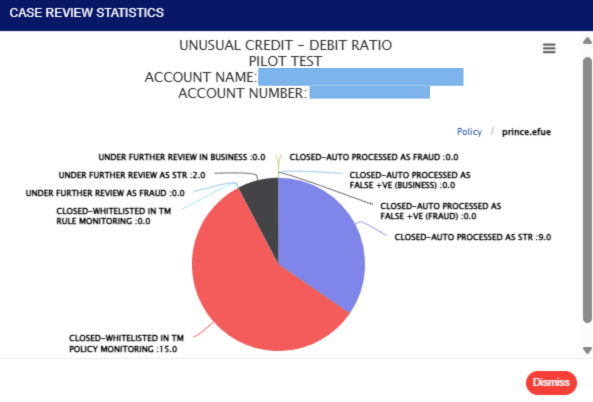
Clicking on the visualization chart will display detailed information on the review case, including figures as shown in Fig. g below, which illustrates how the reviewing personnel handled the review case. This includes cases manually closed by the reviewer, those auto-processed by the system and pushed to Fraud, those whitelisted, and those under review at different desks.
This provides a deeper insight into how cases were reviewed for a particular customer and the alerts generated by the rule within the specified date range.
When cases are pushed to STR for review and they are not closed, the alert will be pending on ML/TF/PF cases under review on the “case review statistics”.
Fig g
This displays the reviewer’s name. Also, every action taken on the account under review.
Click on “Explore Rule” to display the TRANSACTION MONITORING RULE EXPLORER Page.
Click on “Explore Rule” to display the TRANSACTION MONITORING RULE EXPLORER as seen below.
This section provides a guide on how to carry out TM Rule Explorer in the Compliance Planet Anti Money Laundering/Core Banking Finance Software, with step-by-step instructions and pictures.
STEP 1: From the app dashboard, click “DIGITAL FINANCIAL CRIMES SURVEILLANCE” as in Fig a below.
FIG a
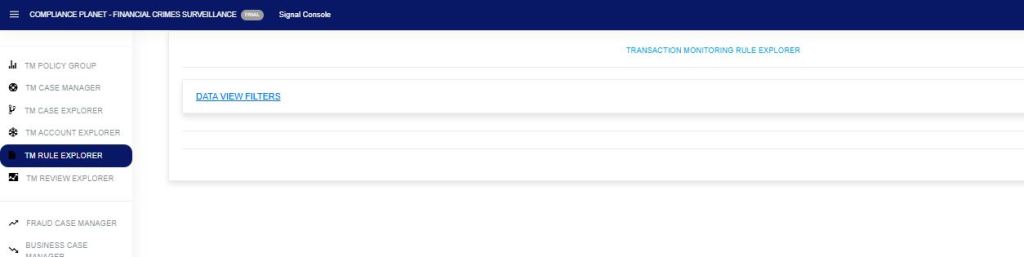
STEP 2: From the left-hand side menu, click “TM Rule Explorer” as in Fig. b below.
FIG b
STEP 3: Click on the “Data View Filter” as in Fig. c below to open the sub-menu: Entries, Search, View (Export to Excel), Start Date, and End Date.
FIG c
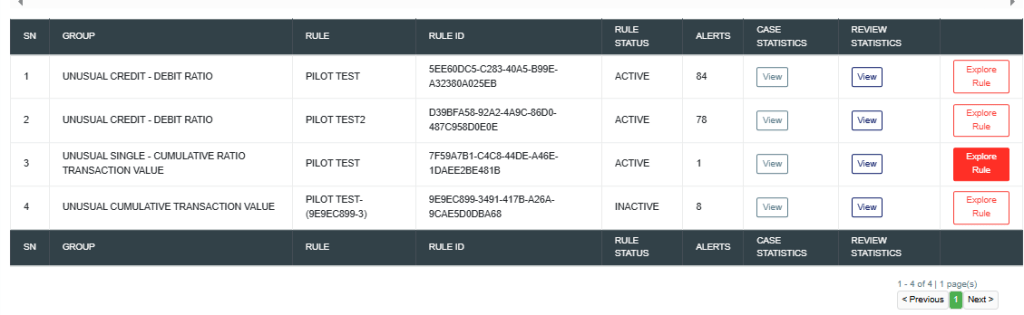
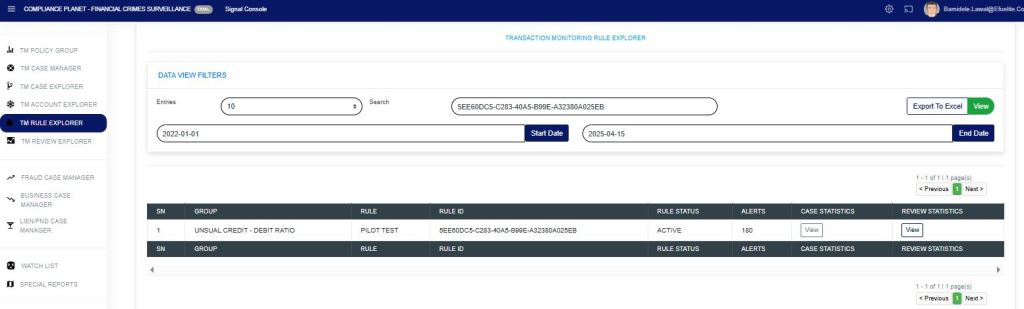
STEP 4: In the search bar, enter either the Rule ID, Rule Name, or Rule Description. Enter the Start Date and End Date, then click View as in Fig. d below. This will display the details of the rule.
FIG d
The “Alert” column shows the number of alerts picked within the specified date range for that rule.
Click the “view” option under the case statistics column to show a visualization of the “case statistics“. All the cases pending TM review (shows the number of cases that are pending), closed cases (shows the number of cases that have been closed), fraud cases under review (shows the number of cases for fraud review), business cases under review (shows the number of cases for business review), and ML/TF/PF cases under review (shows the number of cases for STR review) within the date range specified as in Fig e below.
FIG e
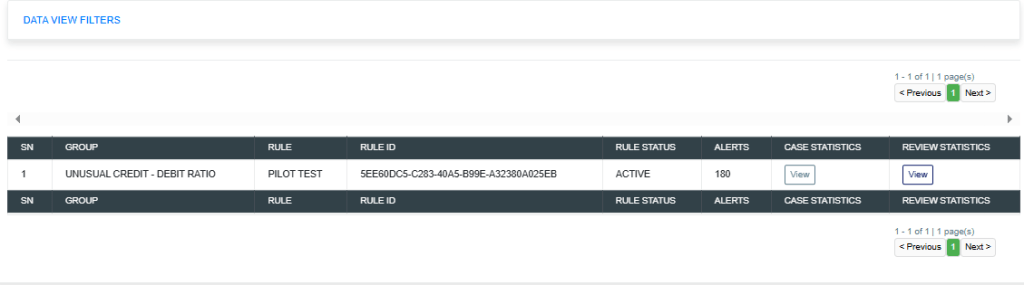
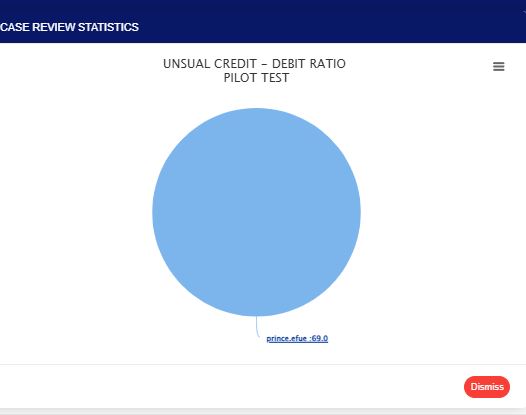
Click the “view” option under the review statistics column to show a visualization of the “review statistics“. This will display the policy rule name and personnel who have reviewed cases from the rule, as shown in Fig. f below.
FIG f
Clicking on the visualization chart will display detailed information on the rule within the specified period that has been reviewed, along with the person(s) who reviewed the case(s). This also gives a deeper insight into how the reviewing personnel handled the review case. The ones manually closed by the reviewer, those auto-processed by the system and pushed to Fraud and STR, those whitelisted, and those under different review desks, as shown in Fig. g below.
This section provides a guide on how to create Watch-List operations on the Compliance Planet Anti Money Laundering/Core Banking Finance Software, with step-by-step instructions and pictures.
STEP 1: From the app dashboard, click “DIGITAL FINANCIAL CRIMES SURVEILLANCE” as in Fig 1a below.
FIG 1a
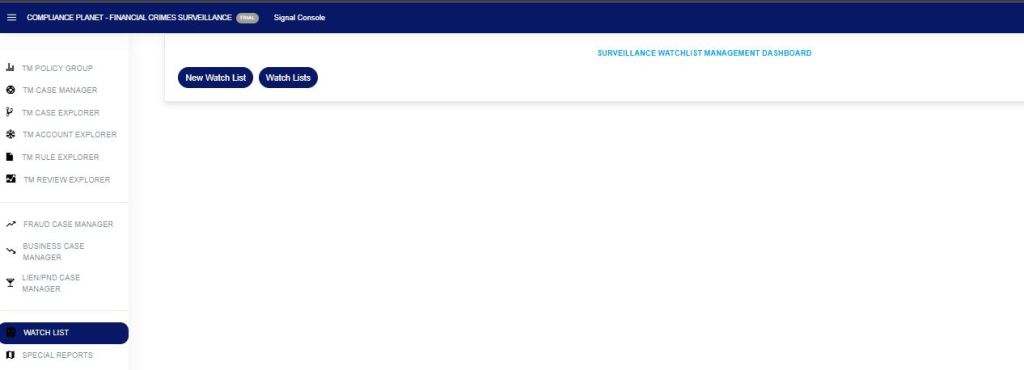
STEP 2: From the left-hand side menu, click “Watch List” as in Fig 1b below to display “New Watch List” and ” Watch Lists”.
FIG 1b
STEP 3: Click on the “New Watch List” as in Fig 1c below to create a watch list.
FIG 1c
The watch-list is to monitor account(s) that have bridged a particular TM rule.
Name: This is to give a specific name to the watchlist created.
Description: a unique description for the created watchlist.
Currency: the created watchlist is currency-specific, e.g., “NGN, USD, GBP“.
Activate: toggle the activation button on to enable the watchlist. The watchlist is not active if this button is not toggled on.
Save: to save the watchlist you created.
NB: The currency must be specified differently for each. If the watchlist is for NGN or USD, the account(s) to be monitored must be NGN or USD only, not mixed, to avoid errors.
This section provides a guide to carrying out Watch-List operations in the Compliance Planet Anti Money Laundering/Core Banking Finance Software, with step-by-step instructions and pictures.
STEP 1: From the app dashboard, click “DIGITAL FINANCIAL CRIMES SURVEILLANCE” as in Fig 2a below.
FIG 2a
STEP 2: From the left-hand side menu, click “Watch List” as in Fig 2b below to display “New Watch List” and ” Watch Lists”.
FIG 2b
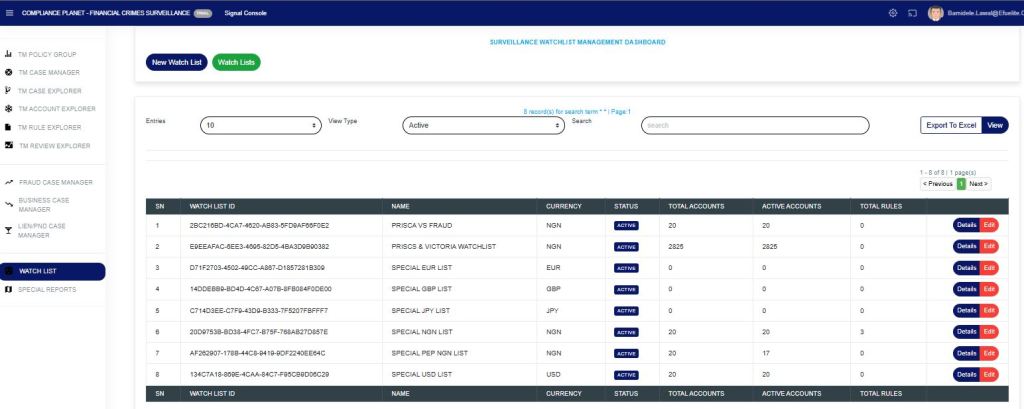
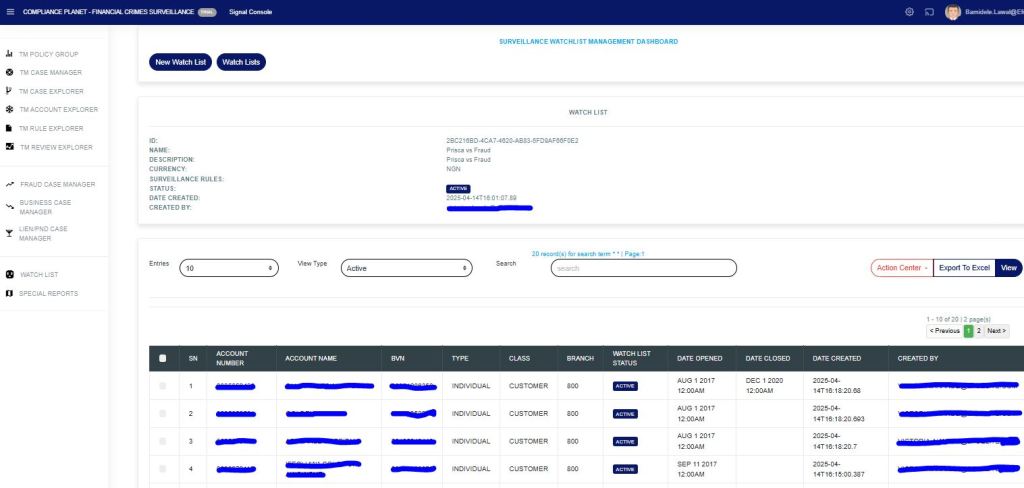
STEP 3: Click on the “Watch Lists” as in Fig 2c below, which displays entries (number of data per page), view type (active or inactive watchlist), search (to search for a specific watchlist), view (to display the searched watchlist), and export to Excel to view the watchlist in an Excel sheet.
FIG 2c
On the page, there is;
Watch List ID: this column displays each created watchlist with their unique IDs.
Name: the name of the watchlist created.
Currency: this column displays the currency type for the created watchlist.
Status: this shows the status of the watchlist whether active or inactive.
Total Accounts: this shows the total number of account(s) in each watchlist.
Active Accounts: this shows the total number of account(s) that are active in the watchlist created.
Total Rules: this shows the total number of TM policy rule(s) that the watchlist is existing.
STEP 4: Click on “Details” as in Fig 2d below, this displays detailed information of the selected watchlist. The ID, watchlist Name, Description, Currency, Surveillance rule(s) where is watchlist has been categorized, Status of the watchlist, Date the watchlist was created, and personnel that created it.
FIG 2c
The table in the watchlist displays the customer’s account number, name, BVN, type, branch, watchlist status, account opened date, account closed date (if the account is closed), and the email of the personnel that created the watchlist.
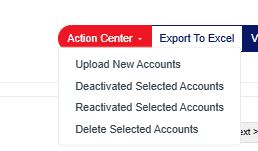
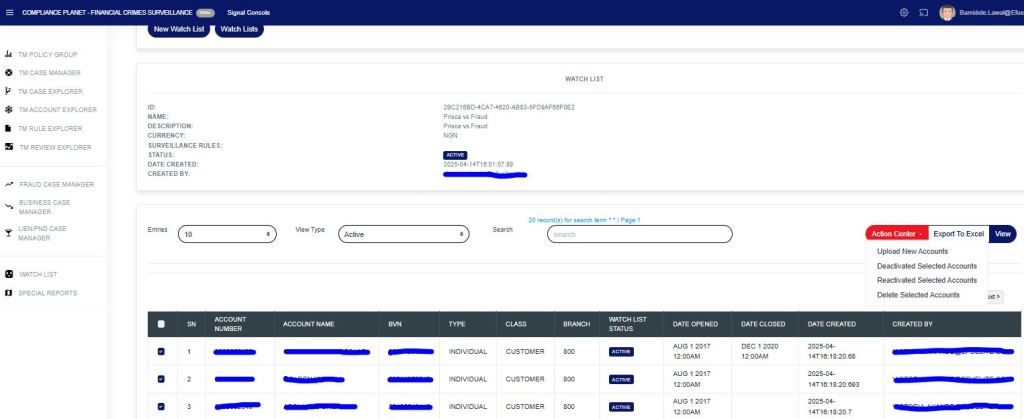
To do a bulk upload of new accounts, deactivate account(s), reactivate account(s), and delete account(s). This can be done using the “Action Center” option as in Fig 2d below.
FIG 2d
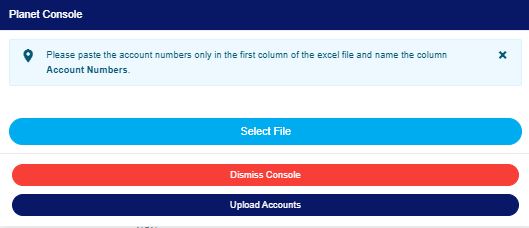
For bulk uploading of new account(s) operations, click “Upload New Accounts”, as shown in Fig. 2e below. This displays a drop-down to select a file (an already prepared Excel file with the first column of the Excel file containing the account number(s) of customers and a heading for the column “Account Numbers”). Then, click “Upload Accounts” to upload the selected Excel file. This will automatically bulk upload the accounts searching through the solution, bringing all the data related to the account number.
Additionally, an Excel file will be downloaded along with the bulk upload, allowing you to view the status of each account that has been uploaded.
FIG 2e
Account(s) can be deactivated, reactivated, or deleted from a watchlist by selecting them and clicking the option that needs to be carried out in the Action Center, as in Fig. 2f below.
FIG 2f
To make changes to a watchlist’s information, the “Edit” button can be selected as in Fig. 2g below.
This section provides a guide on how to carry out whitelisting operations from a rule, policy, or global monitoring on the Compliance Planet Anti Money Laundering/Core Banking Finance Software, with step-by-step instructions and pictures.
STEP 1: From the app dashboard, click “DIGITAL FINANCIAL CRIMES SURVEILLANCE” as in Fig. a below.
Fig a
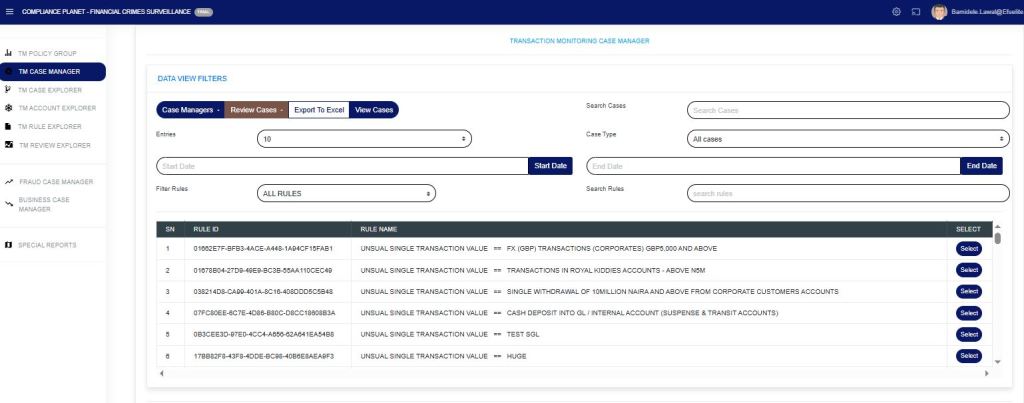
STEP 2: From the left-hand side menu, click “TM Case Manager” as in Fig b below to display the “Data View Filters”.
FIG b
STEP 3: Then click “Data View Filters” to show a menu window that displays all the menus: Case Managers, Review Cases, Export to Excel, View Cases, Search Cases, Entries, Case Type, Start Date & End Date, Filter Rules, and Search Rules as in Fig. C below.
FIG c
Input the Start Date and End Date, select “case type” and from the drop-down, select pending cases as in Fig. D below.
Fig d
The “Search case” can be used to search for a specific account or multiple accounts, separated by a pipe, as shown in Fig. e below.
Fig e
Then click “filter rules” to display a drop-down of “All Rules, Rules Deployed by Me, or Rules Assigned to Me“. The search rule bar can be used to search for a rule name by entering a phrase in the rule.
Click the “select button” to highlight as in Fig. f below.
Fig f
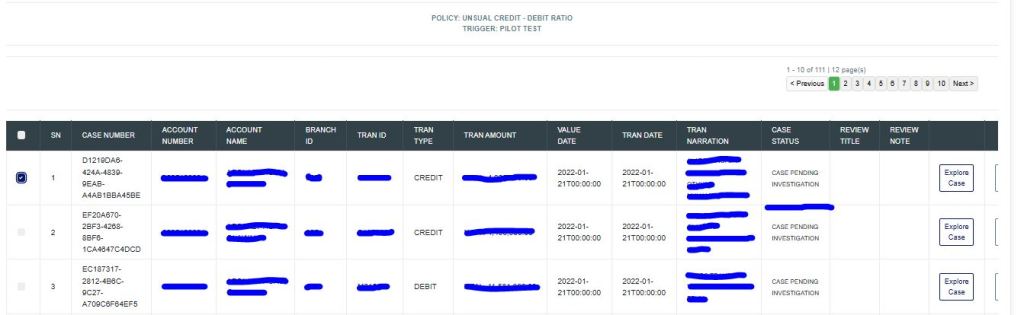
Click on the “View Cases” to display all the records. This will display the policy name and account(s) that have bridged the rule.
Select the account(s) to be whitelisted from the list of accounts if there is more than one, as in Fig. g below.
Fig g
Then, click “Review Cases” to open a drop-down menu and choose the type of whitelist to categorize the account(s), either by rule, policy, or global monitoring, as shown in Fig. h below.
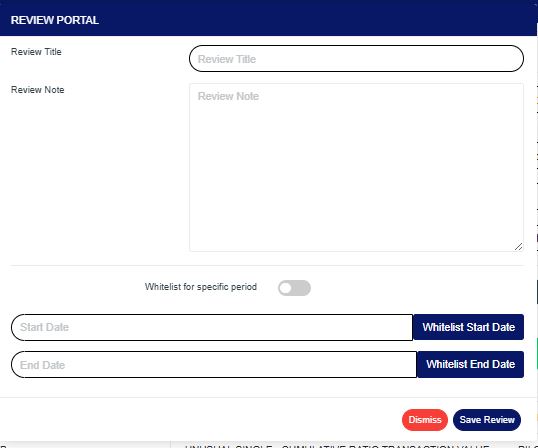
Click on the whitelist option, and it displays the image below. Providing the review title, review note, whitelist for a specific period (if it is for a period), and whitelist start and end dates. Then save the review for future reference.
Input the Review title, review note, toggle on the “whitelist for a specific period”, input Start Date and End Date, select “save review”
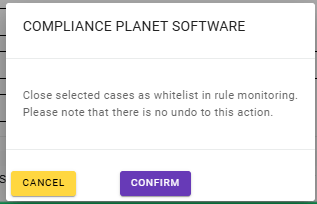
Then click “Confirm” to save all process.
For further enquiries: Tel: +234(0) 816 555 9818 Email: solutions@efuelite.com Web: http://solutions.efuelite.co
This section provides a brief visualization summary of all product tiers present in the institution, whether classified or not, in the Compliance Planet Anti-Money Laundering/Core Banking Finance Software, along with step-by-step instructions and pictures.
From the app dashboard, click “REGULATORY REPORTS,” as shown in the Figure below.
Fig
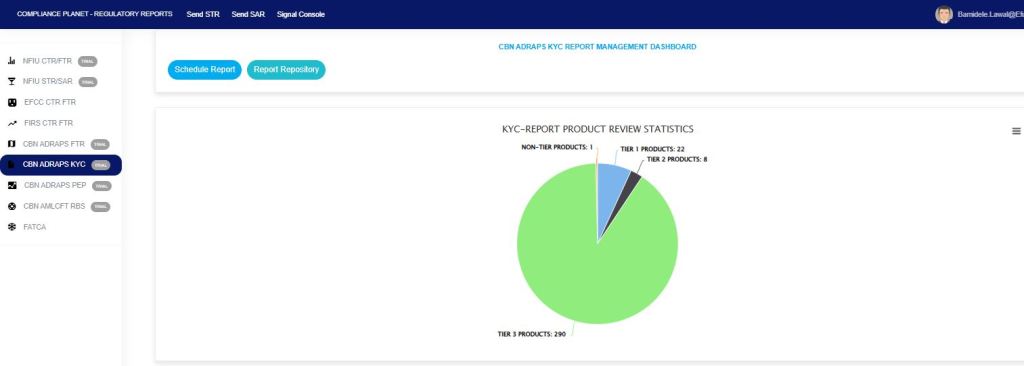
Click on “CBN ADRAPS KYC” on the drop-down list, and this displays the ADRAPS KYC page as shown in the Fig. below.
Fig
This displays all account product(s) classified as Tier 1, Tier 2, Tier 3, or Non-Tier. This Non-Tier product will not be captured for CBN ADRAPS KYC reporting, nor for CTR/FTR and STR reporting purposes.