NOTE: Only person(s) Profiled as Team Lead 1 or Team lead 2 can carry out these operations.
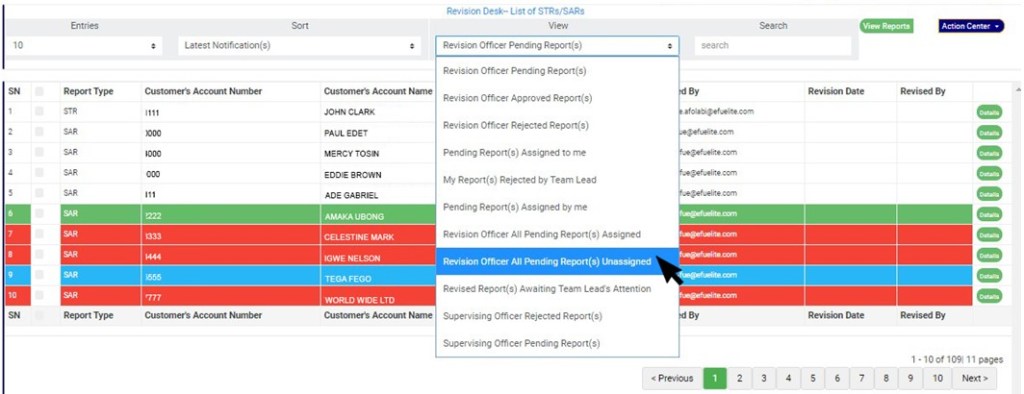
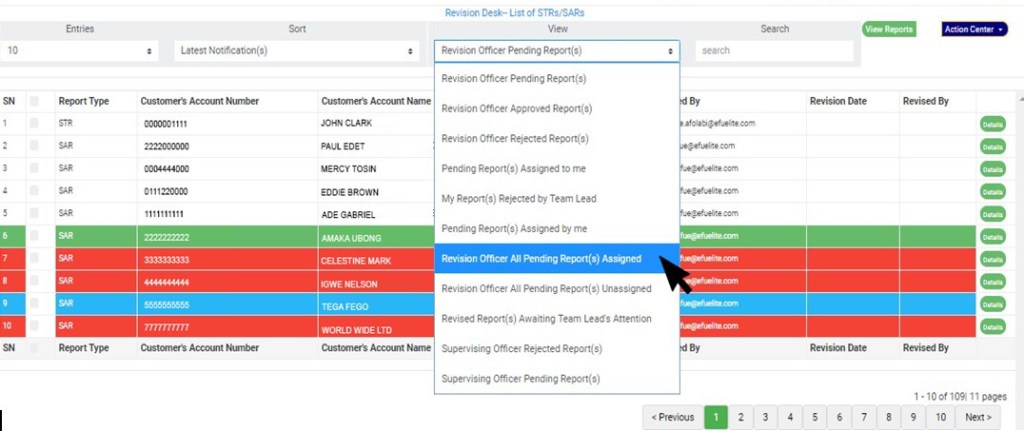
STEP 1: To assign Notification(s) to any member on the revision desk team, go to the VIEW box still on the revision desk page; select ‘Revision Officer All Pending Notifications Unassigned’, then click on the “view report” button.
(fig. 6.3x)
STEP 2: Click on the checkbox beside the report type to select the Notifications you want to assign. See an example in Fig 6.3y below
(fig. 6.3y)
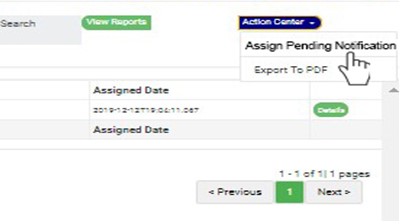
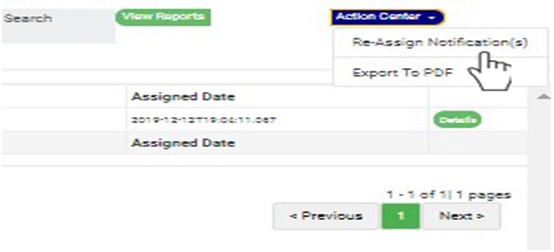
STEP 3: Click on the action center button as shown in in Fig 6.3z below
(fig. 6.3z)
STEP 4: Click on “Assign Pending Notification” from the action center dropdown. See an example in Fig 6.3aa below
(fig. 6.3aa)
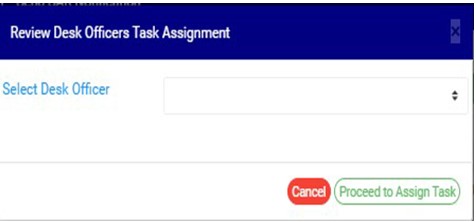
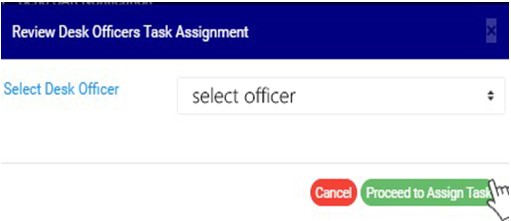
STEP 5: Clicking Assign Notification will display a “Review Desk Officers Task Assignment” dashboard as shown below in fig 6.3 ab below
(fig. 6.3ab)
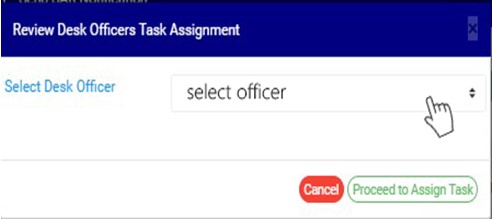
STEP 6: Select the officer you want to assign the Notification. This is shown in fig 6.3ac below
(fig. 6.3ac)
STEP 7: Click on “Proceed to Assign Task” to proceed or “cancel” to close the console and dismiss the operation.
(fig. 6.3ad)
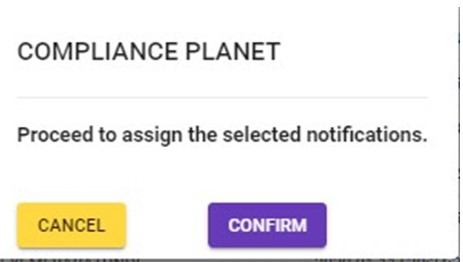
STEP 8: Clicking on “proceed to assign task” will display a console to confirm your selected action. See an example in Fig 6.3ae below. To proceed, click on CONFIRM and to dismiss the operation, click on CANCEL.
NOTE: Only person(s) profiled as Revision desk team lead 2 can carry out this operation.
STEP 1:To re-assign Notification(s) to any member on the revision desk team, Click the VIEW box still on the NFIU STR/SAR revision page; select ‘Revision Officer All Pending Notifications assigned’, then click on the “view report” button. See fig 6.3af for an example.
(fig. 6.3af)
STEP 2: Click on the checkbox beside the report type to select the notification you want to re-assign. See an example in Fig 6.3ag below
(fig. 6.3ag)
STEP 3: Click on the action center button as shown in in Fig 6.3ah below.
(fig. 6.3ah)
STEP 4: Click on “Re-Assign Notification” from the action center dropdown. See an example in Fig 6.3ai below
(fig. 6.3ai)
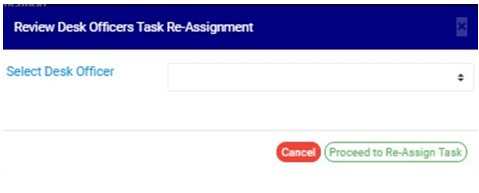
STEP 5: Clicking Re-Assign Notification will display a “Review Desk Officers Task Re-Assignment” dashboard as shown below in fig 6.3 aj below
(fig. 6.3aj)
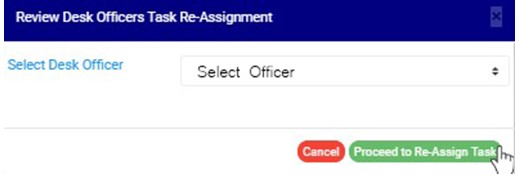
STEP 6: Select the officer you want to assign the Notification and click on proceed to assign task. This is shown in fig 6.3ak below
(fig. 6.3ak)
STEP 7: Click on “Proceed to Re-assign Task” to procced or ‘cancel” to close the console and dismiss the operation. See an example in Fig 6.3al below
(fig. 6.3al)
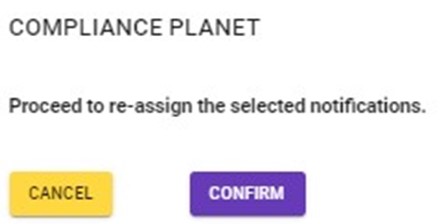
STEP 8: Clicking on “proceed to re-assign task” will display a console to confirm your selected action. See an example in Fig 6.3am below. To proceed, click on CONFIRM and to dismiss the operation, click on CANCEL.
NOTE: This action can only be done by person(s) profiled as either Team Lead 1 or Team Lead 2
STEP 1: Click on the checkbox beside the report type to select the Notifications you want to delete on the ‘Revision Officer pending Notification’ page. See an example in Fig 6.3an below
(fig. 6.3an)
You can also select all Notifications on the page by clicking on the checkbox at the top. See an example in fig 6.3ao below
(fig. 6.3ao)
STEP 2: Click on the “Delete Notification(s)” button on the action center dropdown as shown in Fig 6.3ap below
(fig. 6.3ap)
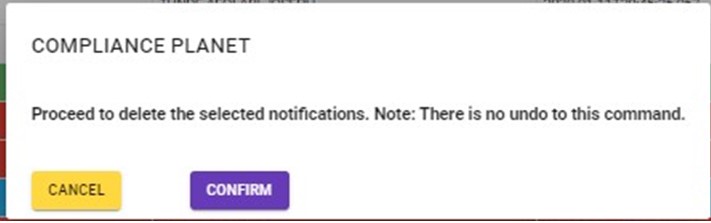
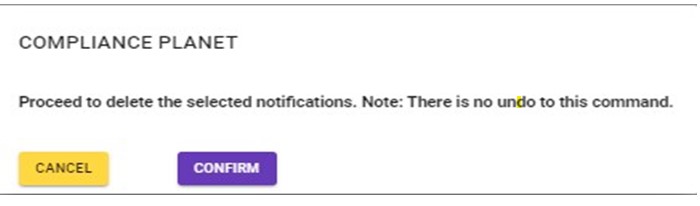
STEP 3: Clicking on “Delete Notification(s)” will display a console to confirm your selected action. See an example in Fig 6.3aq below. To proceed, click on CONFIRM and to dismiss the operation, click on CANCEL.
(fig. 6.3aq)
Click on ‘CONFIRM’ as in fig. 6.3aq above to delete the Notifications or cancel to discontinue action.
Under this control Panel feature, the compliance planet provides a list of financial institutions and their SWIFT codes. Operations include editing, deleting, downloading and adding new SWIFT codes, with options to carry out operations individually or in bulk.
NOTE: Only person(s) profiled as deputy supreme Admin and assigned right(s) to “view Swift Dom transactions” will be able to carry out this operation.
To perform any of the operations on SWIFT schemes;
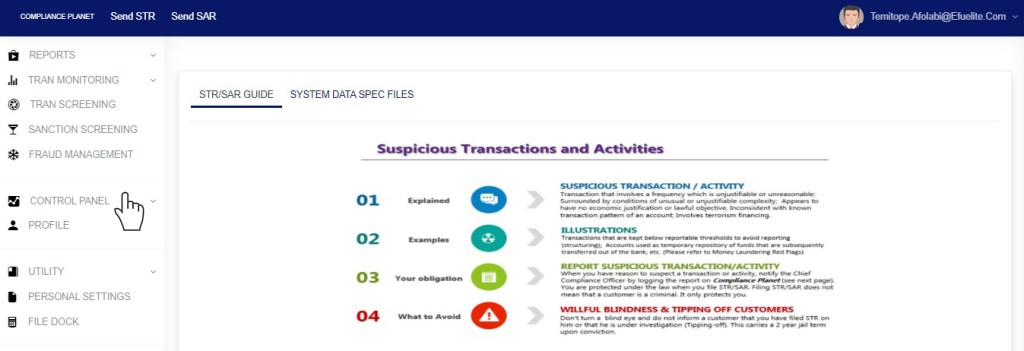
STEP 1: From the left hand side menu, Click ‘Control panel’ as in fig. 11.2a.
Fig 11.2a
This will display a drop down as in Fig 11.2b below.
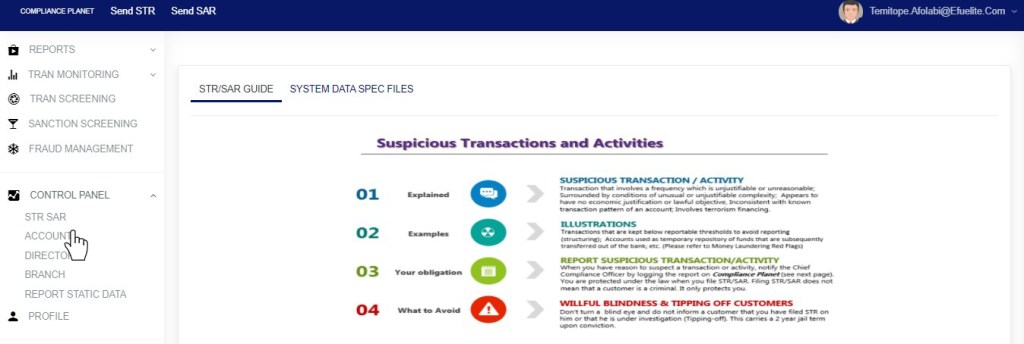
STEP 2: Click ‘ACCOUNT’ on the drop down list. See an example in Fig 11.2b below.
Fig 11.2b
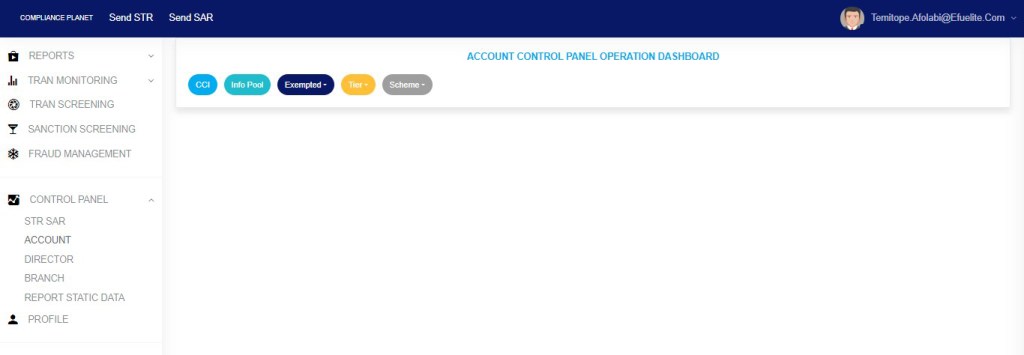
This will display the ACCOUNT CONTROL PANEL OPERATIONS dashboard as in Fig 11.2c below
Fig 11.2c
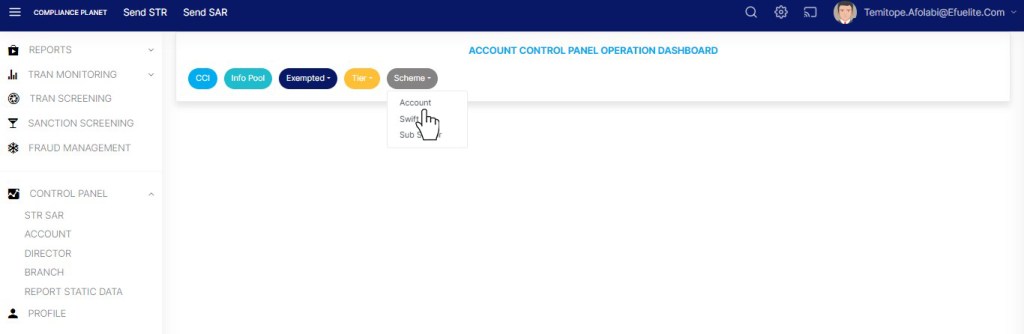
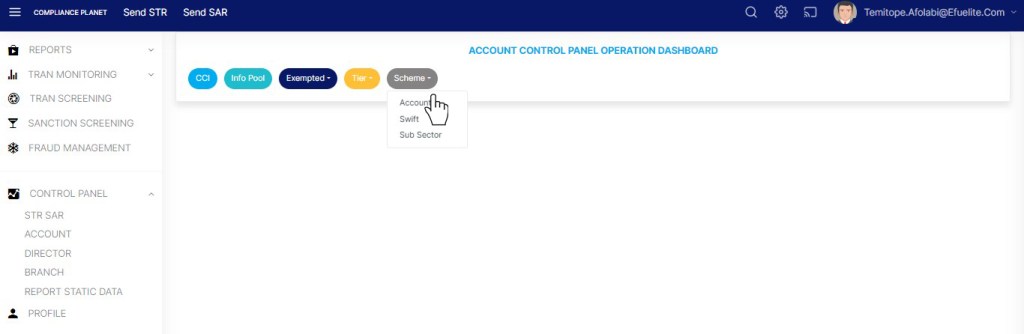
STEP 3: Click “SCHEME” from the top menu, on the account page. See an example in fig11.2d below
Fig 11.2d
This displays a dropdown as in fig 11.2e below
STEP 4: Click “Swift” on the drop down list as in fig 11.2e below
Fig 11.2e
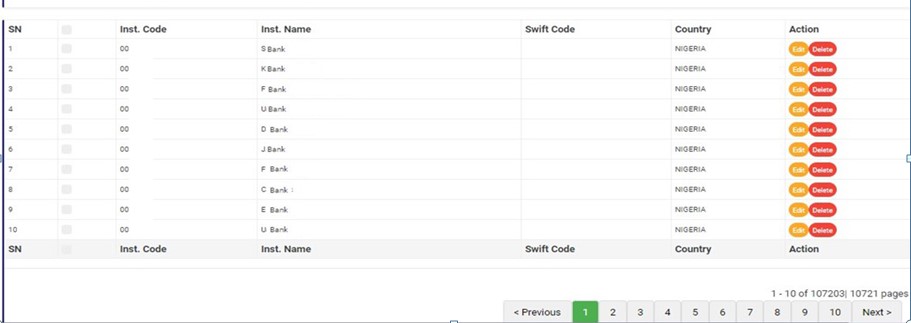
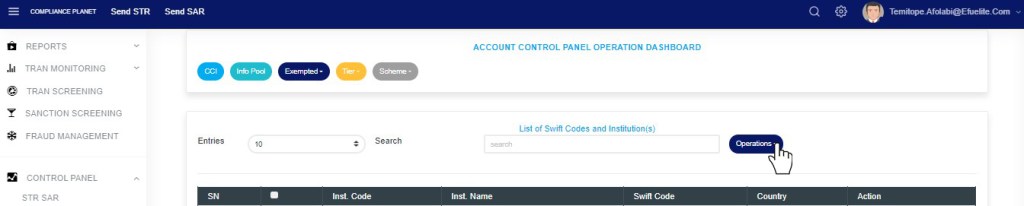
This displays a page showing a list of all financial institutions, their SWIFT codes and other details.See fig. 11.2f for an example.
(fig. 11.2f)
At the bottom-right corner of the page, the software gives information about the number of pages of the list, with the page numbers written out. The page numbers represent buttons to go to each page. By clicking on any page number, the software takes you to that particular page. Click on the ‘NEXT’ button to go to the next page or the ‘PREVIOUS’button to go to the page before the current page. See these features in fig. 11.2f above.
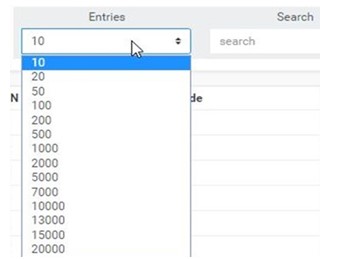
Click on the ‘ENTRIES’ box to adjust the number of financial institutions you see per page. See how to adjust the number of entries per page in fig. 11.2g.
(fig. 11.2g)
Search for SWIFT Schemes by inputting institution code, institution name, or SWIFT code in the search box as in fig. 11.2h below. Search results are immediately.
(fig. 11.2h)
Each institution has two action buttons; ‘Edit’ button and ‘Delete’ button. The different operations are explained below.
How to Edit a SWIFT scheme
NOTE: Only person(s) profiled as deputy supreme Admin and assigned right(s) to “view Swift Dom transactions” and “screen edit Swift Dom transactions’ will be able to carryout this operation.
To change details of an institution;
STEP 1: Click on its ‘Edit’ button as shown in the example in fig. 11.2i below.
(fig. 11.2i)
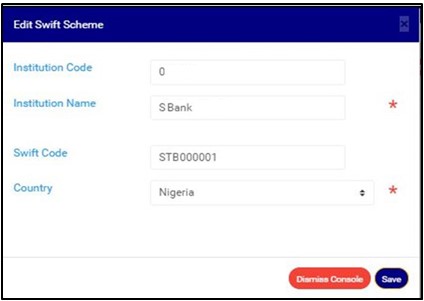
Clicking on ‘Edit’ will lead to the display of a Edit Swift console as in fig. 11.2j.
(fig. 11.2j)
STEP 2: Fill in the details you want to add or change.
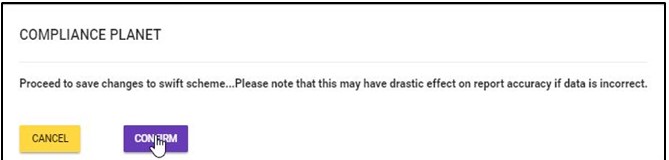
STEP 3: Click on ‘SAVE’ to update the details on the software. Clicking on ‘Save’ will display a confirmation console as in fig. 11.2kto confirm you want to change the details.
(fig. 11.2k)
Click on ‘CONFIRM’ to save the changes
How to Delete a SWIFT scheme
To delete a SWIFT scheme, click on ‘DELETE’ as in fig. 11.2l below.
(fig. 11.2l)
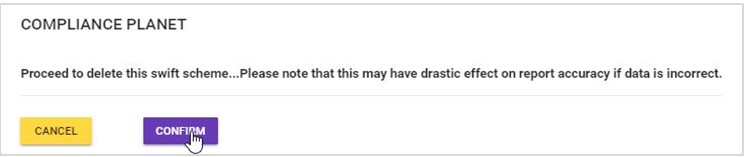
This displays a confirmation console to confirm your request to delete as in fig. 11.2m
(fig. 11.2m)
Click on ‘CONFIRM’ to proceed. A notification as shown in fig. 11.2n will be displayed at the top of the page when the action is done.
(fig. 11.2n)
Bulk Operations
The action buttons available under the bulk operations section of the page are;
Download SWIFT schemes
Delete selected schemes
New SWIFT scheme
Upload scheme
NOTE: Only person(s) profiled as deputy supreme Admin and assigned right(s) to “view Swift Dom transactions” and “Bulk edit Swift Dom transactions’ will be able to carry out this operation.
To select a scheme for treatment, mark the scheme by clicking on its checkbox as shown in the example in fig. 11.2n. One or more schemes can be selected for bulk treatment.
(fig. 11.2o)
To select or deselect all the schemes on a page, click on the checkbox of the table title bar. This checkbox is between SN and Inst. Code. See fig. 11.2p below.
(fig. 11.2p)
A) How to Download SWIFT Schemes
NOTE: Only person(s) profiled as deputy supreme Admin and assigned right(s) to “view Swift Dom transactions” and “Bulk edit Swift Dom transactions’ will be able to carry out this operation.
Click Operations button at the top-right side of the page as in fig 11.2q below
Fig 11.2q
This will display a dropdown as in fig 11.2r below
To download all the SWIFT schemes on the software, click on ‘DOWNLOAD SCHEMES’ on the drop down list as in fig 11.2r below. You do not need to mark all the schemes to download all.
(fig. 11.2r)
Clicking on ‘DOWNLOAD SCHEMES’ will display a confirmation console as in fig. 11.2s. Click on ‘CONFIRM’ to proceed with the download or ‘CANCEL’ to stop action.
(fig. 11.2s)
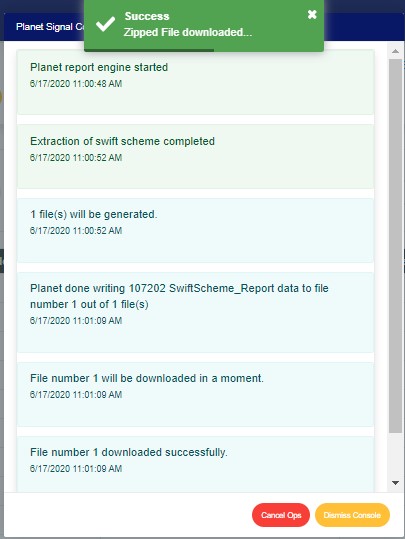
The signal console will show ongoing processes as shown in fig. 11.2t, and when download is complete, a notification will appear at the top of the page.
(fig. 11.2t)
B) How to Delete SWIFT Scheme
NOTE: Only person(s) profiled as deputy supreme Admin and assigned right(s) to “view Swift Dom transactions” will be able to carry out this operation.
After selecting the SWIFT schemes to be deleted; click on ‘DELETE SELECTED SCHEMES’ from the operations drop down list as in fig. 11.2u.
(fig. 11.2u)
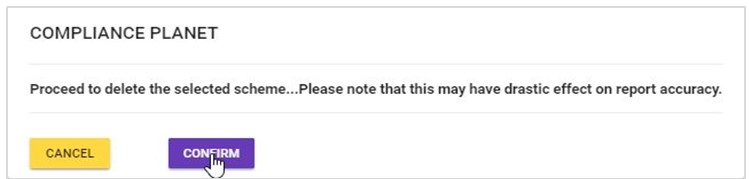
This will display a confirmation console to confirm your request as shown in fig. 11.2v below. Click “Confirm” to proceed with the delete or “Cancel” to close the console.
(fig. 11.2v)
C) How to Create a New SWIFT Scheme
NOTE: Only person(s) profiled as deputy supreme Admin and assigned right(s) to “view Swift Dom transactions” will be able to carry out this operation.
To add a new SWIFT scheme on the software, click on ‘NEW SCHEME’ on the operations drop down list as in fig. 11.2w
(fig. 11.2w)
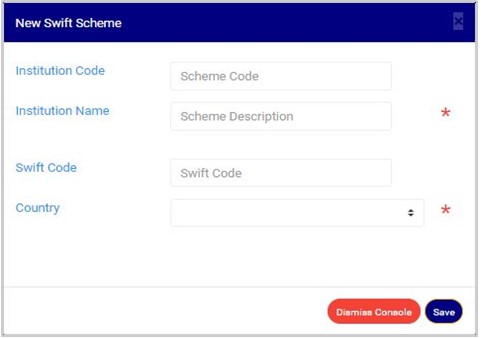
Clicking on the ‘NEW SWIFT SCHEME’ button will display a ‘NEW SWIFT SCHEME’ console as in fig. 11.2x, on which you are to input details of the scheme.
(fig. 11.2x)
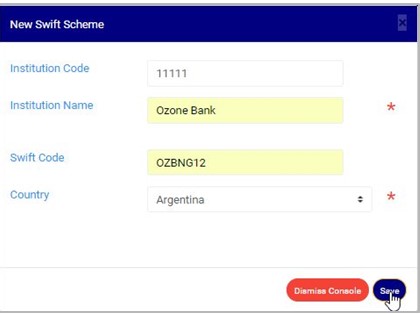
Fill in the details of the new scheme in their respective fields. After inputting the details, click on ‘SAVE’ as shown in fig. 11.2y for an example.
(fig. 11.2y)
Clicking on ‘SAVE’ will display a confirmation console to confirm your action. Click on ‘CONFIRM’ to proceed with the creation of a new SWIFT scheme or ‘CANCEL’ to discontinue.
(fig. 11.2z)
➔If you proceed with adding a new SWIFT scheme the new scheme would be added to the list of SWIFT schemes on the software.
D) Bulk Upload of New SWIFT Schemes.
To add more than one new SWIFT scheme on the software; you must have an excel file filled with the details of the new SWIFT schemes according to the software’s file specification for uploading new SWIFT schemes.
NOTE: Only person(s) profiled as deputy supreme Admin and assigned right(s) to “view Swift Dom transactions” and “Bulk edit Swift Dom transactions’ will be able to carry out this operation.
Here is how to make a bulk upload.
STEP 1: Click on ‘UPLOAD SCHEME’ as in fig. 11.2aa below.
(fig. 11.2aa)
This displays a ‘Planet Swift Scheme Upload’ console as in fig. 11.2ab.
To close the upload console, click on ‘DISMISS CONSOLE’. By doing this, you can still reopen the upload to continue from where you stopped when you click on ‘Upload scheme’.
(fig. 11.2ab)
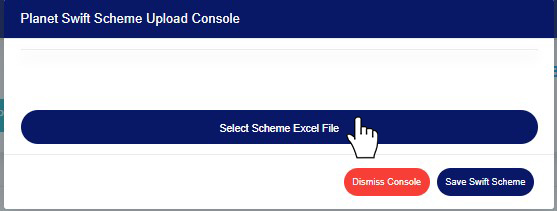
STEP 2: Click on ‘SELECT SCHEME EXCEL FILE’ as in fig. 11.2ac to choose the excel file filled with the new details to be uploaded on the software.
(fig. 11.2ac)
If you do not have the file specification for uploading new details, you can download from the “SYSTEM DATA SPEC FILES” on the software homepage.
I
(fig. 11.2ad)
This downloads an excel file with pre-filled headings according to the specification for uploading swift schemes. Open the file, fill in the required details of the new SWIFT schemes and save the changes to the file. Renaming the file on your computer is optional. Now you have a file to upload. Click on ‘Select Scheme Excel File’ to select the file.
After selecting a file from your computer, the name of the selected file will be added to the upload console. See fig. 11.2ae for an example.
(fig. 11.2ae)
STEP 3: Click on the ‘SAVE SWIFT SCHEME’ button as in fig. 11.2ae above to save the new SWIFT schemes on the software.
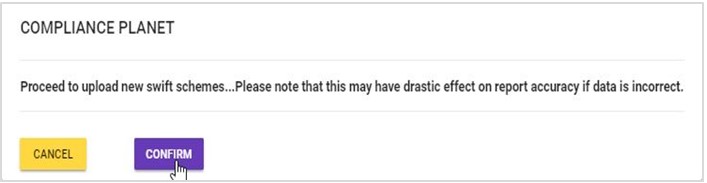
This will display a confirmation console. Click on ‘CONFIRM’ to proceed or ‘CANCEL’ to return to the upload console. See fig. 11.2af.
(fig. 11.2af)
A notification as in fig. 11.2ag will be displayed at the top of the page as the software is saving the new SWIFT schemes.
SWIFT scheme upload report will be downloaded to your computer. This report will give information about the number of schemes (records) uploaded, processed, saved and number of duplicate and exempted schemes.
Under this control panel feature, the compliance planet provides a list of account schemes a financial institution has. The operations include editing, deleting, downloading and adding new account schemes, with options to carry out operations individually or in bulk.
Note: Only person(s) profiled as deputy supreme admin can carry out account scheme operations.
To perform any of the operations on Account schemes;
STEP 1: From the left hand side menu, Click ‘Control panel’ as in fig. 12.2a.
Fig 12.2a
This will display a drop down as in Fig 12.2b below.
STEP 2: Click ‘ACCOUNT’ on the drop down list. See an example in Fig 12.2b below.
Fig 12.2b
This will display the ACCOUNT CONTROL PANEL OPERATIONS dashboard as in Fig 12.2c below
Fig 12.2c
STEP 3: Click “SCHEME” from the top menu, on the account page. See an example in fig12.2d below
Fig 12.2d
This displays a dropdown as in fig 12.2e below
STEP 4: Click “Account” on the drop down list as in fig 12.2e below
Fig 12.2e
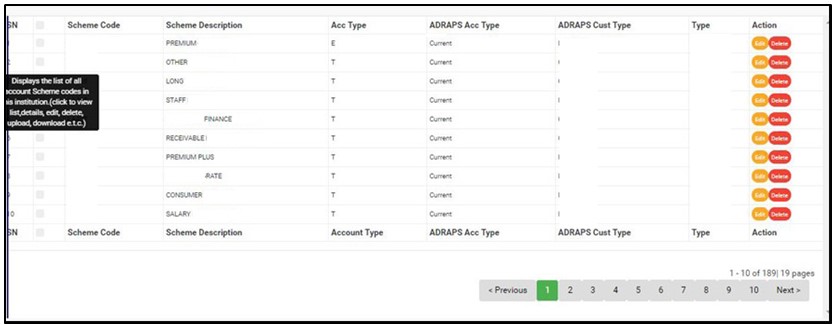
This will display a page showing a list of all the financial institution’s account schemes. An account schemes comprises of a scheme code, an account type, an ADRAPS account type, an ADRAPS customer type and type. See fig. 12.2f for an example.
Account type is an alphabetic representation of each account scheme in line with the provided schema description by NFIU.
ADRAPS account type: This is the specification of an account type in line with ADRAPS requirements. ADRAPS account typecan either be ‘Current’, ‘Savings’ or ‘Deposit’.
ADRAPS customer type: This refers to the various types of customer account types in accordance to CBN ADRAPS template/schema description file. The customer types are; Individual, Estate, Joint account, Corporate, Government, Association, N.G.O., Embassy, International agency, Government and ‘Others’.
Type: This represents the financial institution’s classification of the account sub-package.
(fig. 12.2f)
As seen in fig. 12.2f above, at the bottom-right corner of the page, the software gives information about the number of pages of the list, with the page numbers written out. The page numbers represent buttons to go to each page. By clicking on any page number, the software takes you to that particular page. Click on the ‘NEXT’ button to go to the next page or the ‘PREVIOUS’button to go to the page before the current page.
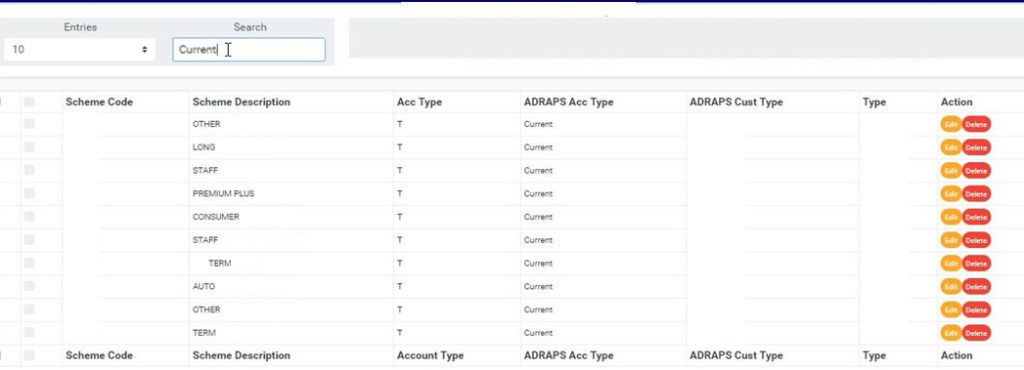
Click on the ‘ENTRIES’ box to adjust the number of account schemes you see per page. See how to adjust the number of entries per page in fig. 12.2g.
(Fig. 12.2g)
Search for Account Schemes by inputting the account scheme code, scheme description, account type, ADRAPS account type or ADRAPS customer type in the search box as in fig. 12.2h below. Search results will appear immediately a character is typed in the search box.
(fig. 12.2h)
Each Account scheme has two (2) action buttons; ‘Edit’ button and ‘Delete’ button. The different operations are explained below.
How to Edit an Account Scheme
To change details of an account scheme;
STEP 1 Click on its ‘Edit’ button as shown in the example in fig. 12.2i below.
(fig. 12.2i)
Clicking on ‘Edit’ will display a console titled, ‘Edit Account Scheme’, as in fig. 12.2j.
(fig. 12.2j)
STEP 2: Fill in the details you want to add or change.
STEP 3: Click on ‘SAVE CHANGES’ as shown in fig. 12.2j above, to update the account scheme details on software. Clicking on ‘Save Changes’ will display a confirmation console as in fig. 12.2k to confirm you want to change the details.
(fig. 12.2k)
Click on ‘CONFIRM’ as in fig. 12.2k above to save the changes or cancel to discontinue action.
How to Delete an Account Scheme
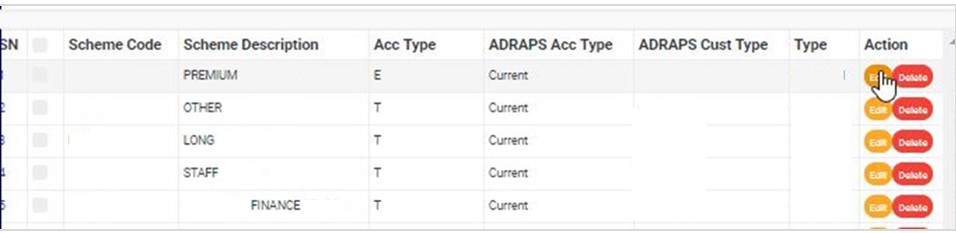
To delete an account scheme, click on ‘DELETE’ as in fig. 12.2l .
(fig. 12.2l)
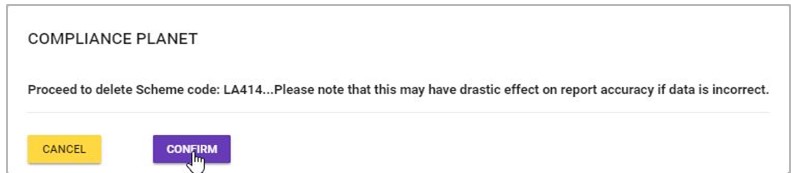
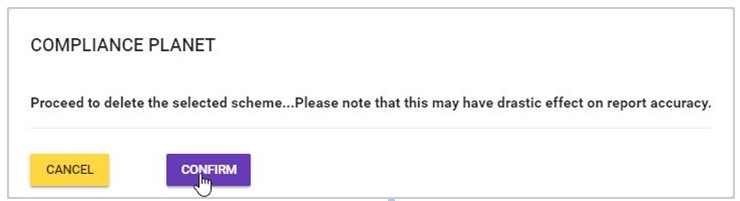
This displays a confirmation console to confirm your request to delete that particular account scheme as in fig. 12.2m Click on ‘CONFIRM’ to proceed.
(fig. 12.2m)
Bulk Operations
The action buttons available under the bulk operations section of the Account Scheme page are;
Download account schemes
Delete selected schemes
New account scheme
Upload scheme
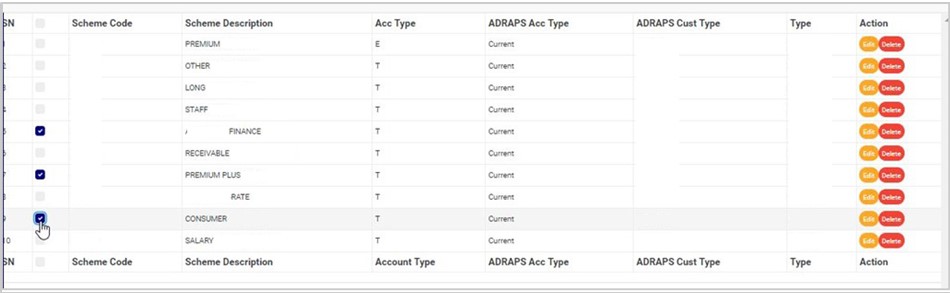
To select an account scheme for treatment, mark the account scheme by clicking on its checkbox as shown in the example in fig. 12.2n below. One or more account schemes can be selected for bulk treatment as seen in the example.
(fig. 12.2n)
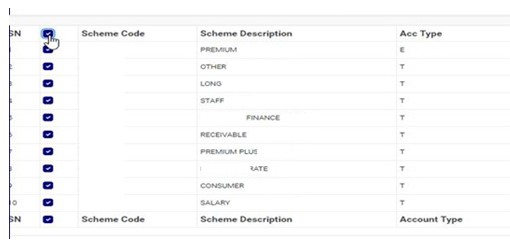
To select or deselect all the account schemes on a page, click on the checkbox of the table title bar as in fig. 12.2o. This checkbox is between SN and Scheme Code.
(fig. 12.2o)
A) Downloading Account Schemes
To download all the financial institution’s account schemes on the software, Click “Operations” button on the top-right side of the page as in fig 12.2p below.
This displays a dropdown list as in fig 12.2q below
Click on ‘DOWNLOAD ACCOUNT SCHEMES’ as in fig. 12.2q. No need to mark all the account schemes.
(fig. 12.2q)
Clicking on ‘DOWNLOAD ACCOUNT SCHEMES’ will display a confirmation console to confirm you want to download all the account schemes. Click on ‘CONFIRM’ as in fig. 12.2r to proceed with the download or ‘CANCEL’ to stop action.
(fig. 12.2r)
If you proceed with the download, the signal console will show ongoing processes as in fig 12.2s below, and when download is complete, a notification will be displayed at the top of the page.
(fig. 12.2s)
B) Deleting Account schemes
After selecting the account schemes to be deleted; Click on ‘DELETE SELECTED SCHEMES’ as in fig. 12.2t below
(fig. 12.2t)
Clicking on this bulk delete button will display a confirmation console to confirm your request as shown in fig. 12.2u below.
(fig. 12.2u)
C) Creating A New Account Scheme
To add a new account scheme on the software, click on ‘CREATE NEW ACCOUNT SCHEME’ as in fig. 12.2v below.
(fig. 12.2v)
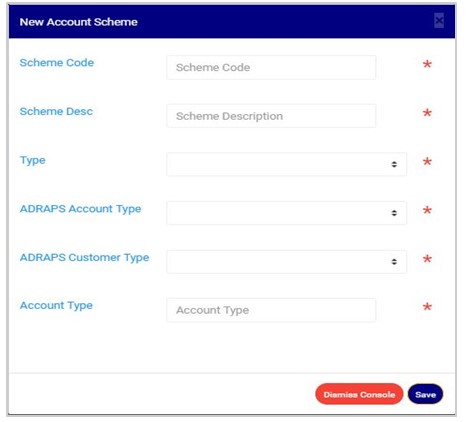
Clicking on ‘NEW ACCOUNT SCHEME’ will display a console titled, ‘NEW ACCOUNT SCHEME’. on which you are to input the details of the new scheme. See fig. 12.2w for an example.
(fig. 12.2w)
Fill in the details of the new account scheme in their respective fields. See fig. 12.2x for an example. After inputting the details, click on ‘SAVE’ as shown below.
(Fig. 12.2x)
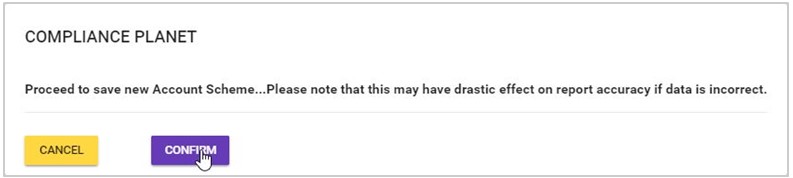
Clicking on ‘SAVE’ will display a confirmation console to confirm you want to add a new account scheme as in fig. 12.2y. Click on ‘CONFIRM’ to proceed with the creation of a new Account scheme or ‘CANCEL’ to discontinue.
(fig. 12.2y)
If you proceed, a notification as in fig. 12.2z will be displayed at the top of the page when the account scheme has been successfully created. The new scheme would be added to the list of Account schemes on the planet right away.
(fig. 12.2z)
D) Bulk Upload of New Account Schemes.
To add more than one new account scheme on the software; you must have an excel file filled with the details of the new account schemes according to the compliance planet’s file specification for uploading new account schemes. Here is how to make a bulk upload.
STEP 1: Click on ‘UPLOAD SCHEME’ as in fig. 12.2aa below.
(fig. 12.2aa)
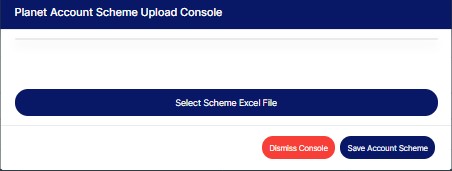
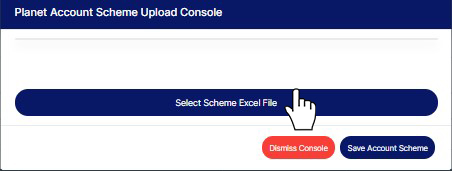
This will display a ‘Planet Account Scheme Upload’ console as in fig. 12.2ab.
(fig. 12.2ab)
STEP 2: Click on ‘SELECT SCHEME EXCEL FILE’ as in fig. 12.2ac to choose the excel file filled with the details of the new account schemes to be uploaded on the software.
(fig. 12.2ac)
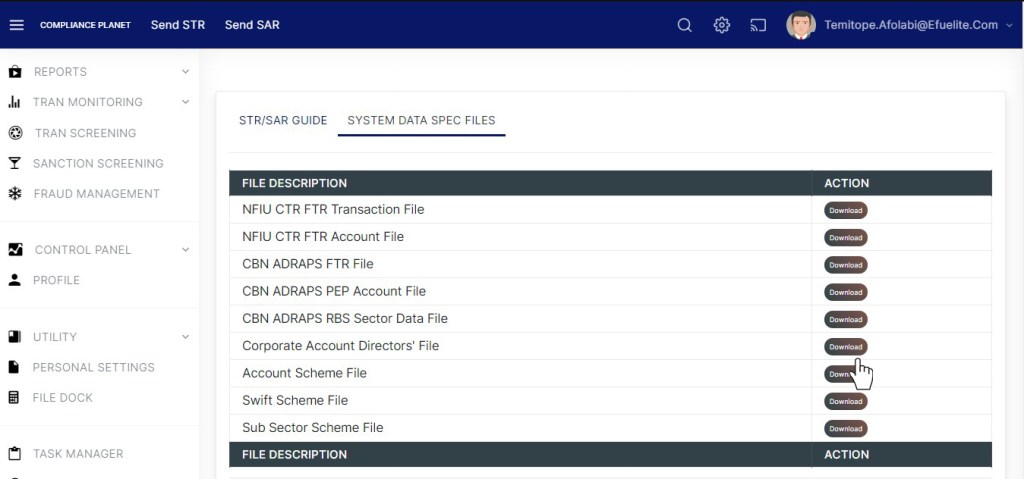
If you do not have the file specification for uploading the new account schemes, you can download from the “SYSTEM DATA SPEC FILES” on the software home page as shown in fig. 12.2ad to download a file specification.
I
(fig. 12.2ad)
This downloads an empty excel file with pre-filled headings (according to the required specification) under which the details for the new account schemes will be entered. Open the file, fill in the required details of the new account schemes and save the changes to the file. Renaming the file on your computer is optional. Now that you have a file to upload, click on ‘Select Scheme Excel File’ to choose that file for upload.
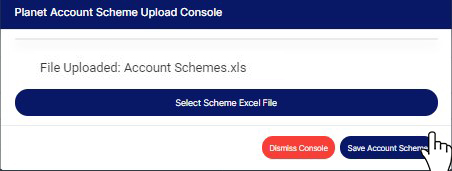
After selecting a file from your computer, the name of the selected file will be added to the upload console. See fig. 12.2ae for an example.
(fig. 12.2ae)
To close the upload console, click on ‘DISMISS CONSOLE’.
STEP 3: Click on the ‘SAVE ACCOUNT SCHEME’ button as in fig. 12.2af to save the new account schemes on the planet.
(fig. 12.2af)
Clicking on this button will display a confirmation console. Click on ‘CONFIRM’ to proceed or ‘CANCEL’ to return to the upload console. See fig. 12.2ag for an example.
(fig. 12.2ag)
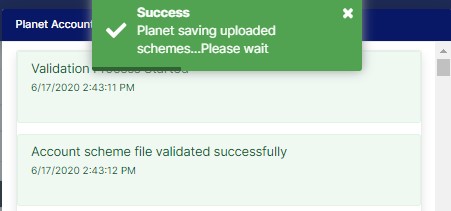
A notification as in fig. 12.2ah below will be displayed at the top of the page as the software is saving the new account schemes.
The next stage of processing after revising an STR/SAR notification is the SUPERVISION STAGE. Only Notifications that have been approved by the revision desk team lead(s) will be pushed to the supervision desk. Here are the steps to supervising a suspicious transaction Notification.
NOTE: Only person(s) profiled as ‘supervision desk officer’ with the right to edit can carry out these operations.
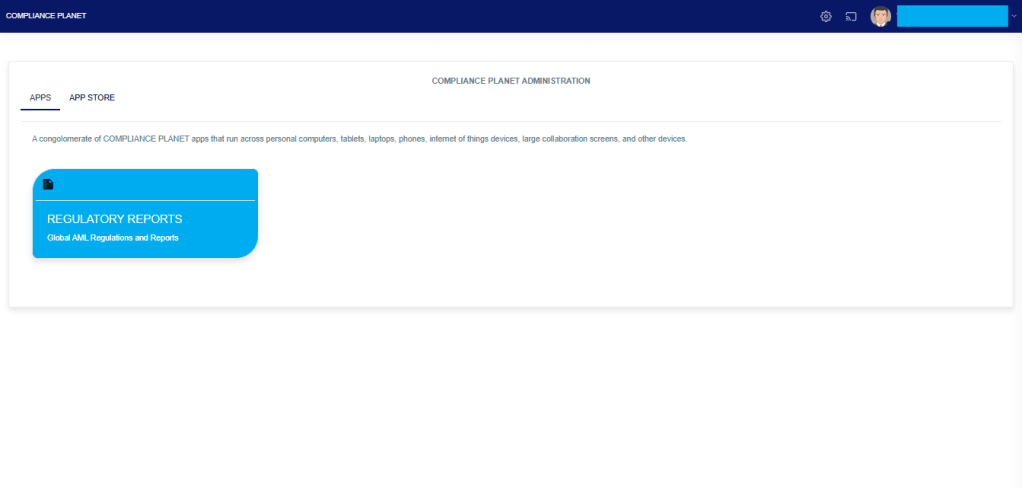
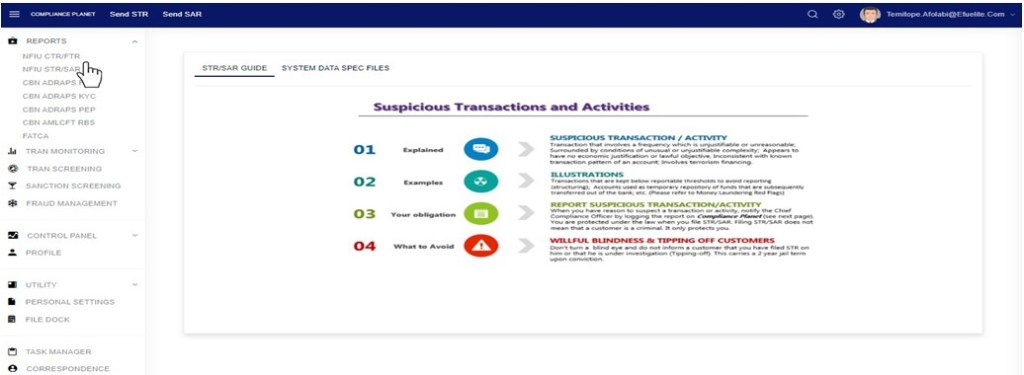
From the app dashboard, click on ‘REGULATORY REPORTS’ as in the image below.
This will display a drop-down as in the image below. The dropdown lists the report types available on the Compliance Planet software.
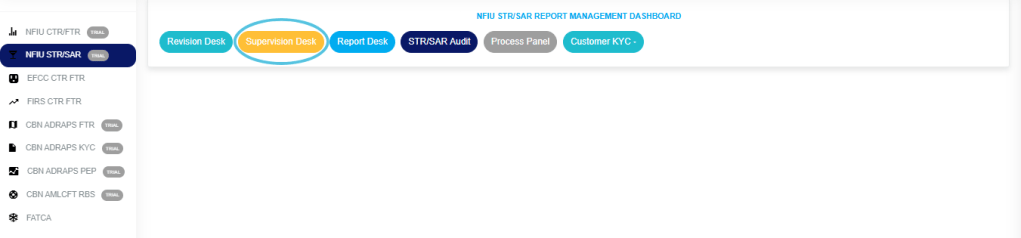
Click “NFIU STR/SAR” from the drop-down menu to open the NFIU STR/SAR page. See the image below.
STEP 1: From the top menu, click on “SUPERVISION DESK” as in the image below.
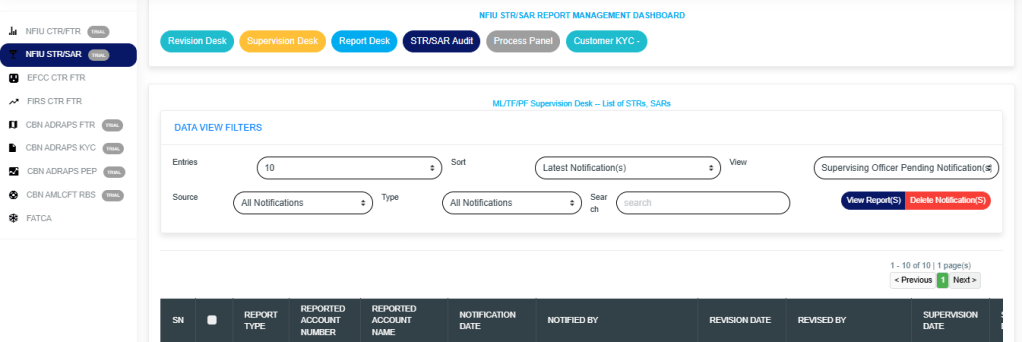
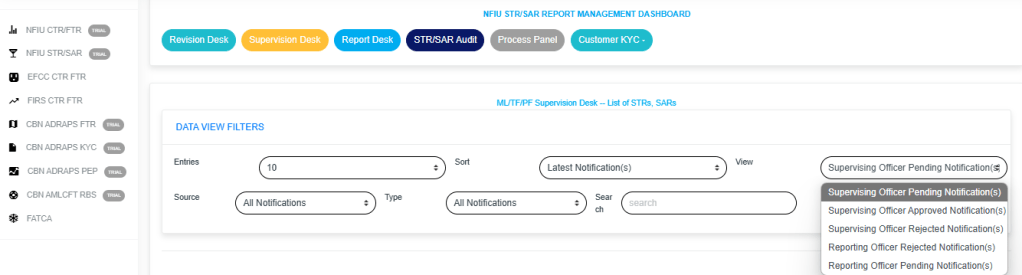
The above action will display the Supervision Desk Page as seen in the image below. Then select the “DATA VIEW FILTERS”.
Click on the “ENTRIES” box to increase the number of Notifications you want to see per page.
Click on the “SORT” box to sort the notifications by alphabetical order, from the latest to the earliest, or vice versa, as shown.
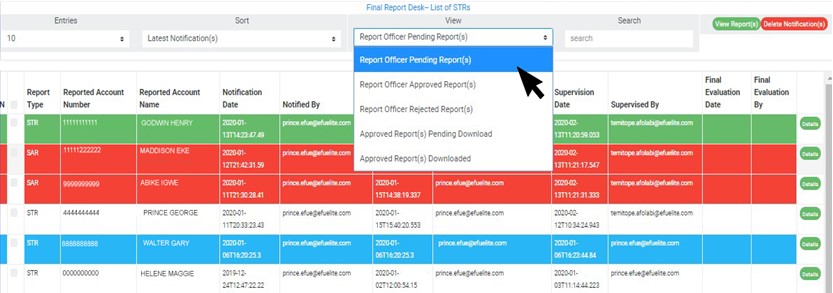
Click on the “VIEW” box to see notifications classified according to the stage of processing they have reached.
Click on the “SOURCE” box to select either All Notifications, Digital Surveillance Notification, or Manually Filled Notifications.
Click on the “TYPE” box to select either All Notification, Suspicious Transaction Notification, or Suspicious Activity Notification.
Click on the “SEARCH” box to search for a particular notification by typing in the customer’s name or account number. More details below.
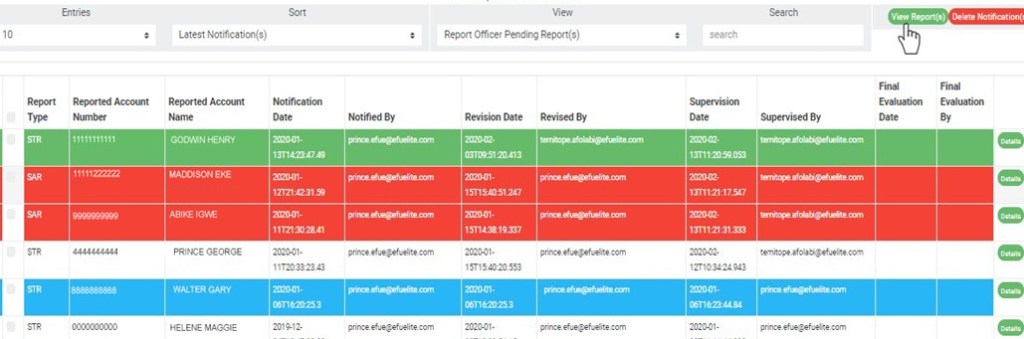
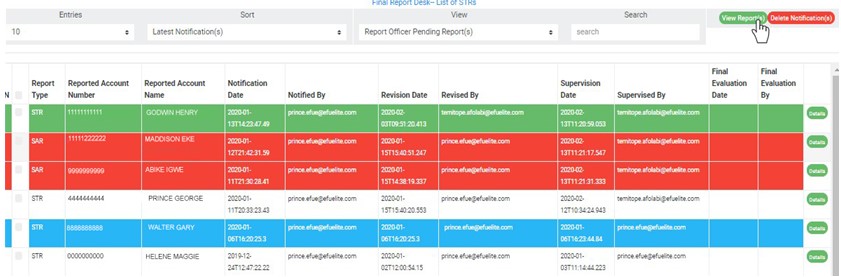
Click on the “VIEW REPORTS” button after selecting the class of Notification(s) from the VIEW box. This is to view the notifications from any of the selected classes. This button is at the top-right corner of the page.
Click on the “DELETE NOTIFICATIONS” to delete notifications.
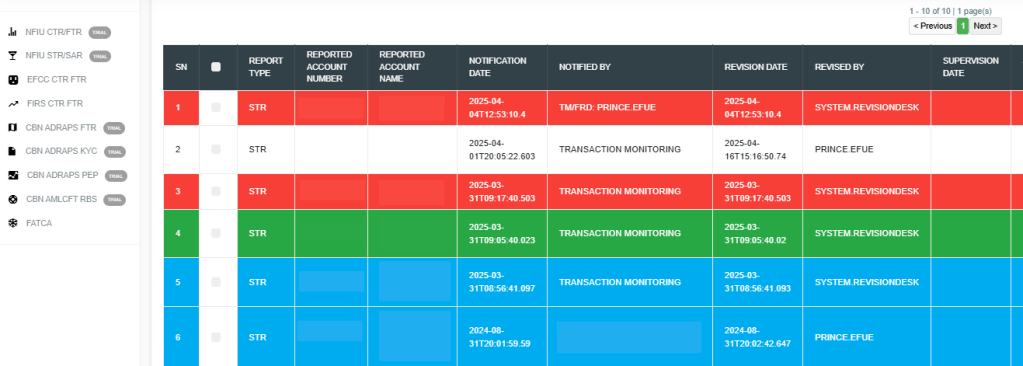
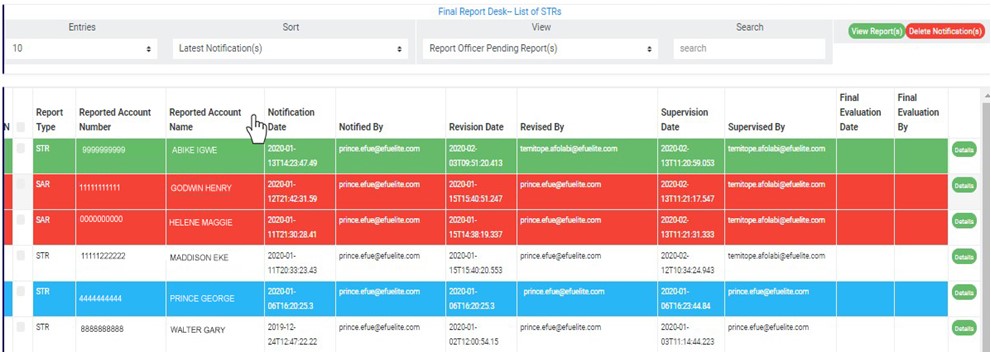
Based on the “VIEW” box details, the notifications are categorized according to their current stage of processing, as shown in the image below.
The classes are:
Supervision Officer Pending Notification(s); these are STR/SAR notifications that have been reviewed and approved by a revision officer, but they have not been treated by the supervision officer.
Supervision Officer Approved Notification(s); these are STR/SAR notifications that have been treated, approved, and forwarded to the reporting officer for further processing. Once a Notification is approved by a supervision officer, it joins the reporting officer pending Notification(s) list for further approval.
Supervision Officer Rejected Notification(s); these are STR/SAR notifications that are not satisfactory to the supervision officer. When a Notification is rejected by the supervision officer, the revision officer will get a mail notification to revisit the Notification and send it again if needed. The Notification this time around will include reason(s) for rejection.
Reporting Officer Rejected Notification(s); these are STR/SAR Notifications that have been treated and approved by the revision officer and/or the supervision officer, but they are unsatisfactory for further approval by the reporting officer.
Reporting Officer Pending Notification(s); these are STR/SAR Notifications that have been approved by revision and/or supervision officer and await the reporting officer’s treatment.
The Notification(s) highlighted “RED” indicate that it has not been viewed by anyone on the Supervising desk.
The Notification(s) highlighted “GREEN” indicate that it has been viewed by you alone.
The Notification(s) highlighted “WHITE” indicates that it has been viewed by you and at least one other Supervising officer.
The Notification(s) highlighted “BLUE” indicates that it has been viewed by other Supervising officer(s), excluding you
At the top-right and bottom-right corners of the page, the software gives information about the number of pages, with the page numbers written out. All the page numbers represent buttons to go to each page. By clicking on any page number, the software takes you to that particular page. Click on the “NEXT “button to take you to the next page. Click the “PREVIOUS” button to return to the page you were viewing earlier.
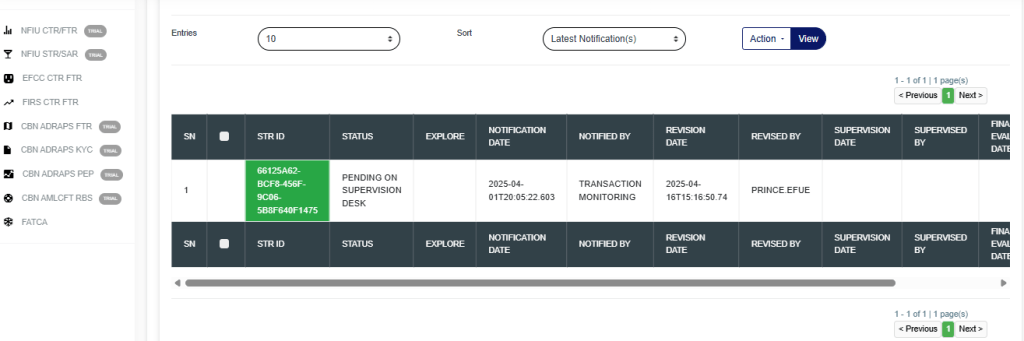
STEP 2: Select the notification to be treated from the ‘SUPERVISION OFFICER PENDING NOTIFICATION(S) by clicking on the “Details” button at the end of the notification row, as in the image below.
STEP 3: By clicking on ‘DETAILS’, the STR SUPERVISION DESK NOTIFICATIONS Page will display as in the image below, then click on “HISTORICAL INVESTIGATION ANALYSIS“.
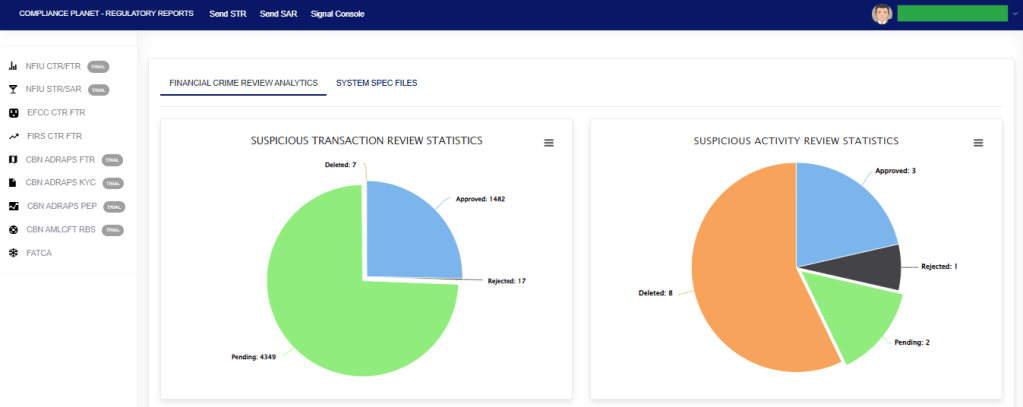
The “STR OPERATION” shows if there are Deleted STR Notifications, Approved STR Notifications, Rejected STR Notifications, and Pending STR Notifications associated with that specific account.
The “SAR OPERATION” shows if there are Deleted SAR Notifications, Approved SAR Notifications, Rejected SAR Notifications, and Pending SAR Notifications associated with that specific account.
Click on the “ENTRIES” box to increase the number of Notifications you want to see per page.
Click on the “SORT” box to sort the notifications either by alphabetical order or from the latest to the earliest notifications, or vice-versa, as shown.
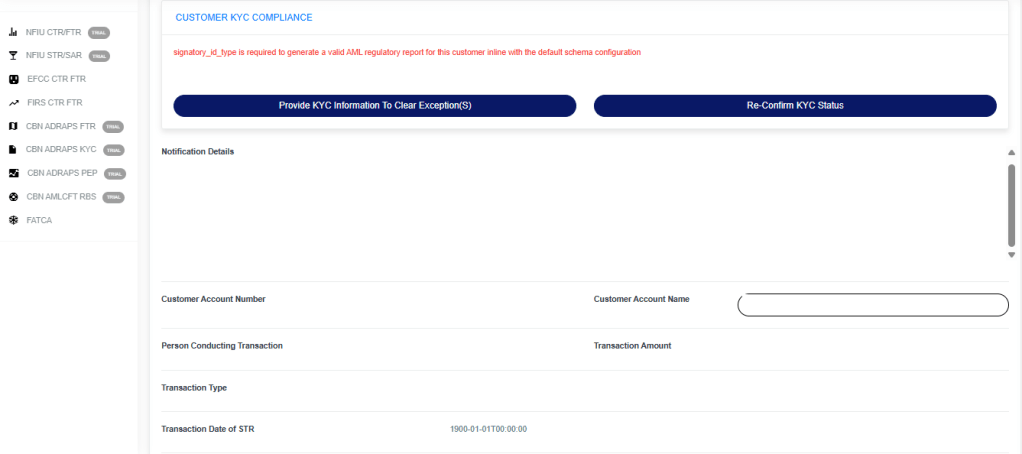
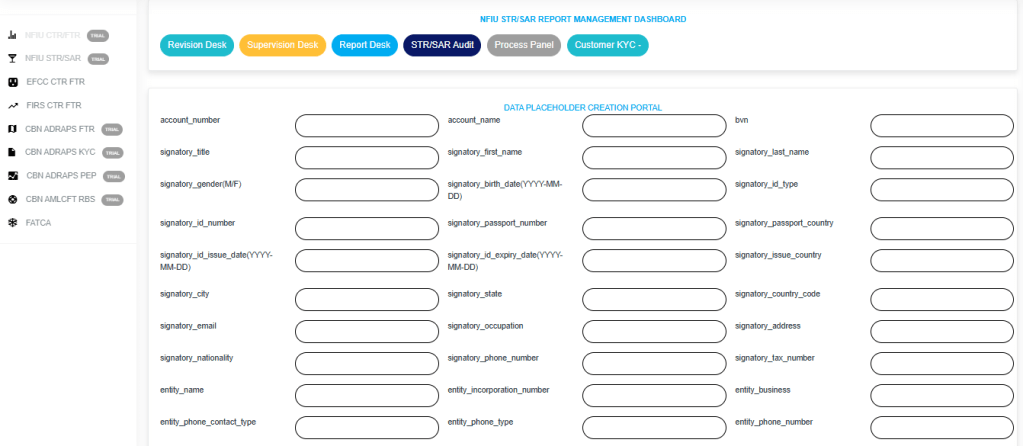
STEP 4: Click on “CUSTOMER KYC COMPLIANCE” to view the missing data for the specific account, as shown in the image below.
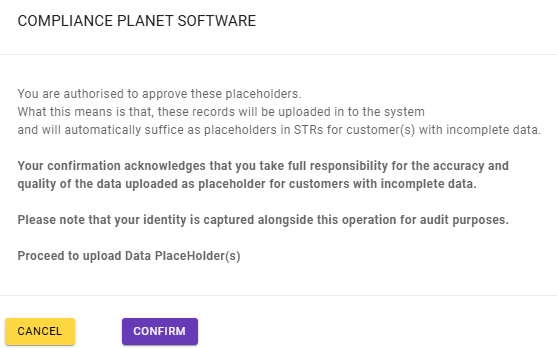
Click on “Provide KYC Information to Clear Exception(s)” to navigate to the page shown below, where you can enter the missing details. Then, click on “Submit Data Procedure” to proceed to the confirmation page.
Click “CONFIRM” to upload the data or click “CANCEL” to exit the confirmation process.
If the account has no exceptions, it will appear as shown in the image below.
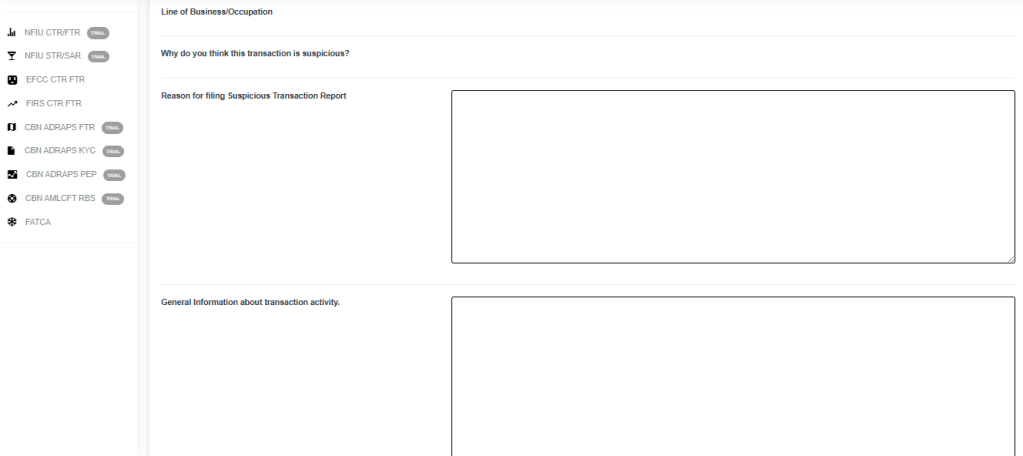
STEP 5: Click on the ‘Reason for Filing Suspicious Transaction Report’ box to edit the revision officer’s reason(s) for approving the Notification. This step is optional. See an example in the image below.
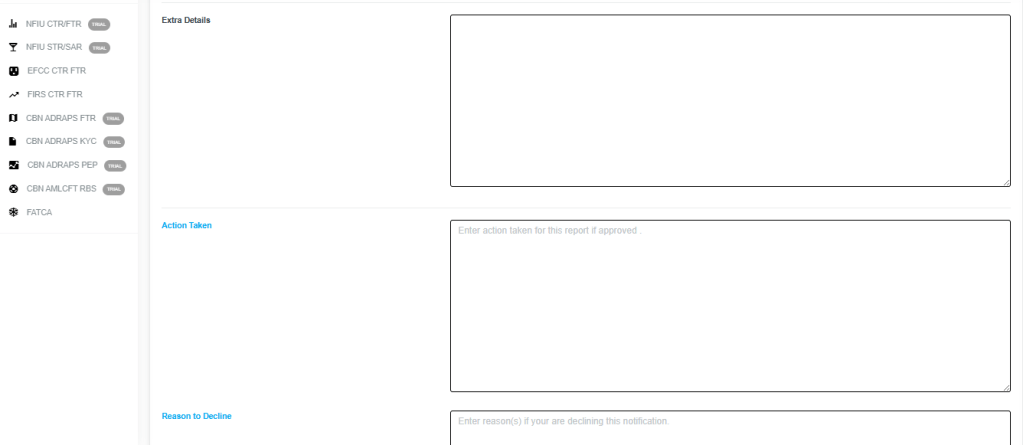
STEP 6: Click on “Extra Details” box to edit the revision officer’s comment and click on the “Action Taken” box to edit action(s) taken concerning the suspicion filed. See an example in the image below.
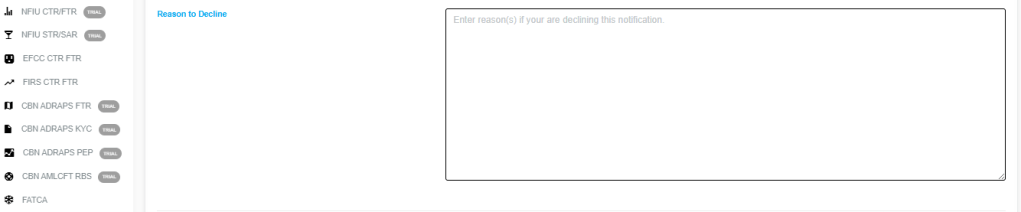
STEP 7: Click on ‘Reason to Decline’ box (if you want to reject the notification) to input your comments. This step is mandatory if you want to reject the notification. See the image below for an example.
STEP 8: Click on “SURVEILLANCE CASES” to view the account’s cases, as illustrated in the image below.
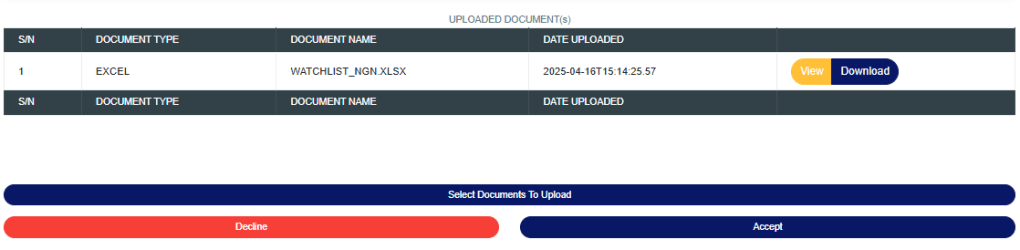
STEP 9: Click on “SELECT DOCUMENTS TO UPLOAD” to add additional documents that support the STR. Next, click on “REJECT” or “ACCEPT”—this will open a confirmation console to verify your selected action. Ensure you are certain of your choice before proceeding, as this action is irreversible once confirmed. Refer to the images below to see how the confirmation console appears when selecting “Reject” and “Accept” respectively. To continue, click CONFIRM; to exit the console without taking action, click CANCEL.
STEP 1: Click on the ‘VIEW’ box and select ‘REPORTING OFFICER REJECTED NOTIFICATION(S)’. See fig. 6.4r below for an example.
(fig. 6.4r)
➔ Click on ‘VIEW REPORTS’ to see the notifications. On this page, the supervising officer will be able to re-process Notification for approval again.
STEP 2: To see details of the STR Notification, click on ‘DETAILS’. Every notification still undergoing processing has this button at the end of its row
(fig. 6.4s)
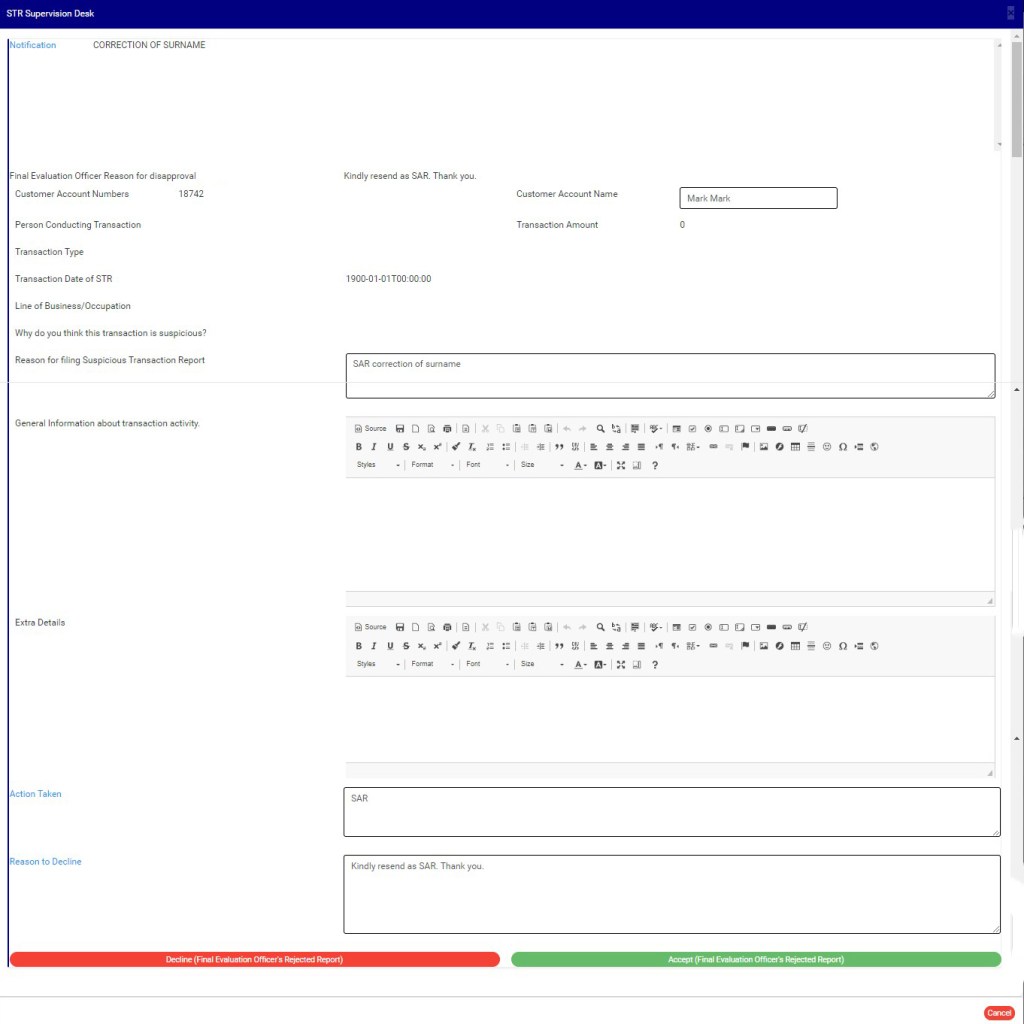
STEP 3: Clicking on the DETAILS button will display a console which allows you to revisit the notification. See fig. 6.3t below for an example.
(fig. 6.4t)
STEP 4: Edit the details you want to change. You can edit all information except the notification itself. This means you can change the Reason for filing report, General information about transaction activity, Extra details, Action taken and reason to decline.
STEP 5: Click on REJECT or ACCEPT. This displays a confirmation console to confirm your selected action. Check that you are sure of your options before rejecting or accepting the notification as this step cannot be reversed once confirmed. See fig. 6.4u and 6.4v for the confirmation console displayed when you decide to ‘reject’ and when you choose to ‘accept’ respectively. To proceed, click on CONFIRM and to cancel the review, click on CANCEL.
(Fig. 6.4u)(fig. 6.4v)
Note: You have to be profiled as a supervisor with rights to edit
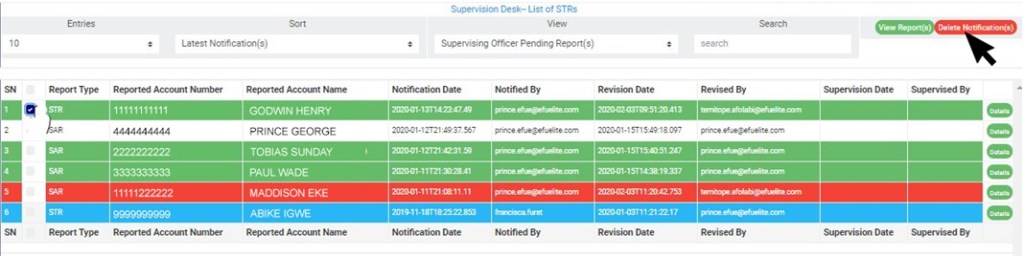
STEP 1: Click on the checkbox beside the report type to select the Notifications you want to delete. See an example in Fig 6.4w below
(fig. 6.4w)
STEP 2: Click on the “Delete Notification(s)” button as shown in in Fig 6.4x below
(fig. 6.4x)
STEP 3: Clicking on “Delete Notification(s)” will display a console to confirm your selected action. See an example in Fig 6.4y below. To proceed, click on CONFIRM and to dismiss the operation, click on CANCEL.
(fig. 6.4y)
NOTE: You have to be profiled as a ‘supervisor’ and a ‘Team Lead’ on supervision Desk.
This data control feature provides a list of account scheme-tier tags. The operations include;
Editing an account scheme tier,
Deleting an account scheme tier, and
Creating a new account scheme tier tag.
Note: Only person(s) profiled as deputy supreme admin can carry out account scheme operations.
To perform any of the operations on ACCOUNT SCHEME-TIER TAGS;
STEP 1: From the left hand side menu, Click ‘Control panel’ as in fig. 13.2a.
Fig 13.2a
This will display a drop down as in Fig 13.2b below.
STEP 2: Click ‘ACCOUNT’ on the drop down list. See an example in Fig 13.2b below.
Fig 13.2b
This will display the ACCOUNT CONTROL PANEL OPERATIONS dashboard as in Fig 13.2c below
Fig 13.2c
STEP 3: Click “Tier” from the top menu, on the account page. See an example in fig13.2d below
Fig 13.2d
This displays a dropdown as in fig 13.2e below
STEP 4: Click “Account” on the drop down list as in fig 13.2e below
Fig 12.2e
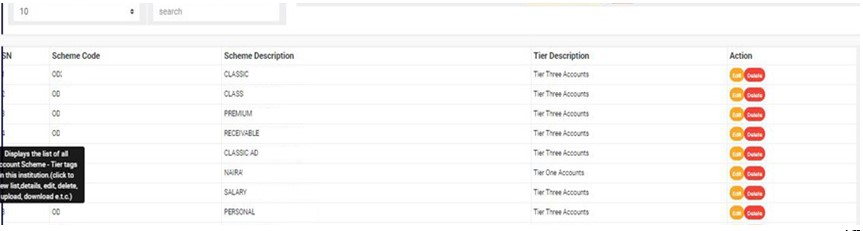
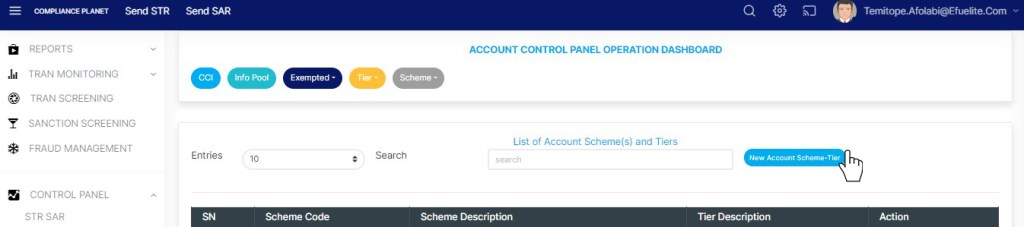
This displays a page showing a list of all account schemes and their tier tags.See fig. 13.2f for an example.
(fig. 13.2f)
From fig. 13.2f above, at the bottom-right corner of the page, the software gives information about the number of pages of the list, with the page numbers written out. The page numbers represent buttons to go to each page. By clicking on any of the page number, the software takes you to that particular page. Click ‘NEXT’ to go to the next page or ‘PREVIOUS’ to go to the page before the current page.
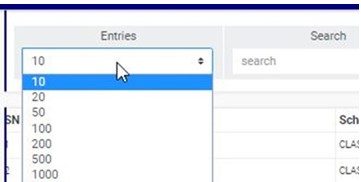
Adjust the number of account scheme tier tags per page by clicking on the ‘ENTRIES’ box. See fig. 13.2g for an example.
(fig. 13.2g)
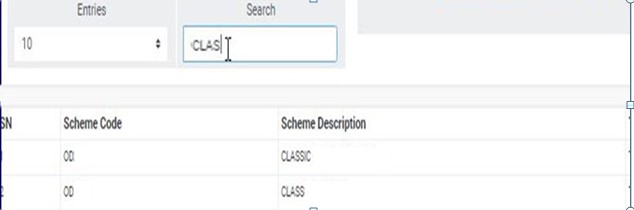
Search for Account Schemes and their tier tags by typing the scheme code, scheme description or tier description. Search results will be displayed immediately a character is typed in the search box. See fig. 13.2h below for an example.
(fig. 13.2h)
Each entry has two (2) action buttons; ‘Edit’ button and ‘Delete’ button. The operations are explained below.
How To Edit an Account Tier
To change details of an account scheme-tier tag;
STEP 1: Click on the ‘Edit’ button as shown in fig.13.3a below.
(fig. 13.3a)
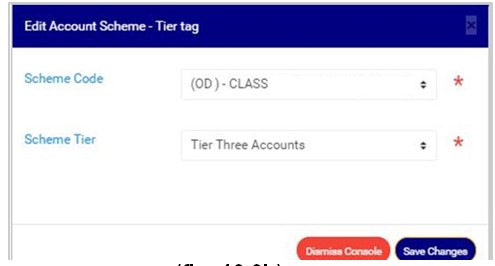
This displays an ‘Edit Account Scheme-Tier tag’ console, as in fig. 13.3b.
(fig. 13.3b)
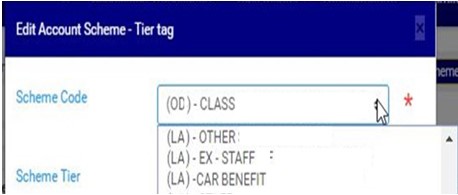
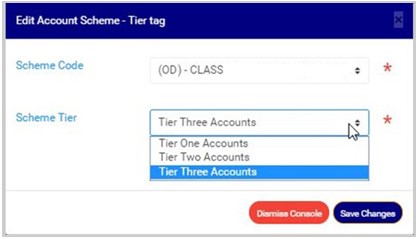
STEP 2: Select a scheme code and/or a scheme tier as in fig. 13.3c and fig. 13.3d respectively, depending on what you want to edit.
(fig. 13.3c)
(fig. 13.3d)
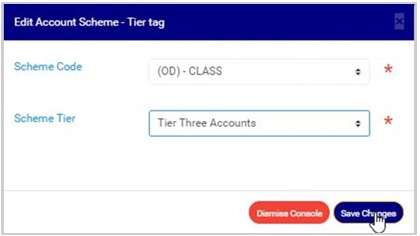
STEP 3: Click ‘SAVE CHANGES’ as shown in fig. 13.3e below, to update the new changes on the software.
(fig. 13.3e)
This displays a confirmation console as in fig. 13.3f to confirm you want to change the details.
(fig. 13.3f)
Click on ‘CONFIRM’ as in fig. 13.3f above to save the changes or cancel to discontinue action. When the changes are saved, a notification will be displayed at the top of the page as in fig. 13.3g below.
(fig. 13.3g)
How to Delete an Account Tier
To delete an account scheme-tier tag, click on ‘DELETE’ as in fig. 13.4a below.
(fig. 13.4a)
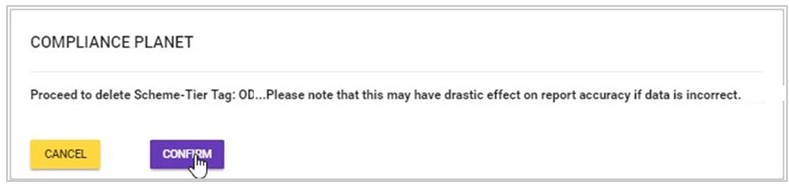
This displays a confirmation console to confirm your request to delete the account scheme-tier tag as in fig. 13.4b. Click on ‘CONFIRM’ to proceed or ‘CANCEL’ to discontinue.
(fig. 13.4b)
A notification as in fig. 13.4c will be displayed at the top of the page when scheme-tier tag delete is complete.
(fig. 13.4c)
How to Create New Account Scheme-Tier Tag
This refers to the adding of a new account scheme-tier tag. Here is how to do this.
STEP 1: Click on ‘NEW ACCOUNT SCHEME-TIER’ as in fig. 13.5a below.
(fig. 13.5a)
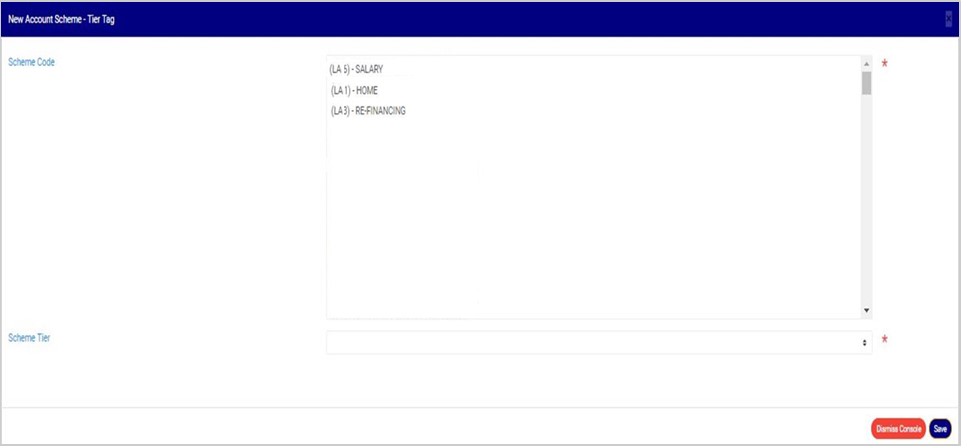
Clicking on ‘NEW ACCOUNT SCHEME-TIER’ will display a console titled, ‘NEW ACCOUNT SCHEME-TIER TAG’, on which you are to select details of the scheme. See fig. 13.5b below for an example.
(fig. 13.5b)
Select account scheme code from the list of scheme codes as seen in fig. 13.5c for an example.
(fig. 13.5c)
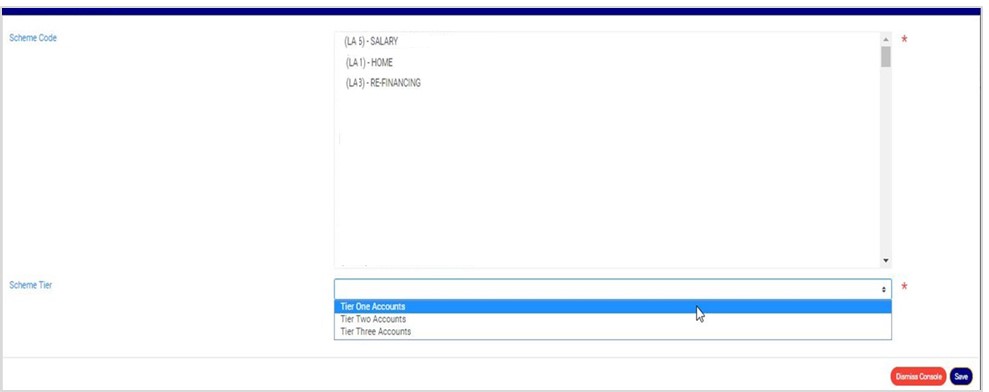
Select scheme-tier tag as shown in fig. 13.5d below.
(fig. 13.5d)
STEP 2: Click ‘SAVE’ as shown in fig. 13.5e below to add the new scheme tier-tag.
(fig. 13.5e)
This displays a confirmation console as in fig. 13.5f below. Click on ‘CONFIRM’ to proceed with the creation of a new account scheme tier tag or ‘CANCEL’ to discontinue.
(fig. 13.5f)
If you proceed, a notification as in fig. 13.5g will be displayed at the top of the page when the account scheme-tier tag is successfully created.
This is the final stage of processing STR/SAR Notifications. Once approved by the reporting officer, the Notifications can be downloaded. Below are steps on how to finalize approval to report STRs/SARs. Also, in this section, you will learn how to download an STR/SAR file.
How to Evaluate and Give Final Approval
Notifications that have been approved by revising officer(s) and/or supervising officer(s) move to the ‘REPORTING OFFICER PENDING NOTIFICATION (S)’ list to be given the final approval. The treatment of a SAR Notification is different from that of a STR Notification. Therefore, the review and final approval on the reporting desk is categorized into two (2) on this desk; EVALUATING AND APPROVING STRs and EVALUATING AND APPROVING SARs.
NOTE: You have to be profiled as a report evaluation officer on report desk with rights to EDIT to be able to carry out this operation.
In this section, you will learn how to evaluate and give final approval for each Notification type, but first, here is how to locate a pending Notification irrespective of its Notification type (STR or SAR).
STEP 1: from the left hand side menu, Click on ‘REPORTS’ as in fig 6.5a below
fig 6.5a
This will display a drop down as in fig 6.4.1b below. The dropdown lists the report types available on the compliance planet software.
STEP 2: Click ‘NFIU STR/SAR on the drop down list. See an example in Fig 6.5b below.
fig 6.5b
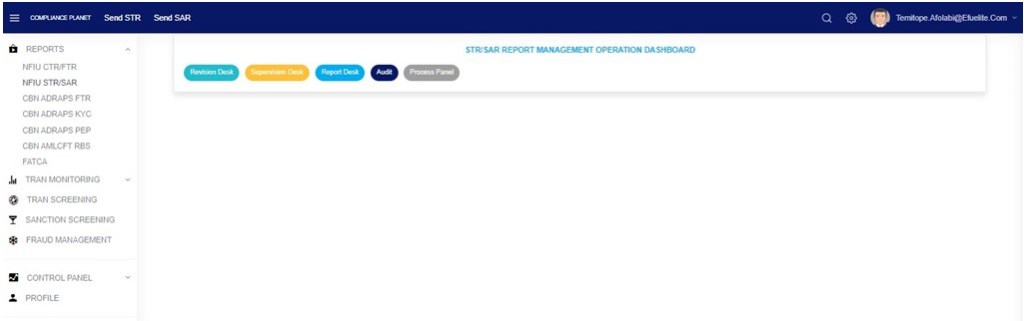
This will display the NFIU STR/SAR page as in Fig 6.5c below
Fig 6.5c
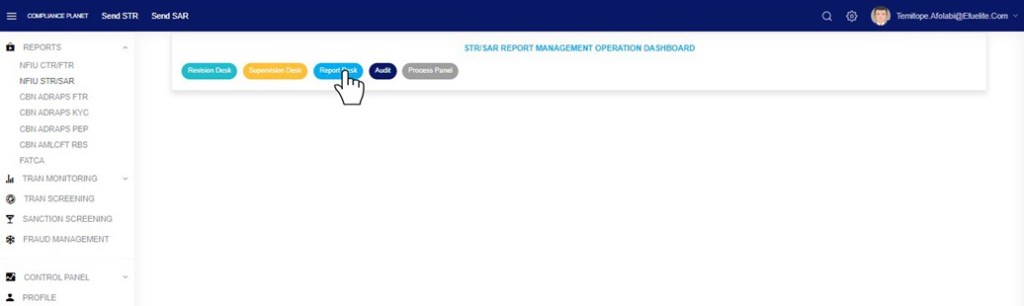
STEP : From the top menu, click Report desk as in Fig 6.5d below
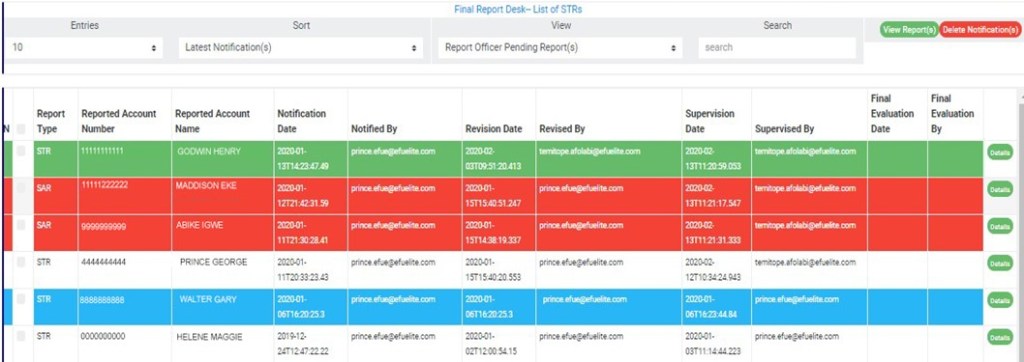
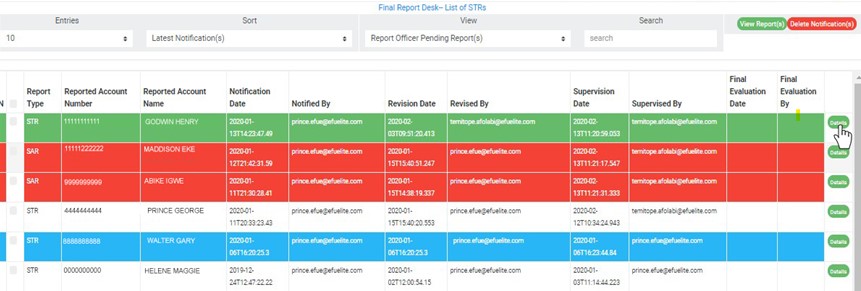
This displays a page as in fig. 6.5e below.
(fig. 6.5e)
The notification(s) highlighted “RED” indicates that the notification(s) has not been viewed by anyone on the Reporting desk.
The notification(s) highlighted “GREEN” indicates that the notification(s) has been viewed by you alone.
The notification(s) highlighted “WHITE” indicates that the notification(s) has been viewed by you and at least one other Reporting officer(s)
The notification(s) highlighted “BLUE” indicates that the notification(s) has been viewed by other Reporting officer(s) excluding you
You can increase the number of notifications you want to see per page by clicking on the ENTRIES box. Pick any number of entries per page of your choice. See fig. 6.5f below for an example.
(fig. 6.5f)
STEP 2: You can sort the notifications by clicking on any of the column header, either by alphabetical order or from the latest to the earliest notifications or vice-versa. This step is optional. See fig. 6.5g for an example.
(Fig. 6.5g)
STEP 3: Click on the VIEW box to see notifications classified according to the stage of processing they have gotten to. See fig. 6.5h for the classes of Notifications available to a reporting officer’s view. Select any of them.
(fig. 6.5h)
As seen in fig. 6.5e above, the classes are;
Reporting Officer Pending Notification(s); these are STR/SAR notifications that have been reviewed and approved by a revision officer and/or supervising officer but they have not been treated by the reporting officer. This is the default view of the reporting officer
Reporting Officer Approved Notification (s); these are STR/SAR notifications that have been treated, approved by reporting officer. Once a notification is approved by reporting officer, it joins the Approved Report(s) Pending Download list.
Reporting Officer Rejected Notification(s); these are STR/SAR notifications that are not satisfactory to the reporting officer. When a notification is rejected by the reporting officer, the supervising officer will get a mail notification to revisit the STR/SAR notification and send again if need be.
Approved Notification(s) Pending Download; these are STR/SAR notifications that have been treated and approved by all officers and await download.
Approved Notification(s) Downloaded; these are STR/SAR notifications that have been downloaded.
STEP 4: After selecting the class of Notification (s) from the VIEW box, click on ‘VIEW REPORT(S)’ to see the notification(s). This button is at the top-right corner of the page just as it was in the pages for the other desks. See fig. 6.5i for an example.
(fig. 6.5i)
Also, you can search for a particular notification by typing the customer name or account number concerned in the search box. See fig. 6.5j below for an example of a search
(fig. 6.5j)
Also, at the bottom-right corner of the page, the software gives information about the number of pages, with the page numbers written out. All the page numbers represent buttons to go to each page. By clicking on any page number, the software takes you to that particular page. There is the ‘NEXT’ button to take you to the next page when you click on it and there is the ‘PREVIOUS’ button to take you to the page before the current page. See these features in fig. 6.5g above.
From fig. 6.5e, 6.5f, 6.5g, 6.5h, 6.5i and 6.5j above, it can be seen that the NFIU STR report page reveals information about the notifier, the date of notification, the reported account number, the reported account name and the report type. The report type column specifies if the Notification is a suspicious transaction or a suspicious action. As stated earlier, the treatment of Notifications differs according to their report type. Now, that you already know how to locate Notifications for final review and approval on the reporting desk, here is how to treat each report type.
This section provides a guide on how to evaluate and approve a suspicious transaction. The STR Notifications awaiting final approval are in the ‘REPORTING OFFICER PENDING NOTIFICATION(S)’ list.
Note: You have to be profiled as a Reporting officer on report desk with rights to EDIT to be able to carry out this operation.
STEP 1: Select ‘REPORTING OFFICER PENDING NOTIFICATION(S)’ from the VIEW box as shown in fig. 6.5k below.
(fig. 6.5k)
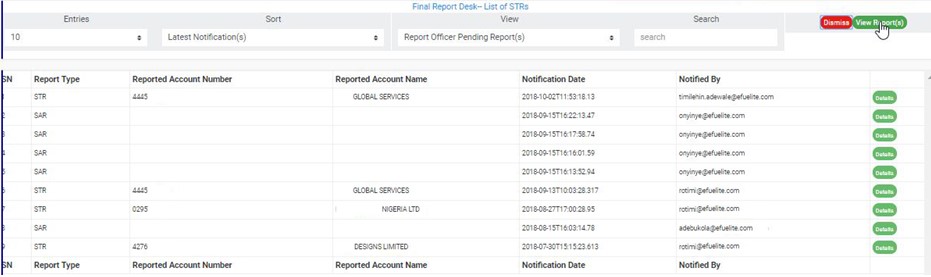
STEP 2: Click on VIEW REPORTS. This will display Notifications awaiting final approval. See the cursor clicking on this button and the Notifications in fig. 6.5l below.
(fig. 6.5l)
STEP 3: Select the STR to be treated by clicking on the ’DETAILS’ button at the end of the notification row. See the cursor clicking on the button in fig. 6.5m below.
(fig. 6.5m)
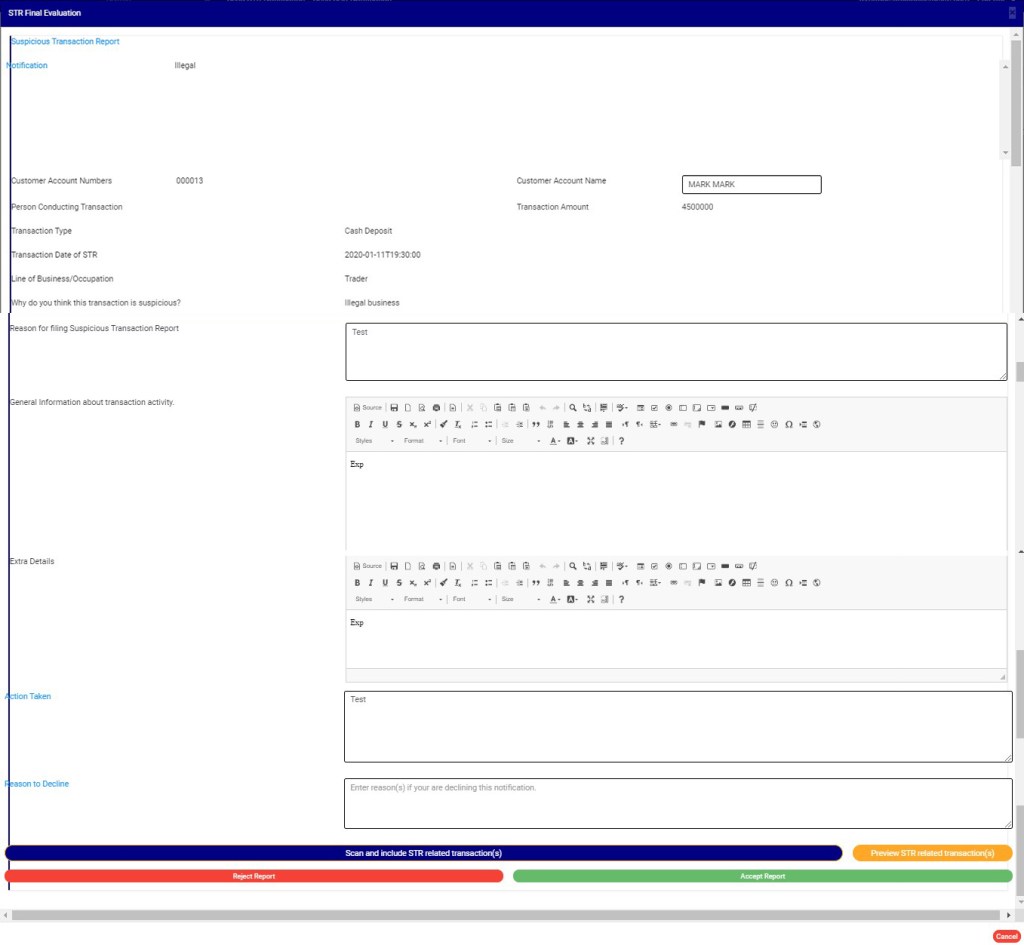
This displays a console titled, ‘STR Final Evaluation’. See fig. 6.5n below for an example of the STR final approval console.
(Fig. 6.5n)
This console offers information about the revision officer and the supervision officer with their comments and actions. The final approval console for STRs has two features the console for SARs does not have.
These are;
Scanning and adding details of transactions related to a suspicious transaction in the report to be generated.
Previewing the tagged related STR transactions.
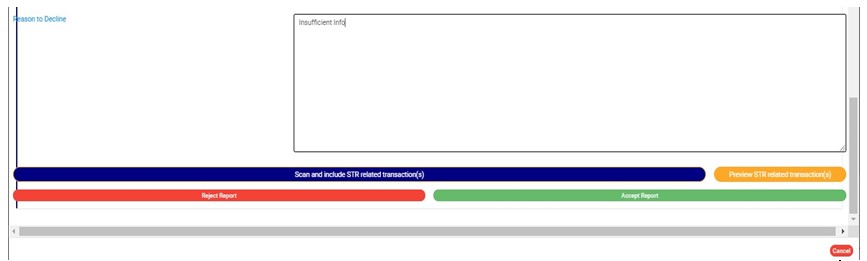
STEP 4: Enter reason to decline (If any) based on your observation. This step is mandatory if you want to reject the Notification. Check out fig. 6.5o below for an example.
(Fig. 6.5o)
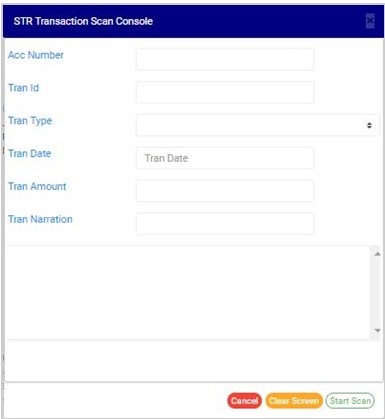
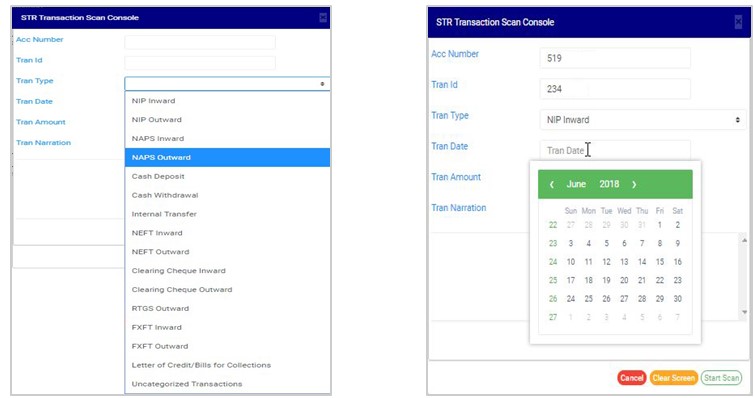
STEP 5: Click on ‘SCAN AND INCLUDE STR RELATED TRANSACTION’to add STR related transaction(s) to the report to be generated. Adding details of related STR transactions will make your report comprehensive and well detailed. Clicking on this button will bring up another console on which you are to input the details of the related transaction. See fig. 6.5p below for an example of a scan console.
(fig. 6.5p)
Follow the instructions below to make use of a SCAN CONSOLE;
Enter the Account Number involved in the related transaction. This account number must exist in the account base.
Enter the transaction ID.
Click on the ‘Tran Type’ box to select the CTR/FTR Transaction type from a drop-down list as in fig. 6.5q below and set the transaction date from ‘Tran Date’ as seen in fig. 6.5r also.
(fig. 6.5q) (fig. 6.5r)
Here is how to make use of a calendar. Take a look at the arrows labelled a – d in fig. 6.5s to study the calendar;
Click on the given year to change it to your year of choice.
Click on the given month to change it to your month of choice.
Click on the date of the month.
You can also click on the angle brackets on the calendar [ ‘<’ or ‘>’ ] to go backward or forward.
(Fig 6.5s)
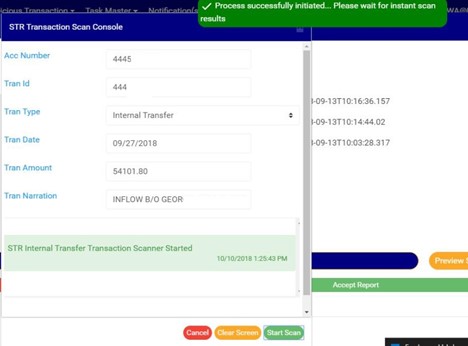
Enter the amount involved in the related transaction.
Input the ‘narration’ of the related transaction.
Click on ‘START SCAN’ for software to scan and include the transaction in the Notification. See the cursor pointing to this button in fig. 6.5q below.
To clear all the details already entered in, click on ‘CLEAR SCREEN’. The software will wipe off the details immediately.
To close the scan console, click on ‘CANCEL’.
See fig. 6.5t below for an example of a console with already filled in details, ready for scanning.
(fig. 6.5t)
The software immediately starts a scan when you click on ‘Start Scan’. During the scan a notification will be displayed at the top of the page. See fig. 6.5u for an example.
(fig. 6.5u)
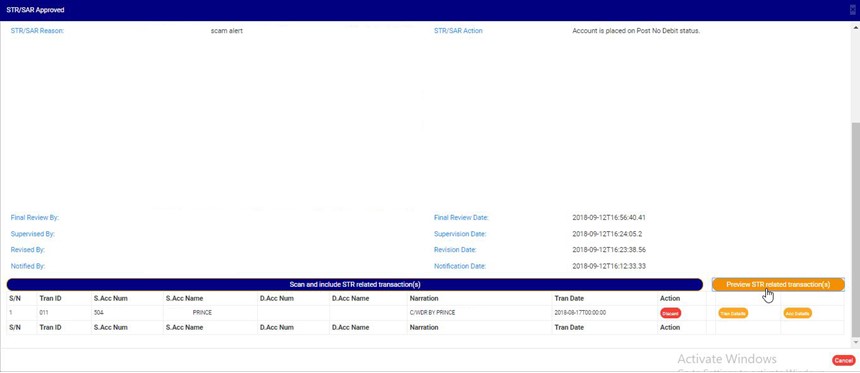
STEP 6: Click on ‘Preview STR Related Transaction(s)’ to see the related STR transactions you scanned earlier. This button is next to the ‘SCAN AND INCLUDE STR RELATED TRANSACTION’ button. See this feature in fig. 6.5o above. By clicking on the preview button, a table will appear right under the scan and preview button, listing the scanned STR related transaction(s) as in fig, 6.5v below.
(Fig. 6.5v)
As seen in fig. 6.5v above, the table comes with features to delete the transaction from the STR, see the details of the transaction and details of the account involved.
To delete a scanned transaction from the Notification, click on ‘DISCARD’. See an example in fig. 6.5w below.
(fig. 6.5w)
To see the details of a transaction, click on ‘TRAN DETAILS’. This button is between the ‘discard button’ and the ‘Acc details’ button as seen in fig. 6.5x below.
(fig. 6.5x)
By clicking on ‘TRAN DETAILS’, a console as in fig. 6.5y below will be displayed, giving details about the scanned transaction.
(fig. 6.5y)
You can also edit some of the transaction details. The details that can be changed are; source account number, source account name, source account bank code, destination account number, destination account name and destination bank code. To edit these details, click on ‘EDIT’. This button is on the title pane of the console. See the cursor clicking on the ‘EDIT’ button in fig. 6.5y above.
Clicking on ‘EDIT’, a console with the aforementioned details will be displayed as in fig. 6.5z below. Make the changes you want and click on ‘SAVE CHANGES’. See the cursor clicking on the button to save the changes made in fig. 6.5z.
(fig. 6.5z)
Click on ‘ACC DETAILS’ to see the details of the accounts involved in the scanned related transaction. See an example in fig. 6.5aa below.
(fig. 6.5aa)
Clicking on the ‘ACC DETAILS’ button, a console will be displayed as in fig. 6.5ab below. As seen below, this console gives details about both the source account and the destination account. These details cannot be edited. After viewing, click on the ‘DISMISS CONSOLE’ button at the bottom-right corner of the console.
(fig. 6.5ab)
You can scan and include as many transactions as you want to your suspicious transaction Notification.
STEP 7: Click on ‘ACCEPT’ to approve the STR or ‘REJECT’ if Notification is unsatisfactory. The software will display a confirmation console to confirm your selected option. See fig. 6.5ac and 6.5ad to see examples of when you choose to ‘accept’ or ‘reject’ respectively. To proceed, click on CONFIRM and to cancel the action, click on CANCEL. Check that you are sure of your options before confirming your request to reject or accept the Notification because this step is irreversible.
This section provides a guide on how to treat a suspicious action and give a final approval. The SAR Notifications awaiting final approval are also in the ‘REPORTING OFFICER PENDING NOTIFICATION(S)’ list.
NOTE: You have to be profiled as a report evaluation officer on report desk with rights to EDIT to be able to carry out this operation.
STEP 1: Select ‘REPORTING OFFICER PENDING NOTIFICATION(S)’ from the VIEW box as shown in fig. 6.5ae below.
(fig. 6.5ae)
STEP 2: Click on VIEW REPORTS and notifications awaiting final approval will be displayed immediately. See the cursor on this button and the Notifications in fig. 6.5af below.
(fig. 6.5af)
STEP 3: Select the SAR to be treated by clicking on the ’DETAILS’ button at the end of the SAR notification row. See the cursor clicking on the button in fig. 6.5ag below.
(fig. 6.5ag)
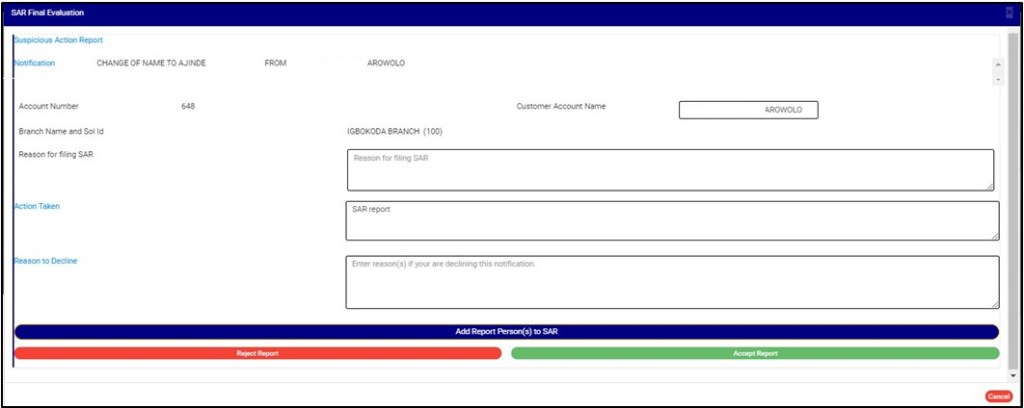
This displays a console titled, ‘SAR FINAL EVALUATION’. See fig. 6.5ah below for an example of the SAR final approval console.
(fig. 6.5ah)
From the example in fig. 6.5ah shown above, the final approval console for SARs reveals information about action taken and the reason(s) for the Notification, but is different from the console for a STR. This console has a feature for adding report person(s) to an SAR.
STEP 4: Enter any extra notes in the “reason to decline “box based on your observation. This step is mandatory if you want to reject the Notification. Check out fig. 6.5ai below for an example.
(fig. 6.5ai)
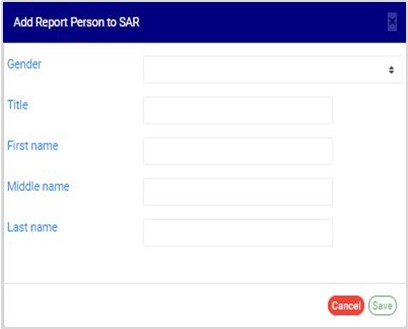
STEP 5: Click on ‘ADD REPORT PERSON(S) TO SAR’ to add details of report person. Report person refers to the person that sent the SAR Report.This displays a console as in. Fig. 6.5aj is an example of the console to input details of report person.
(fig. 6.5aj)
Follow the instructions below to make use of the console seen in fig. 6.5ag.
Select the gender of report person by clicking on the ‘Gender’ box.
Enter the title of report person
Enter the first name of report person
Enter the middle name of report person
Enter the last name of report person
Click on ‘SAVE’. To close the console, click on CANCEL.
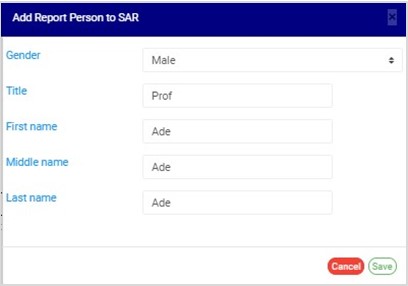
See fig. 6.5ak for an example of a console with details ready to save
(fig. 6.5ak)
The software will add the new information you have added right under the ‘ADD REPORT PERSONS TO SAR’ button just as in fig. 6.5al below. Click on ‘ADD REPORT PERSONS TO SAR’ to add more persons.
(fig. 6.5al)
As shown in fig. 6.5al above, there are two buttons at the end of the row for each report person. These are; ‘EDIT’ button and ‘DELETE’ button. To change the details for a report person, click on ‘EDIT’ and the console just as in fig. 6.5ak above will be displayed. Make the changes and click on save. To remove a report person from a SAR, click on ‘DELETE’.
STEP 6: Click on ‘ACCEPT’ to give final approval or ‘REJECT’ to disapprove the Notification. A confirmation console will be displayed to confirm your selected action. See fig. 6.5am and 6.5an to see examples of when you choose to ‘accept’ or ‘reject’ respectively. To proceed, click on ‘CONFIRM’ and to cancel the action, click on ‘CANCEL’. Check that you are sure of your options before confirming your request to accept or reject the Notification because this step is irreversible.