In this section, Institution asset data includes the name of the institution, the institution code, address, year of establishment and contact person details. This section provides a guide on how to perform operations as regards institution asset data on the Compliance Planet, with step-by-step instructions and pictures.
To view the institution asset data;
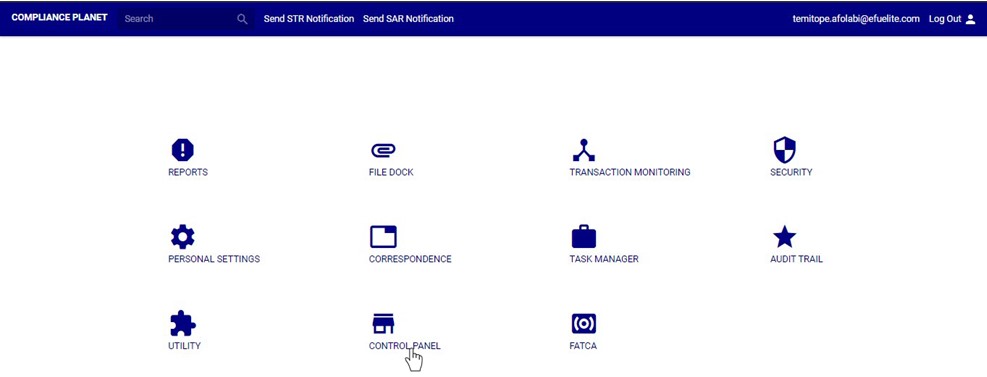
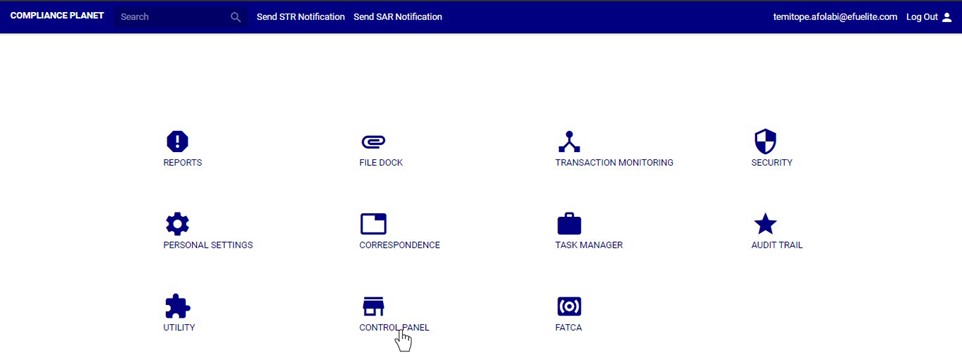
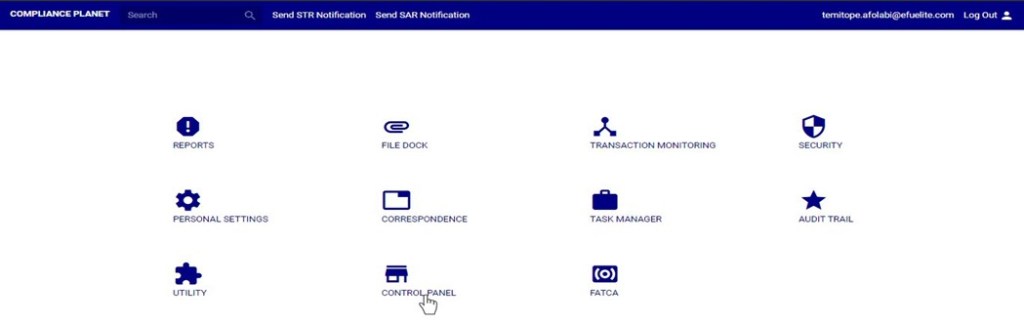
STEP 1: From the main dashboard, click ‘CONTROL PANEL’ as in fig 27.1a below
(fig. 27.1a)
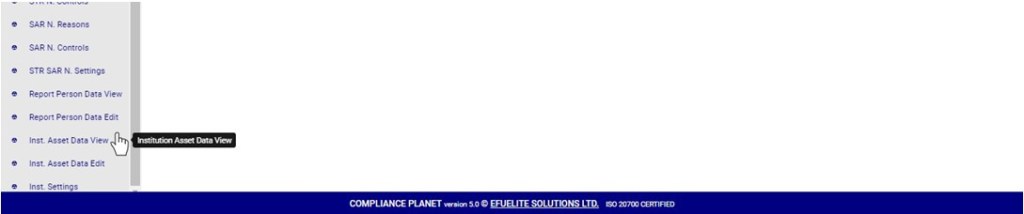
STEP 2: Click on ‘INSTITUTION ASSET DATA VIEW’ on the left hand side menuas in fig. 27.1b below.
(fig. 27.1b)
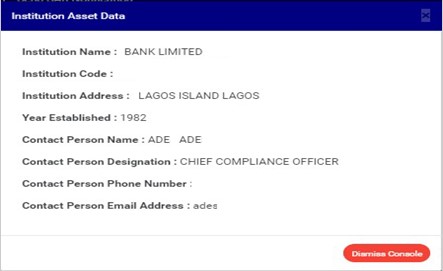
By clicking on ‘Institution Asset Data View’, a console will be displayed on your screen. See an example of an institution asset data in fig. 27.1c below.
(fig. 27.1c)
How to Edit Institution Asset Data
To make changes to the institution asset data,
STEP 1: From the left hand side menu, click on ‘INSTITUTION ASSET DATA EDIT’ as in fig 27.2a below.
(fig. 27.2a)
This displays an ‘Institution Asset Data’ console.
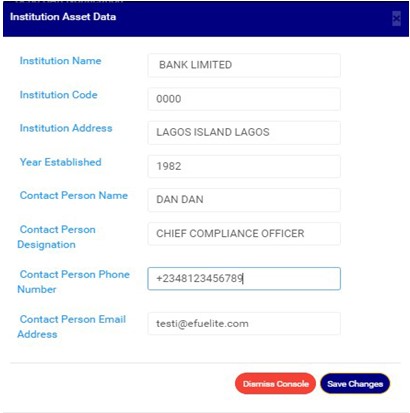
See an example of an institution asset data edit console in fig. 27.2b below.
(fig. 27.2b)
Fill in new data or change the details on the console.
STEP 2: Click on ‘Save Changes’ as shown in fig. 27.2c to save the changes or click on ‘Dismiss console’ to discard changes or new details entered on the console.
(fig. 27.2c)
This displays a confirmation console as in fig. 27.2d will appear to confirm your request.
(fig. 27.2d)
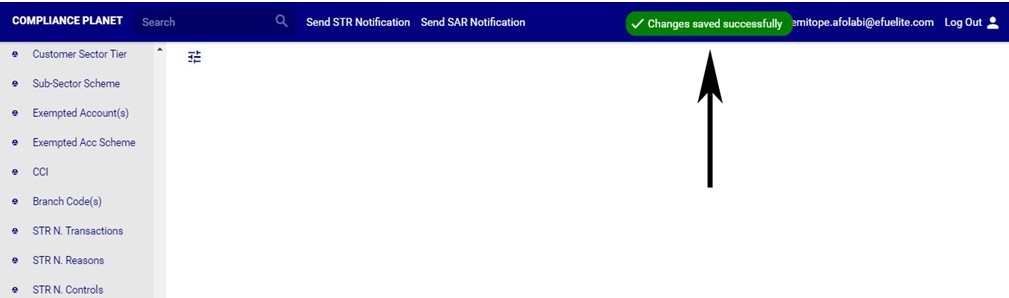
STEP 3: Click on ‘CONFIRM’ to proceed or ‘CANCEL’ to discontinue. A notification as in fig. 21.2e below will be displayed at the top of the page when the operation is complete.
The Action log provides a list of activities or actions that were carried out successfully and completed on the Compliance Planet software in a chronological order at any time. Here is how to view an action log for any period of time.
NOTE: Only the Supreme Administrator can carry out this operation
STEP 1: Click on ‘Action log’ on the audit trail page as in fig. 28.4a
(fig. 28.4a)
You can also click on ‘User trail’ on the left hand side menu as in Fig. 28.4b
(fig. 28.4b)
This displays the User log page as seen in fig. 28.4c below.
(fig. 28.4c)
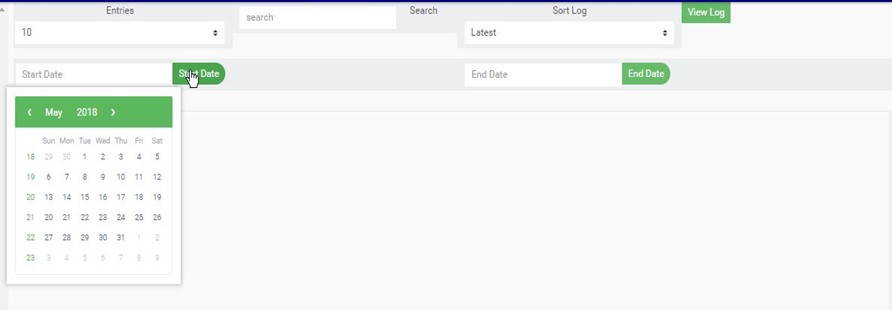
STEP 2: Click on the ‘Start Date’ button. This will display a calendar below the date. See fig. 28.4d for an example.
(fig. 28.4d)
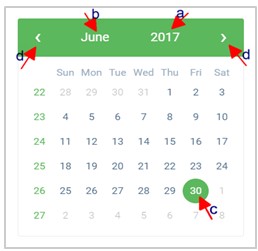
Take a look at the arrows labelled a to d in fig. 28.4e to study the calendar.
Click on the given year to change it to your year of choice.
Click on the given month to change it to your month of choice.
Then, click on the date of the month.
You can also click on the angle brackets on the calendar [ ‘<’ or ‘>’ ] to go backward or forward.
(fig. 28.4e)
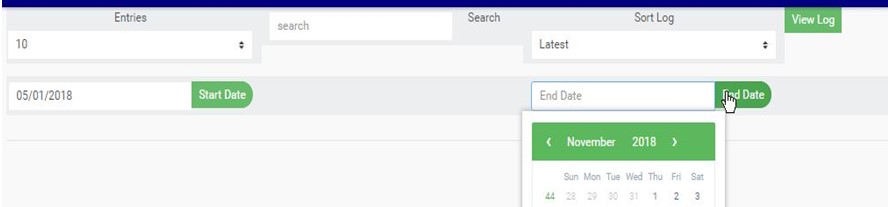
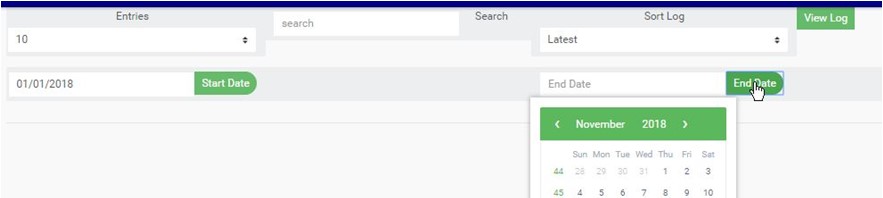
STEP 3: Click on the ‘End Date’ button to specify the end date. This displays a calendar below the date box. See fig. 28.4f for an example.
(fig. 28.4f)
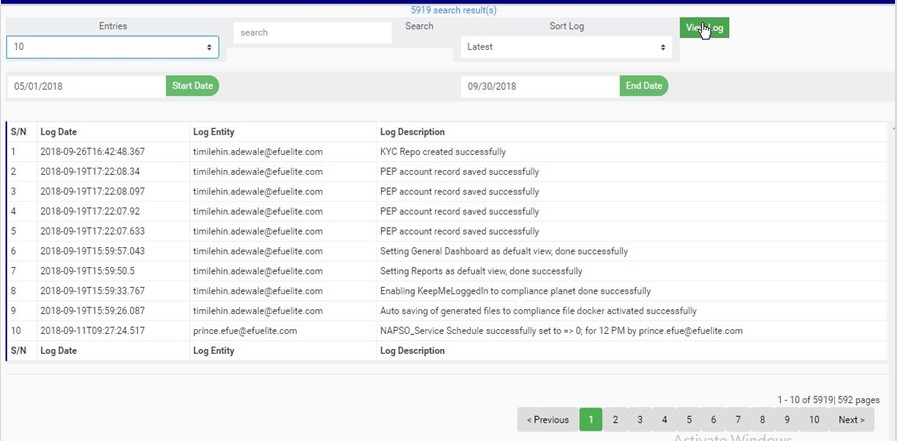
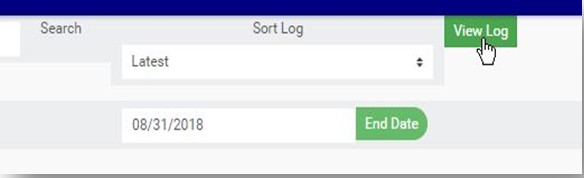
STEP 4: Click on ‘View Log’ as in fig. 28.4g to view the services.
(fig. 28.4g)
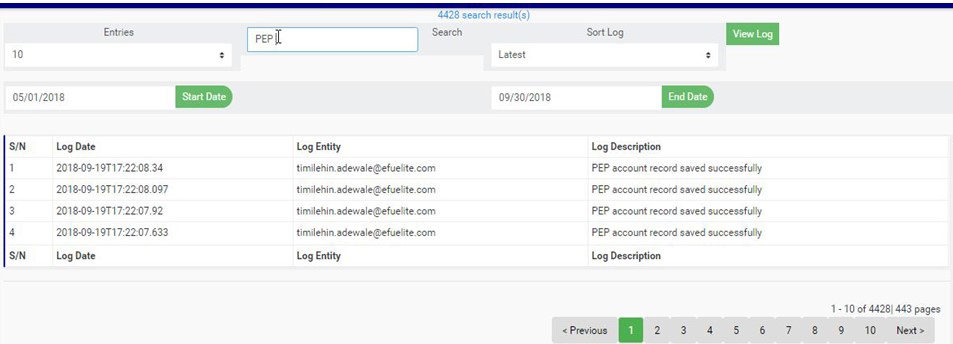
This displays a list of activities that were successfully carried within the specified date. See fig. 28.4h for an example.
(fig. 28.4h)
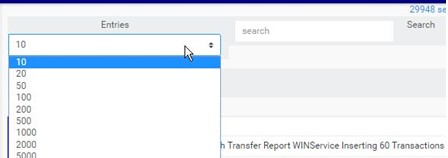
Click on the ‘entries’ box to change the number of entries you want to see per page. See fig. 28.4i.
(fig. 28.4i)
Search by inputting a search term in the ‘Search’ box. See fig. 28.4j for an example of a search.
(fig. 28.4j)
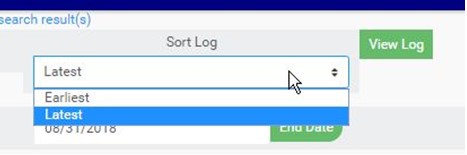
You can sort out the records to be seen from the latest to the earliest or vice-versa. Specify the order of the list by clicking on the ‘Sort Log’ box as in fig. 28.4k below.
(fig. 28.4k)
At the bottom-right corner of the page, the software provides information about the number of pages, with the page numbers written out. Clicking on a page number to go to that particular page. Click on ‘NEXT’ to go to the next page and click on ‘PREVIOUS’ to go to the page before the current page. See these features in fig. 28.4l below.
The service log keeps a record of the Compliance Planet software services forming a logical path linking a sequence of operations on the software. The service log provides a list of services that have affected an operation in a sequential order. It is used to trace the services that have affected the contents of a record.
NOTE: Only the Supreme Administrator can carry out this operation
Here is how to view a service log;
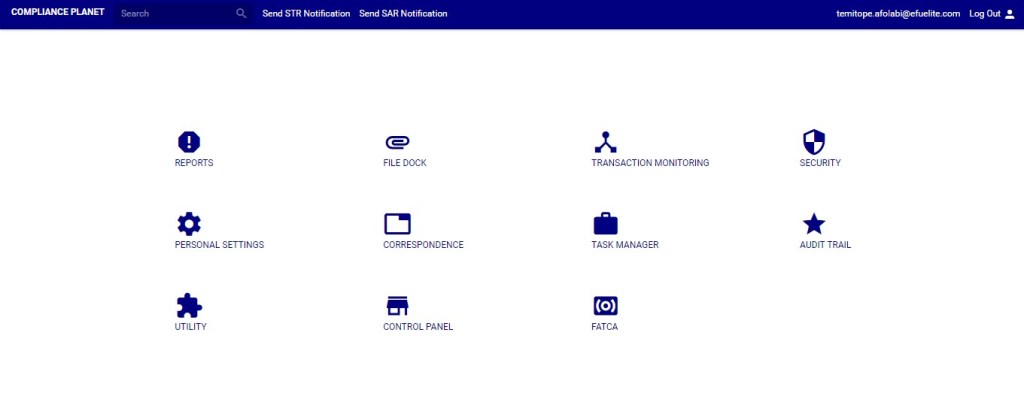
STEP 1:From the main dashboard, click ‘AUDIT TRAIL’ as shown in fig 28.2a below
(Fig 28.2a)
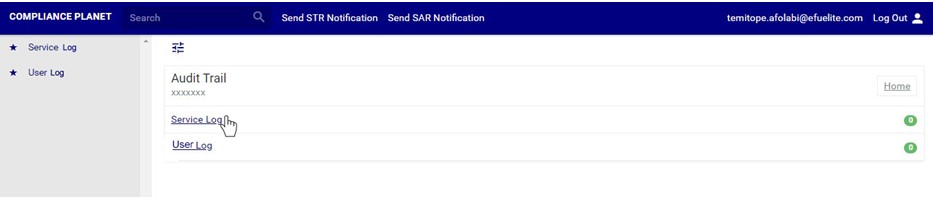
This will display the audit trail page as shown in fig. 28.2b.
(fig. 28.2b)
STEP 1: Click on ‘Service log’ on the audit trail page as shown in fig.28.3a. below.
(fig. 28.3a)
You can also click on ‘Service log’ on the left hand side menu as in fig. Fig. 28.3b
(fig. 28.3b)
This will display the service log page as seen in fig. 28.3c below.
(fig. 28.3c)
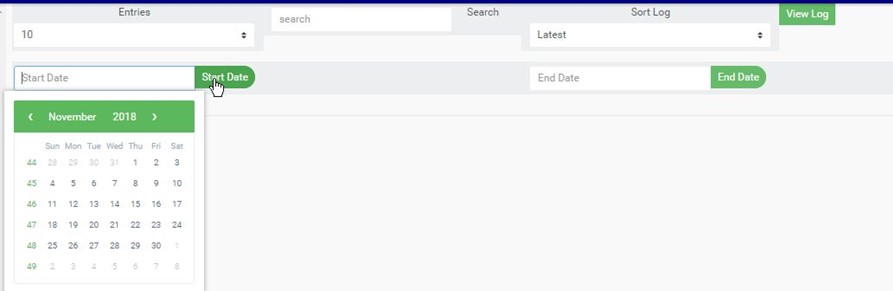
STEP 2: Click on the ‘Start Date’ button this displays a calendar just below the date box. See fig. 28.3d for an example.
(fig. 28.3d)
Take a look at the arrows labelled a to d in fig. 28.3e to study the calendar.
Click on the given year to change it to your year of choice.
Click on the given month to change it to your month of choice.
Then, click on the date of the month.
You can also click on the angle brackets on the calendar [ ‘<’ or ‘>’ ] to go backward or forward.
(fig. 28.3e)
STEP 3: Click on the ‘End Date’ button to specify the end date, this also displays a calendar below the date box. See fig. 28.3f for an example.
(fig. 28.3f)
STEP 4: Click on ‘View Log’ as in fig. 28.3g below to view the services.
(Fig. 28.3g)
This displays a list of services pertaining to operations that were carried within the specified period. See fig. 28.3h for an example.
(fig. 28.3h)
Click on the ‘entries’ box to change the number of entries you want to see per page. See fig. 28.3i.
(fig. 28.3i)
You can search for a service by typing th search term in the ‘Search’ box. The software displays the results in real time. See fig. 28.3j for an example of a search.
(fig. 28.3j)
You can sort out the records to be seen from the latest to the earliest or vice-versa. Specify the order of the list by clicking on the ‘Sort Log’ box as in fig. 28.3k.
(fig. 28.3k)
At the bottom-right corner of the page, the software provides information about the number of pages, with the page numbers written out. Clicking any page number, to go to that particular page. Click ‘NEXT’ to go to the next page and click on ‘PREVIOUS’ to go to the page before the current page. See these features in fig. 28.3l below.
(fig. 28.3l)
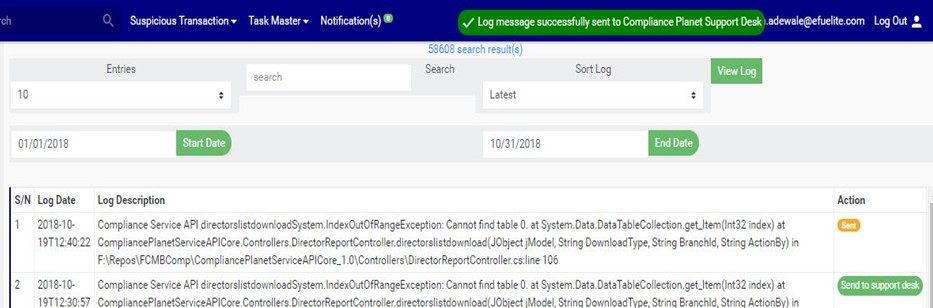
Each service log entry has an action button used for mailing the service log to the Compliance support desk.(See fig. 28.3m below) Here is how to mail a service log to the support desk;
Click on ‘Send To Support Desk’. This button is at the end of the row of each log entry. See this in fig. 28.3m below.
(fig. 28.3m)
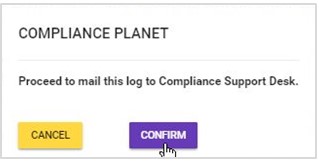
This displays a confirmation console as in fig. 28.3n will be displayed. Click on ‘Confirm’ to proceed
(fig. 28.3n)
.
A notification will be displayed at the top of the screen as in fig. 28.3o when the mail is sent successfully and the action button for that log will change to ‘Sent’.
This section provides a guide on how to view the Audit trail, that is, the track of services or actions on the Compliance Planet, with step-by-step instructions and pictures.
What is an Audit Trail?
An audit trail is a record that provides a documentary evidence of the sequence of activities, processes and services that have affected a specific operation or procedure on the Compliance Planet at any time in a chronological order. This record of system activities and services enables the reconstruction and examination of the sequence of events and operations on the planet and/or changes.
Audit Trail Operations
The audit trail menu houses features that provide information on the occurrence of the compliance planet services and significant actions carried out successfully on the compliance planet. The audit trail section comprises of;
Service log
Action log
NOTE: Only the Supreme Administrator can carry out this operation
To get an audit trail,
From the main dashboard, click ‘AUDIT TRAIL’ as shown in fig 28.2a below
(Fig 28.2a)
This will display the audit trail page as shown in fig. 28.2b.
In this section you can edit the bio-data of the institution, this includes; the full and short name of the institution, the institution code, tax number, Bvn,address, year of establishment, default email and default occupation. This section provides a guide on how to perform operations as regards institution settings on the Compliance Planet, with step-by-step instructions and pictures.
NOTE: Only the Supreme Administrator can carry out this operation
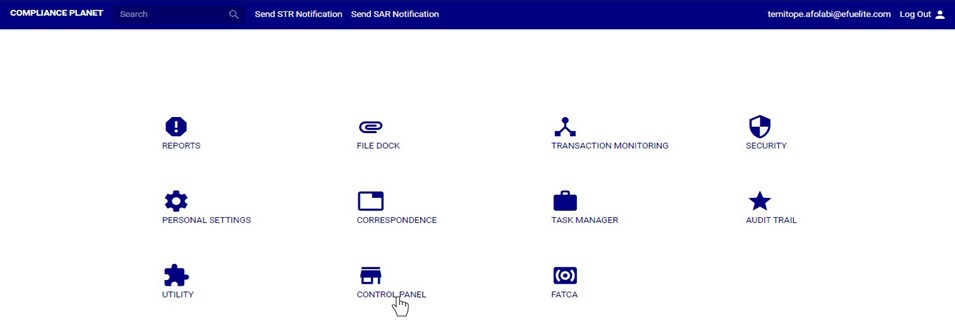
STEP 1: From the main dashboard, click ‘CONTROL PANEL’ as in fig 27.3a below
(fig. 27.3a)
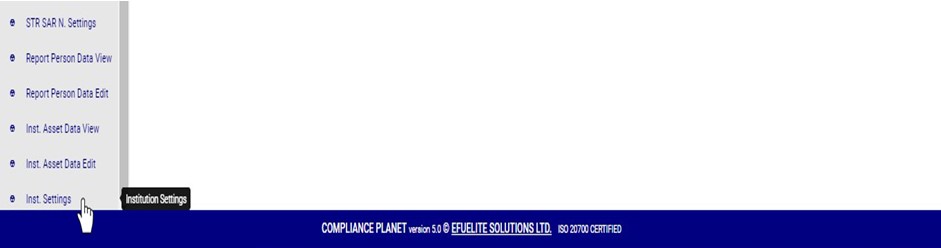
STEP 2: Click on ‘INSTITUTION SETTINGS’ on the left hand side menuas in fig. 27.3b below.
(fig. 27.3b)
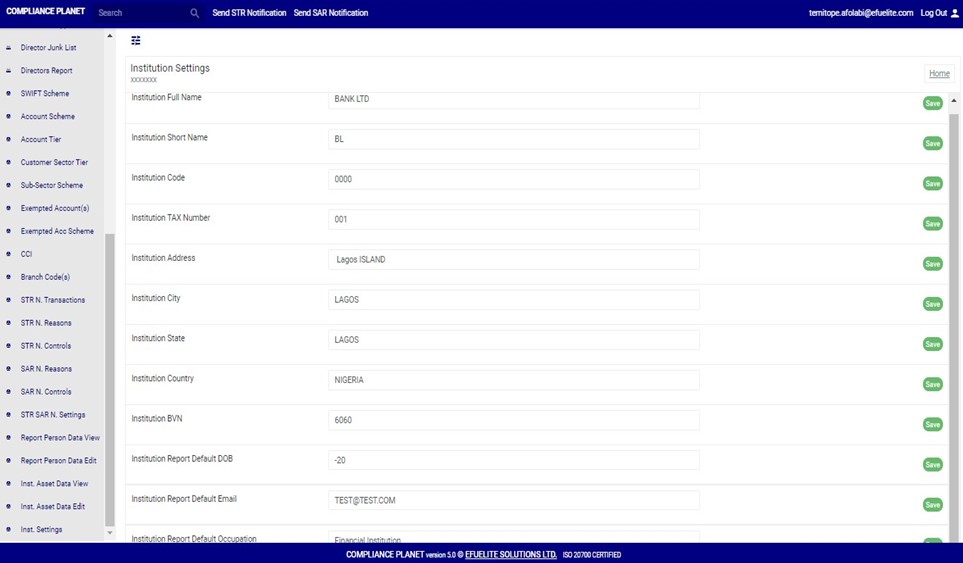
This displays a console as in fig. 27.3c below
(fig. 27.3c)
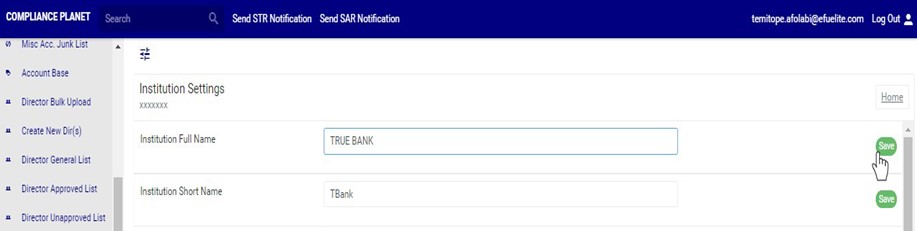
STEP 3: Click on any of the textboxes to edit it. See an example in fig. 27.3d below.
(fig. 27.3d)
STEP 4: Click on the green “SAVE” button at the right end of the row to update that specific field. See an illustration in fig. 27.3e below.
(fig. 27.3e)
A notification as in fig. 27.3f below will be displayed at the top of the page when the operation is complete.
This section provides a guide on how to modify controls available when sending an STR notification on the Compliance Planet software, with step-by-step instructions and pictures.
WHAT ARE STR NOTIFICATION CONTROLS?
These controls include; Customer Account name, Customers’ account number, Transaction amount, transaction type, Date of transaction, Person conducting transaction, line of business, Reason for filing STR, General information, Extra details etc.
This section provides the opportunity to edit what the person(s) involved in the process of sending an STR notification will see. The modification available includes Activating or deactivating a control Setting the requirement of the control i.e. if it’s compulsory or not Tool tip description i.e. the extra guide or note to be displayed when the mouse cursor is on a particular control. Tool tip activation i.e. activating or deactivating the tool tip option. Visibility i.e. setting those that can see any of these commands.
NOTE: Only person(s) profiled as deputy supreme admin can carry out these operations.
STEP 1: From the main dashboard, click ‘CONTROL PANEL’ as in fig 22.1a below
(fig 22.1a)
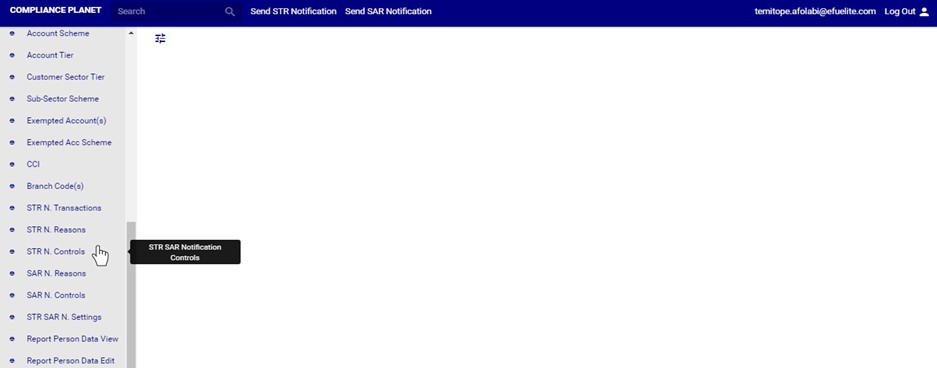
STEP 2: Click on ‘STR N. CONTROLS’ on the left hand side menu. See this in fig. 22.1b below.
(Fig 22.1b)
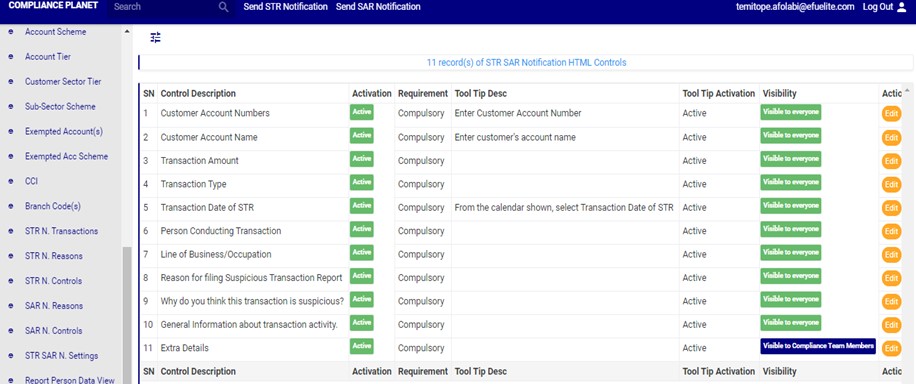
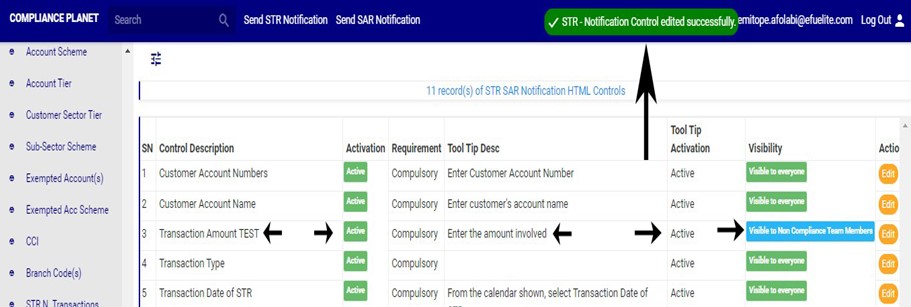
This displays a page showing a list of all STR notification controls and their status, requirement ,tool tip description ,tool tip activation status and visibility. See fig. 22.1c below for an example.
(fig 22.1c)
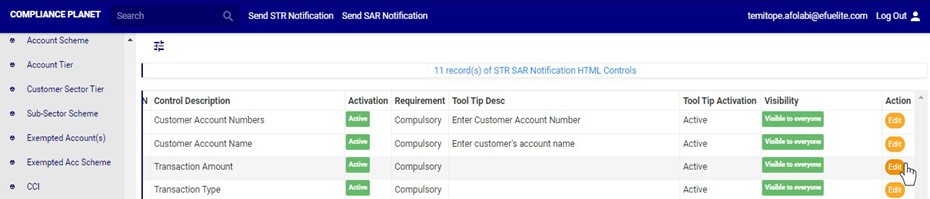
STEP 3: Click onthe edit button on the action row. See this in fig. 22.1d below
(fig 22.1d)
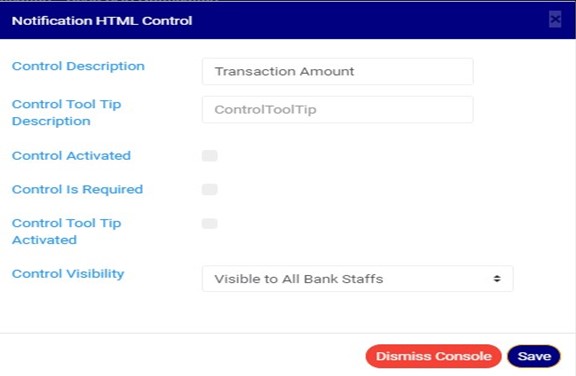
Clicking on the edit button displays a ‘Notification HTML Control’ console See fig. 22.1e below for an example.
(fig 22.1e)
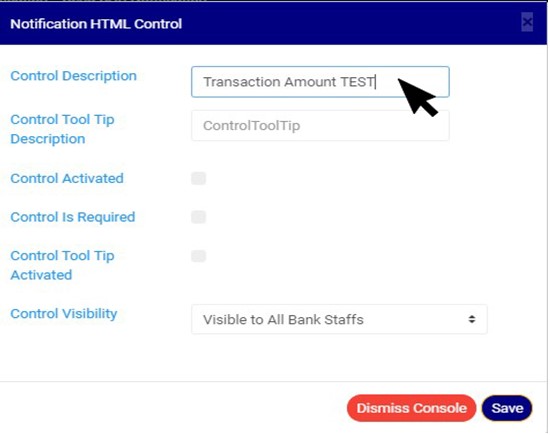
STEP 4: Click on control description textbox to edit the description for that particular control. See an example in fig. 22.1f below
(Fig 22.1f)
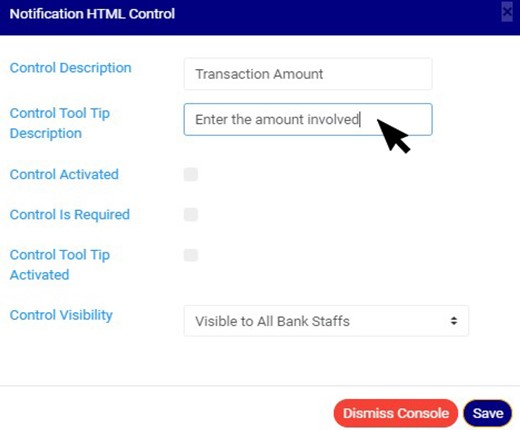
STEP 5: Click on control tool tip textbox to add or edit tool tip description (i.e the extra guide or note to be displayed when the mouse cursor is on a particular control).See an example in fig. 22.1g below
(Fig 22.1g)
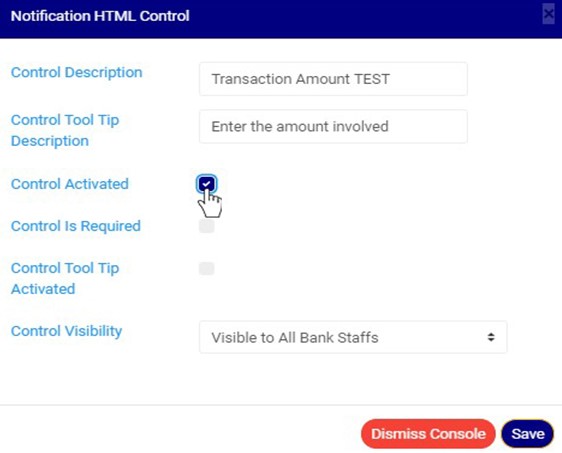
STEP 6: Click ‘CONTROL ACTIVATION’ checkbox as in fig. 22.1h below to activate the control, note that unchecking this checkbox will deactivate the control and make it unavailable when sending an STR notification.
(Fig 22.1h)
STEP 7: Click the ‘CONTROL IS REQUIRED’ checkbox as in fig. 22.1i below to set the control as compulsory, note that checking this option means that the person sending the STR notification will not be able to send a notification if that field is not filled.
(Fig 22.1i)
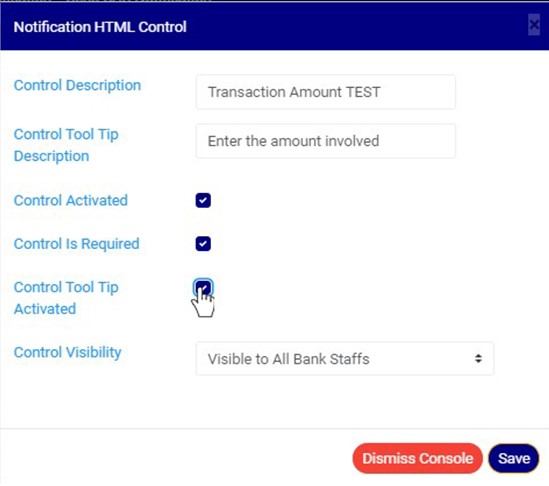
STEP 8: Click on ‘Control Tool Tip Activated’ checkbox as in fig. 22.1j below to activate the tooltip option for that particular control, note that unchecking this checkbox will deactivate the tool tip for that control and make it unavailable in the STR notification console.
(Fig 22.1j)
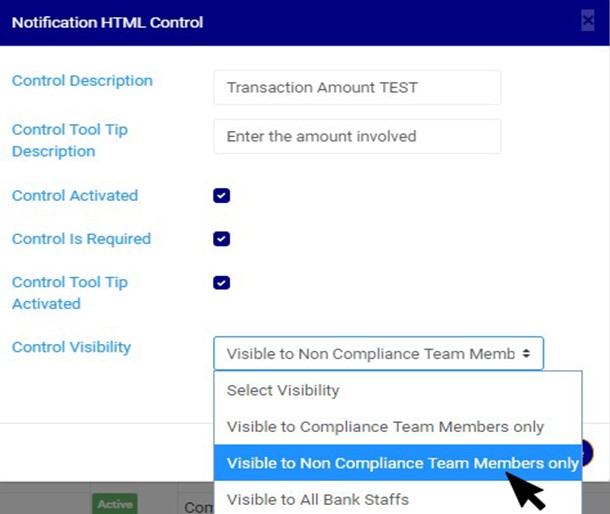
STEP 9: Click on ‘CONTROL VISIBILITY’ to select those that can see the field i.e. you can make the field visible to compliance team members only, non-compliance team members only, or all bank staffs. See an example in fig. 22.1k below
(Fig 22.1k)
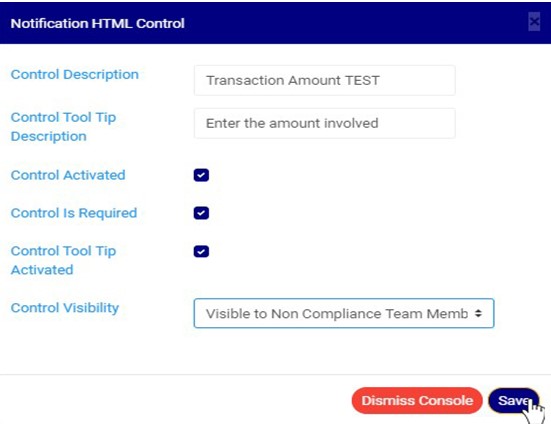
STEP 10: Click on ‘SAVE’ button as in in fig. 22.1l below to save the changes.
(Fig 22.1l)
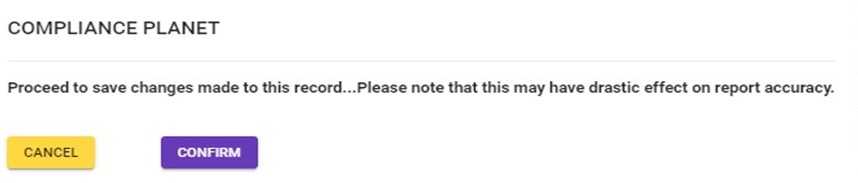
Clicking on the save button will display a console as in Fig 22.1m below. Click on ‘CONFIRM’ to save the changes or cancel to discontinue action.
(Fig 22.1m)
When the changes are saved, a notification will be displayed at the top of the page as in fig. 22.1n below.
This section provides a guide on how to modify controls available when sending an SAR notification on the Compliance Planet, with step-by-step instructions and pictures (see section 6.2.2 for sending an STR report).
These controls include; Branch Name and Sol Id, Account Number, Customer’s Former Name, Customer’s Former DOB, Other Details, Customer’s New Name, Reason for filing SAR, Customer’s New Dob etc.
This section provides the opportunity to edit what the person(s) involved in the process of sending an SAR notification will see. The modification available includes
Activating or deactivating a control
Setting the requirement of the control i.e. if it’s compulsory or not
Tool tip description i.e. the extra guide or note to be displayed when the mouse cursor is on a particular control.
Tool tip activation i.e. activating or deactivating the tool tip option.
Visibility i.e. setting those that can see any of these commands.
NOTE; Only person(s) profiled as deputy supreme admin can carry out these operations
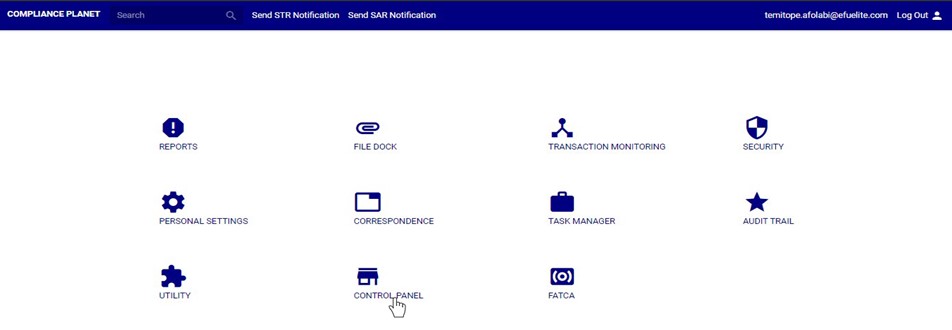
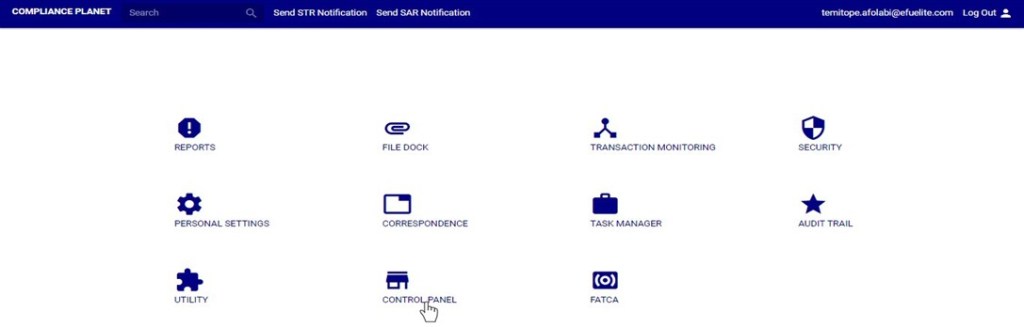
STEP 1: From the main dashboard, click ‘CONTROL PANEL’ on the planet’s dashboard as in fig 24.1a below
(fig 24.1a)
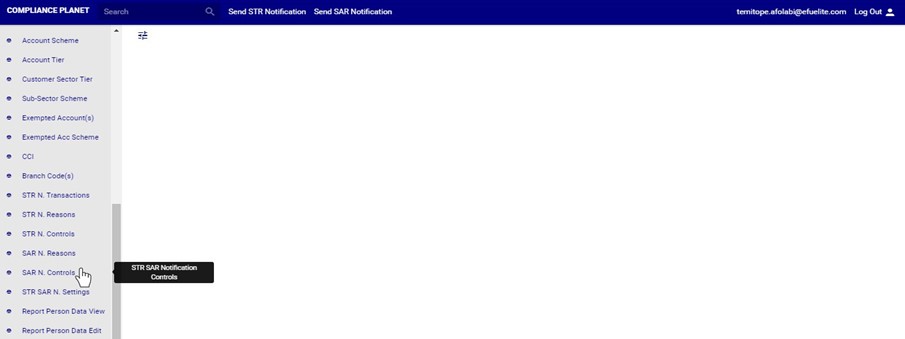
STEP 2: Click on ‘SAR N. CONTROLS’ on the left hand side menu. See this in fig. 24.1b below.
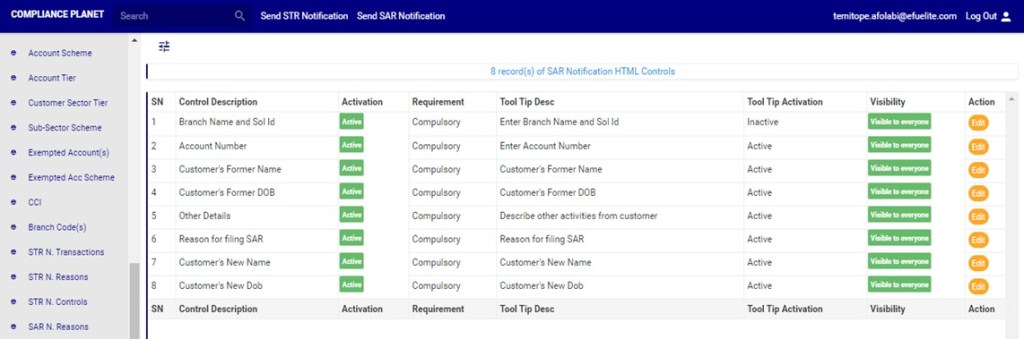
(Fig 24.1b) Clicking on ‘SAR N. CONTROLS’ will display a page showing a list of all SAR notification controls and their status, requirement, tooltip description, tooltip activation and visibility. See fig. 24.1c below for an example.
(fig 24.1c)
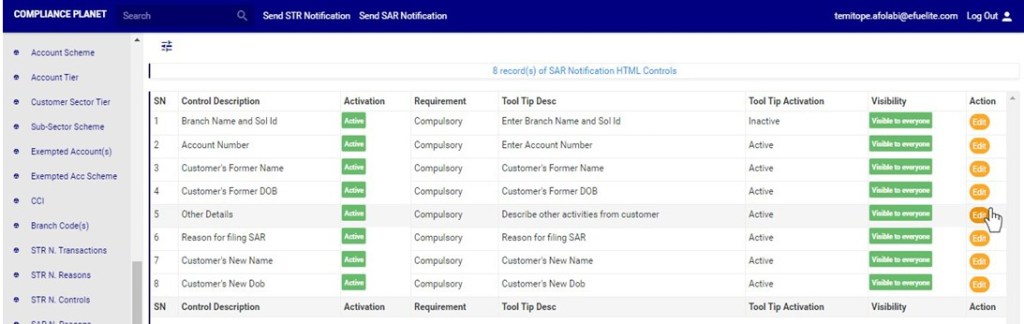
STEP 3: Click onthe ‘edit’ button on the action row as in fig. 24.1d below
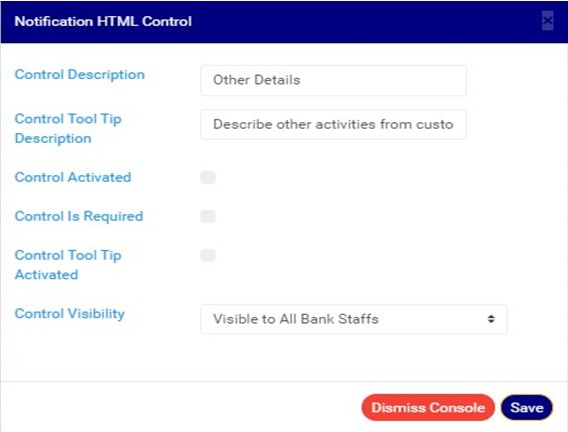
(Fig 24.1d) Clicking on the edit button will display a ‘Notification HTML Control’ console See fig. 24.1e below for an example.
(fig 24.1e)
STEP 4: Click on ‘control description’ text box to edit the description for that particular control. See an example in fig. 24.1f below
(Fig 24.1f)
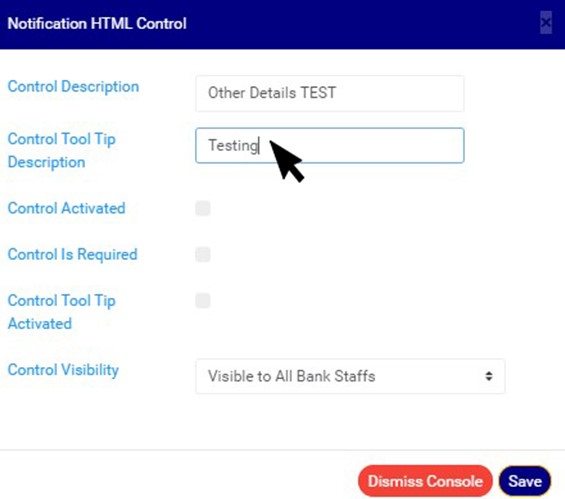
STEP 5: Click on ‘control tool tip description’ textbox to add or edit tool tip description for that particular control. See an example in fig. 24.1g below
(Fig 24.1g)
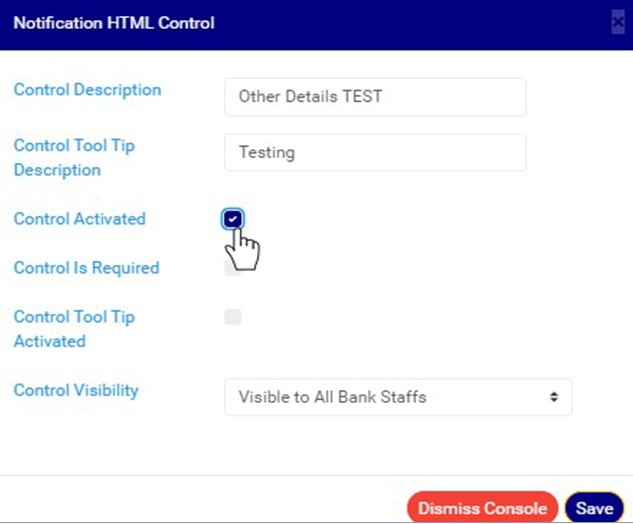
STEP 6: Click on ‘CONTROL ACTIVATED’ checkbox as in fig. 24.1h below to activate the control, note that unchecking this checkbox will deactivate the control and make it unavailable in the SAR notification console.
(Fig 24.1h)
STEP 7: Click ‘CONTROL IS REQUIRED’ checkbox as in fig. 24.1i below to set the control as compulsory, note that checking this option means that the person sending the SAR notification will not be able to send a notification if that field is not filled.
(Fig 24.1i)
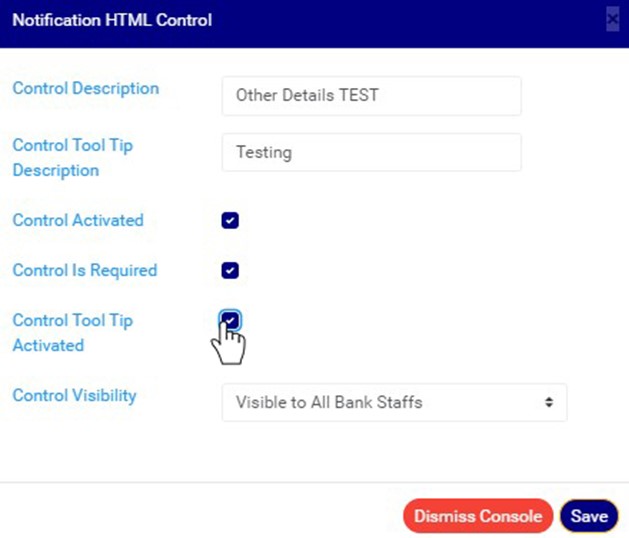
STEP 8: Click on ‘CONTROL TOOLTIP ACTIVATED’ checkbox as in fig. 24.1j below to activate the tooltip option for that particular control, note that unchecking this checkbox will deactivate the tool tip feature for that control and make it unavailable in the SAR notification.
(Fig 24.1j)
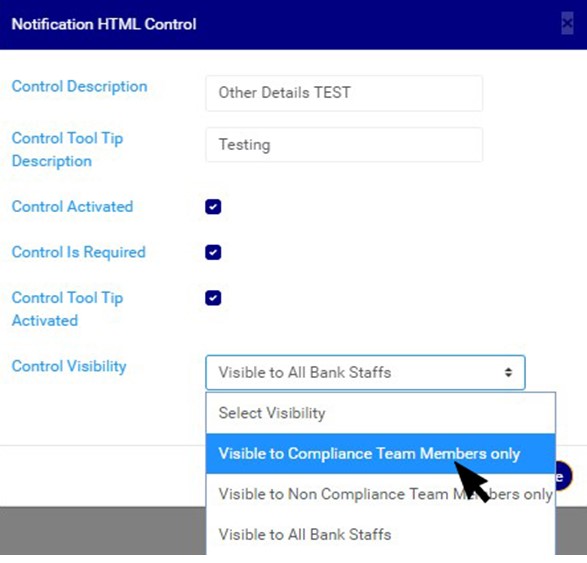
STEP 9: Click on ‘CONTROL VISIBILITY’ to select those that can see the control i.e. you can make the field visible to compliance team members only, non-compliance team members only, or all bank staffs. See an example in fig. 24.1k below
(Fig 24.1k)
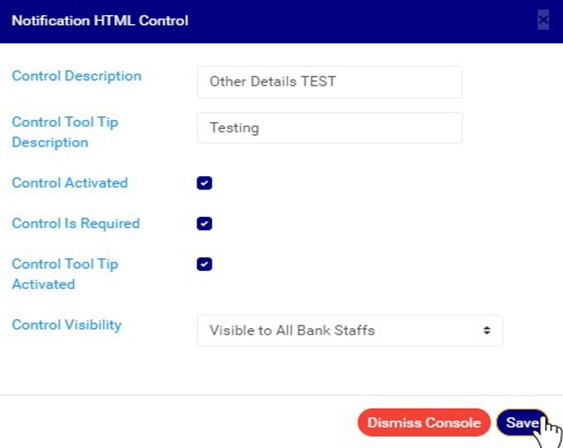
STEP 10: Click on ‘SAVE’ button as in in fig. 24.1l below to save the changes.
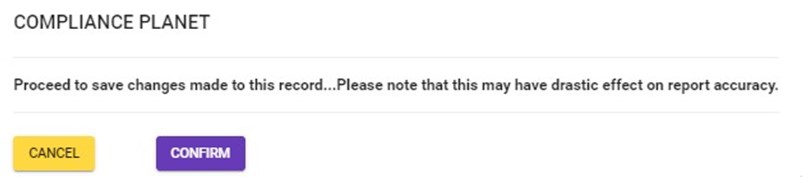
(Fig 24.1l) Clicking on the save button will display a console as in Fig 24.1m below. Click on ‘CONFIRM’ to save the changes or cancel to discontinue action.
(Fig 24.1m) When the changes are saved, a notification will be displayed at the top of the page as in fig. 24.1n below.
This section provides a guide on settings pertaining to STR and SAR notifications on the Compliance Planet, with step-by-step instructions and pictures.
Under this Control panel feature, the software provides options to;
Modify the route an STR or SAR notification will go through
Allow file attachments to be uploaded with the STR or SAR notification
Validate account number when Sending an STR or SAR notifications
NOTE: Only person(s) profiled as a deputy supreme admin will be able to carry out these operations
To perform any of the operations on STR SAR NOTIFICATION SETTINGS;
STEP 1: From the main dashboard, click ‘CONTROL PANEL’ as in fig 25.1a below
(fig. 25.1a)
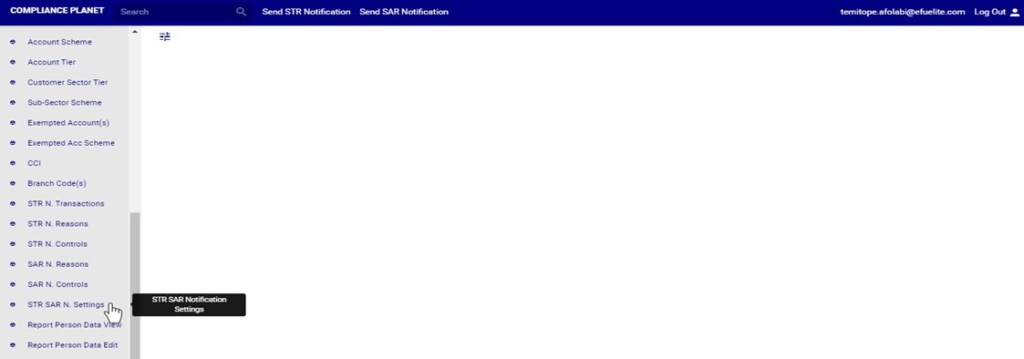
STEP 2: Click on ‘STR SAR NOTIFICATION SETTINGS’ on the left hand side menu as in fig. 25.1b below.
(fig. 25.1b)
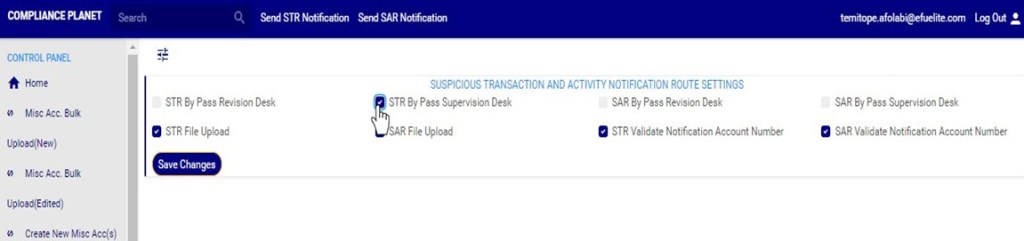
Clicking on SAR NOTIFICATION SETTINGS will display page showing a list of all STR SAR notification settings. See fig. 25.1c for an example.
(fig. 25.1c)
STEP 3: Select the any of the STR SAR notification settings checkbox to activate that particular setting. See an example in fig 25.1d below
(fig. 25.1d)
Selecting the STR SAR notification settings checkbox will activate that particular setting while deselecting the checkbox means you want to deactivate the setting.
STR by pass revision desk: Selecting this option will deactivate the revision desk; this means that all STR notifications sent will by-pass or will not go through the revision desk. This option may be used when the financial institution does not have a revision desk in the compliance department.
STR by pass supervision desk: Selecting this option will deactivate the supervision desk; this means that all STR notifications sent will by-pass or will not go through the supervision desk. This option may be used when the financial institution does not have a supervision desk in the compliance department.
SAR by pass revision desk: Selecting this option will deactivate the revision desk; this means that all SAR notifications sent will by-pass or will not go through the revision desk. This option may be used when the financial institution does not have a revision desk in the compliance department.
SAR by pass supervision desk: Selecting this option will deactivate the supervision desk; this means that all SAR notifications sent will by-pass or will not go through the supervision desk. This option may be used when the financial institution does not have a supervision desk in the compliance department.
STR file Upload: Selecting this enables the option to upload documents (attachments) to accompany the STR notification.
SAR file upload: Selecting this enables the option to upload documents (attachments) to accompany the SAR notification
STR Validate Notification account number: Selecting this option means that when sending an STR notification, the planet will validate the inputted AC number if it exists on the financial institutions’ database.
SAR Validate Notification account number: Selecting this option means that when sending an SAR notification, the planet will validate the inputted AC number if it exists on the financial institutions’ database.
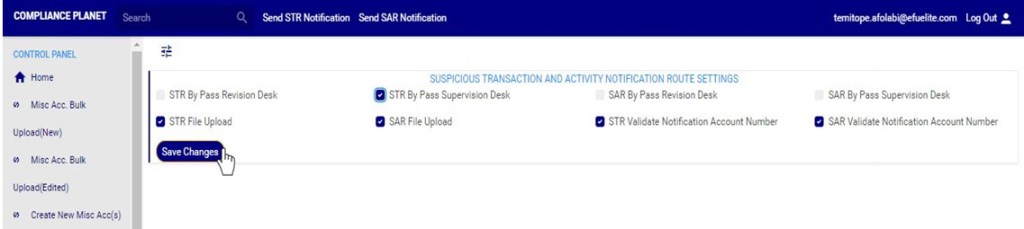
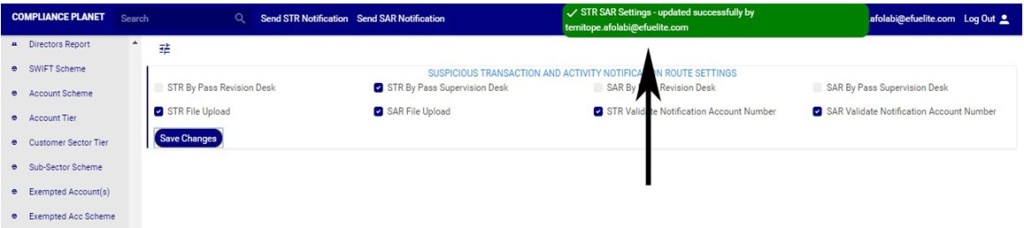
STEP 4: Click on ‘SAVE CHANGES’ button to save the changes. See an example in fig 25.1e below.
(fig. 25.1e)
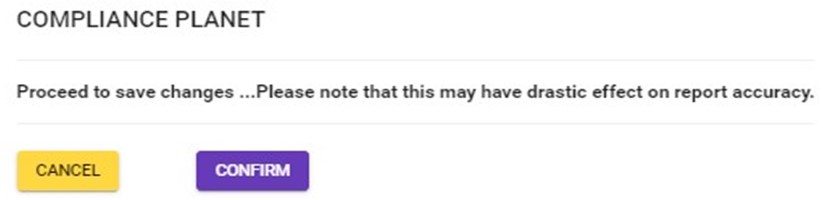
Clicking on the save changes button will display a confirmation console as in Fig 25.1f below. Click on ‘CONFIRM’ to save the changes or cancel to discontinue action.
(Fig 25.1f)
When the changes are saved, a notification will be displayed at the top of the page as in fig. 25.1g below.
This section provides a guide on how to perform operations pertaining to the report person data on the Compliance Planet, with step-by-step instructions and pictures.
WHO IS A REPORT PERSON?
The report person refers to an authorized representative of the reporting institution. The personal and official details of the person make up the ‘Report person data’. The Compliance planet attaches the report person data to all reports processed and generated and it is static for all reports.
NOTE: Only person(s) profiled as deputy supreme admin will be able to carry out these operations
How to view Report Person Data
To view Report Person data;
STEP 1: From the main dashboard, click ‘CONTROL PANEL’ as in fig 26.2a below
(fig. 26.2a)
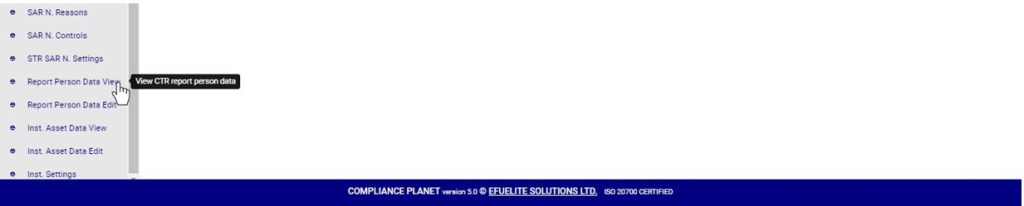
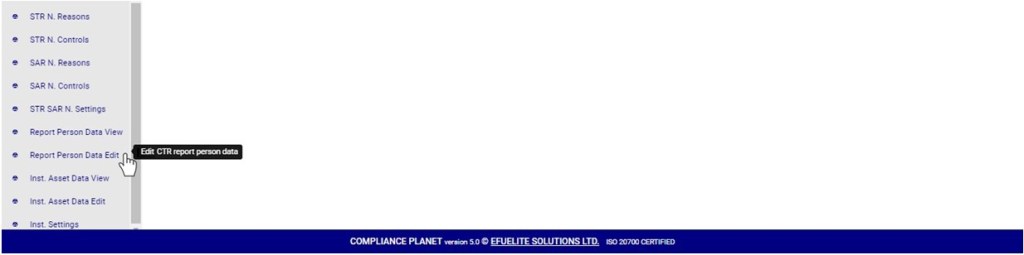
STEP 2: Click on ‘REPORT PERSON DATA VIEW’ on the left hand side menu as in fig 26.2b
(fig. 26.2b)
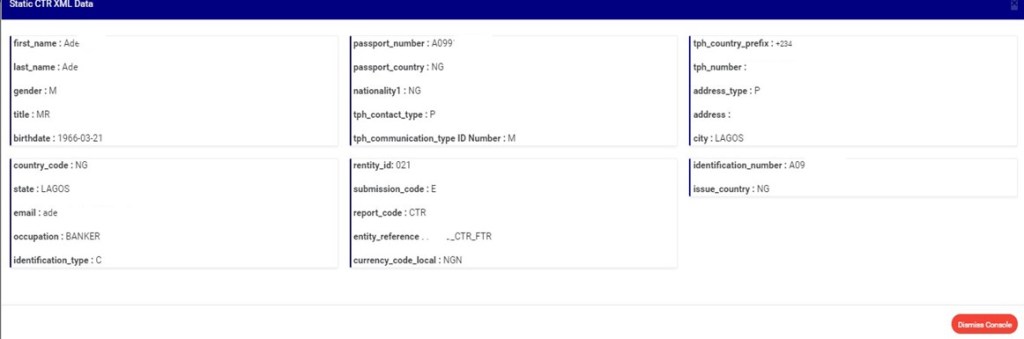
This displays a confirmation console as in fig. 26.2d below.
(fig. 26.2c)
Click on ‘Dismiss Console’ to close the console.
How to Edit Report Person Data
To make changes to the report person data;
STEP 1: From the left hand side menu, click on ‘REPORT PERSON DATA EDIT’ as in fig 26.3a below.
(fig. 26.3a)
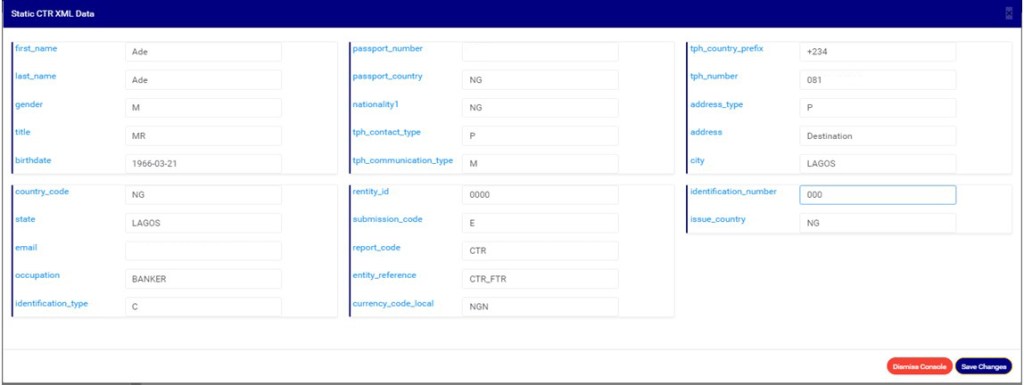
This displays a console as in fig. 26.3b below.
(fig. 26.3b)
Fill in the new details or change the details on the console.
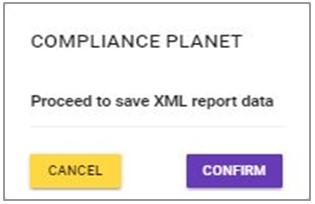
STEP 2: Click on ‘Save Changes’ as shown in fig. 26.3c. To discard changes or the new details entered on the console, click on ‘Dismiss console’.
(fig. 26.3c)
This displays a confirmation console as in fig. 26.3d to confirm your request.
(fig. 26.3d)
STEP 3: Click on ‘CONFIRM’ as in fig. 26.3d to proceed or ‘CANCEL’ to discontinue the operation. A notification will be displayed at the top of the page when the operation is complete.
This section provides a guide on how to modify “REASON” options available when sending an SAR notification (see section 6.2.2) on the Compliance Planet, with step-by-step instructions and pictures. These options are available when filling “Reason for filing SAR” when sending an SAR notification.
SAR NOTIFICATION REASON OPERATIONS
Here, the operations are;
1. Editing notification reason,
2. Deleting reason
3. Adding a new reason
NOTE: Only person(s) profiled as deputy supreme admin can carry out these operations.
To perform any of the operations;
STEP 1: From the main dashboard, click ‘CONTROL PANEL’ as in fig 23.1a below
(fig. 23.1a)
STEP 2: Click ‘SAR N. REASON’ on the left hand side menu as in fig 23.1b below
(fig. 23.1b)
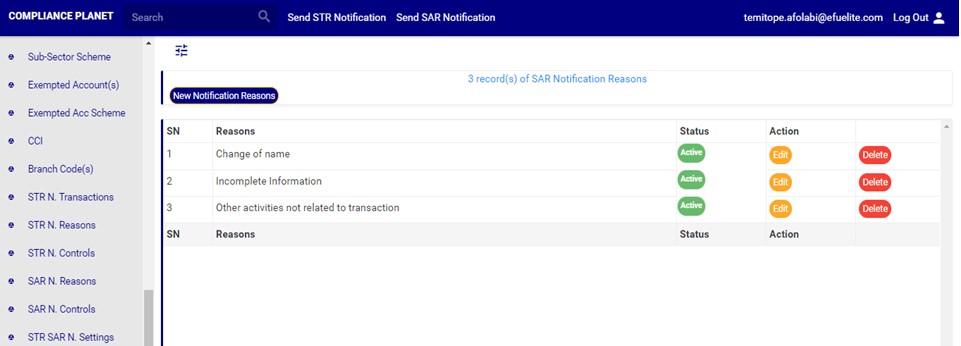
➔ This will display a page showing a list of all reasons that have been created and available on the planet. See fig. 23.1c for an example.
(fig. 23.1c)
This refers to changing the description or status of the SAR notification reason. Here is how to do this.
How to edit SAR notification reason
STEP 1: Click on the ‘EDIT’ button on the action column. See fig. 23.2a for an example.
(Fig 23.2a)
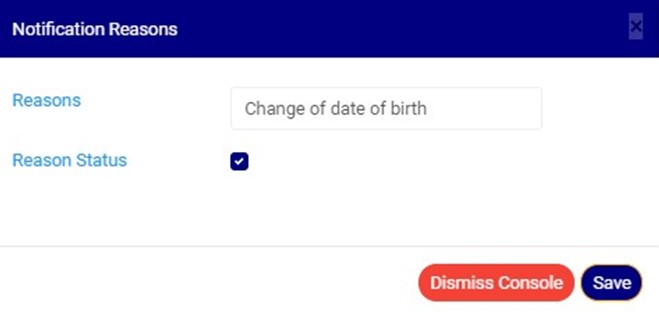
➔ Clicking the EDIT button will display a console titled, ‘Notifications Reasons’ as shown in fig 23.2b below.
(Fig 23.2b)
STEP 2: Click on the reasons textbox to change the Notification reason description. See an example in Fig 23.2c below.
(Fig 23.2c)
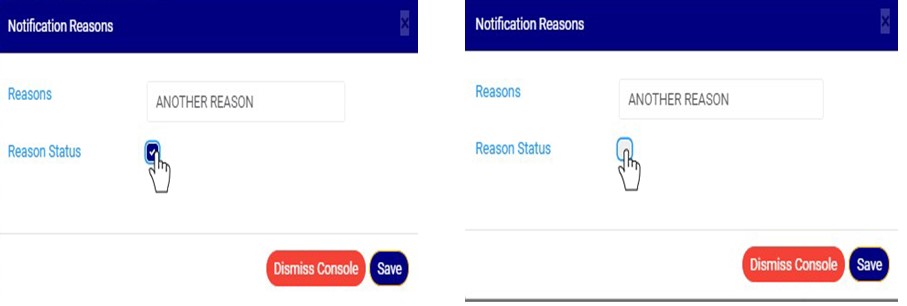
STEP 3: Click on the reason status checkbox to make that notification reason active or inactive. This is illustrated in Fig 23.2d and Fig 23.2e below
(Fig 23.2d) (Fig 23.2e)
➔ Fig 23.2 d shows that the notification reason is set ACTIVE while Fig 23.2e shows that the notification reason is set INACTIVE.
➔ An active notification reason will form part of the available options when sending a SAR notification on the compliance planet software while an inactive notification reason will no longer be part of the available options when sending a new SAR notification on the compliance planet.
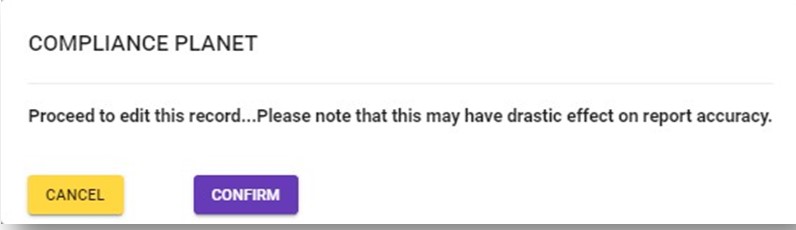
STEP 4: Click on ‘SAVE’ button to save the edit or click ‘DISMISS CONSOLE’ to close the console. See Fig 23.2f for an example
Fig 23.2f
➔ This displays a confirmation console as in fig 23.2g below
Fig 23.2g
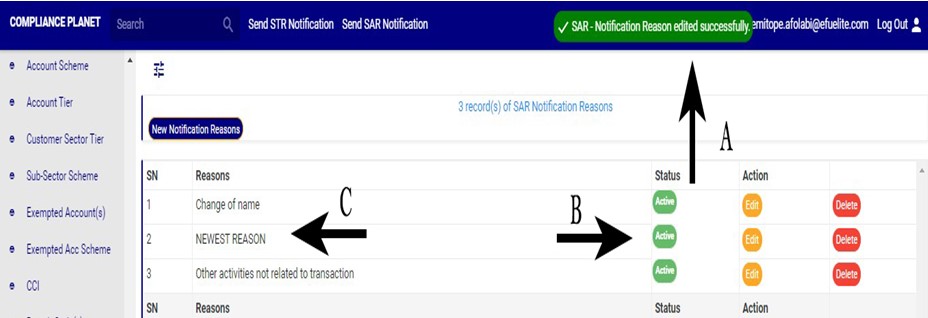
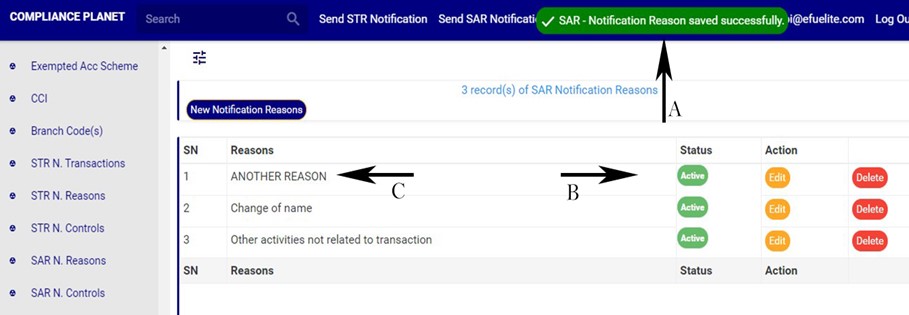
➔ A notification as in fig. 23.2h(A) will be displayed at the top of the page when the operation is successful. Also, See fig. 23.2h for an example of the updated description and status
Fig 23.2h
How to delete an SAR notification reason
A deleted SAR notification reason will no longer be part of the available options when sending a SAR notification on the software(See section 6.2.2 for sending an SAR notification).
Here is how to do this.
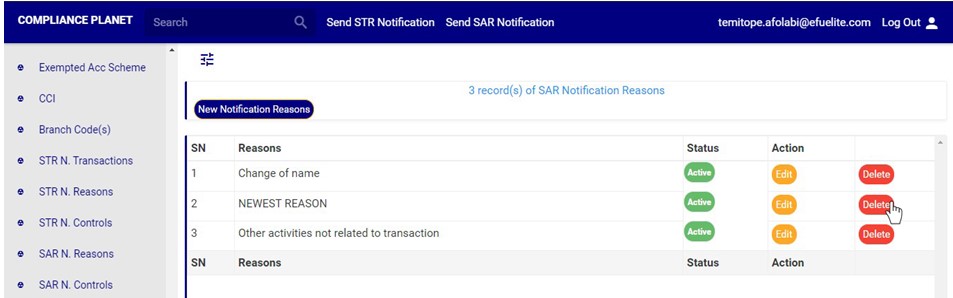
STEP 1: Click on the ‘DELETE’ button of the SAR notification reason as in fig23.3a.
(fig23.3a)
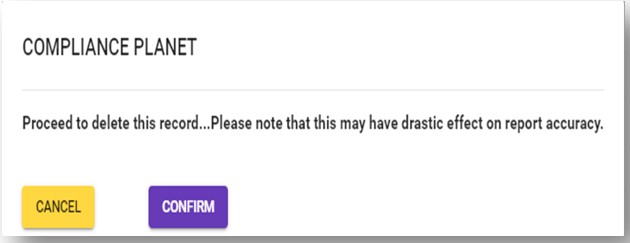
➔ This displays a confirmation console to confirm your request to delete the SAR reason.
STEP 2: Click on ‘CONFIRM’ as in fig23.3b to proceed or ‘CANCEL’ to discontinue.
(fig23.3b)
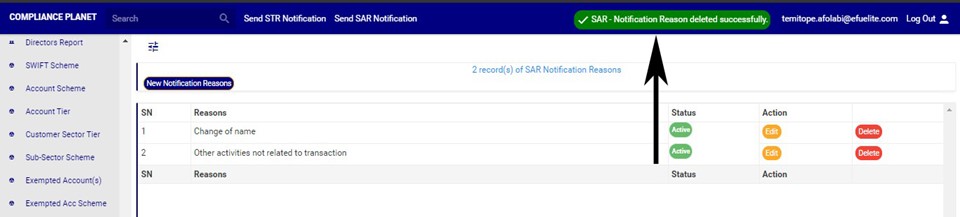
➔ A notification will be displayed at the top of the page when the delete operation is complete as in Fig 24.3c below
(fig23.3c)
How to add new STR notification reason
This refers to creating a new SAR notification reason. This notification reason will form part of the available options when sending a new SAR notification on the compliance planet (See section 6.0 for sending an SAR notification).
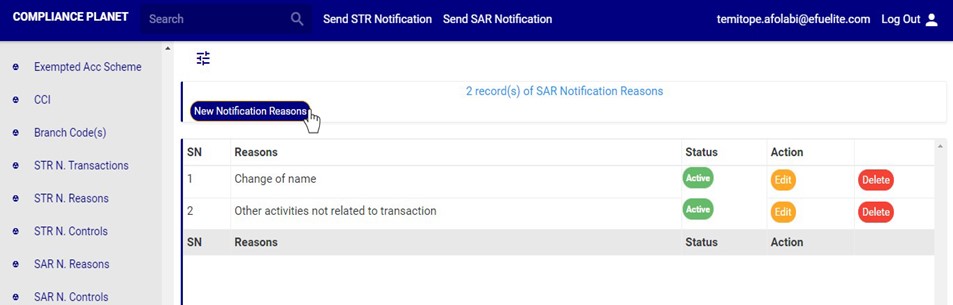
STEP 1: Click on ‘NEW NOTIFICATION REASON’ as shown in fig. 23.4a below
(fig. 23.4a)
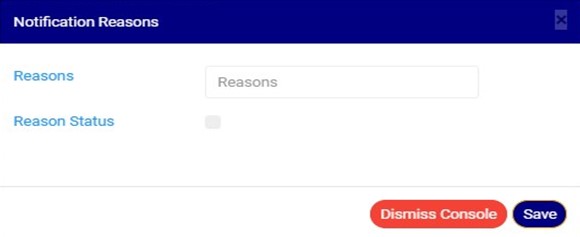
➔ A console as in fig. 23.4b will be displayed.
(fig. 23.4b)
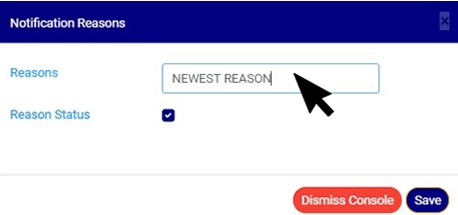
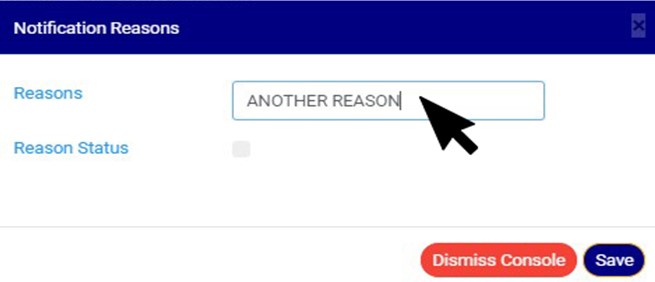
STEP 2: Fill the reasons textbox as in fig. 23.4c below
(fig. 23.4c)
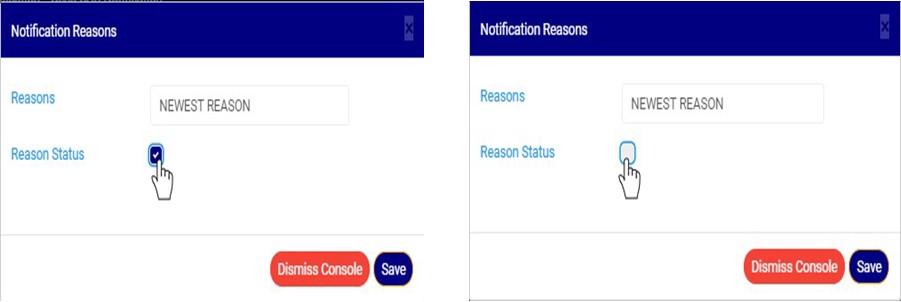
STEP 3: Click on the ‘reason status’ checkbox to make that notification reason active or inactive. This is illustrated in Fig 23.4d and Fig 23.4e below
(Fig 23.4d) (Fig 23.4e)
➔ Fig 23.4d shows that the notification reason is set ACTIVE while Fig 23.4e shows that the notification reason is set INACTIVE.
➔ An active notification reason will form part of the available options when sending SAR notification on the software, while an inactive notification reason will no longer be part of the available options when sending a new SAR notification on the compliance planet.
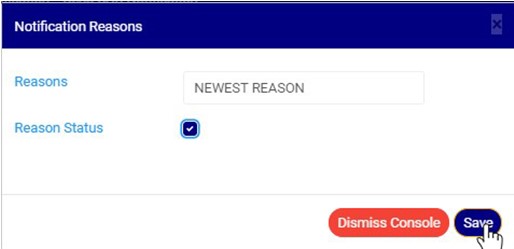
STEP 3: Click on ‘SAVE’ to save the edit or click ‘DISMISS CONSOLE’ to close the console. See Fig 23.4f for an example
Fig 23.4f
➔ This displays a confirmation console as in fig23.4g below
Fig 23.4.g
➔ A notification as in fig. 23.4h (A) will be displayed at the top of the page when the operation is successful. Also, See fig. 23.4h for an example of the updated description and status