This downloads data placeholder for a customer from the Compliance Planet Software.
From the app dashboard, click on “REGULATORY REPORTS” as shown below.
This will display a drop down as in image below. The dropdown lists the report types available on the compliance planet software.
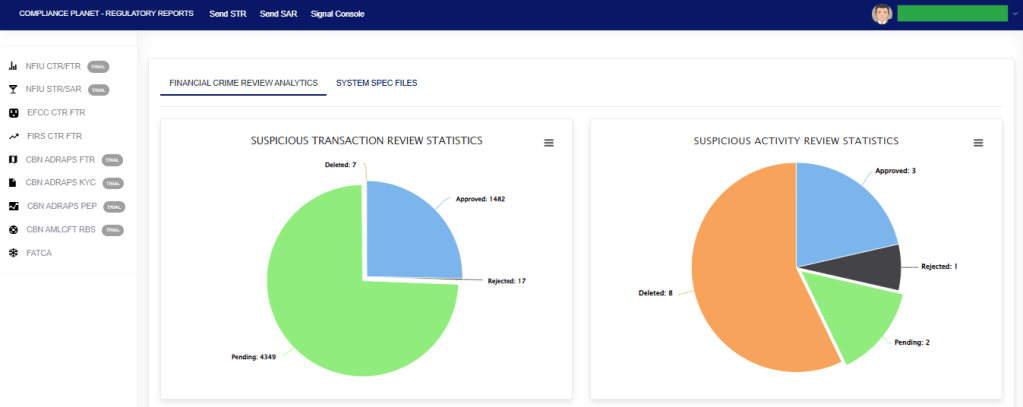
Click “NFIU STR/SAR” from the drop-down menu to open the NFIU STR/SAR page. See the image below.
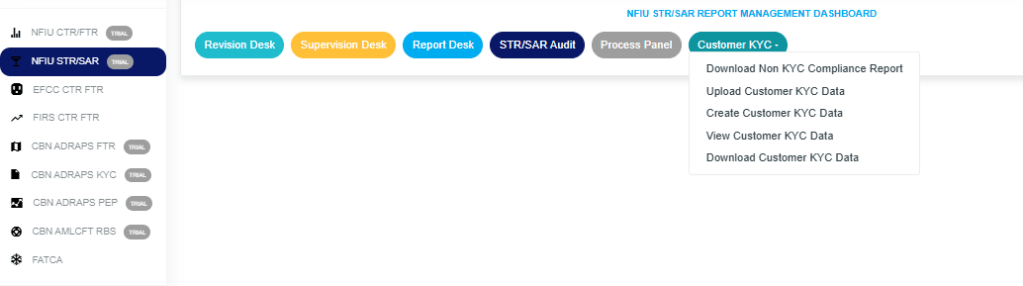
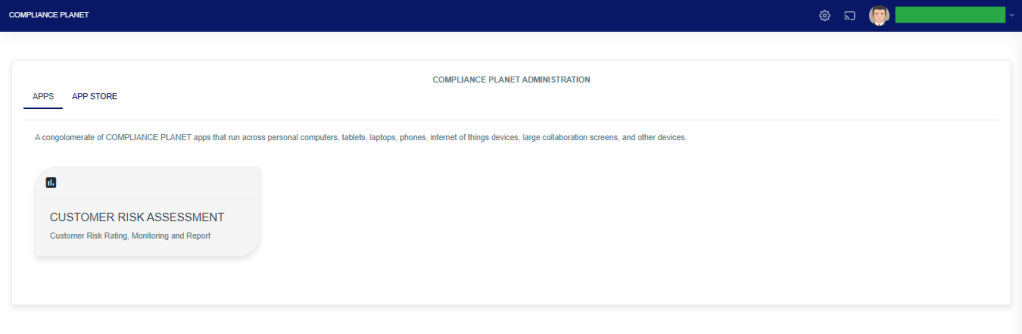
Click on “CUSTOMER KYC” which then displays a page as seen below.
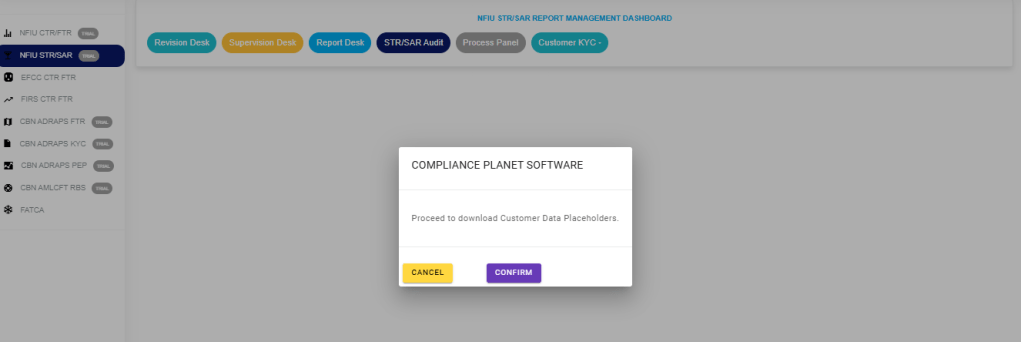
STEP 1: Click “DOWNLOAD CUSTOMER KYC DATA” in the dropdown options to display the confirmation console, then select “Confirm” to download as in the image below.
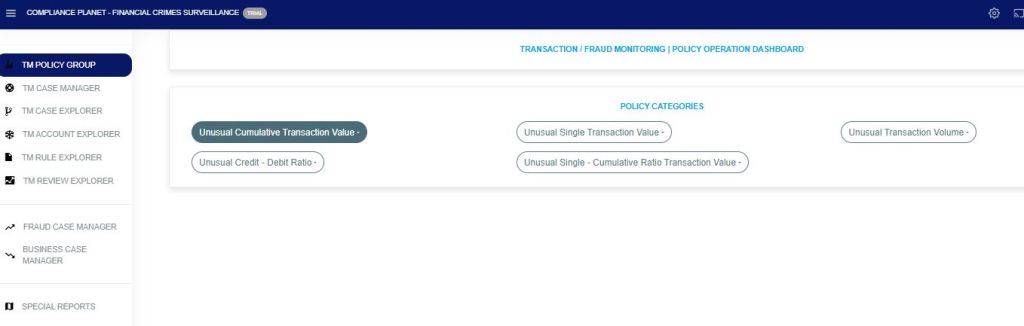
The Compliance Planet Anti Money Laundering/Core Bank Finance Software has several policy groups under Transaction/Fraud Monitoring to handle a wide range of monitoring scenarios.
Below are the different policy categories and their explanation.
UNUSUAL SINGLE TRANSACTION VALUE This policy category allows the creation of transaction/fraud monitoring rules to monitor single transaction inflow and/or outflow over a specified period. This policy category allows setting dynamic periods from account inception, account age (moving period of account birth date), etc. It will give instant signals in a change in customer transaction threshold behavior.
UNUSUAL TRANSACTION VOLUME This policy category facilitates the creation of transaction/fraud monitoring rules to track inflows and outflows that surpass a predetermined threshold based on the total volume of transaction activity over a set timeframe. It provides real-time alerts for any potentially suspicious customer transaction count/volume.
UNUSUAL CUMULATIVE TRANSACTION VALUE This policy category enables the formulation of transaction/fraud monitoring rules to track inflows and outflows that exceed a defined threshold based on the total accumulated transaction value over a designated period. The policy generates immediate alerts when there is a notable change in the customer’s transaction threshold behavior.
UNUSUAL CREDIT/DEBIT TRANSACTION RATIO This policy category enables the creation of transaction/fraud monitoring rules to track inflows and outflows that exceed a designated credit/debit ratio above the total cumulative transaction, both inflows and outflows, over a specific time frame. It also allows for configuring adaptable periods, from the account’s creation to its current age, based on the account’s start date. The system provides immediate notifications when there are alterations in the customer’s transaction behavior.
UNUSUAL SINGLE CUMULATIVE RATIO TRANSACTION VALUE This policy category allows the creation of transaction/fraud monitoring rules to track inflows and outflows that exceed a defined percentage above the total cumulative transaction values, either inflow or outflow, accumulated over a specific past timeframe. It introduces the ability to set flexible monitoring periods, from the account’s inception, its current age, and other customizable intervals. It provides immediate alerts for unusual or potentially fraudulent customer transaction patterns.
Note: This operation requires the Administrator or Auditor’s permission.
The Global screening helps to scan an institution based on certain parameters and if a match is found, it further displays the Scan Results(customers’ account(s)) and their score prediction assigned by the system.
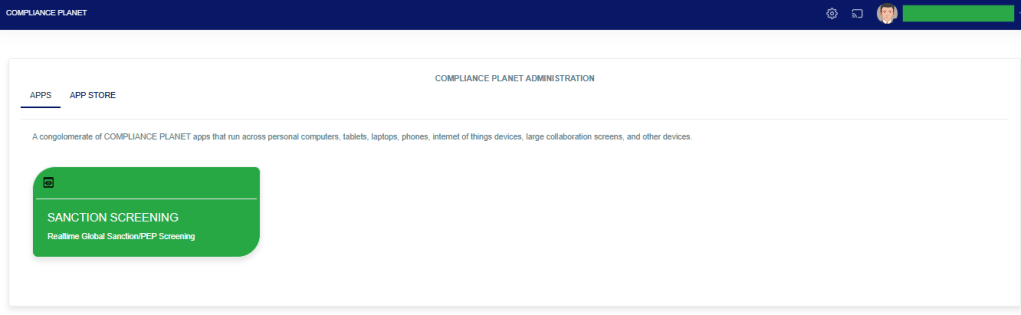
STEP 1: From the app dashboard, click on “SANCTIONSCREENING” as seen below.
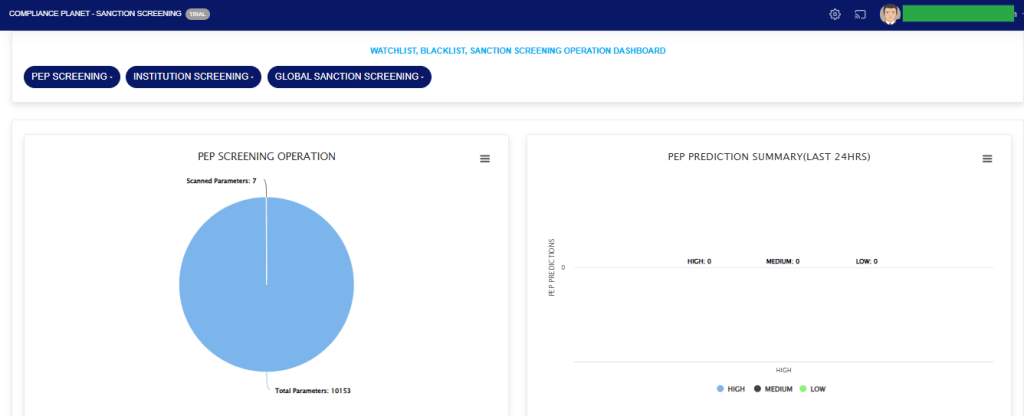
The above action will display a page as seen in the image below.
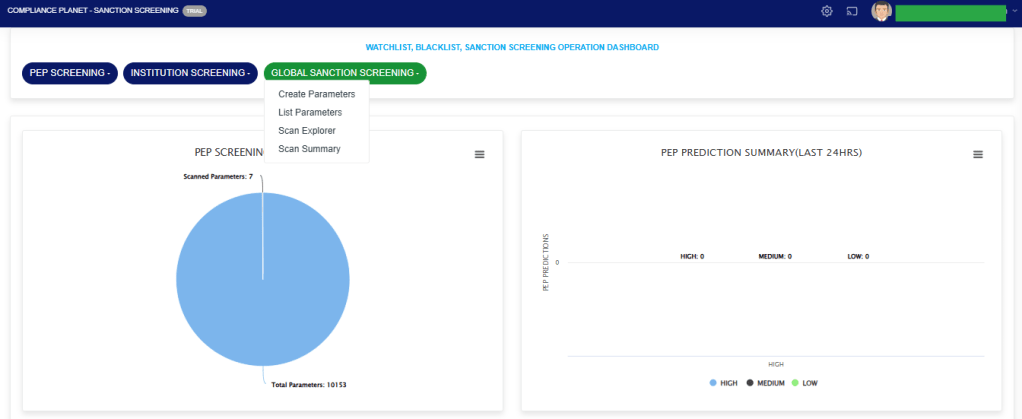
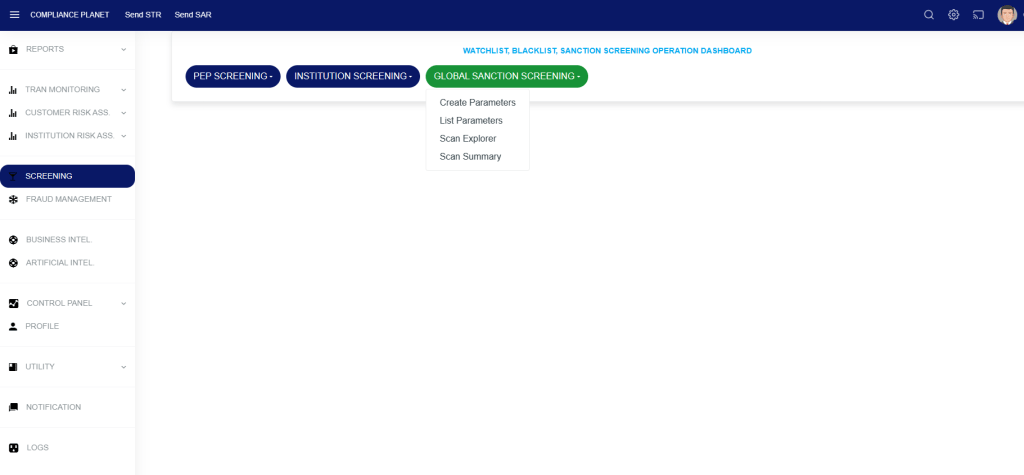
STEP 2: From the top menu, click “Global Sanction Screening”, this action will display a dropdown menu as seen in the image below. From the dropdown menu, click “Create Parameters”.
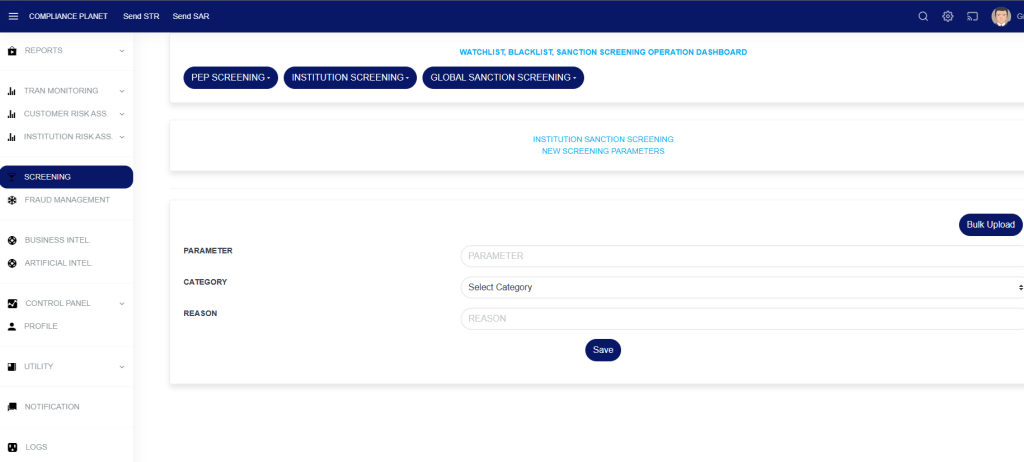
STEP 3: On the NEW SCREENING PARAMETERS page, fill in the fields.
PARAMETER: The parameter you want to scan
CATEGORY: The category of the parameter, this is a dropdown to select from.
REASON: The reason for scanning the parameter.
You can also bulk upload parameters already prepared in excel by clicking on the “Bulk Upload” button.
Click on the “Save” button to save the parameter.
Note: The category selected determines the parameter entered. e.g if the category selected is “NAME”, then the parameter should be a name. If the category selected is “EMAIL”, then the parameter should be an email address.
How to list the Global Screening Parameters
STEP 1: Click on “List Parameters” to see the list of parameters entered into the software.
STEP 2: The “GLOBAL SAANCTION SCREENING PARAMETERS” page shows the list of parameters that have been entered into the software and their scan status.
How to view the Global Screening scan explorer
Step 1: Click on the “Global Sanction Screening” dropdown button and select the “Scan Explorer” option.
The above action will display a page as seen in the image below.
The Scan Explorer provides details of scan results across the entered date ranges. These results can be filtered down to only results that are meaningful to you by applying various scan filters.
The function of the scan filters is explained below;
Start Date and End Date: These fields allow you to filter the list of scan results to a specific date range. The date range refers to the dates the parameters were scanned. This filter is mandatory.
Category: To view scan results having the same Category, select the desired Category from the Category dropdown and click on the View button.
Reasons: To view scan results having the same scan reason, select the desired Reason from the Reasons dropdown and click on the View button.
Entries: The number of scan results to see on the page.
Search: To search for the parameter(s).
L. Score and H. Score: The low score and high score work together to filter the results based on score prediction. The L. Score entered must be less than the H. Score. After entering your desired score prediction range, click on the View button to see the result.
Export To Excel: To export the list of scan results to Excel, click on the ‘Action‘ dropdown button and select “Export To Excel”
The data representation of the columns is explained below;
Account Number: The account number that the scan parameter matched.
Account Name: The account name that the scan parameter matched.
Date Opened: The date the matched account was opened.
Date Closed: The date the matched account was closed(This field is empty if the account is still open).
Account Status: The status of the matched account.
Scan Parameter: The actual scan parameter entered into the system
Scan Category: The category the scan parameter falls under. e.g Name, BVN, Email, etc…
Scan Prediction: This is the system prediction score for each parameter.
Scan Reason: The reason entered alongside the scan parameter.
Scan Date: The date the parameter was scanned.
How to view the Global Screening scan summary
Step 1: Click on the Global Screening dropdown button and select the “Scan Summary” option.
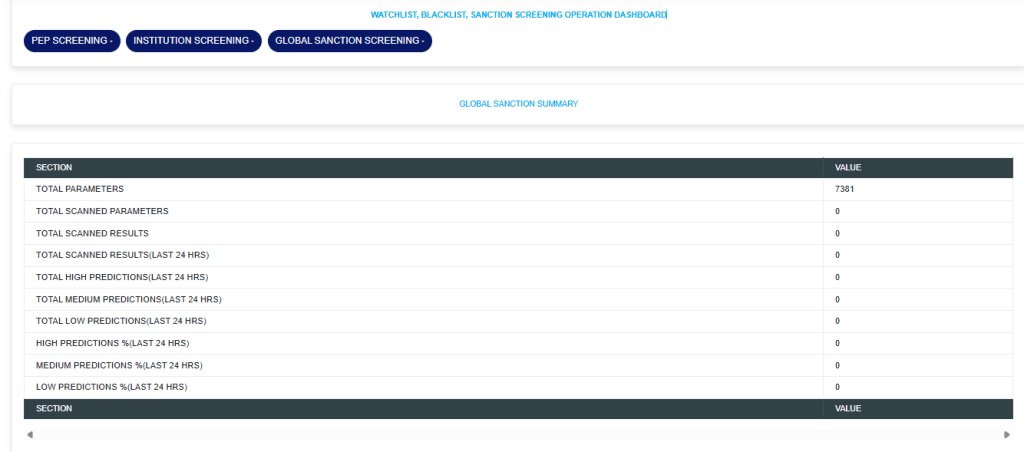
The above action will display a page as seen in the image below.
TOTAL PARAMETERS: This Section Value quickly informs the reviewer of the number of parameters uploaded into the system for scanning/screening purposes.
Parameters could be BVN, NAMES, ID Numbers, PHONE NUMBERS, or EMAILS.
TOTAL SCANNED PARAMETERS: This Section Value informs the reviewer how many parameters have been scanned thus far. This number would increase daily.
TOTAL SCANNED RESULTS: This Section Value informs the reviewer how many results are present from all parameters that have been scanned.
TOTAL SCANNED RESULTS(LAST 24 HRS): This Section Value informs the reviewer of the total number of new results from the scan conducted in the last 24 hours.
This aids the reviewer who may be reviewing on a daily basis, focusing on the newer scans and helping to attain a thorough review process. There are explorers where these scan results can be targeted by the date the scan results were entered by the software.
TOTAL HIGH PREDICTIONS(LAST 24 HRS): This Section Value plays a very important role as the software uses artificial intelligence and Machine Learning to learn the data from Scan results and give scores on how sure it is about the matches. The lowest score is 1 and the highest is 100.
100 means that the software is extremely confident that the scan result (a customer’s account) is an exact match to the scanned parameter.
This enables the reviewer to focus more closely on high matches and easily sort them out, thereby avoiding time wasted on false positives.
The software categorizes HIGH PREDICTIONS as scan results that score 80 and above. Furthermore, providing high predictions for the last 24 hours informs the reviewer how many records should be prioritized out of the total scanned results from the last 24 hours.
This further makes the review process faster. Predictions in this category are colored red for easy identification.
TOTAL MEDIUM PREDICTIONS(LAST 24 HRS): The software categorizes MEDIUM PREDICTIONS as scan results that score between 50 and 79. Predictions in this category are colored yellow for easy identification.
TOTAL LOW PREDICTIONS(LAST 24 HRS): The software categorizes LOW PREDICTIONS as scan results that score between 1 and 49. Predictions in this category are colored blue for easy identification.
HIGH PREDICTIONS%(LAST 24 HRS): This tells the percentage of high predictions in the scan results from scans conducted in the last 24 hours.
MEDIUM PREDICTIONS%(LAST 24 HRS): This tells the percentage of medium predictions in the scan results from scans conducted in the last 24 hours.
LOW PREDICTIONS%(LAST 24 HRS): This tells the percentage of low predictions in the scan results from scans conducted in the last 24 hours. The software gives a special prediction score of 81 to scan parameters it detects as Names of individuals that match the Signatory/Director of corporate accounts. With the software’s artificial intelligence and machine learning capabilities to scan and predict match accuracy probabilities, reviewing these scan results is made easier than expected.
The bulk upload helps in uploading more than one scan parameter into the system for the automatic scan.
Note: This operation requires the Administrator or Auditor’s permission.
How to Prepare the Scan Parameters in an Excel File
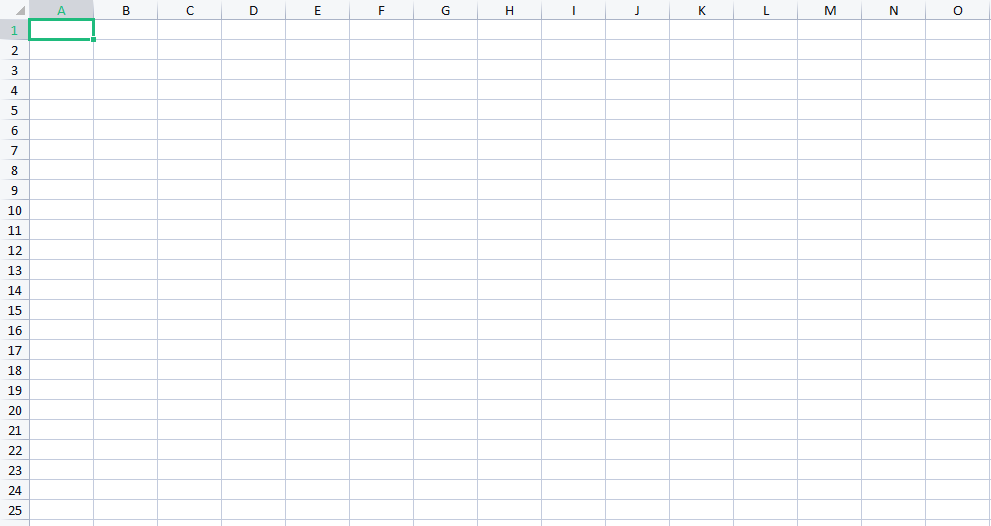
STEP 1: Open an excel sheet as seen in the image below. This must be the first sheet(Sheet1) in the excel workbook.
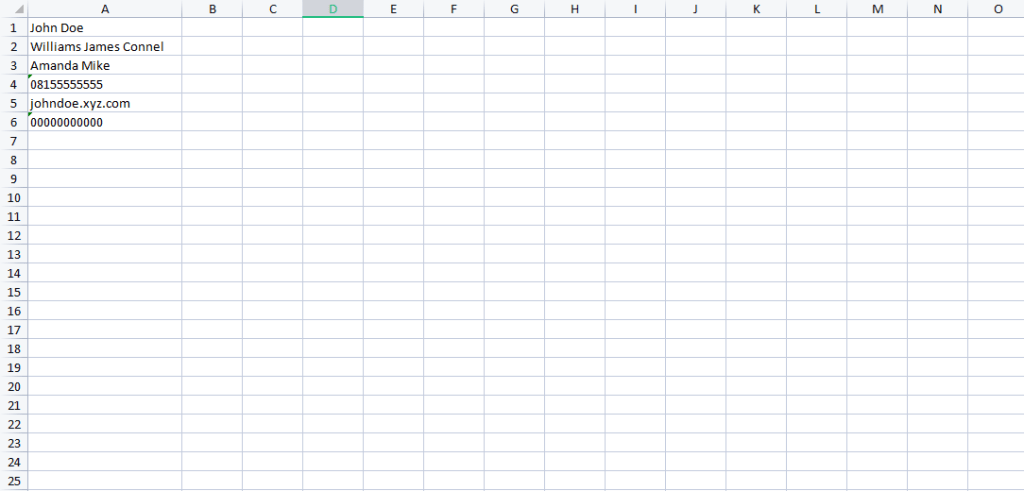
STEP 2: Fill in the scan parameters in the first column (column A) as seen in the image below.
The excel sheet should not have column names(Start inputting the scan parameters from row 1).
These scan parameters can be either a name, phone number, email address, ID Number, or BVN.
Note: The first, last and middle name must be in the same column with a space in between them (Column A).
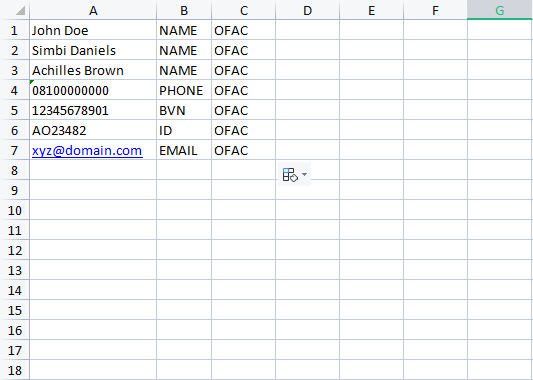
STEP 3: Fill in the scan parameter category in the second column (column B) as seen in the image below.
The software accepts four different parameter categories(Name, Email address, Phone Number, ID Number, and BVN).
1. When a scan parameter is a name, the category should be NAME
2. When a scan parameter is a phone number, the category should be PHONE
3. When a scan parameter is an email address, the category should be EMAIL
4. When a scan parameter is a BVN, the category should be BVN
5. When a scan parameter is an ID Number, the category should be ID
STEP 4: Fill in a reason in the third column (column C) as seen in the screenshot below.
Save the excel file and proceed to the Compliance Planet AML software.
How to Upload the scan parameters in the Compliance Planet Software
STEP 5: From the left-hand side menu, click “SCREENING” as seen below.
STEP 6: From the top menu, click “Global Sanction Screening”, this action will display a dropdown menu as seen in the image below. From the dropdown menu, click “Create Parameters”.
STEP 7: On the NEW SCREENING PARAMETERS page, click on the “Bulk Upload” button to select the excel file which you have earlier filled with the scan parameters.
STEP 8: Click on the Save button.
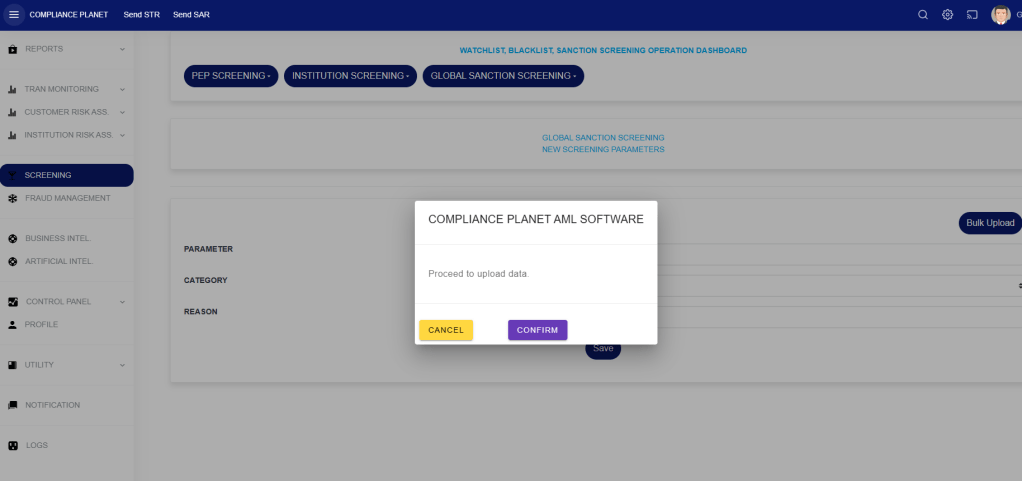
STEP 9: Click on the CONFIRM button to begin the upload process.
The bulk upload helps in uploading more than one scan parameter into the system for the automatic scan.
Note: This operation requires the Administrator or Auditor’s permission.
How to Prepare the Scan Parameters in an Excel File
STEP 1: Open an excel sheet as seen in the image below. This must be the first sheet(Sheet1) in the excel workbook.
STEP 2: Fill in the scan parameters in the first column (column A) as seen in the image below.
The excel sheet should not have column names(Start inputting the scan parameters from row 1).
These scan parameters can be either a name, phone number, email address, ID Number, or BVN.
Note: The first, last and middle name must be in the same column with a space in between them (Column A).
STEP 3: Fill in the scan parameter category in the second column (column B) as seen in the image below.
The software accepts four different parameter categories(Name, Email address, Phone Number, ID Number, and BVN).
1. When a scan parameter is a name, the category should be NAME
2. When a scan parameter is a phone number, the category should be PHONE
3. When a scan parameter is an email address, the category should be EMAIL
4. When a scan parameter is a BVN, the category should be BVN
5. When a scan parameter is an ID Number, the category should be ID
STEP 4: Fill in a reason in the third column (column C) as seen in the screenshot below.
Save the excel file and proceed to the Compliance Planet AML software.
How to Upload the scan parameters in the Compliance Planet Software
STEP 5: From the left-hand side menu, click “SCREENING” as seen below.
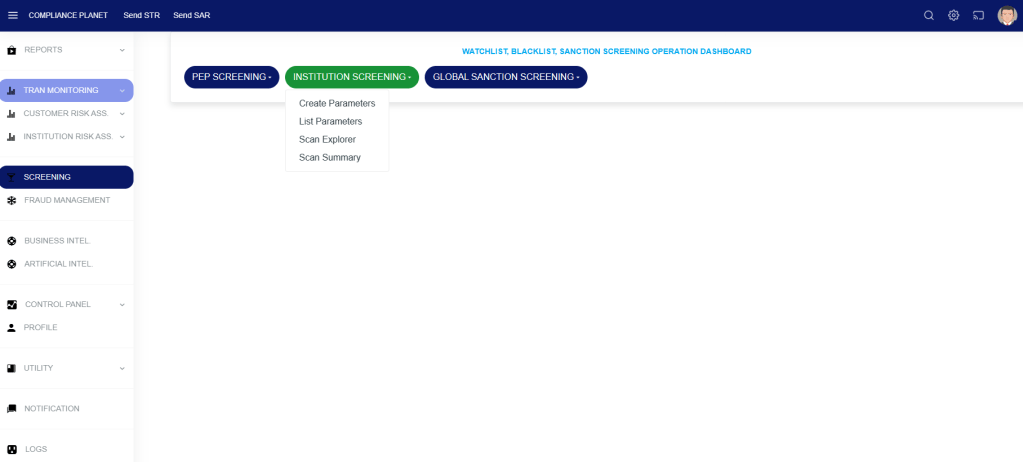
STEP 6: From the top menu, click “INSTITUTION Screening”, this action will display a dropdown menu as seen in the image below. From the dropdown menu, click “Create Parameters”.
STEP 7: On the NEW SCREENING PARAMETERS page, click on the “Bulk Upload” button to select the excel file which you have earlier filled with the scan parameters.
STEP 8: Click on the Save button.
STEP 9: Click on the CONFIRM button to begin the upload process.
The Policy Alert Explorer helps to display alerts triggered by the various policies created on the system.
STEP 1: From the left-hand side menu, click “TRAN MONITORING” as in Fig 2a below which then displays a drop-down.
FIG 1a
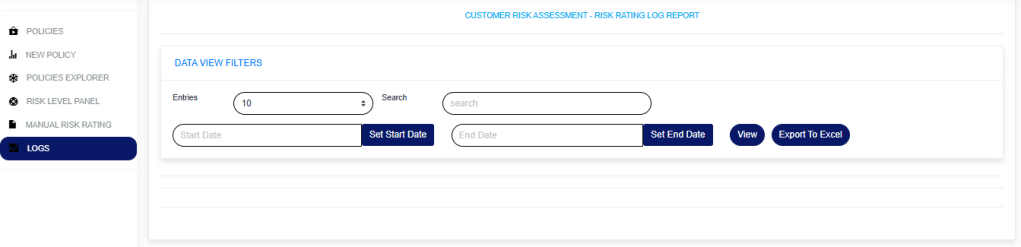
STEP 2: click on “POLICIES ALERTS EXPLORER”
Entries: select the number of records you want to see from the policy.
Search: The user is to input a policy name to filter down and search for a specific policy.
Enter a start and end date to view the result.
Click on the “View” button to see the alerts.
To further filter down the results, Click on the “Threshold” drop-down and select the desired threshold. For example, if 3 is selected, only alerts for accounts that has been picked 3 times or above across policies will be displayed.
To export the result to excel, click on the “Export To Excel” button.
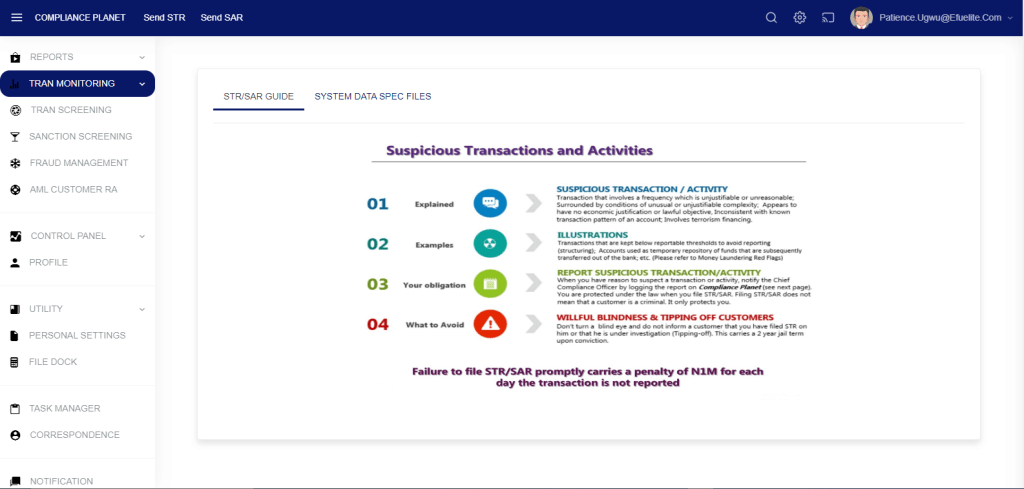
This section provides a guide on how to use the TM Case Manager feature on the Compliance Planet Anti-Money Laundering/Core Banking Finance Software, complete with step-by-step instructions and illustrations.
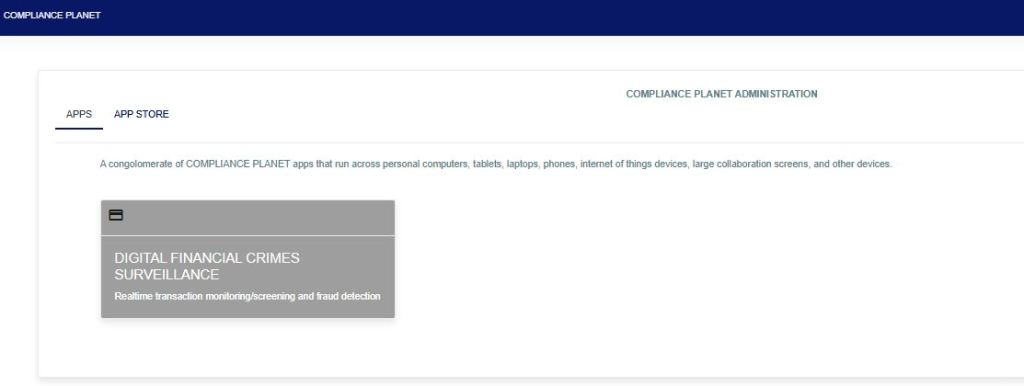
STEP 1: From the app dashboard, click “DIGITAL FINANCIAL CRIMES SURVEILLANCE” as in Fig. a below.
FIG a
STEP 2: From the left-hand side menu, click “TM Case Manager” as in Fig. b below to display the “Data View Filters“.
FIG b
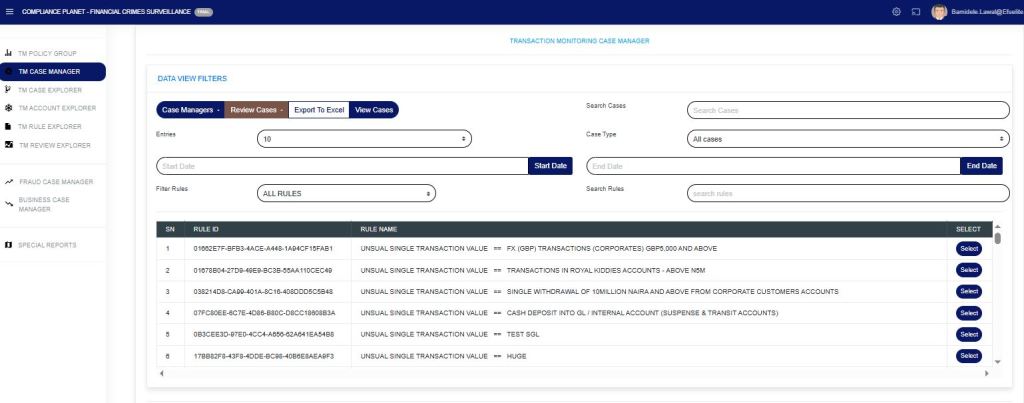
STEP 3: Then click “Data View Filters” to show a menu window that displays all the menus: Case Managers, Review Cases, Export to Excel, View Cases, Search Cases, Entries, Case Type, Start Date & End Date, Filter Rules, and Search Rules as in Fig. C below.
FIG c
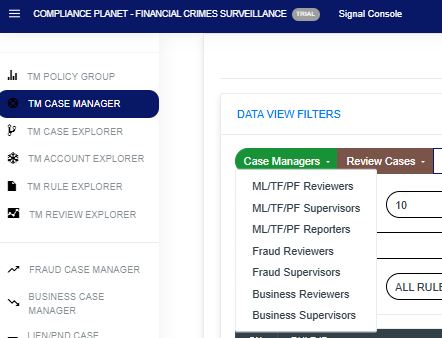
STEP 4: Click on “Case Managers” as in Fig. D below to display a drop-down of all the case managers.
ML/TF/PF Reviewers: TM policy rule that needs further review, which has been sent to the STR Review desk.
ML/TF/PF Supervisors: TM policy rule that needs further review, which has been sent to the STR Supervision desk.
ML/TF/PF Reporters: TM policy rule that needs further review, which has been sent to the STR Report desk.
Fraud Reviewers: A TM policy rule that requires further review has been sent to the Fraud Review desk in the event of suspected fraud.
Fraud Supervisors: TM policy rule that needs further review, which has been sent to the Fraud Supervision in case of fraud suspicion.
Business Reviewers: TM policy rule that requires business reviews not for reporting but for institutional sanity. e.g., staff account used for betting.
Business Supervisors: The TM policy rule that needs further review requires business supervision.
Fig d
STEP 5: Click on “Review Cases” to further enhance the review of policy rule case(s), as in Fig. E below, to display a drop-down of all the review cases.
Close case (manually) as ML/TF/PF reported STRs: when an alert(s) from the case manager has been treated on STR and filed externally, this menu needs to be selected so that the system will not regard such alert(s) as pending alert on the visualization dashboard.
Close case as ML/TF/PF monitoring false-positive alert: when an alert(s) is/are extracted and has a number of transactions and not all the alert(s) is/are meant for STR review(s), those not for STR review(s) is/are removed by selecting this option.
Close case as Fraud monitoring false-positive alert: alerts(s) not meant for STR review(s) are removed by selecting this option.
Close case as Business monitoring false-positive alert: alerts(s) not meant for STR review(s) are removed by selecting this option.
Whitelist account(s) in Rule: whitelisting in a rule allows accounts to be marked as closed from pending cases in that rule.
Whitelist account(s) in Policy: whitelisting in policy applies to all rules under a specific policy group.
Whitelist account(s) in Global Monitoring: Whitelisting in Global Monitoring ensures that accounts are exempt from alerts across all policy categories.
Place account(s) on PND: This places an account(s) on PND to avoid fraud.
Place lien on account(s) alert: This is to place a freeze/hold on account(s) alert.
NB: Whitelisting account(s) from a rule, policy, or global does not mean the account(s) will not be monitored, but they will not pop up as a pending case awaiting review. It will show as closed in the whitelist, and pick the review details where the account(s) were first whitelisted, and put them in an Excel file. For example, when you whitelist an account(s) in a rule, policy, or globally, from the start date entered in the case manager, the account(s) will be marked as whitelisted.
Fig e
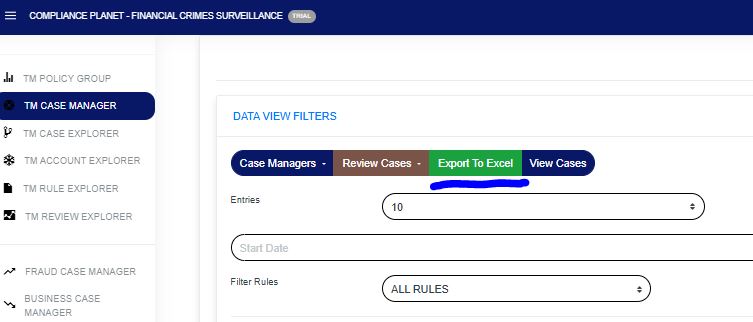
STEP 6: Click on “Export to Excel” as in Fig. f below to carry out further analysis on a downloaded rule.
Fig f
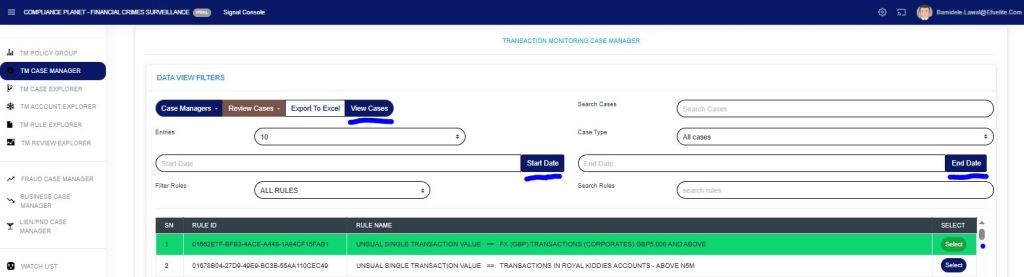
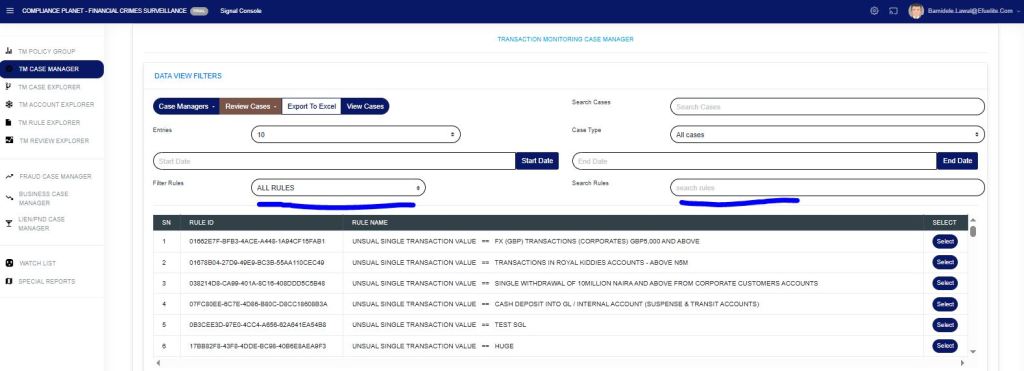
STEP 7: To view rule cases, select the policy rule by clicking on the “select button” to highlight, input the start date and end date, then click on “View Cases” as in Fig. g below.
Fig g
Then the lower part of the page now displays the policy rule name and all the information regarding the account, as seen in the figure below. Each rule can be viewed in the Explorer case, the Explorer account, or the Explorer rule.
As in the figure below, the Filter Rule menu gives a drop-down of: All rules, Rules Deployed by me, or Rules Assigned to me.
The Search rule menu allows searching for a particular rule. A phrase can also be used to search for rule(s) with such a phrase.
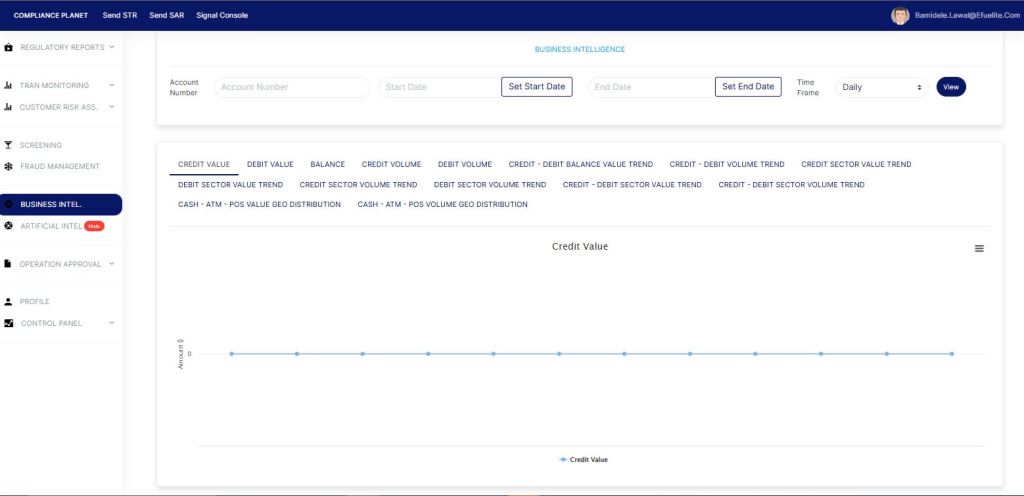
The business intelligence helps to give insight through a graphical representation of customers transaction trend across a specified period.
STEP 1: From the left-hand side menu, click “BUSINESS INTEL” as in the image below.
STEP 2: Enter the needed parameters as explained below to see the graphical representation of a customer’s transaction trend.
Enter a customer’s account number in the “Account Number” field.
Enter a start date and end date
Select time frame from the “Time Frame” dropdown
Select a trend type from the various trend types as seen in the image below
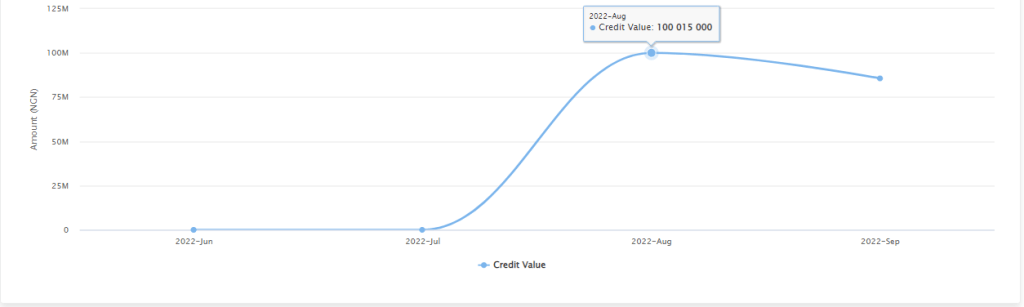
Click on the “View” button to see result.
Download the graph by clicking on the “hamburger” menu on the right side of the graph.
CREDIT VALUE: This is a value-based Line graph trend type gives a graphical representation of an account’s inflows value across a specified period.
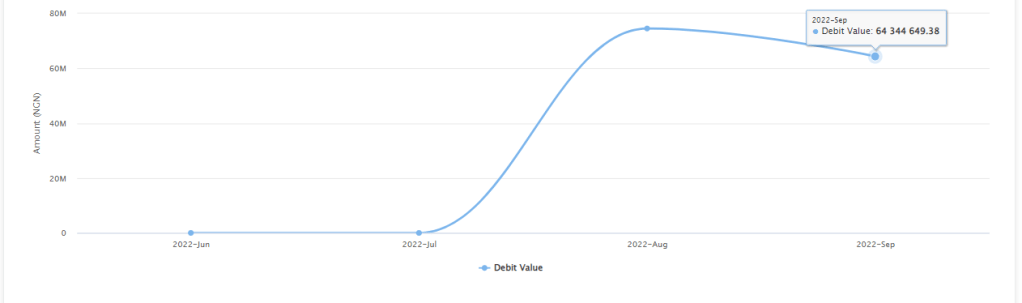
DEBIT VALUE: This is a value-based Line graph trend type that gives a graphical representation of an account’s outflows value across a specified period.
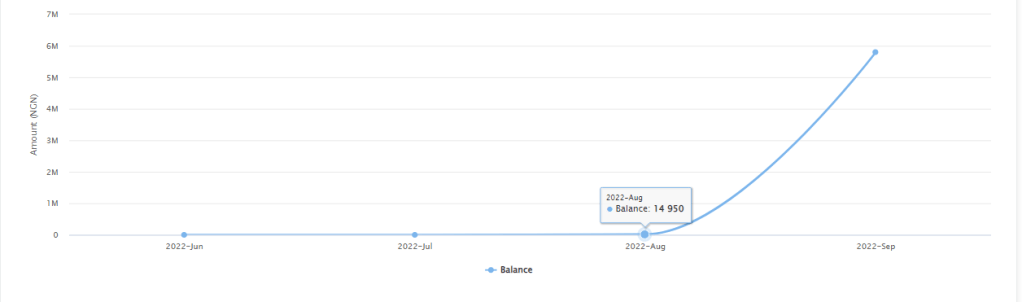
BALANCE: This is a value-based Line graph trend type that gives a graphical representation of an account’s balance across a specified period.
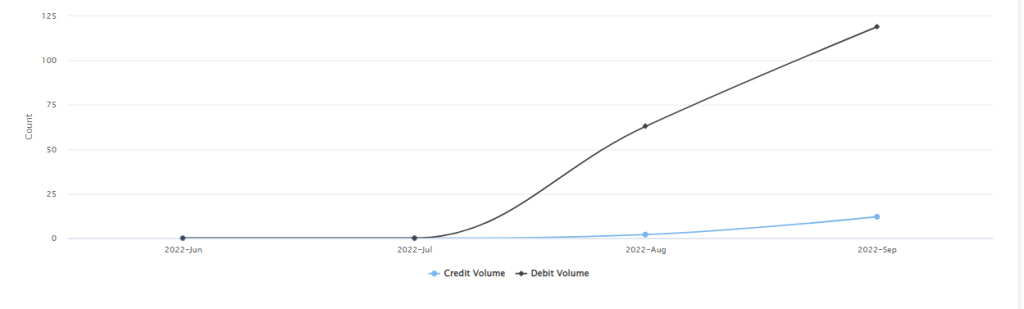
CREDIT VOLUME: This is a volume(counts) based Line graph trend type that gives a graphical representation of an account’s inflows volume(counts) across a specified period.
DEBIT VOLUME: This is a volume(counts) based Line graph trend type that gives a graphical representation of an account’s outflows volume(counts) across a specified period.
CREDIT – DEBIT BALANCE VALUE TREND: This is a value-based combined Line graph trend type that gives a graphical representation of an account’s inflows value, outflows value and balance across a specified period.
CREDIT – DEBIT VOLUME TREND: This is a volume(counts) based combined Line graph trend type that gives a graphical representation of an account’s inflows volume, outflows volume, and balance across a specified period.
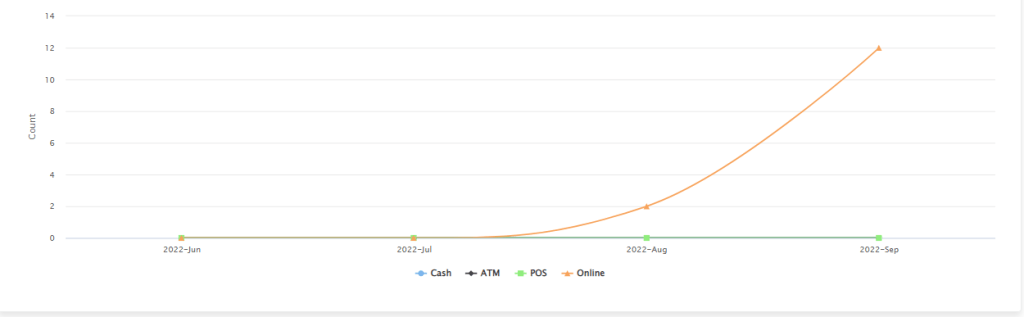
CREDIT SECTOR VALUE TREND: This is a value-based Line graph trend type that gives a graphical representation of an account’s inflows transaction value across different transaction sectors (Cash, ATM, POS, Online) for a specified period.
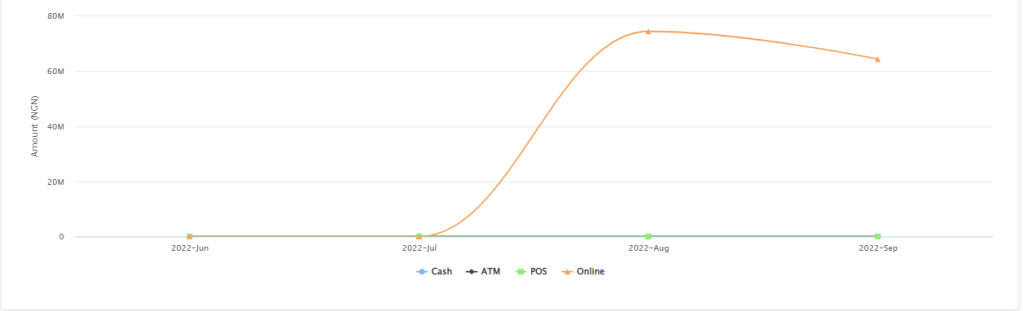
DEBIT SECTOR VALUE TREND: This is a value-based Line graph trend type that gives a graphical representation of an account’s outflows transaction value across different transaction sectors (Cash, ATM, POS, Online) for a specified period.
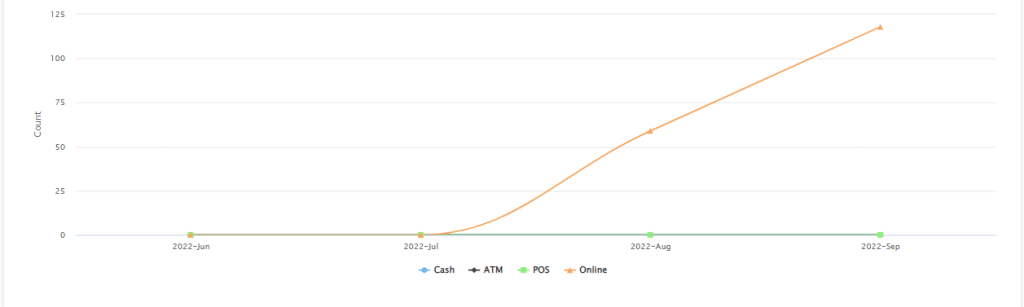
CREDIT SECTOR VOLUME TREND: This is a volume(counts) based Line graph trend type that gives a graphical representation of an account’s inflows transaction volume(counts) across different transaction sectors (Cash, ATM, POS, Online) for a specified period.
DEBIT SECTOR VOLUME TREND: This is a volume(counts) based Line graph trend type that gives a graphical representation of an account’s outflows transaction volume(counts) across different transaction sectors (Cash, ATM, POS, Online) for a specified period.
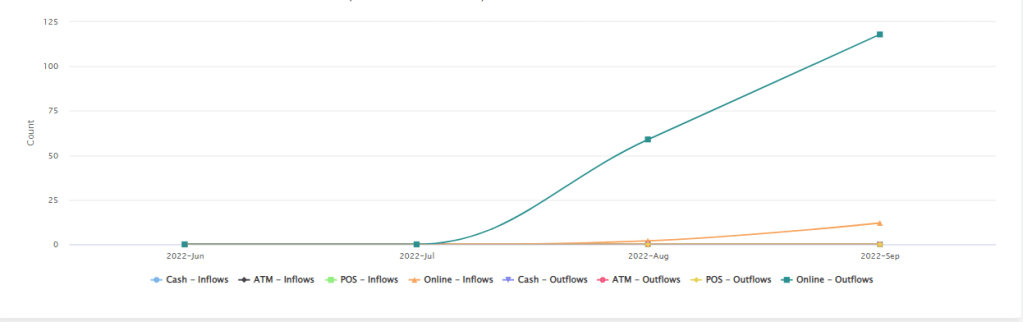
CREDIT-DEBIT SECTOR VALUE TREND: This is a value-based combined Line graph trend type that gives a graphical representation of an account’s inflows and outflows transaction value across different transaction sectors (Cash, ATM, POS, Online) for a specified period.
CREDIT-DEBIT SECTOR VOLUME TREND: This is a volume(counts) based combined Line graph trend type that gives a graphical representation of an account’s inflows and outflows transaction volume(counts) across different transaction sectors (Cash, ATM, POS, Online) for a specified period.
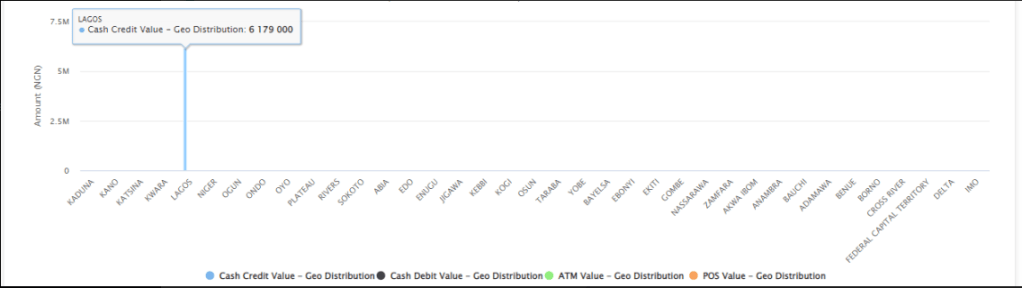
CASH-ATM-POS VALUE GEO DISTRIBUTION: This is a value-based Bar graph trend type that gives a graphical representation that is focused on an account’s transaction value across the states in a country and the ATM and POS transaction sectors for a specified period.
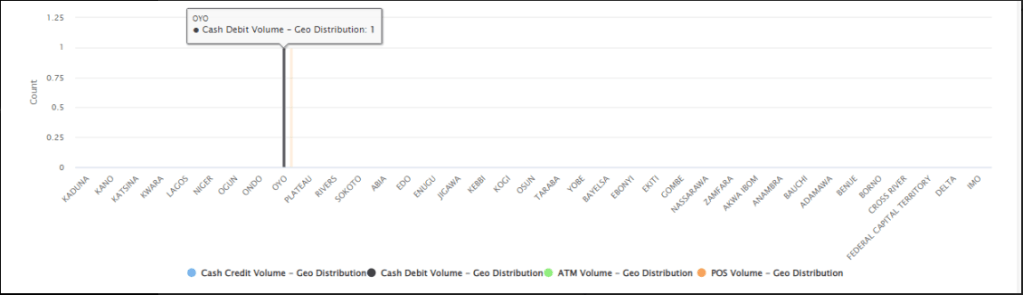
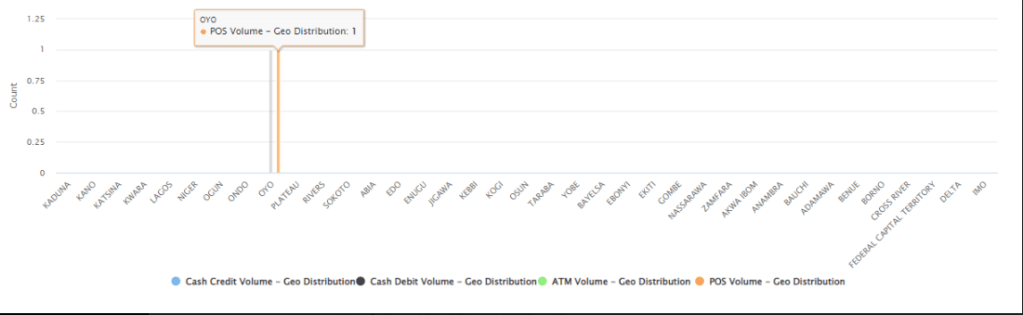
CASH-ATM-POS VOLUME GEO DISTRIBUTION: This is a volume(counts) based Bar graph trend type that gives a graphical representation that is focused on an account’s transaction volume(counts) across the states in a country and the ATM and POS transaction sectors for a specified period.