Note: This operation requires the Administrator or Auditor permission.
The BVN screening helps scan an institution for a match; it also indicates whether the search parameter (BVN) has already been profiled under the BVN Watchlist in the system, by displaying the account(s) the BVN is tied to.
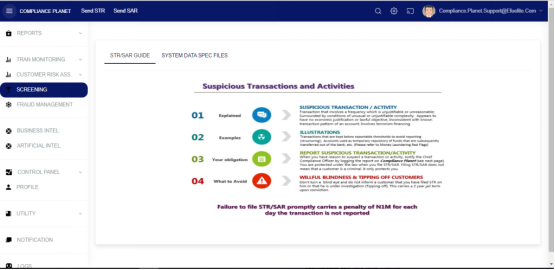
STEP 1: From the left-hand side menu, click “SCREENING” as seen below.
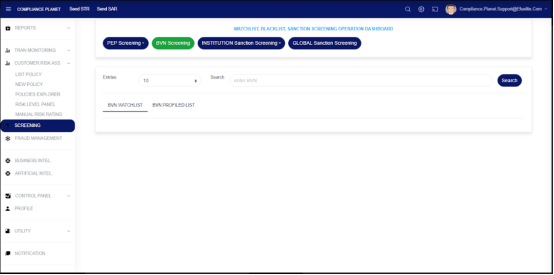
STEP 2: From the left-hand side menu, click “BVN Screening” as seen below.
On the above page, enter a BVN in the Search field and click on the Search button to perform an instant search.
BVN WATCHLIST: This tab shows the account(s) tied to the searched BVN and profiled as watchlist at the institution.
BVN PROFILED LIST: This tab shows account(s) that the searched BVN is tied to, irrespective of whether the BVN is profiled under the watch list or not.
Note: This operation requires the Administrator or Auditor permission.
The PEP screening helps scan an institution for likely PEPs, and if a match is found, it further indicates whether the Scan Results (a customer account) has already been profiled as a PEP in the system or not.
How to Create a Screening Parameter
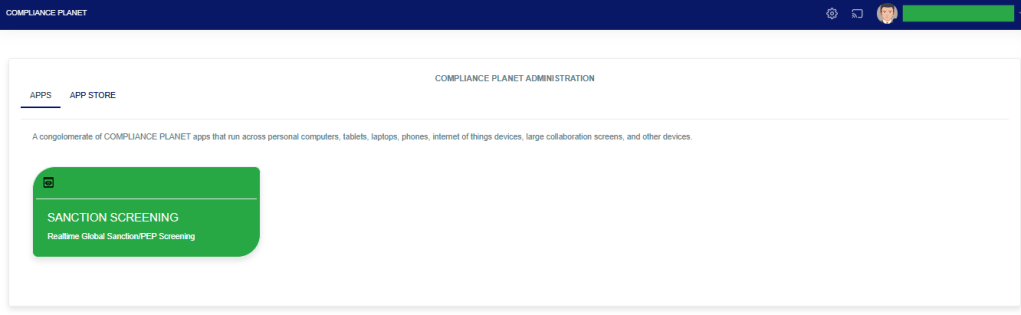
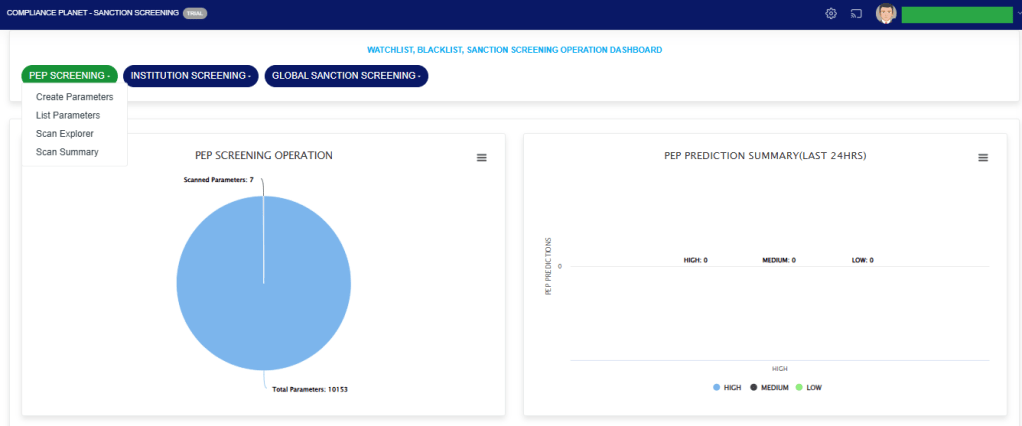
STEP 1: From the app dashboard, click “SANCTION SCREENING” as seen below.
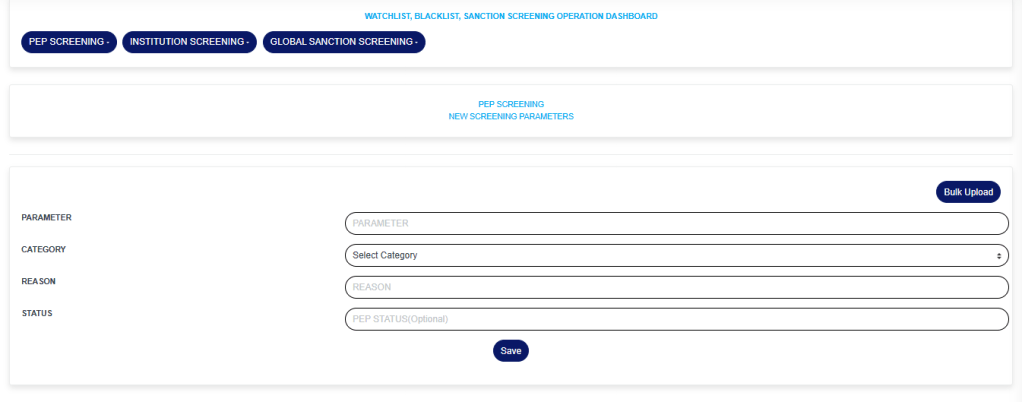
STEP 2: From the top menu, click “PEP Screening.” This action will display a dropdown menu, as seen in the image below. From the dropdown menu, click “Create Parameters”.
STEP 3: Fill in the fields on the NEW SCREENING PARAMETERS page.
PARAMETER: The parameter you want to scan
CATEGORY: The category of the parameter, this is a dropdown to select from.
REASON: The reason for scanning the parameter.
STATUS: The status of the PEP; this field is optional.
You can also bulk upload parameters already prepared in Excel by clicking the “Bulk Upload” button.
Click on the “Save” button to save the parameter.
Note: The category selected determines the parameter to enter. E.g., if the category selected is “NAME”, then the parameter should be a name. If the category selected is “EMAIL,” then the parameter should be an email address.
How to List PEP Screening Parameters
STEP 4: Click on “List Parameters” to see the list of parameters entered into the software.
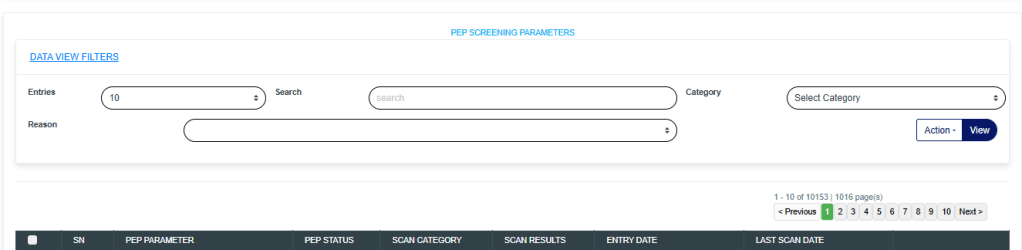
STEP 5: The “PEP SCREENING PARAMETERS” page shows the list of parameters that have been entered into the software and their scan status.
Select Category: To view parameters having the same Category, select the desired Category from the Select Category dropdown and click on the View button.
Instant Scan: To instantly scan a parameter, click on the “Scan” button for the parameter you want to instantly scan. This will perform an instant scan of the parameter, and the “Scan Result Column” will be updated in real-time for the parameter.
Reasons: To view parameters having the same scan reason, select the desired Reason from the Reasons dropdown and click on the View button.
Entries: The number of parameters to see on the page.
Search: To search for the parameter(s).
Export To Excel: To export the list of parameters to Excel, click on the ‘Action‘ dropdown button and select “Export To Excel.”
Delete Parameter(Single): To delete a parameter, click the red “Delete” button on the parameter you want to delete.
Delete Parameter(Bulk): To bulk delete parameters, select the parameters you want to delete by checking the checkbox on each row(This checkbox is before the SN column. After checking the boxes, click on the ‘Action‘ dropdown button and select “Delete Selected Records.”
The Scan Results Column in the table shows the number of matches found for a parameter. To view the results, click on the result number.
How to view the PEP scan explorer
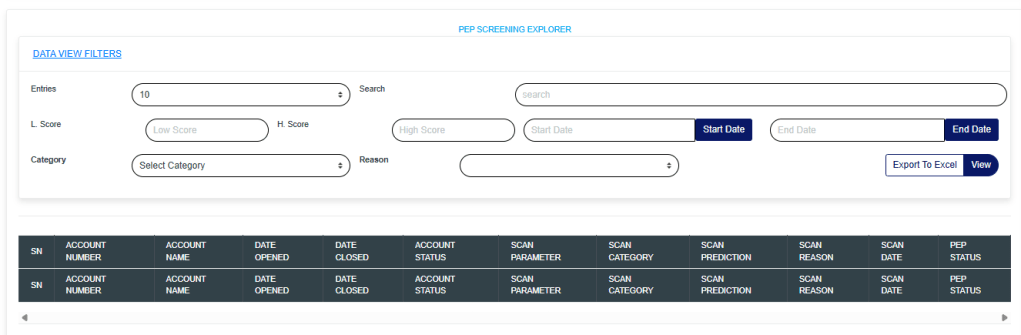
Step 1: Click the PEP Screening dropdown and select “Scan Explorer”.
The action above will display a page, as shown in the image below.
The Scan Explorer provides details of scan results across various date ranges. These results can be filtered down to only results that are meaningful to you when applying various scan filters.
The function of the scan filters is explained below;
Start Date and End Date: This filters the scan results list to a desired date range. The date range refers to the dates the parameters were scanned. This filter is mandatory.
Category: To view scan results having the same Category, select the desired Category from the Category dropdown and click on the View button.
Reasons: To view scan results having the same scan reason, select the desired Reason from the Reasons dropdown and click on the View button.
Entries: The number of scan results to see on the page.
Search: To search for the parameter(s).
L. Score and H. Score: The low score and high score work together to filter the results based on score prediction. The L. Score entered must be less than the H. Score. After entering your desired score prediction range, click the View button to see the result.
Export To Excel: To export the list of scan results to Excel, click on the ‘Action‘ dropdown button and select “Export To Excel.”
The data representation of the columns is explained below;
Account Number: The account number that the scan parameter matched.
Account Name: The account name that the scan parameter matched.
Date Opened: The date the matched account was opened.
Date Closed: The date the matched account was closed(This field is empty if the account is still open).
Account Status: The status of the matched account.
Scan Parameter: The actual scan parameter entered into the system
Scan Category: The category the scan parameter falls under. e.g. Name, BVN, Email, etc…
Scan Prediction: This is the system prediction score for each parameter.
Scan Reason: This is why it was entered alongside the scan parameter.
Scan Date: The date the parameter was scanned.
How to View the PEP Scan Summary
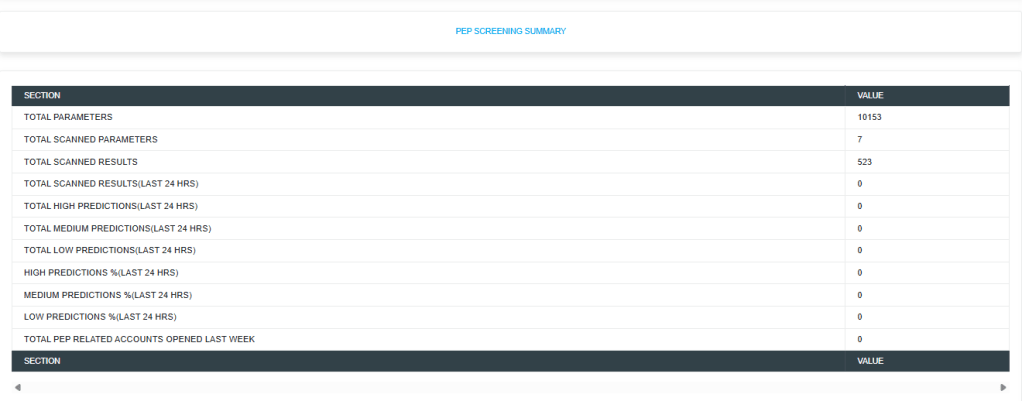
Step 1: Click the PEP Screening dropdown and select the “Scan Summary” option.
The action above will display a page, as shown in the image below.
TOTAL PARAMETERS: This Section Value quickly informs the reviewer of the number of parameters uploaded into the system for scanning/screening purposes.
Parameters include BVN, NAMES, ID Numbers, PHONE NUMBERS, or EMAILS.
TOTAL SCANNED PARAMETERS: This Section Value informs the reviewer how many parameters have been scanned thus far. This number would increase daily.
TOTAL SCANNED RESULTS: This Section Value informs the reviewer how many results are present from all parameters that have been scanned.
TOTAL SCANNED RESULTS(LAST 24 HRS): This Section Value informs the reviewer of the total number of new results from the scan conducted in the last 24 hours.
This aids the reviewer who may be reviewing daily scans, focusing on the newer ones, and helping to achieve a thorough review process. There are explorers where these scan results can be targeted by the date the scan results were entered by the software.
TOTAL HIGH PREDICTIONS(LAST 24 HRS): This Section Value plays a very important role as the software uses artificial intelligence and Machine Learning to learn the data from Scan results and give scores on how sure it is about the matches. The lowest score is 1, and the highest is 100.
100 means that the software is extremely confident that the scan result (a customer’s account) matches the scanned parameter.
This enables the reviewer to focus more closely on high matches and easily sort them out, thereby avoiding time wasted on false positives.
The software categorizes HIGH PREDICTIONS as scan results that score 80 and above. Furthermore, providing high predictions for the last 24 hours informs the reviewer how many records should be prioritized out of the total scanned results from the previous 24 hours.
This further makes the review process faster. Predictions in this category are colored red for easy identification.
TOTAL MEDIUM PREDICTIONS(LAST 24 HRS): The software categorizes MEDIUM PREDICTIONS as scan results that score between 50 and 79. Predictions in this category are colored yellow for easy identification.
TOTAL LOW PREDICTIONS(LAST 24 HRS): The software categorizes LOW PREDICTIONS as scan results that score between 1 and 49. Predictions in this category are colored blue for easy identification.
HIGH PREDICTIONS%(LAST 24 HRS): This tells the percentage of high predictions in the scan results from scans conducted in the last 24 hours.
MEDIUM PREDICTIONS% (LAST 24 HRS): This indicates the percentage of medium predictions in the scan results from scans conducted within the last 24 hours.
LOW PREDICTIONS%(LAST 24 HRS): This tells the percentage of low predictions in the scan results from scans conducted in the last 24 hours. The software assigns a special prediction score of 81 to scan parameters it detects, naming individuals that match the Signatory/Director of corporate accounts. With the software’s artificial intelligence and machine learning, scanning and predicting the probability of match accuracy in scores makes reviewing these scan results easier than expected.
TOTAL PEP-RELATED ACCOUNTS OPENED LAST WEEK: This tells the number of PEP-related accounts opened in the last 7 days. The software periodically uses the BVN of already profiled PEPs to scan the institution CBA of accounts linked to the profiled PEPs’ BVN and automatically profiles them as PEPs.
These profiled PEPs are available in the PEP Account Repository. The link below talks about how to view these profiled PEPs.
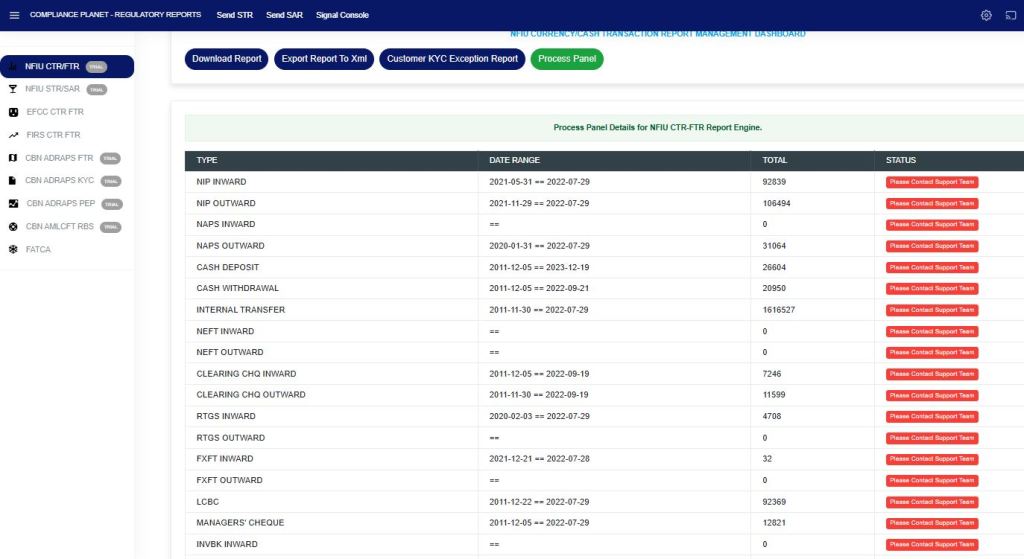
The CTR/FTR process panel presents all transaction types, their date ranges, and the number of transactions for each type that have been processed on the Compliance Planet. The date range on the planet refers to the earliest and latest dates of transactions processed in the Compliance planet.
Note: Only persons assigned the right(s) to ‘view CTR reports’ and ‘process CTR reports’ will be able to carry out this operation.
From the app dashboard, click on “REGULATORY REPORTS” as shown below
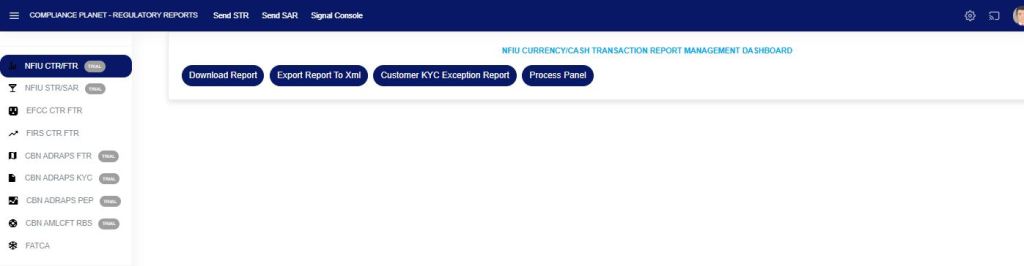
Click on ‘NFIU CTR/FTR’ on the drop-down list. See an example in Fig below. This will display the NFIU CTR/FTR page.
Fig
From the menu, click on “Process Panel”, which will display all the transaction types, date range, total records, and status, as shown in the Fig below.
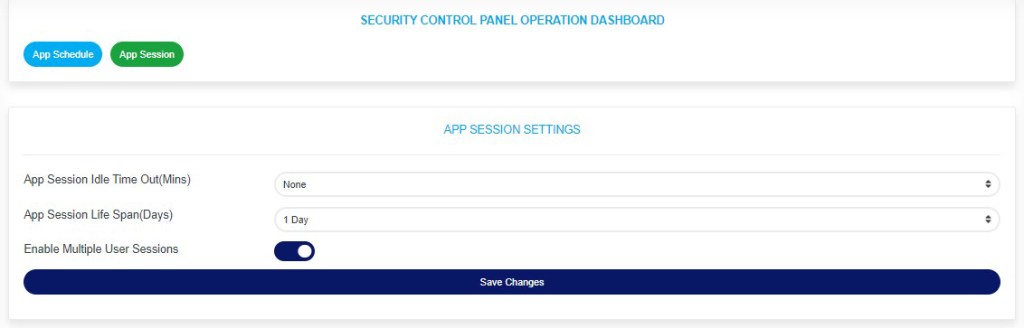
1. Idle time Out: This is the maximum period users can stay without interacting with the software. When this feature is activated, users will be automatically logged out after a specified period of inactivity.
2. App Session Life Span: This is the maximum period a user’s session can last, i.e., a user will be automatically logged out once the set life span elapses. Note that a session starts when a user logs into the software and ends when the user logs out.
3. Multiple User Sessions: This determines if the user will be permitted to log into the software on more than one browser, tab on a browser, or device at the same time.
NOTE: Only administrators can carry out these operations
Follow the Steps below to perform the operations listed above in the Compliance Planet AML software.
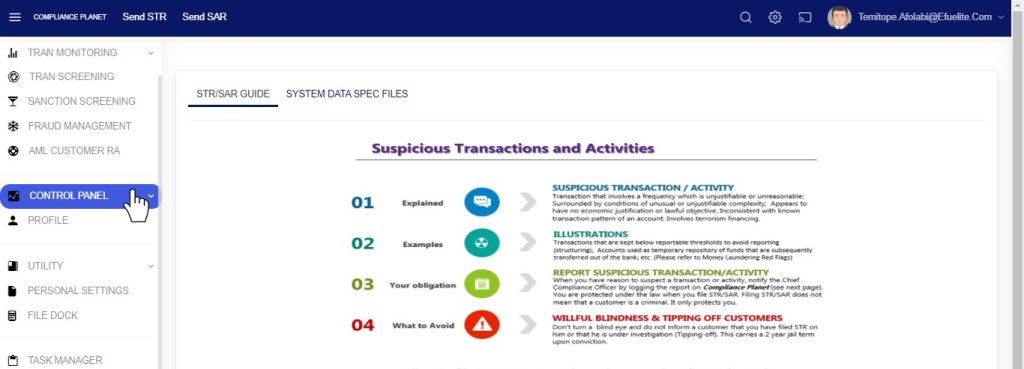
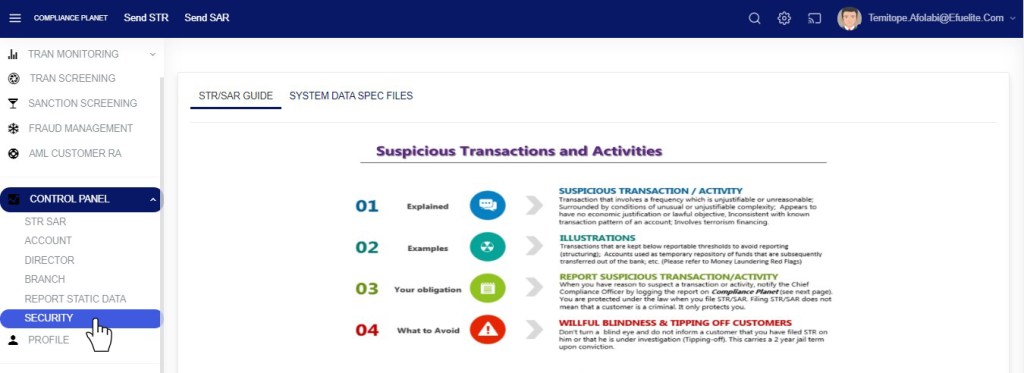
From the left-hand side menu click “Control Panel” as in fig below.
This will display a drop-down as in fig below
Click “Security” from the control panel drop-down as in fig below
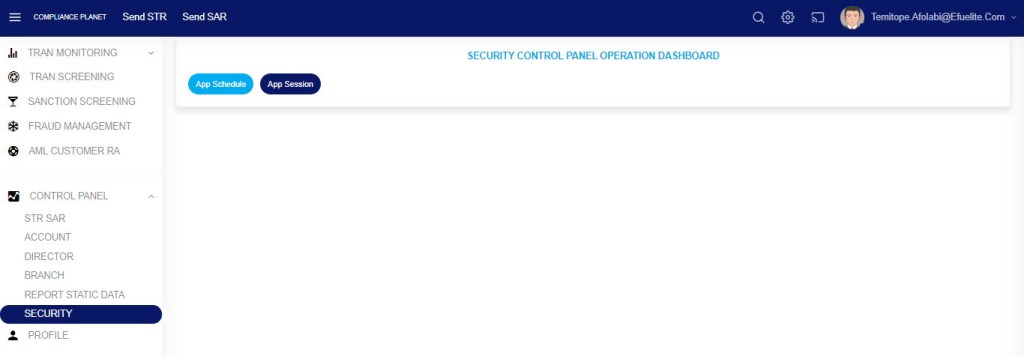
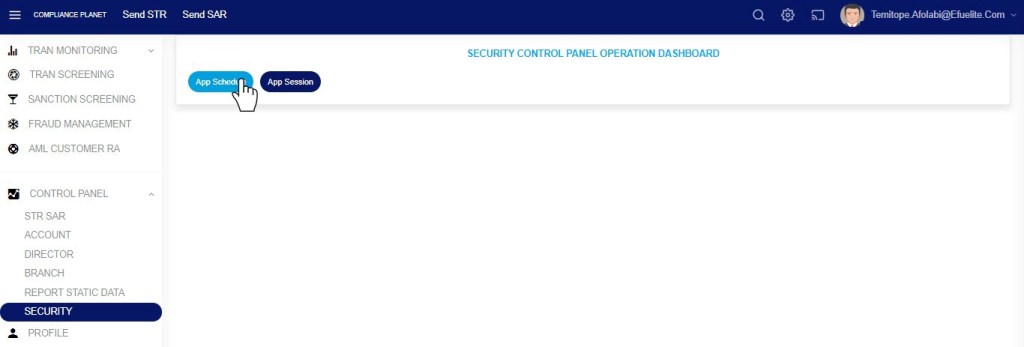
This will display a SECURITY CONTROL PANEL OPERATIONS DASHBOARD as in fig below
STEP 1: Click “App Session” from the top menu on the SECURITY CONTROL PANEL DASHBOARD. See an example in fig 39.2a below.
Fig 39.2a
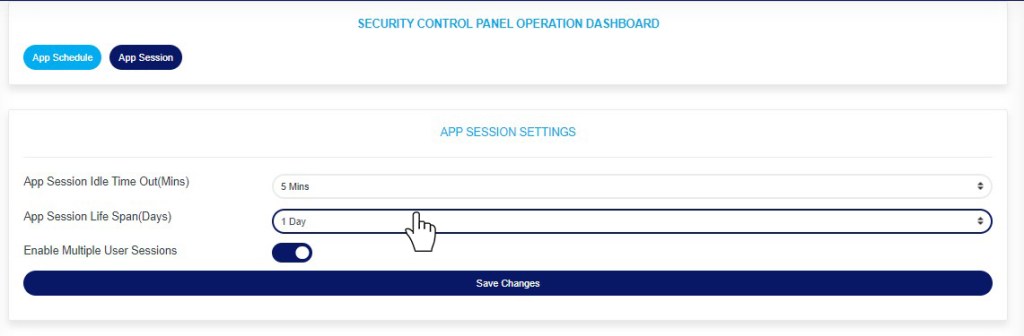
This displays a page as in fig 39.2b below
Fig 39.2b
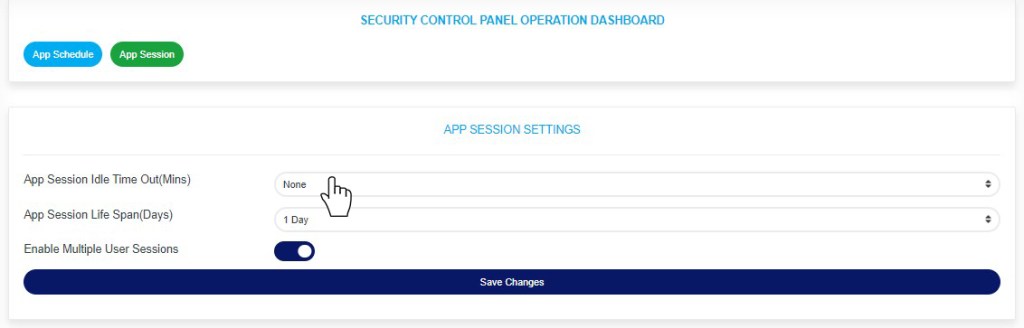
STEP 2: Click the “App Session Idle Time Out (Mins)” box as in Figure 39.2c below.
Fig 39.2c
This displays a drop-down as in fig 39.2d below.
STEP 3: Select your preferred idle time-out duration in minutes, as in Fig. 39.2d below.
Note that selecting “None” will deactivate the idle time-out feature.
Fig 39.2d
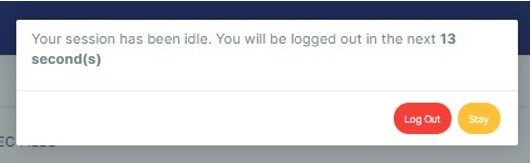
A timer console will be displayed as soon as the set maximum idle time remains 1 minute. The time will count down to zero, and if the user does not interact with the software before it gets to zero, the user will be logged out of the application. See an example below
fig.27.3l
STEP 4: Click the “App Session Life Span (Days)” box as in Fig. 39.2e below.
Fig 39.2e
This displays a drop-down as in fig 39.2f below.
STEP 5: Select your preferred App Session Life Span duration in days as in fig 39.2f below.
Note: Selecting “None” will deactivate the App Session Life Span feature
Fig 39.2f
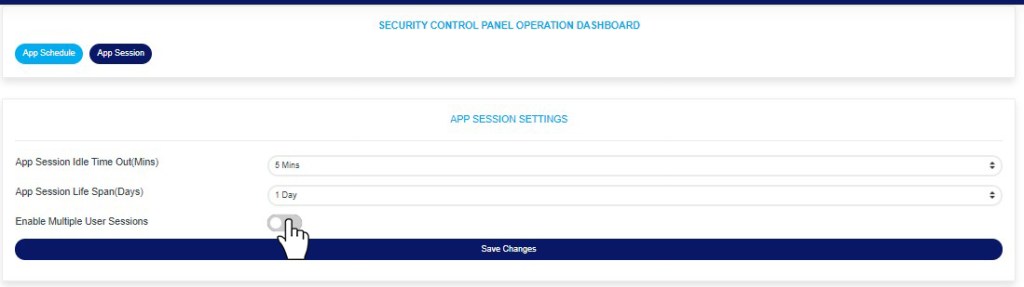
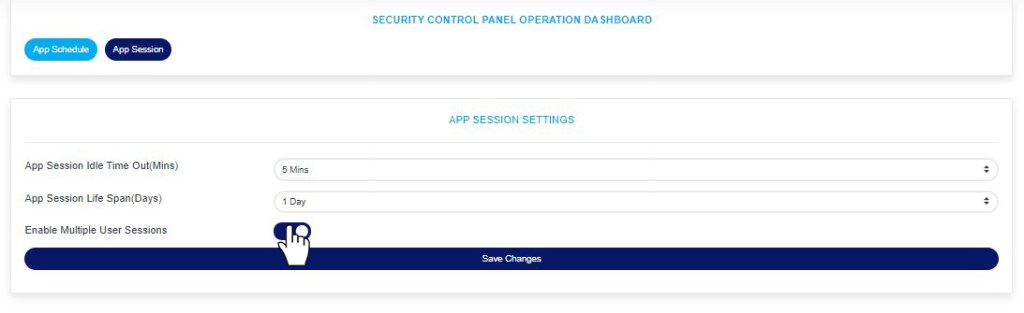
STEP 6: Toggle the “Enable Multiple User Sessions” box to either allow multiple user sessions or disallow multiple user sessions. See examples in fig. 39 .2 g and fig 39.2h below
Dis-enable Multiple User Sessions
Fig 39.2g
Enable Multiple User Sessions
Fig 39.2h
STEP 7: Click “Save Changes” as in fig 39.2h below to update the App Session Settings.
Fig 39.2i
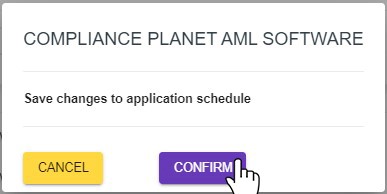
This displays a confirmation console as in fig 39.2j below
STEP 8: Click “Confirm” to proceed or “Cancel” to close the console.
Fig 39.2j
This will display a notification at the top of the page showing that the app session settings have been successfully updated.
This section provides options to schedule the day(s) and hour(s) the Compliance Planet will be accessible for users. For example, the software can be scheduled to be accessible to users only on Monday to Friday (i.e., weekdays).
NOTE: Only administrators can carry out these operations
Follow the Steps below to set the App Schedule on the Compliance Planet AML software.
From the left-hand side menu click “Control Panel” as in fig below.
Fig 39.0a
This will display a drop-down as in fig below
Click “Security” from the control panel drop-down as in fig 39.0c below
This will display a SECURITY CONTROL PANEL OPERATIONS DASHBOARD as in fig below
STEP 1: Click “App Schedule” from the top menu as in fig 39.1a below.
Fig 39.1a
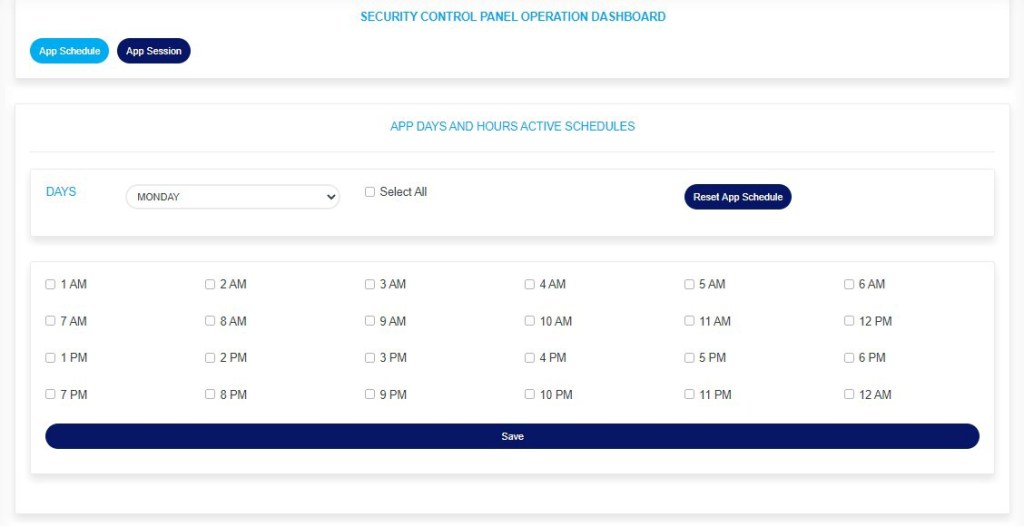
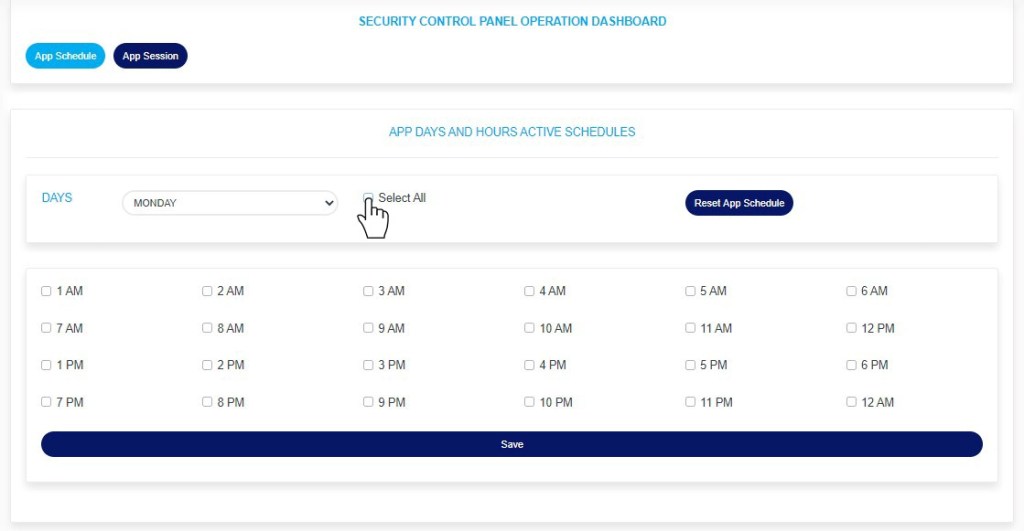
This displays a SECURITY CONTROL PANEL DASHBOARD as in as in fig 39.1b below.
Fig 39.1b
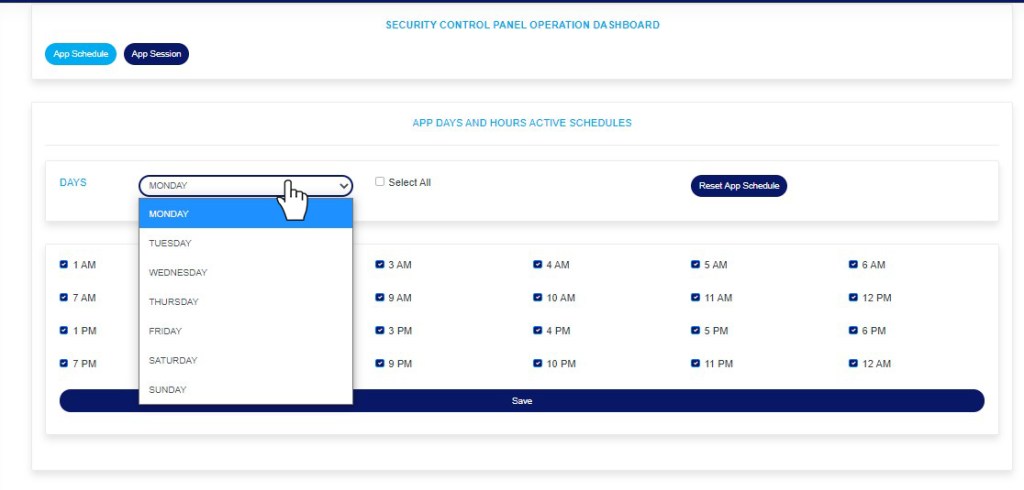
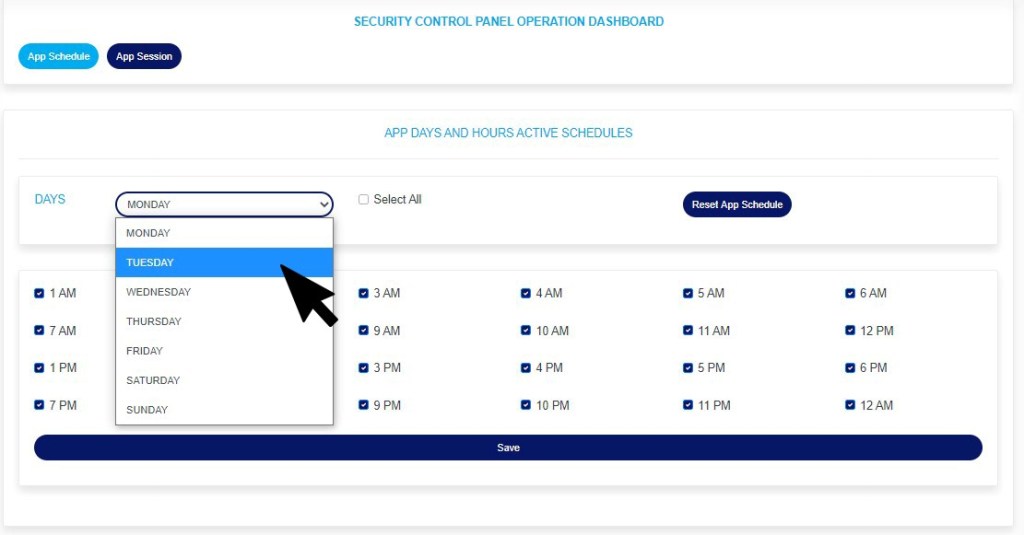
STEP 2: Click the “Days” box to select the day of a week. Here the setting is done for each day individually, so selecting a day of the week displays the hour(s) schedule settings for that day. See an example in fig 39.1c below
Fig 39.1c
STEP 3: Tick the checkbox for the hour(s) of the day you want the Compliance Plant AML software to be accessible for users. For example, in fig 39.1d below user’s will be granted access into the software from 1am to 11am on Mondays.
Fig 39.1d
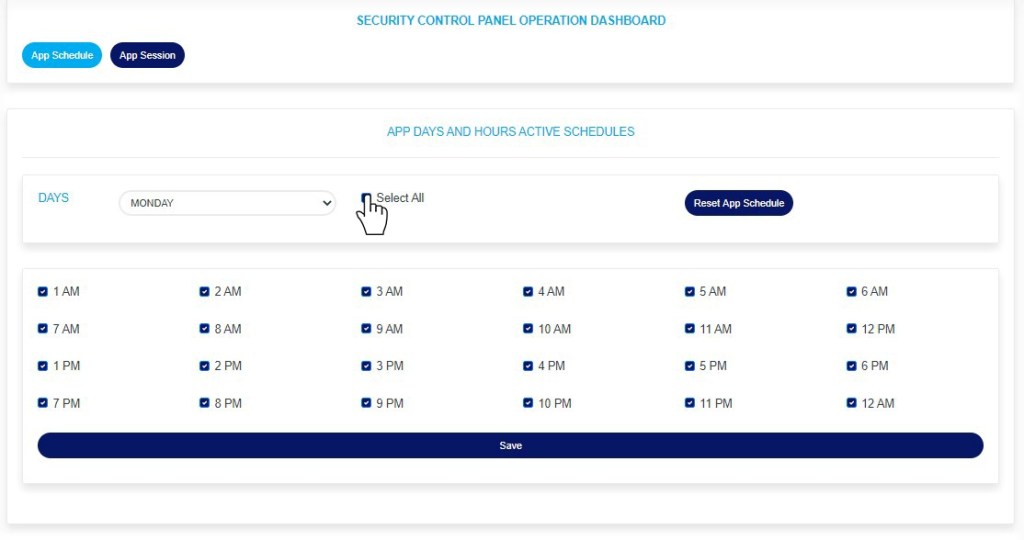
STEP 4: Tick the “Select all” checkbox at the top of the page to select all hours in the selected day. See an example in fig39.1e below
Fig 39.1e
STEP 5: Untick the “Select all” checkbox at the top of the page to deselect all hours in the selected day. See an example in fig39.1f below
Fig 39.1f
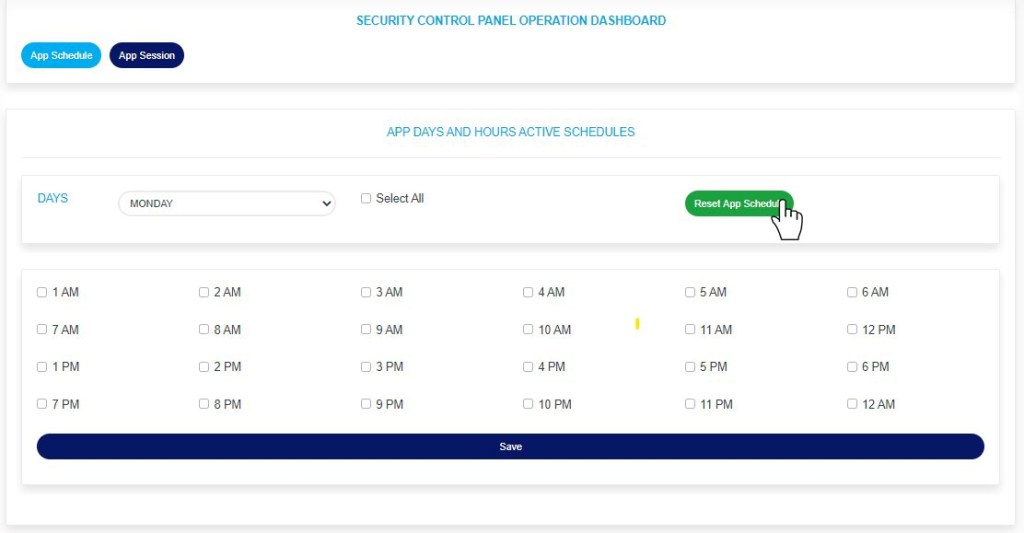
STEP 6: Click “Reset App Schedule” to revert to default settings. Note that the default setting on the Compliance Planet AML Software schedule sets the app active for the whole day (i.e., all the hour checkboxes will be ticked)
Fig 39.1g
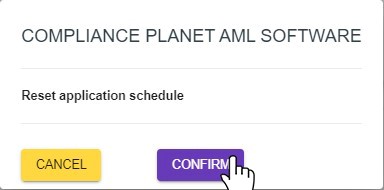
This will display a confirmation console as in fig 39.1h below
STEP 7: Click “Confirm” to proceed or “Cancel” to close the console.
Fig 39.1h
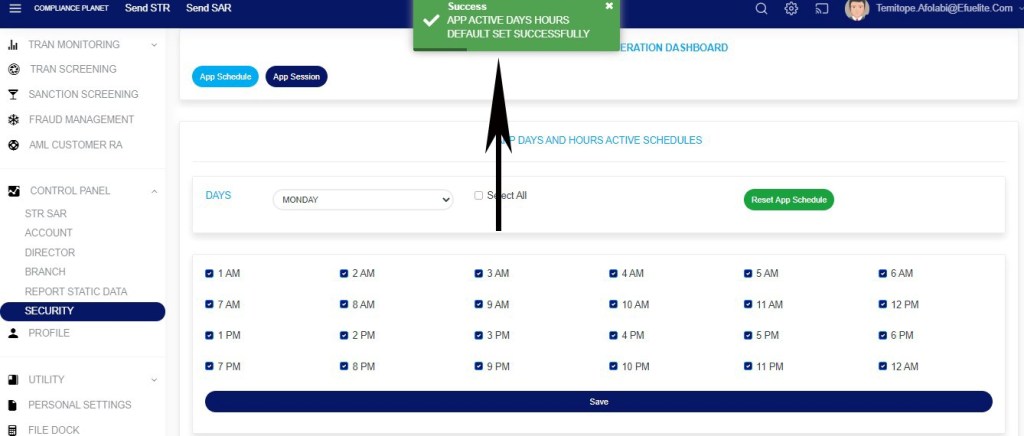
Clicking “Confirm” will display a notification at the top of the page as in fig 39.1i below
Fig 39.1i
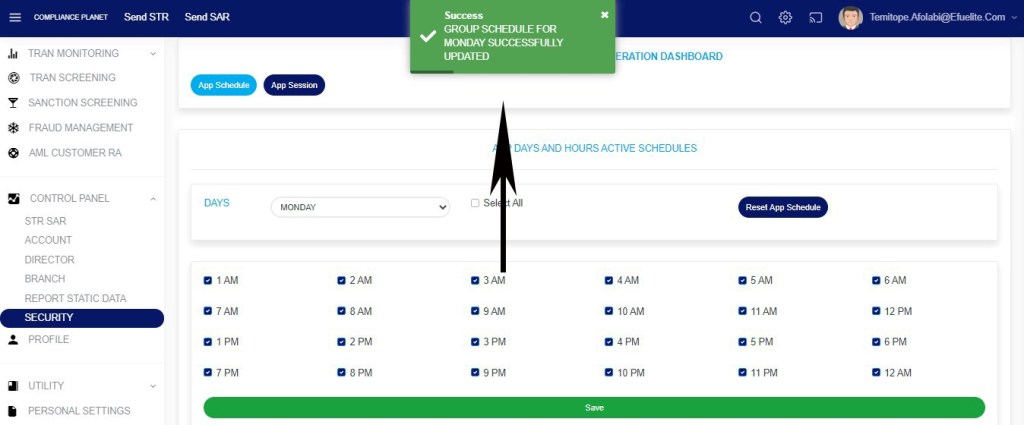
STEP 8: Click “Save” as in fig 39.1j below to save the settings for the selected day (i.e. Monday in this example)
Fig 39.1j
This will display a confirmation console as in fig 39.1k below
STEP 9: Click “Confirm” to proceed or “Cancel” to close the console.
Fig 39.1k
Clicking “confirm” will display a notification at the top of the page showing that the schedule for the selected day has been successfully updated.
Fig 39.1l
STEP 10: Click the “Days” box to select and edit the schedule for other days, then repeat steps 3 to 9 above.
Fig 39.1m
NOTE: This setting does not affect administrators.
The EFCC CTR page on the Compliance Planet features is designed to download the EFCC CTR report for a specified period.
This is different from the NFIU CTR FTR Report. In this section, all transaction types are generated in a single Excel sheet, and it is submitted in Excel format (i.e., you do not download XML or convert to XML as in NFIU CTR FTR)
The Steps to carry out these operations are explained below.
Note: Only persons assigned the right(s) to ‘view CTR reports’ and ‘process CTR reports’ can carry out this operation.
Step 1: From the app dashboard, click on “REGULATORY REPORTS” as in Fig. a below.
Fig a
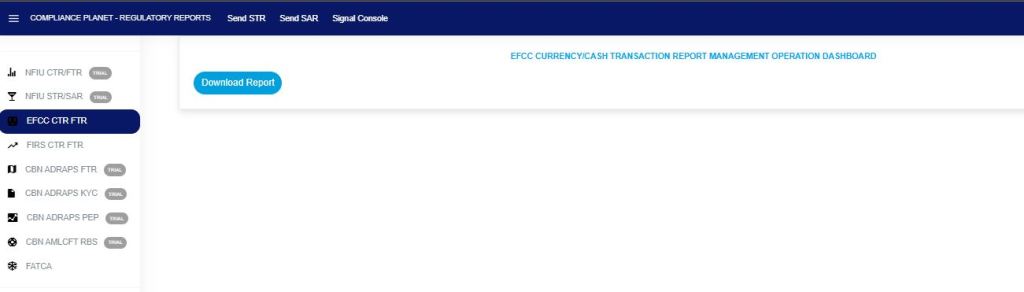
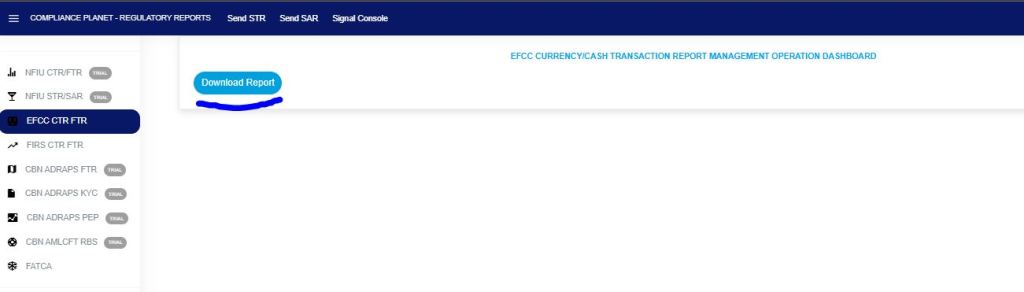
Step 2: Click on “EFCC CTR” on the drop-down list, and this displays the EFCC CTR page as in Fig. b below.
Fig b
You can instantly download EFCC CTR reports for any period. Reports are exported in Excel format. Here is how to schedule and download EFCC CTR transactions.
NOTE: Only the person(s) Assigned right(s) to ‘Process CTR reports’ will be able to carry out this Operation.
STEP 3: On the EFCC CTR homepage, click “Download Reports,” as shown in Fig. C below.
Fig. c
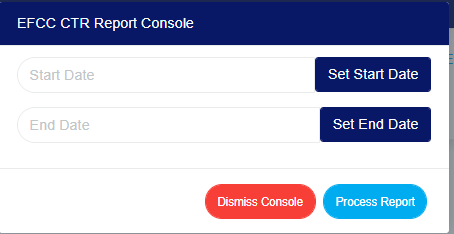
This displays an EFCC CTR Report Console, as shown in Fig. d below.
Fig .d
STEP 4: Click ‘Set Start Date’ and ‘Set End Date’ to specify the periods you want the software to download reports for.
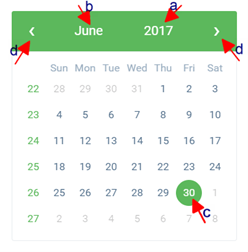
This will display a calendar dropdown as if Fig. e and f below.
Fig e
Fig f
Look at the arrows labelled a to d in Fig h to study the calendar.
Click on the given year to change it to your year of choice.
Click on the given month to change it to your month of choice.
Click on the day of the month.
You can also click on the angle brackets on the calendar ( ‘<’ or ‘>’ ) to go backward or forward.
Fig g
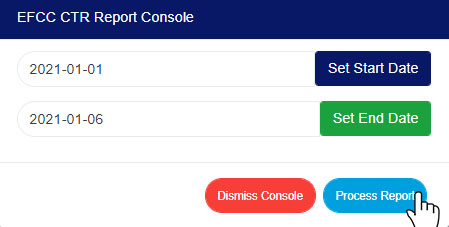
STEP 5: Click on the “PROCESS REPORT” button to generate a report. If you want to cancel the schedule, click on the DISMISS CONSOLE button. These buttons are at the bottom-right corner of the console as in Fig h below.
Fig h
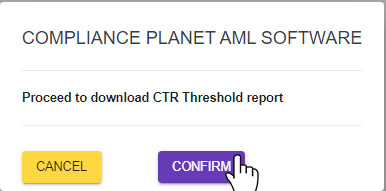
Clicking ‘Process Report’ displays a confirmation console, as shown in Fig i.
Click “Confirm” to proceed with the download or “Cancel” to return to the console.
Fig i
Clicking confirm displays the signal console as in Fig j below, which shows ongoing processes.
Fig j
You can terminate unfinished processes by clicking CANCEL OPS.
The operations pertaining to exempted accounts include exempting an account and removing an account from the exemption list.
NOTE: Only person(s) profiled as deputy supreme admin can carry out these operations
To perform any of the operations on Exempted Accounts;
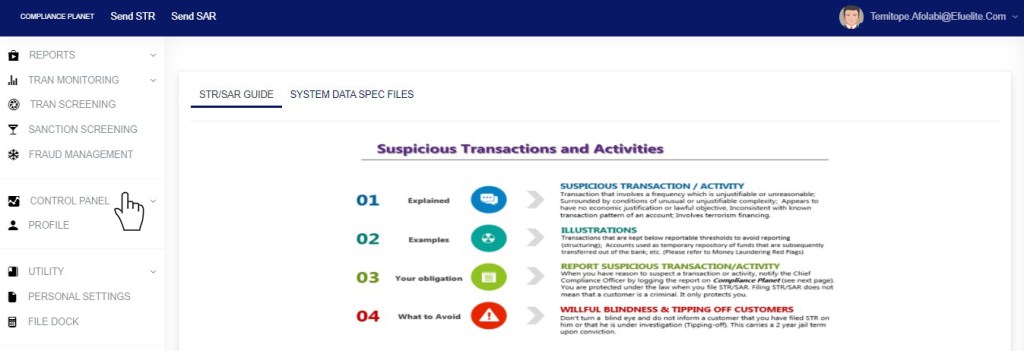
STEP 1: From the left-hand side menu, Click ‘Control panel’ as in fig. 16.2a.
Fig 16.2a
This will display a drop down as in Fig 16.2b below.
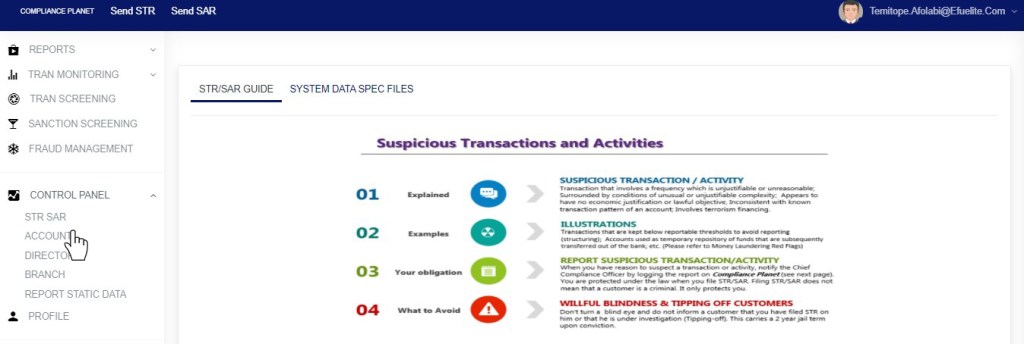
STEP 2: Click ‘ACCOUNT’ on the drop-down list. See an example in Fig 16.2b below.
Fig 16.2b
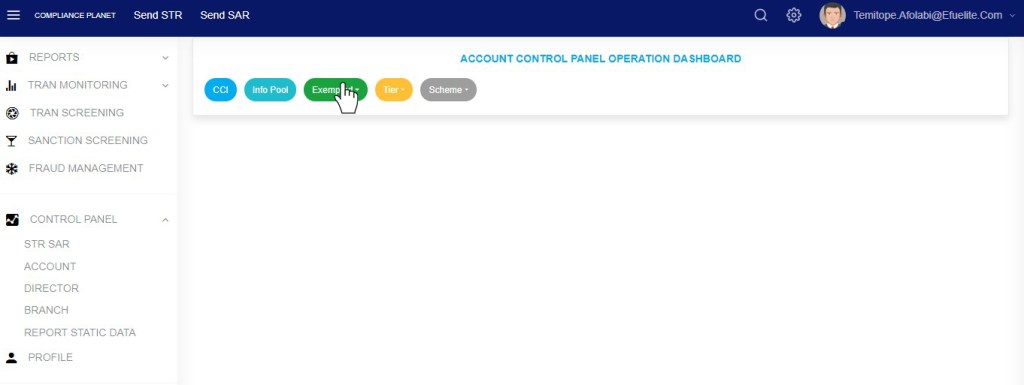
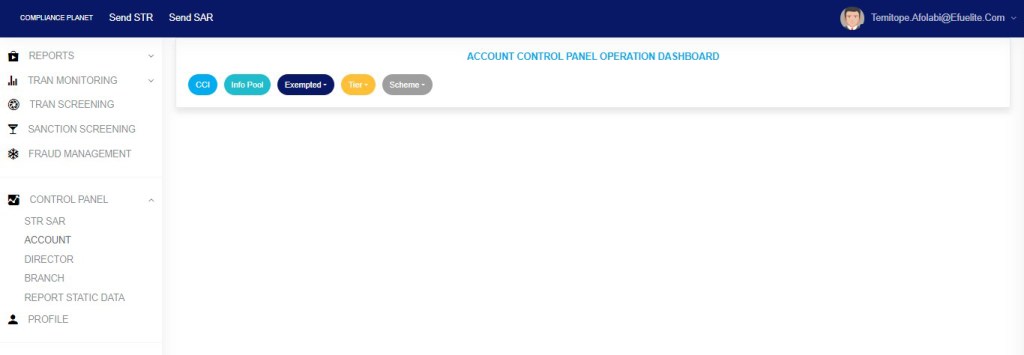
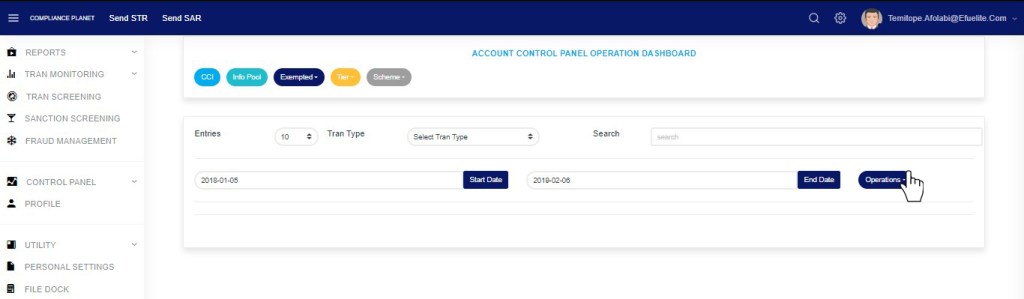
This will display the ACCOUNT CONTROL PANEL OPERATIONS dashboard as in Fig 16.2c below
Fig 16.2c
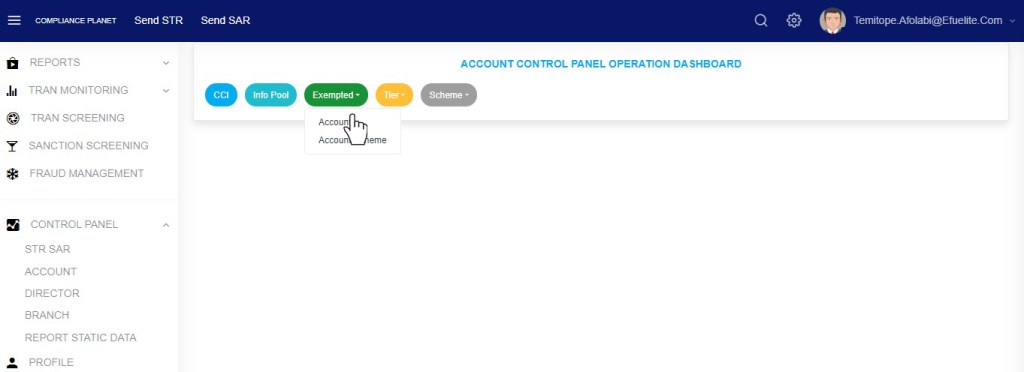
STEP 3: Click “Exempted” from the top menu, on the account page. See an example in fig16.2d below
Fig 16.2d
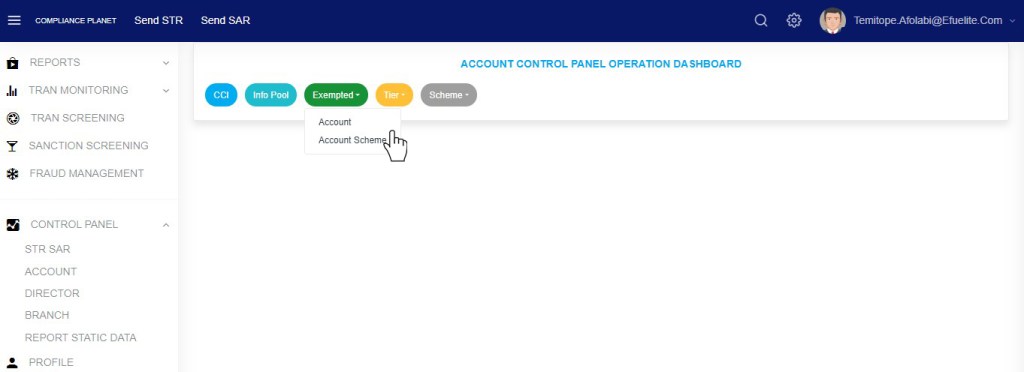
This displays a dropdown as in fig 16.2e below
STEP 4: Click “Account” on the drop-down list as in fig 16.2e below
Fig 16.2e
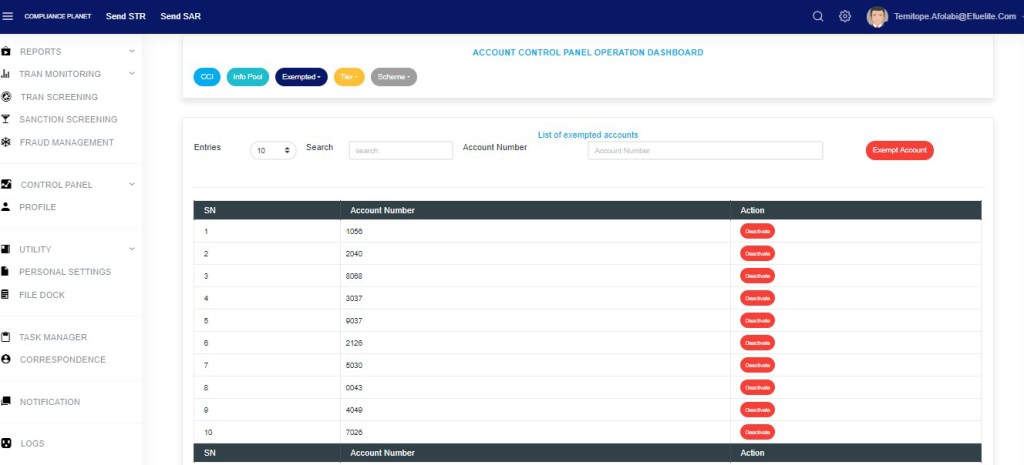
This displays a page as in fig. 16.2f below.
(fig. 16.2f)
To adjust the number of exempted accounts per page, click on the ‘ENTRIES’ box as in fig. 16.2g below and select the number of records you want to see per page.
(fig. 16.2g)
Click on the Search text box to search for an exempted account number as in fig 12.2h below
Fig 16.2h
How To Exempt an Account Number
This refers to adding an account number to the CTR exemption list. Here is how to exempt an account from reports.
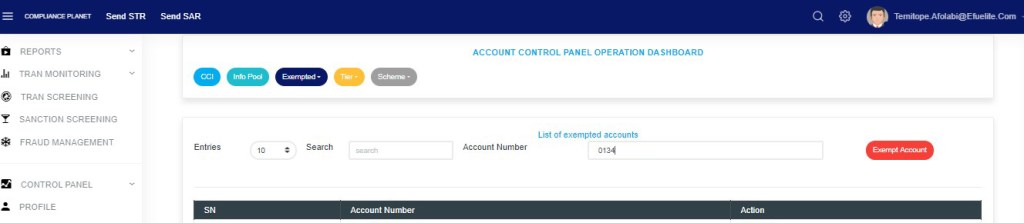
STEP 1: Type an account number in the ACCOUNT NUMBER box. See an example in fig. 16.3a below.
(fig. 16.3a)
STEP 2: Click ‘EXEMPT ACCOUNT’. This button is positioned at the top of the page as shown in fig. 16.3b.
(fig. 16.3b)
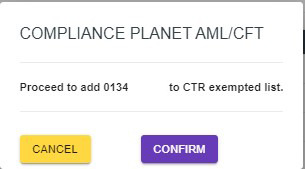
This displays a confirmation console as in fig. 16.3c.
(fig. 16.3c)
STEP 3: Click on ‘CONFIRM’ to add the account number to the exempted account list or ‘CANCEL’ to discontinue. If you proceed, a notification will be displayed at the top of the page.
(fig. 16.3d)
How to Remove An Account Number from the Exemption List
To remove an account number from the CTR exemption list;
STEP 1: Click the ‘DEACTIVATE’ button. See fig. 16.4a for an example.
(fig. 16.4a)
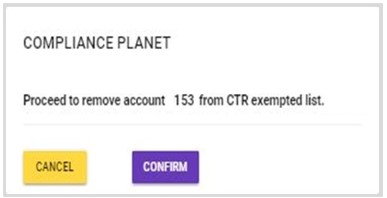
This displays a confirmation console as in fig. 16.4b.
(fig. 16.4b)
STEP 2: Click on ‘CONFIRM’ to remove the account number from the exempted account list or ‘CANCEL’ to discontinue. If you proceed, the account will be removed from the exempted account list right away, and a notification will be displayed at the top of the page.
The operations pertaining to the exempted account scheme include exempting an account scheme and removing an account scheme from the CTR exemption list.
NOTE: Only person(s) profiled as deputy supreme admin can carry out these operations
To perform any of the operations on Exempted Account schemes;
STEP 1: From the left-hand side menu, Click ‘Control panel’ as in fig. 17.2a.
Fig 17.2a
This will display a drop down as in Fig 17.2b below.
STEP 2: Click ‘ACCOUNT’ on the drop-down list. See an example in Fig 17.2b below.
Fig 17.2b
This will display the ACCOUNT CONTROL PANEL OPERATIONS dashboard as in Fig 17.2c below
Fig 17.2c
STEP 3: Click “Exempted” from the top menu on the account page. See an example in fig. 17 .2d below
Fig 17.2d
This displays a dropdown as in fig 17.2e below
STEP 4: Click “Account Scheme” on the drop-down list as in fig 17.2e below
Fig 17.2e
This displays a page as seen in fig. 17.2f below.
(fig. 17.2f)
Click on the ‘ENTRIES’ box to adjust the number of entries per page as shown in fig. 17.2g below.
(fig. 17.2g)
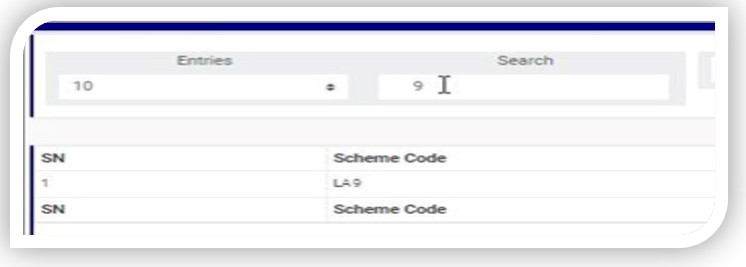
Type a scheme code in the search box to search for an exempted scheme code. See an example of a search in fig. 17.2h below.
(fig. 17.2h)
How To Exempt An Account Scheme
This refers to adding an account scheme code to the exemption list. Here is how to do this.
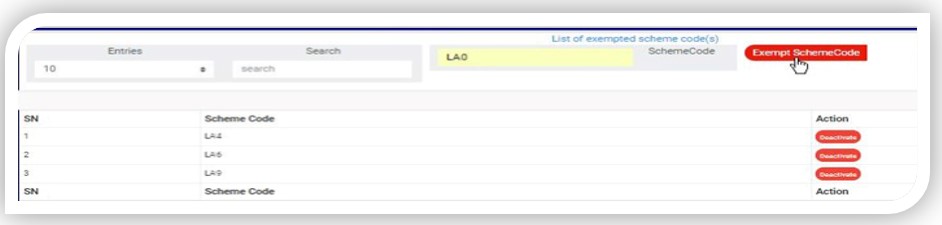
STEP 1: Type an account scheme code in the SCHEME CODE box. See an example in fig. 17.3a below.
(fig. 17.3a)
STEP 2: Click on ‘EXEMPT SCHEME CODE’’ as shown in fig. 17.3b.
(fig. 17.3b)
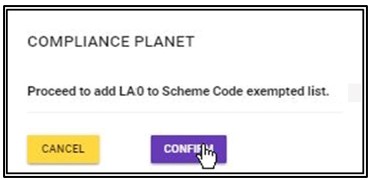
This displays a confirmation console as in fig. 17.3c.
(fig. 17.3c)
STEP 3: Click on ‘CONFIRM’ to add the account scheme to the exemption list or ‘CANCEL’ to discontinue. If you proceed, a notification will be displayed at the top of the page. See fig. 17.3d for an example.
(fig. 17.3d)
How to Remove An Account Scheme from the Exemption List
To remove an account scheme from the exemption list;
STEP 1: Click the ‘DEACTIVATE’ button as in fig. 17.4a for an example.
(fig. 17.4a)
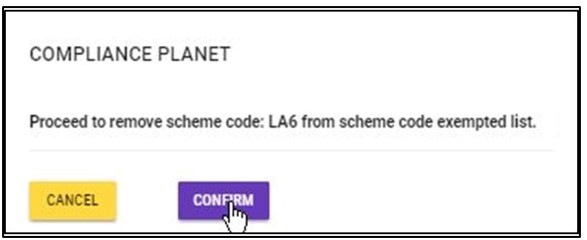
This displays a confirmation console as in fig. 17.4b.
(fig. 17.4b)
STEP 2: Click on ‘CONFIRM’ to remove the account scheme from the scheme code exempted list or ‘CANCEL’ to discontinue. If you proceed, the scheme code will be removed from the list immediately, and a notification will be displayed at the top of the page. See fig. 17.4c for an example.
Under this feature, the software provides a list of the financial institution’s branch codes and their descriptions. The operations pertaining to branch codes on the Compliance Planet software include creating a new branch, activating or deactivating a branch, and deleting a branch, with options to carry out bulk operations also.
NOTE: Only person(s) profiled as deputy supreme admin can carry out these operations
To perform any of the operations on branch codes;
STEP 1: From the left-hand side menu, Click ‘Control panel’ as in fig. 19.2a.
Fig 19.2a
This will display a drop down as in Fig 19.2b below.
STEP 2: Click ‘BRANCH’ on the drop-down list. See an example in Fig 19.2b below.
Fig 19.2b
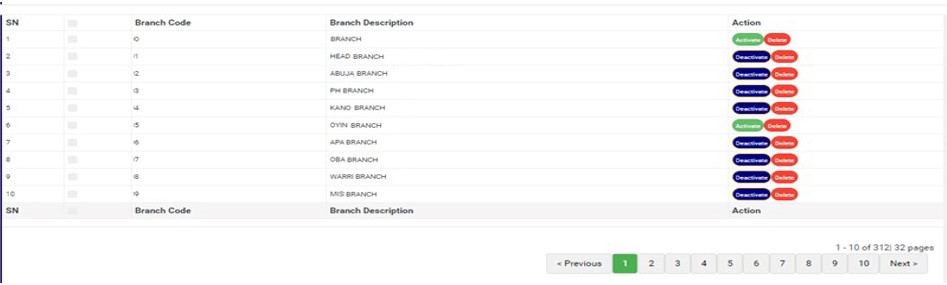
This displays a page showing a list of all the financial institution’s branch codes and their descriptions as in fig. 19.2c.
(fig. 19.2c)
At the bottom-right corner of the page, the software gives information about the number of pages of the list, with the page numbers written out. Click on any page number, to go that particular page. Click on ‘NEXT’ to go to the next page or ‘PREVIOUS’ to go to the page before the current page.
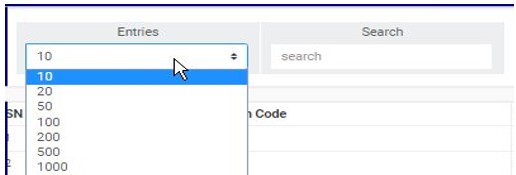
Click on the ‘ENTRIES’ box as in fig. 19.2d to adjust the number of branches you see per page.
(fig. 19.2d)
Search for branches by inputting the branch code or branch description in the search box. Search results will be displayed as soon as a character is typed in the search box. See fig. 19.2e below for an example.
(fig. 19.2e)
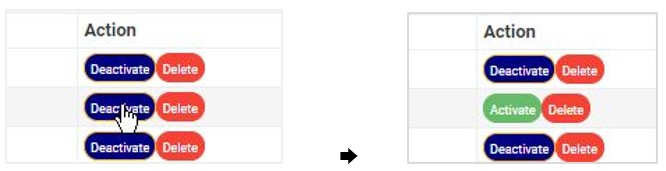
Each branch entry has two (2) action buttons; ‘Activate/Deactivate’ toggle button and ‘Delete’ button. See these buttons in fig. 19.2f.
(fig. 19.2f)
How to Activate or Deactivate an Existing Branch
A branch information can either be active or inactive. For branches that are active, their action buttons will read, ‘DEACTIVATE’ and branches that are inactive will have ‘ACTIVATE’ buttons. The ACTIVATE/DEACTIVATE button is a toggle switch that either activates or deactivates a branch information depending on its current status. Here is how to make use of the button.
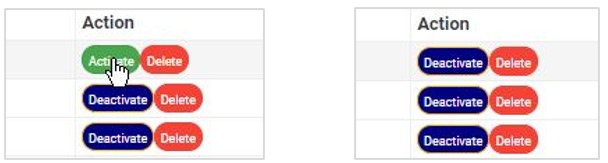
A) How to Activate A Branch
STEP 1: Click on ‘ACTIVATE’ as in fig. 19.3a.
(fig. 19.3a)
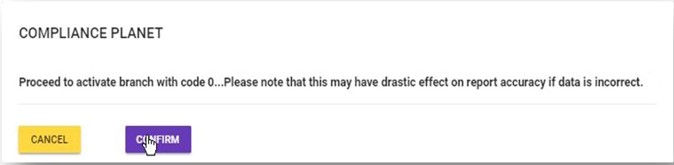
This displays a confirmation console to confirm your request to activate the branch
STEP 2: Click on ‘CONFIRM’ as in fig. 19.3b to proceed or ‘CANCEL’ to discontinue.
(fig. 19.3b)
A notification will be displayed at the top of the page when the activation is successful. See fig. 19.3c for an example.
(fig. 19.3c)
When a branch information has been successfully activated, the action button changes from ‘ACTIVATE’ to ‘DEACTIVATE’. See fig. 19.3d and fig. 19.3e for an example.
(fig. 19.3d) (fig. 19.3e)
B) How to Deactivate A Branch
STEP 1: Click on ‘DEACTIVATE’ as in fig. 19.3f.
(fig. 19.3f)
This displays a confirmation console to confirm your request to deactivate the branch
STEP 2: Click on ‘CONFIRM’ as in fig. 19.3g to proceed or ‘CANCEL’ to discontinue.
(fig. 19.3g)
A notification will be displayed at the top of the page when the deactivation is successful. See fig. 19.3h for an example.
(fig. 19.3h)
When a branch has been successfully deactivated, the action button changes from ‘DEACTIVATE’ to ‘ACTIVATE’. See fig. 19.3i and fig. 19.3j for an example.
(fig. 19.3i) (fig. 19.3j)
How to Delete A Branch
This refers to deleting a branch’s information from the software. Here is how to delete a branch information.
STEP 1: Click on the ‘DELETE’ button of the branch information as in fig. 19.4a.
(fig. 19.4a)
This displays a confirmation console to confirm your request to delete the branch
STEP 2: Click on ‘CONFIRM’ as in fig. 19.4b to proceed or ‘CANCEL’ to discontinue.
(fig. 19.4b)
A notification will be displayed at the top of the page when the delete operation is complete.
How to Create A New Branch
This refers to creating a new branch on the software. Here is how to do this;
STEP 1: Click the ‘Operations’ button at the top-left side of the page. See this in fig 19.5a below
Fig 19.5a
This will display a drop-down as in fig 19.5b below
STEP 2: Click ‘NEW BRANCH’ on the operations drop-down list as shown in fig. 19.5b.
(fig. 19.5b)
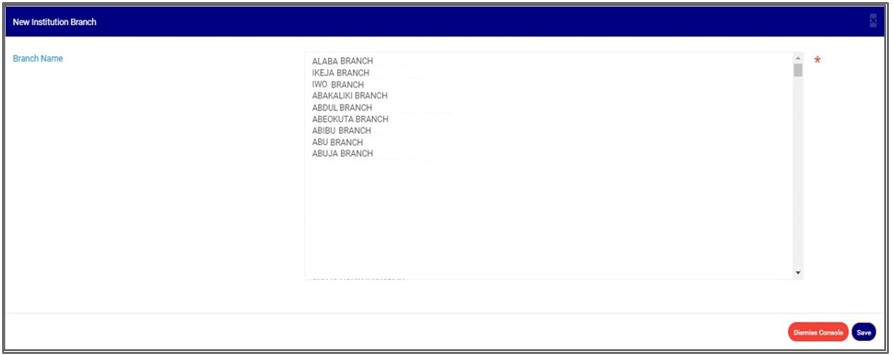
A console as in fig. 19.5c will be displayed. Here, you are to select the branch description.
(fig. 19.5c)
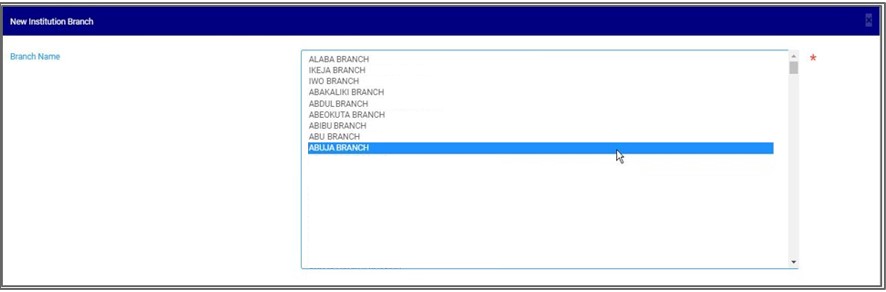
STEP 2: Select branch name as shown in fig. 19.5d.
(fig. 19.5d)
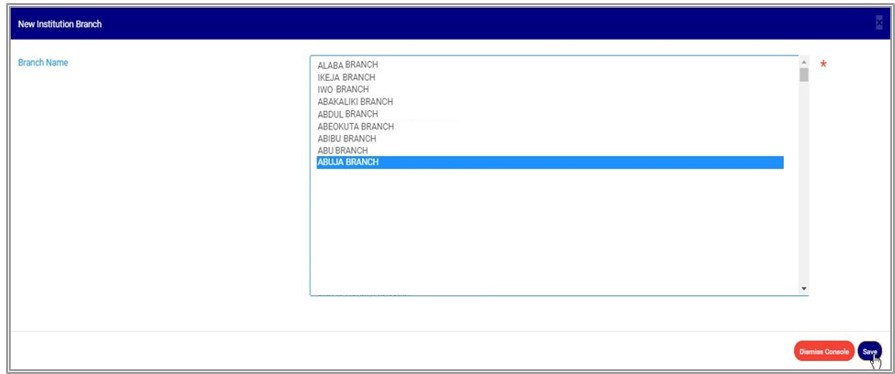
STEP 3: Click on ‘SAVE’ as in fig. 19.5e to save new branch information. Click on ‘DISMISS CONSOLE’ to close the console.
(fig. 19.5e)
This displays a confirmation console to confirm your request.
STEP 4: Click on ‘CONFIRM’ as in fig. 19.5f to proceed or ‘CANCEL’ to discontinue.
(fig. 19.5f)
A notification will be displayed at the top of the page when the operation is complete.
How To carry out bulk activation of branches
This refers to activating more than one branch and here is how to do this.
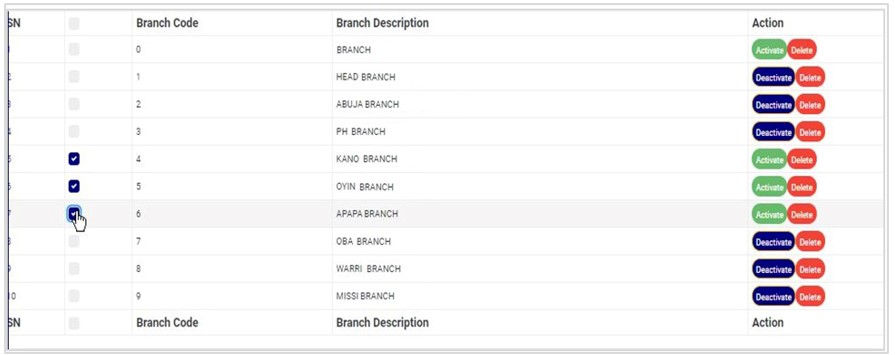
STEP 1: Select the deactivated branches to be activated by clicking on their checkboxes as shown in fig. 19.6a below. An inactive branch has an ‘ACTIVATE’ action button.
(fig. 19.6a)
STEP 2: Click the ‘Operations’ button at the top-left side of the page. See this in fig 19.6b below
Fig 19.6b
This will display a drop-down as in fig 19.6c below
STEP 3: Click ‘ACTIVATE SELECTED’ on the operations drop-down list as shown in fig. 19.6c.
(fig. 19.6c)
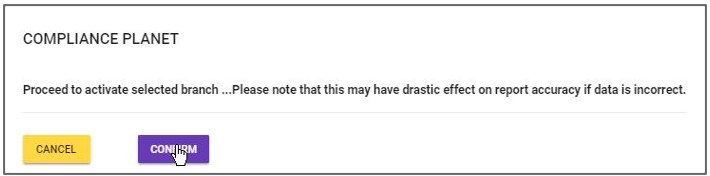
This displays a confirmation console to confirm your request.
STEP 4: Click on ‘CONFIRM’ as in fig. 19.6d to proceed or ‘CANCEL’ to discontinue.
(fig. 19.6d)
When the operation is successful, a notification will be displayed at the top of the page and the Activate/Deactivate toggle button of the selected branch information will change from ‘ACTIVATE’ to ‘DEACTIVATE’. See fig. 19.6e below for an example.
(fig. 19.6e)
How to Carry Out Bulk Deactivation of Branches
This refers to deactivating more than one branch information. Here is how to do this.
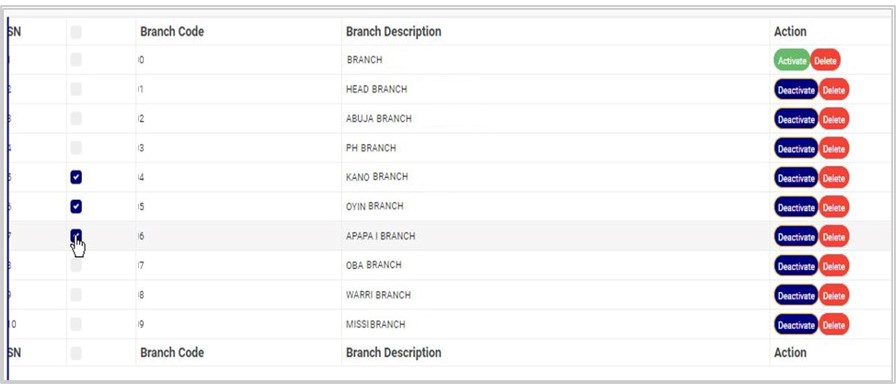
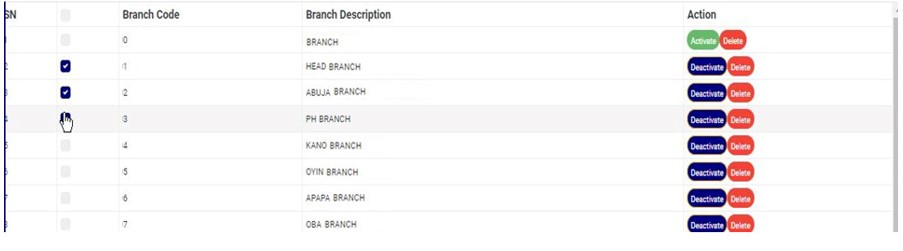
STEP 1: Select the branches to be deactivated by clicking on their check-boxes as shown in fig. 19.7a below. An active branch has a ‘DEACTIVATE’ action button.
(fig. 19.7a)
STEP 2: Click the ‘Operations’ button at the top-left side of the page. See this in fig 19.7b below
Fig 19.7b
This will display a drop-down as in fig 19.7c below
STEP 3: Click ‘DEACTIVATE SELECTED’ on the operations drop-down list as shown in fig. 19.7c.
(fig. 19.7c)
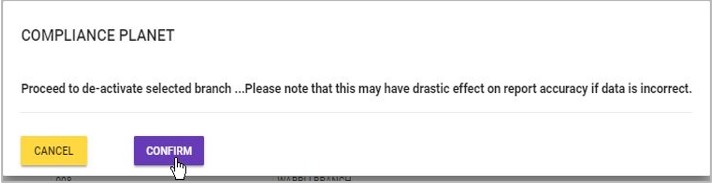
This displays a confirmation console to confirm your request.
STEP 3: Click on ‘CONFIRM’ as in fig. 19.7d to proceed or ‘CANCEL’ to discontinue.
(fig. 19.7d)
When the operation is successful, a notification will be displayed at the top of the page and the Activate/Deactivate button of the selected branch will change from ‘DEACTIVATE’ to ‘ACTIVATE’. See fig. 19.7e below for an example.
(fig. 19.7e)
How to Carry Out Bulk Delete Of Branches
This refers to deleting more than one branch information. Here is how to carry out a bulk delete.
STEP 1: Select the branch information to be deleted by clicking on their checkboxes as shown in fig. 19.8a below. Both active and inactive branches can be deleted.
(fig. 19.8a)
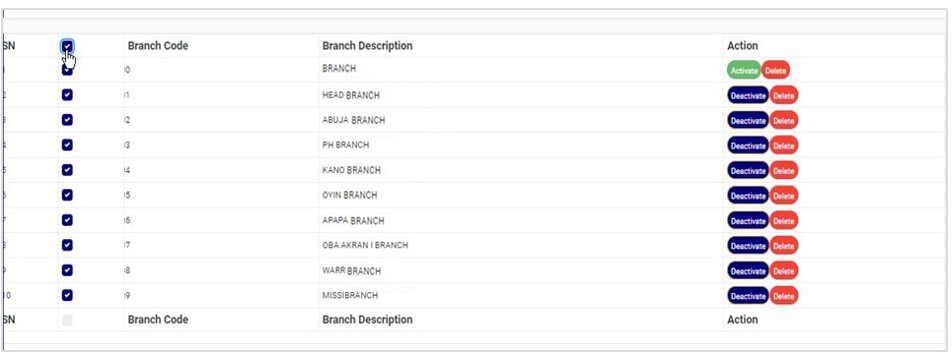
To select or deselect all the entries on a page, click on the checkbox on the table title bar, that is, the checkbox between ‘S/N’ and ‘BRANCH CODE’. See fig. 19.8b for an example.
(fig. 19.8b)
STEP 2: Click the ‘Operations’ button at the top-left side of the page. See this in fig 19.8c below
Fig 19.8c
This will display a drop-down as in fig 19.8d below
STEP 3: Click ‘DELETE SELECTED’ on the operations drop-down list as shown in fig. 19.8d.
(fig. 19.8d)
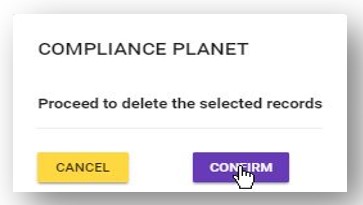
This displays a confirmation console to confirm your request to delete the branches selected.
STEP 3: Click on ‘CONFIRM’ as in fig. 19.8e to proceed or ‘CANCEL’ to discontinue.
(fig. 19.8e)
A notification will be displayed at the top of the page when the operation is complete.
previewing the list of CCI for the transaction report,
Editing a CCI,
Deleting a CCI.
Adding a new CCI,
Downloading a CCI and
Bulk Delete
NOTE: Only person(s) profiled as deputy supreme admin can carry out these operations
To perform any of the operations;
STEP 1: From the left-hand side menu, click ‘Control panel’ as in fig. 18.2a.
Fig 18.2a
This will display a drop down as in Fig 18.2b below.
STEP 2: Click ‘ACCOUNT’ on the drop-down list. See an example in Fig. 18 .2 b below.
Fig 18.2b
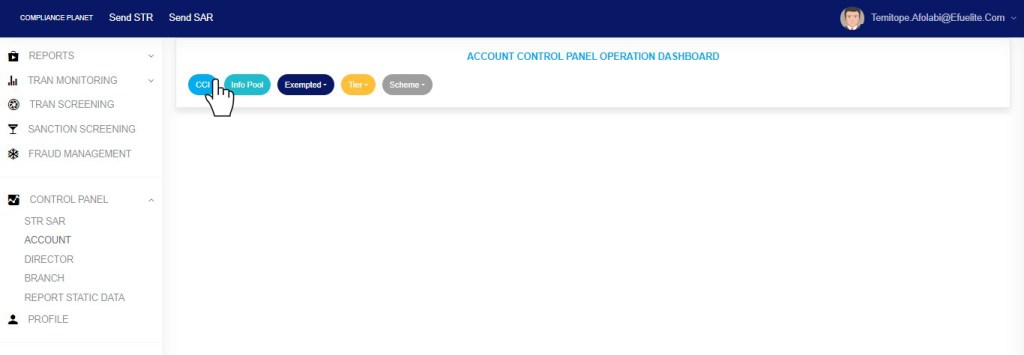
This will display the ACCOUNT CONTROL PANEL OPERATIONS dashboard as in Fig. 18 .2c below
Fig 18.2c
STEP 3: Click “CCI” from the top menu on the account page. See an example in fig. 18 .2d below
Fig 18.2d
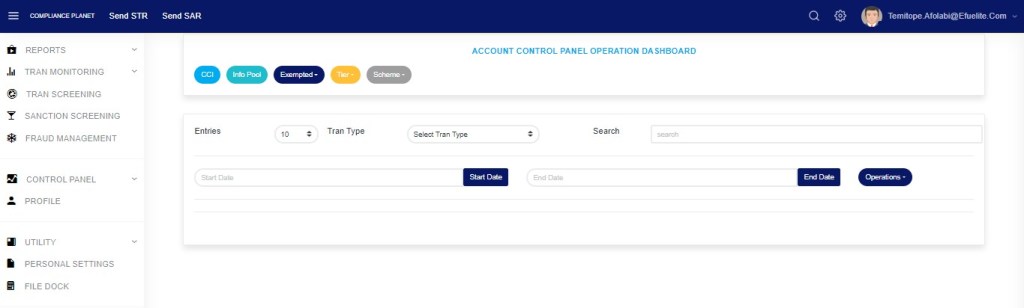
This displays a page as seen in fig. 18.2e below.
(fig. 18.2e)
How To Preview CCI List For Transaction Report
This refers to searching for CCIs for the various transaction reports during a specified period. Here is how to preview a CCI for a transaction type.
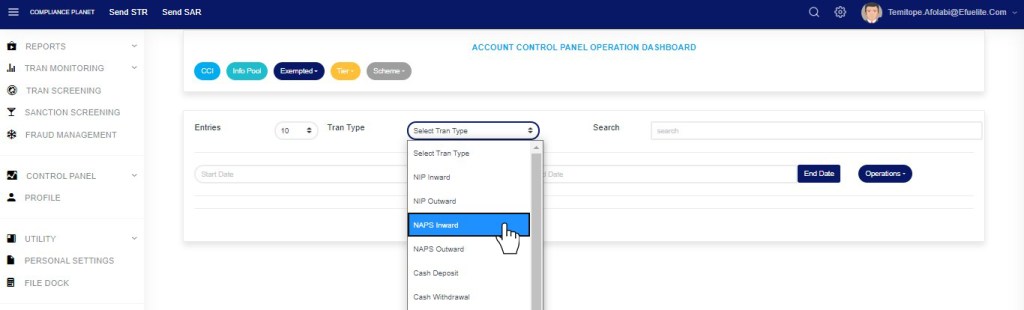
STEP 1: Select the transaction type from the ‘Tran Type’ box as shown in fig. 18.3a.
(fig. 18.3a)
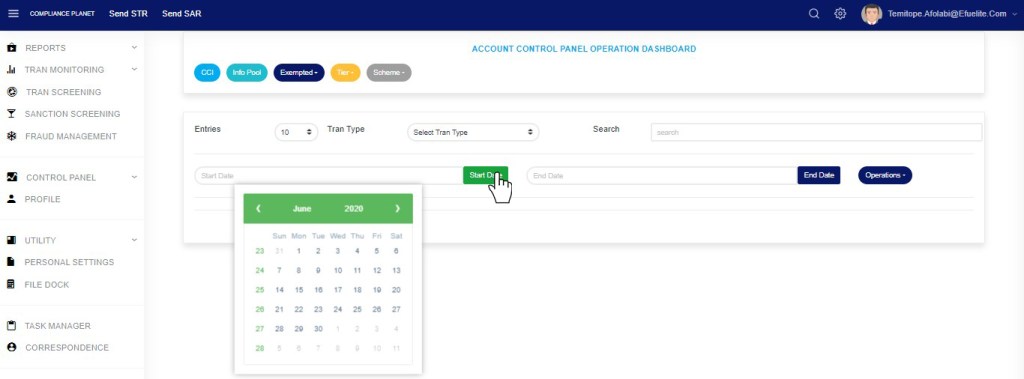
STEP 2: Set ‘START DATE’ and ‘END DATE’ to specify the beginning date and the ending date of the transaction reports whose CCI list is to be generated. See fig. 18.3a for example.
(fig. 18.3b)
STEP 3: Click the “Operations” button as shown in fig 18.3c below
(fig. 18.3c)
This displays a drop-down as in fig 18.3d below
STEP 3: Click ‘PREVIEW’ on the drop-down list as in fig.18.3d below.
(fig. 18.3d)
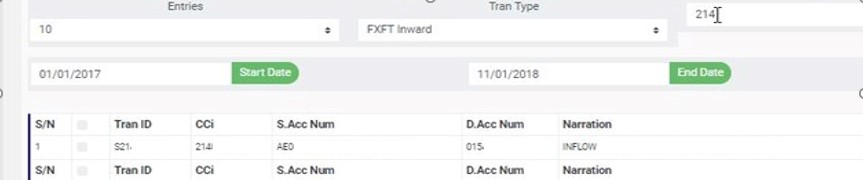
Results for CCI for the selected transaction type will be displayed on the page as in fig. 18.3e below.
(fig. 18.3e)
At the bottom-right corner of the page, the software gives information about the number of pages. The page numbers represent buttons to go to each page. Clicking any page number will take you to that page. Click on the ‘NEXT’ button to go to the next page or the ‘PREVIOUS’ button to go to the page before the current page.
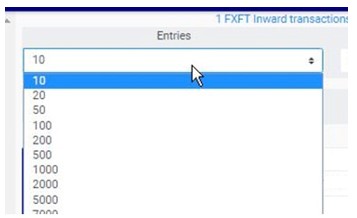
Click on the ‘ENTRIES’ box to adjust the number of entries per page as shown in fig. 18.3f below.
(fig. 18.3f)
You can search for a ‘CCI’ for a transaction by typing the ‘CCi’, source account number or the destination account number involved in the matched transaction. See an example of a search in fig. 18.3g below.
(fig. 18.3g)
How to Edit CCI
This refers to changing the CCi number attached to a transaction. Here is how to do this.
STEP 1: Click on the ‘EDIT’ button of the CCI record. See fig. 18.4a for an example.
(fig. 18.4a)
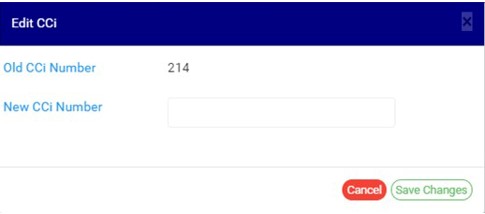
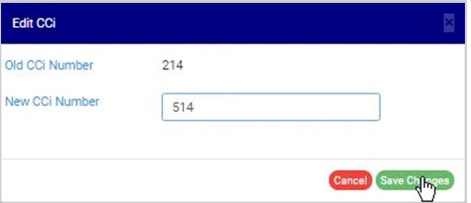
This displays an ‘Edit CCI’ console as shown below.
(fig. 18.4b)
STEP 2: Fill in the new CCi (i.e., the new Certificate of Capital Importation number) to be attached to the transaction for reporting. See fig. 18.4c for an example.
(fig. 18.4c)
STEP 3: Click on ‘SAVE CHANGES’ as in fig. 18.4d to save the new transaction CCi.
(fig. 18.4d)
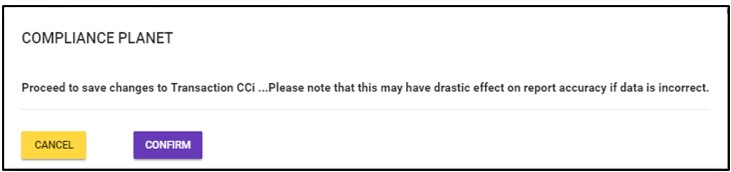
This displays a confirmation console as in fig 18.4e below.
STEP 4: Click ‘CONFIRM’ as in fig. 18.4e to proceed to save changes or click on ‘CANCEL’ to discontinue.
(fig. 18.4e)
A notification as in fig. 18.4f will be displayed at the top of the page upon successful completion of the operation.
(fig. 18.4f)
How To Add New CCI
This refers to matching a CCi to a transaction on the Compliance Planet software. This CCi will form part of the details that will be rendered for that particular transaction when the compliance planet processes an ADRAPS FTR report, including the transaction.
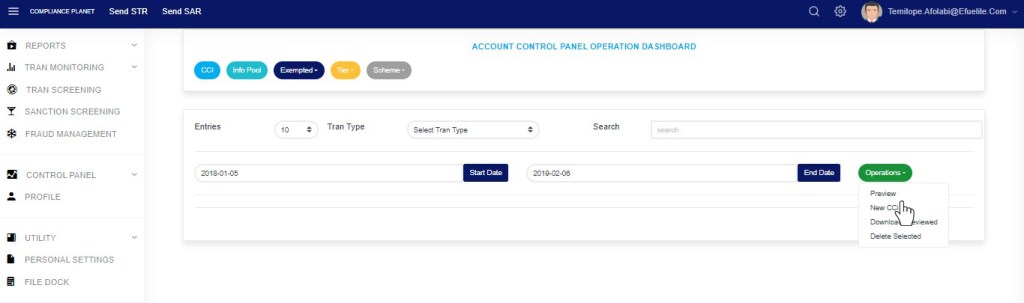
STEP 1: Click the “Operations” button as shown in fig 18.5a below
(fig. 18.5a)
This displays a drop-down as in fig 18.5b below
STEP 3: Click ‘New CCI’ on the drop-down list as in fig.18.5b below.
(fig. 18.5b)
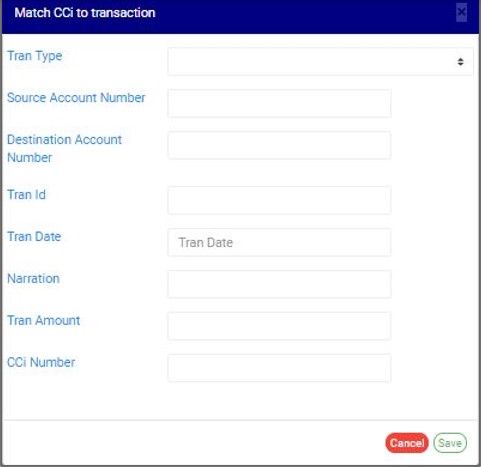
This displays a console as in fig. 18.5c where details of the transaction and the CCi to be attached are to be filled.
(fig. 18.5c)
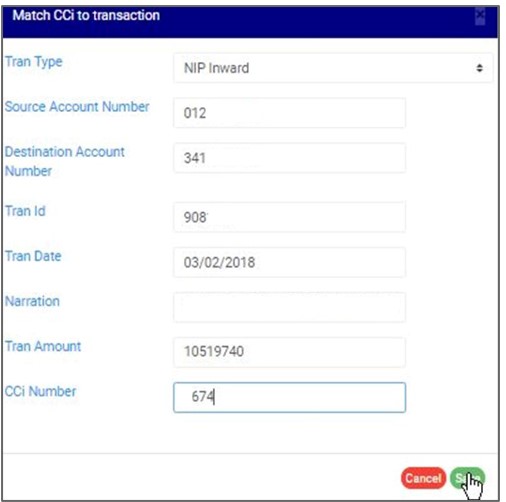
STEP 2: Fill in the required details and click on ‘SAVE’ as in fig. 18.5d to match CCi with the transaction. Click on ‘CANCEL’ to close the console.
(fig. 18.5d)
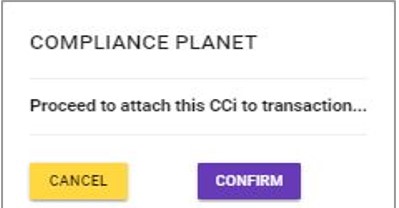
This displays a confirmation console as in fig. 18. 5e to confirm your request.
(fig. 18.5e)
Click on ‘CONFIRM’ to proceed or ‘CANCEL’ to discontinue. A notification will be displayed at the top of the page when the operation is successful.
How To Delete CCI
This refers to deleting a CCi entry. Here is how to do this;
STEP 1: Click the ‘DELETE’ button for the CCi entry, as in fig. 18.6a.
(fig. 18.6a)
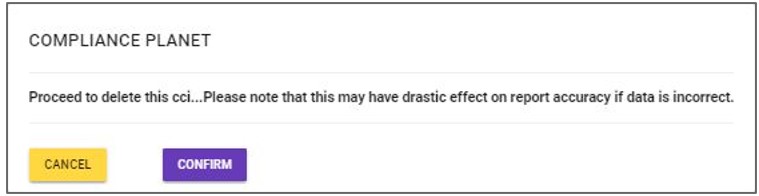
This will display a confirmation console to confirm your request to delete the transaction CCi.
STEP 2: Click on ‘CONFIRM’ as in fig. 18.6b to proceed or ‘CANCEL’ to discontinue.
(fig. 18.6b)
A notification will be displayed at the top of the page when the delete operation is complete.
How to Download CCI
STEP 1: Select the CCI entry to be downloaded as in fig. 18.7a below.
(fig. 18.7a)
STEP 2: Click the “Operations” button as shown in fig 18.7b below
(fig. 18.7b)
This displays a drop-down as in fig 18.7c below
STEP 3: Click ‘Download Previewed’ on the drop-down list as in fig.18.7c below.
(fig. 18.7c)
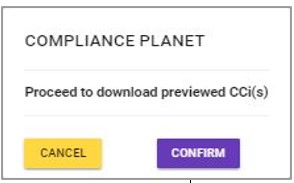
This displays a confirmation console to confirm your request as in fig. 18.7d.
(fig. 18.7d)
STEP 3: Click on ‘CONFIRM’ to proceed with the download or click on ‘CANCEL’ to discontinue.
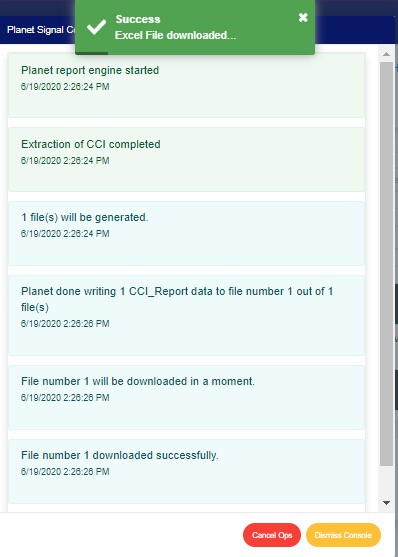
The signal console shows ongoing processes. An example of a signal console is Fig. 18 .7d. When the operation is complete, a notification will be displayed at the top of the page. See fig. 18.7e below for an example.
(fig. 18.7e)
How to Make Bulk Delete of CCI Records
This refers to deleting multiple CCI entries. Here is how to do this;
STEP 1: Select the entries to be deleted by clicking on their check boxes.
STEP 2: Click ‘Delete Selected’ on the operations drop-down list as in fig. 18.8a below.
(fig. 18.8a)
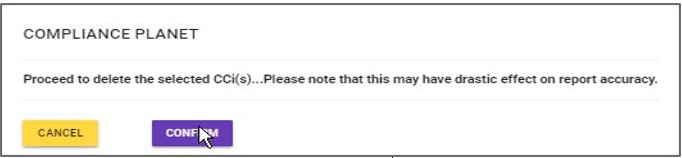
This displays a confirmation console to confirm your request to delete the transaction CCi.
STEP 3: Click on ‘CONFIRM’ as in fig. 18.8b to proceed or ‘CANCEL’ to discontinue.
(fig. 18.8b)
A notification will be displayed at the top of the page when the operation is complete.