This section provides a guide on how to use the Lien and PND Case Manager feature on the Compliance Planet Anti-Money Laundering/Core Banking Finance Software, complete with step-by-step instructions and illustrations.
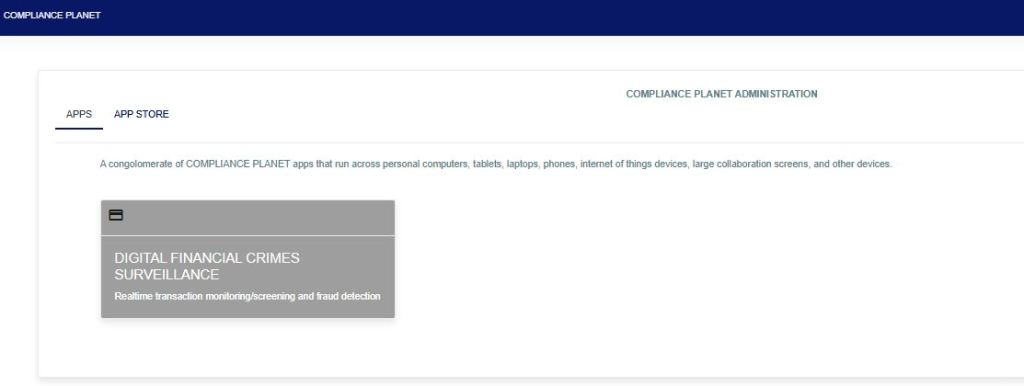
STEP 1: From the app dashboard, click “DIGITAL FINANCIAL CRIMES SURVEILLANCE” as shown below.
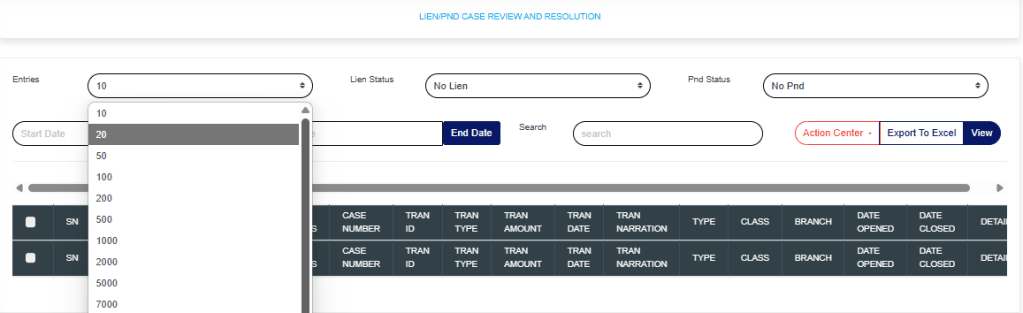
STEP 2: From the left-hand side menu, click on “Lien/PND Case Manager” and the drop-down will be seen as shown below.

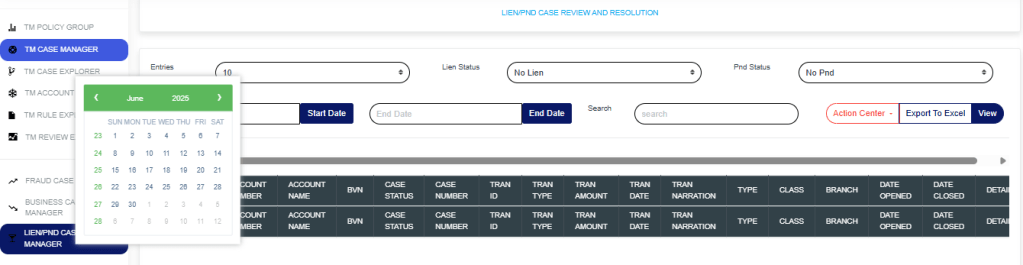
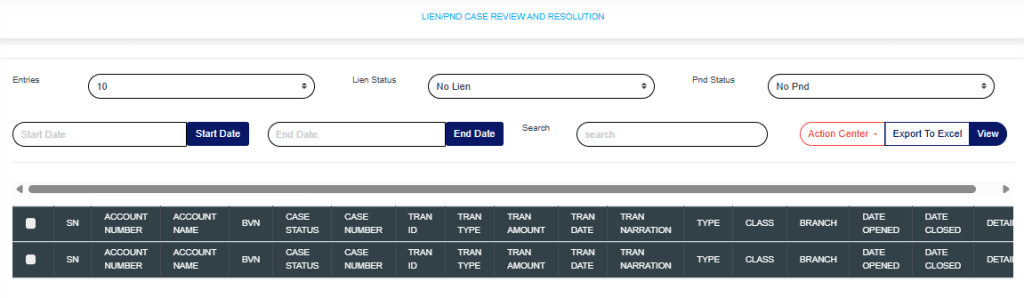
Entries: Click on the “Entries” drop-down to choose how many case entries you want displayed per page.
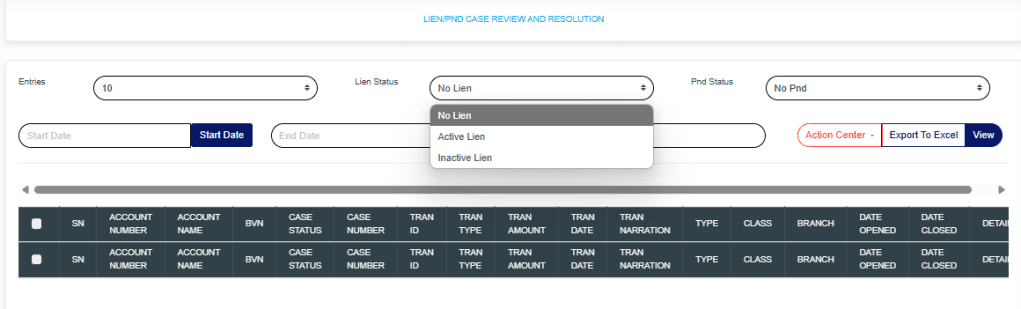
Lien Status: Click on the “Lien” drop-down to filter and select either active or inactive lien.
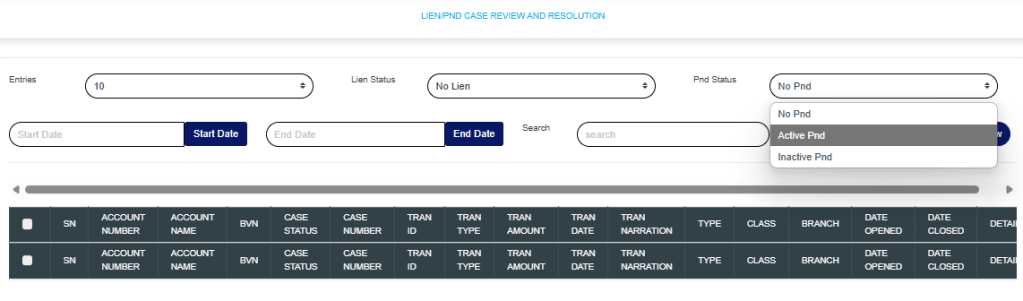
PND Status: Click on the “PND” drop-down to filter and select either active or inactive PND.
Start Date & End Date: Use the “Start Date” and “End Date” fields to filter cases based on a selected time range.
Search: Click on the “Search” box and enter keywords to quickly find specific cases.

Export to Excel: Click on “Export to Excel” to download cases in Excel format.
View: Click on “View” to view cases.
Action Center: Click on the “Action Center” drop-down to perform quick actions on Lien Selected transactions, Place Selected Accounts on PND, Lift Lien on Selected Transactions, or Lift PND on Selected Accounts.
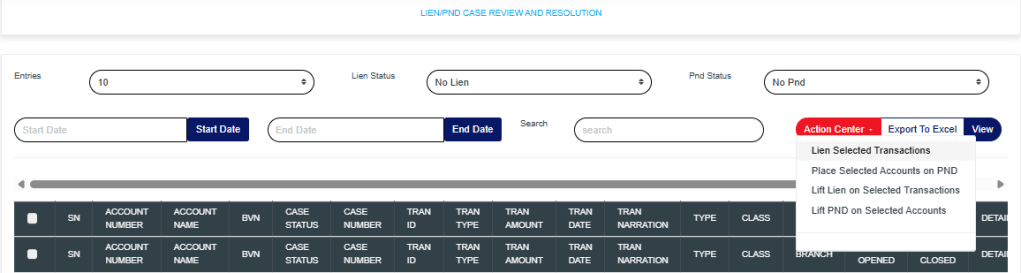
Lien Selected transactions: Click on “Lien Selected Transactions” to place a hold on the selected transactions.
Place Selected Accounts on PND: Click on “Place Selected Accounts on PND” to restrict all debit transactions from the selected accounts.
Lift Lien on Selected Transactions: Click on “Lift Lien on Selected Transactions” to remove the lien placed on the selected transactions.
Lift PND on Selected Accounts: Click on “Lift PND on Selected Accounts” to remove the PND (Post No Debit) restriction from the selected accounts.
These actions will redirect you to the review portal, where you’ll be required to enter a review note explaining the reason for the selected action.
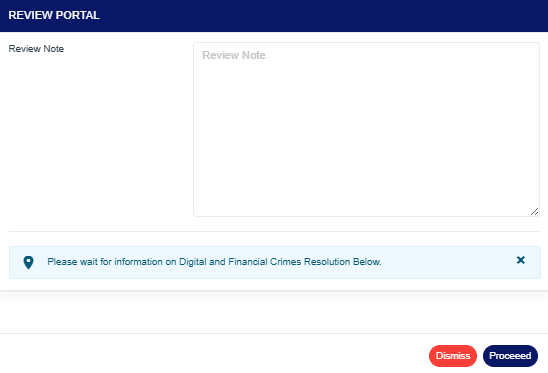
Click on “Proceed” to continue the process.
Click on “Dismiss” to stop the process.
Clicking on Proceed will take you to the confirmation console.
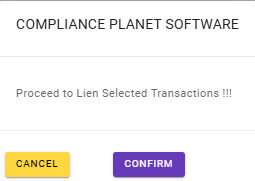
Click on “Confirm” to save all processes.
For further enquiries:
Tel: +234(0) 816 555 9818
Email: solutions@efuelite.com
Web: http://solutions.efuelite.com
